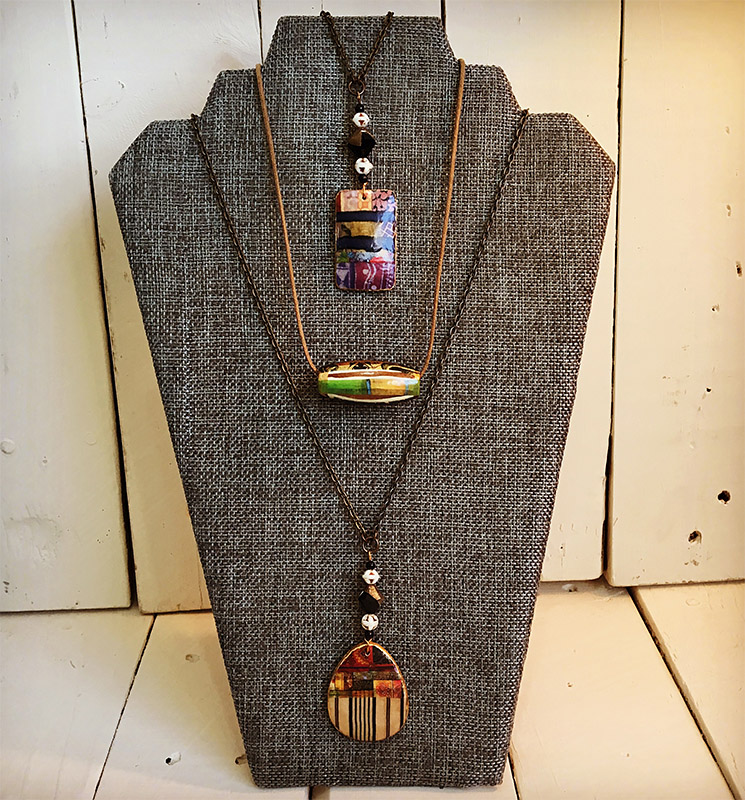
Class by Carolyn Hasenfratz Winkelmann – Image Transfers on Wood Jewelry
Date:
April 25, 2019
Time:
5:30-7:30 PM
Place:
Schnarr’s Hardware, 40 East Lockwood, Webster Groves, MO 63119
Schnarr’s employee Carolyn Hasenfratz Winkelmann is teaching this class again for the first time in three years, and for the first time at Schnarr’s. Make amazing lightweight pendants by transferring found images onto wood. You will be supplied with the materials to make a necklace for wearing your pendants. You will learn the basics of transferring images with tape and gel medium and attaching a clasp to a cord necklace. I will have a selection of transferred images on hand for you to use at the beginning of the class, then while your pendant or pendants are drying, I’ll show you two different techniques for converting found images into beautiful embellishments to add to wood pendants and other art and craft items.
Each class attendee will receive a printout with a written tutorial for that class so if you forget anything we learned you can refer back to it later. Jewelry tools will be available to borrow during the class and some tools and supplies will be available to purchase if you want to continue working on your own.
At each class, there will be at least one door prize randomly awarded to an attendee – probably a craft supply item of some type that relates to the theme of the class. Past prizes have included a necklace kit, a polymer clay frame kit and a craft stencil. That’s my way of saying thank you for coming!
What to Bring
It’s not necessary to bring anything but it’s a good idea to wear old clothes in case there is a glue mishap. If you have found images on glossy papers like magazine or catalog cutouts, or laser printed copies, you can bring those as a source for images.
What’s Provided
I will provide wood pendant blanks, gel medium, images, packing tape, findings and parts for at least one necklace. I will have tools to borrow during class.
Tools and Materials
*Indicates items available at Schnarr’s
Assorted scrap cardstock
X-Acto Knife and Blades
Self-healing cutting mat
*Letter stencils
*Pencil
*Acrylic paint
*Paintbrushes
Acrylic medium
Paint mixing containers
Foamcore
Architextures™ Parchment Rub-Ons by Canvas Corp – Build
Assorted decorative papers with hardware related motifs
Bone folder or burnisher
*Modge Podge (available at our Ladue store)
Scrap corrugated cardboard
*Burlap
Fabric scissors
Paper cutter
*Nuts and bolts
*Brads
*Washers
Old wood yardsticks
*Awl
Metal ruler
*Masking tape
*Mounting tape
*Wrenches
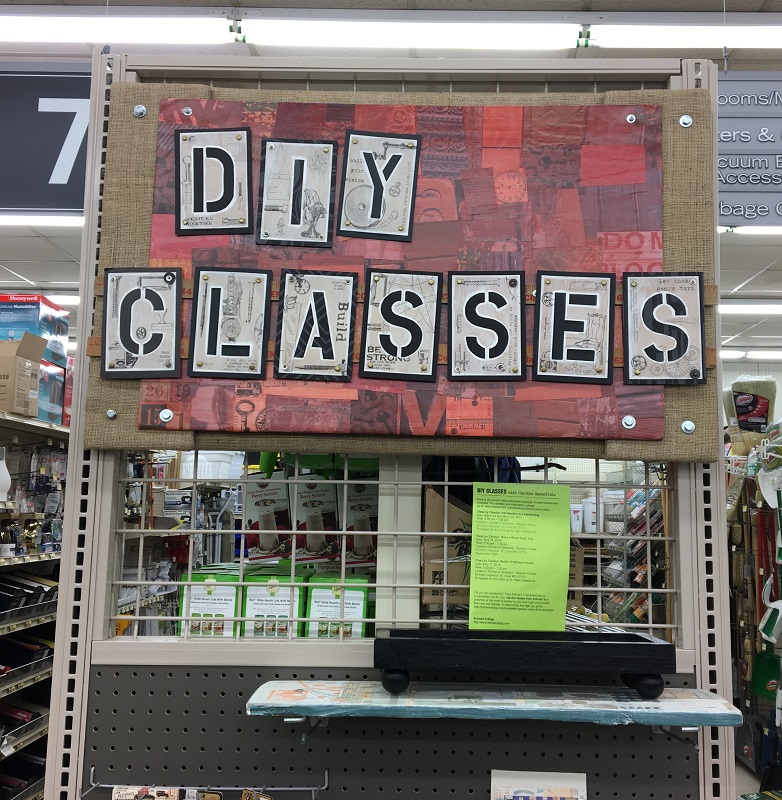
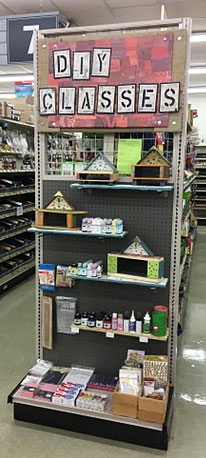
My design for in-store signage for use on an endcap at Schnarr’s Hardware store in Webster Groves, MO was influenced greatly by my love of stencils. I had recently used stencils to make signs for another store. I was happy with the results and eager to try similar lettering techniques with a different look.
I took a set of chipboard reusable letter stencils that I got from Schnarr’s and used them to trace letters for the words “DIY Classes” on pieces of scrap cardstock and thin chipboard. I cut out each letter by hand using an X-acto knife, metal ruler and self-healing cutting mat.
My next step was to give each letter piece a wash of white paint mixed with matte medium and water. After the paint was dry I used some rub-ons burnished with a bone folder to add hardware and building imagery over the white paint wash around the cutout letters. Then with a small brush I outlined the letters and edges with a painted-on line of non-watered down white paint.
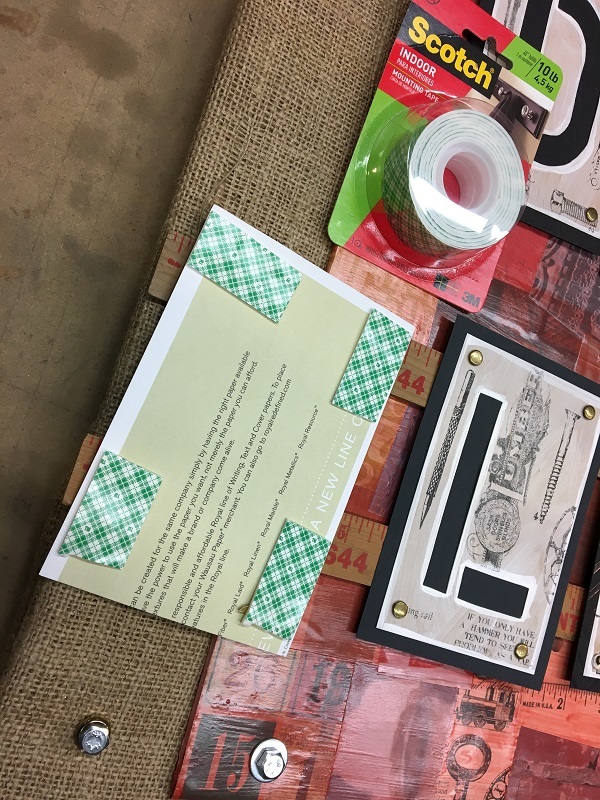
I cut out pieces of black cardstock slightly larger than my letter pieces and placed one behind each to add a frame and make the letters stand out. With an awl I poked holes in the four corners of each letter piece and fastened the layers of paper together with brads, using a variety of washers from my stash here and there with some the brads for extra variety and interest.
After making my letters, I measured the space available for my sign and took stock of what materials I had on hand. I knew I wanted a lightweight sign that would harmonize with the vintage imagery in the rub-ons, look good with the store’s color scheme and suggest the types of mixed media techniques I teach in the DIY Classes I’m promoting.
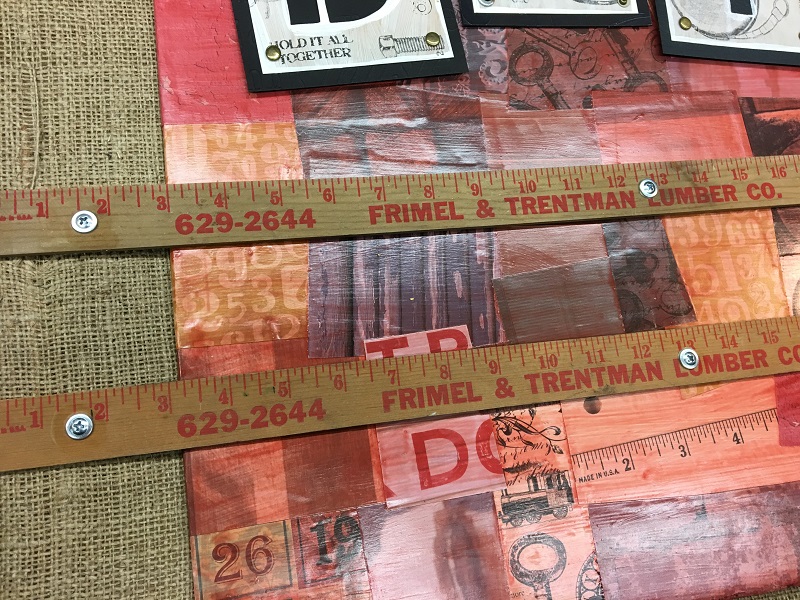
I decided to decoupage paper imagery all over a piece of foamcore and paint over the paper pieces with a wash of red-brown paint so that the designs on the papers would show through and not be too dominant. Most of the paper I chose was by the company DCWV. I looked for paper designs with things on them like vintage letters and numbers, rulers, keys, hardware, aged wood and brick, clock faces, vintage machinery and the like. I used Modge Podge to glue the papers over the foamcore and I mixed matte medium with the paint to make a translucent wash.
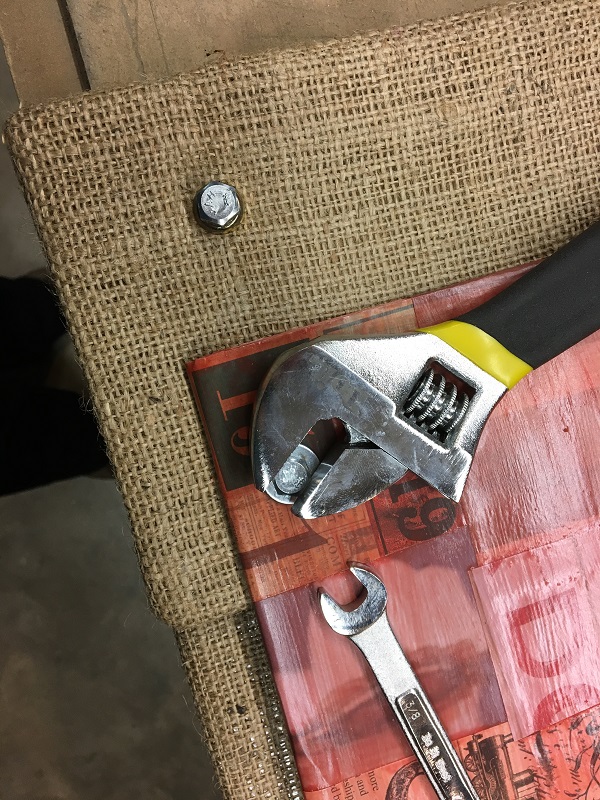
The finished foamcore panel was a bit smaller than the space I needed to cover so I made a frame out of cardboard covered with burlap to mount it on. First I cut out 8 pieces of corrugated cardboard, 2 for each side of the frame for extra strength. I bound the pieces of cardboard together with masking tape then I covered the cardboard frame sides with burlap, securing the burlap with tape on the back side. I poked holes in the burlap covered pieces and in the front foamcore piece with an awl and I used nuts and bolts with washers to attach the layers together.
I laid out my letters on top of the cardboard/burlap/foamcore assembly and saw that the second line, “Classes” was a bit too wide to fit onto the foamcore and was going to have to overlap the burlap edges to fit. I decided to bolt on a couple of old yardsticks to provide a surface for attaching the second row of letters. This emergency adaptation turned out to be a happy accident because in my opinion the rulers added great interest to the design and looked terrific with the images and colors I was using.
My last step was to attach the letters to the sign with mounting tape. I love this stuff!
Stop by Schnarr’s Webster to see the finished sign. On the endcap below it you’ll find samples of projects for future classes I’ll be teaching along with assorted art and craft supplies, some offered at clearance prices!
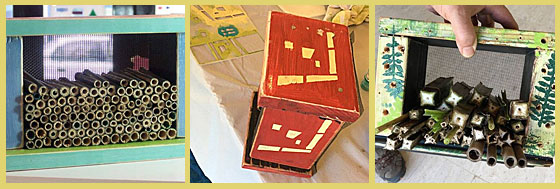
As part of the series of DIY Classes at Schnarr’s Hardware in Webster Groves, Carolyn Hasenfratz will be teaching you how to make, decorate and fill a Pollinator House for your garden. Such houses are sometimes called Bee Houses or Bug Houses. They provide nesting and hibernating space for beneficial insects that bring life, color, pollinating services and natural pest control for your garden. We’ll have paint and stencils available for you to play with so you can give your house a personal touch.
Space in this class is limited to four people and the cost is only $20 per person including materials. Class time is 5:30 pm on May 17, 2018. Register now at this link: Build a Pollinator House
Stop by Schnarr’s in Webster to see some of Carolyn’s prototype pollinator houses on display. These samples are for sale in case you’d prefer to buy one rather than make your own.
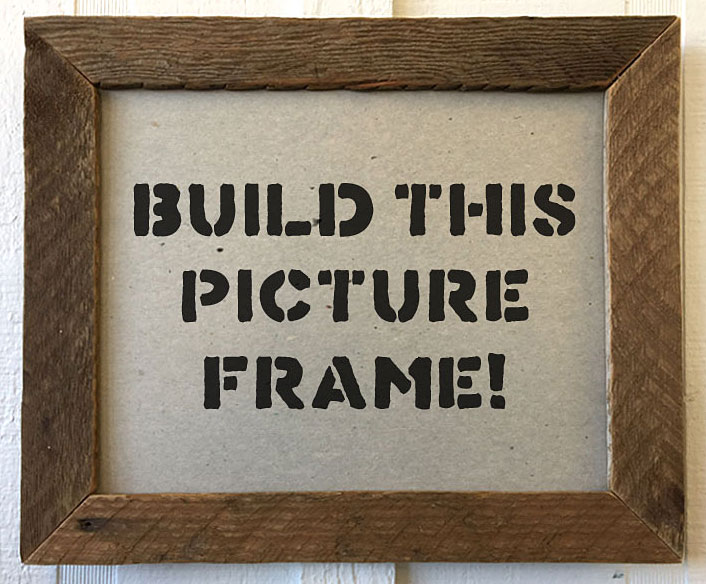
I hope you can join us for our first class at Schnarr’s Hardware in Webster Groves – Make a Picture Frame from Scrap Wood!
Schnarr’s employee Carolyn Hasenfratz will show you how to use reclaimed wood pieces to make a frame that fits an 8 1/2 x 11-inch picture. This size frame is a good size for award certificates and other common documents that you might want to display. Tools and materials will be provided. You will learn techniques that you can use to design and build your own frames from your choice of wood scraps. Save a ton of money by gaining skills you can use by making your own unique frames for your home decor while gaining the satisfaction of saving materials from the landfill.
Class with Carolyn Hasenfratz – Make a Picture Frame from Scrap Wood Date: February 22, 2018 Time: 5:30 pm – 7:30 pm Location: Schnarr’s Hardware in Webster Groves, 40 East Lockwood, St. Louis MO, 63144
What You Can Expect
Learn to build simple picture frames
Learn to design frames from reclaimed wood
Learn to fabricate hardware for the back of the frame using simple tools
Learn how to recycle wood pieces
Learn about sources of low cost reclaimed materials for your DIY projects
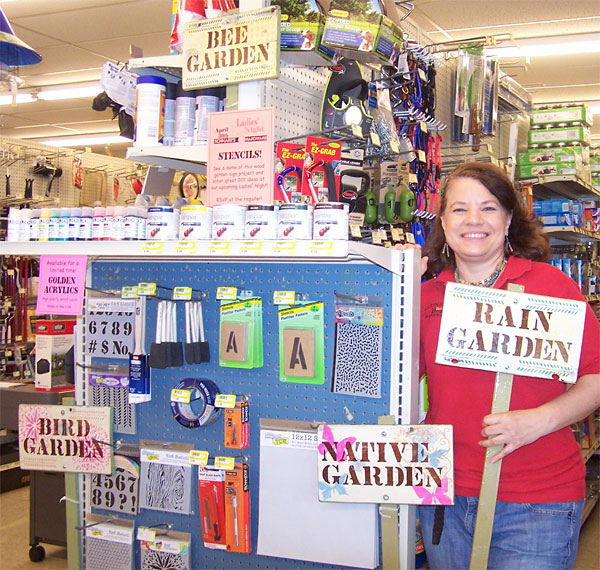
Schnarr’s employee Carolyn with several finished wood garden signs and a selection of supplies you can use to make one. Carolyn will be demonstrating stenciling at our Ladies’ Night on April 30, 2015.
How would you like a practical and decorative wood garden sign? Stencils are handy for such a project because they are available in letters, numbers and lots of fun decorative designs.
Wooden stake
Sponge brushes or sponge pieces (at least one for each color)
Plastic lids from food containers
Large water container (preferably shallow and flat)
Optional – hair dryer or heat tool
Old toothbrush Outdoor wood varnish with sun protection
Paint thinner for cleaning brushes if using brush-on varnish
Drill
Drill bit
2 bolts
2 nuts
2 washers (optional)
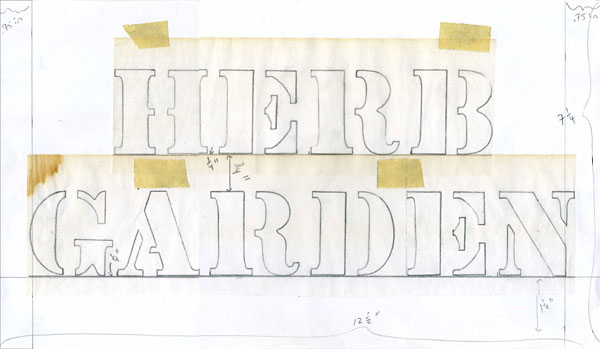
The first step in making such a sign is to decide how big it should be. If you have some scrap wood available, you could let the size of the wood pieces you have on hand determine your design. In my case, I had some used, distressed long boards that were 7 1/4 inches wide. I got out some stencil letters and decided how long my wood piece should be to fit the lettering I wanted on the sign. I worked out some lettering samples on tracing paper and taped these to a piece of paper to determine my final sign size – 7 1/4 x 16 1/2 inches.
Working out my stencil design on paper.
If you don’t have scrap wood to start out with, you can just make your design any size you want and get your wood cut to order. Work out your design ahead of time using pencil, paper and tracing paper, then go get your wood cut or cut it to size yourself. I recommend using wood of a 3/4 to 1/2 inch thickness. If you buy a board at Schnarr’s we will cut it to length.
After the wood is cut, sand it smooth. I recommend you wear a dust mask while sanding. Wipe off the dust with a damp rag.
The next step is to decide on a base or ground color for your sign. For this project I am using all acrylic or latex water-based paints (except for the varnish layer). You can use a dark color as base and stencil on it later with light colors, or make your ground color light with darker colors stenciled on later. If you like the distressed look that I am so fond of, you can put an additional color under the ground color and let some of it show through by sanding on the corners and other strategic places on the sign. You can make the back and sides a different color like I did in my sample or make it all one color. Freezer paper or drop cloths are handy for protecting your work surface while you paint.
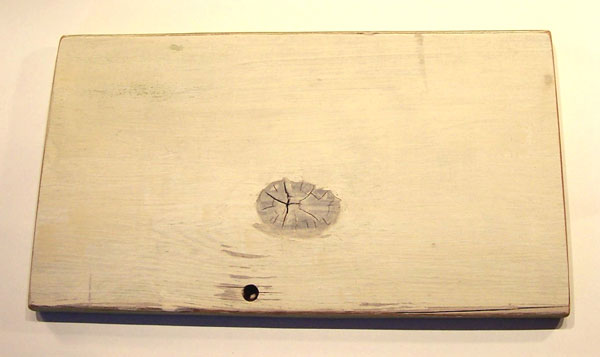
Since I was starting with distressed wood with some paint already on it, I let the existing color influence my other color choices. My scrap wood had previously been painted white over a light green. Some of the green showed through the white as I was sanding. There were a few spots where the paint had peeled away entirely showing dark wood underneath. I wanted to tone down these areas but not cover them up entirely so I decided to paint the front of my sign with an off-white wash to preserve some of the distressed look and create a more even ground for the subsequent design. After the off-white wash was dry I painted the back and sides of my sign green.
Distressed wood cut to size, painted, sanded and read for stenciling.
For a vertical post to use for mounting my sign, I chose a wood stake available at Schnarr’s. I sanded it smooth then painted it green.
After the paint is dry, sand the edges on the sign and post to make them look distressed and wipe both with a damp cloth to get all of the dust off.
Now it’s time to actually start stenciling. Get your work area ready by placing your paints, stencils, tape, small brushes for mixing, water container, rags, small plastic cup, sponge brushes or sponges, and plastic lid where you can reach them. At your feet or on the table if there is enough room, place a large flat container filled with water. This is for placing your stencils and other tools in to soak when you are done using them. This can be a messy process so wear old clothes.
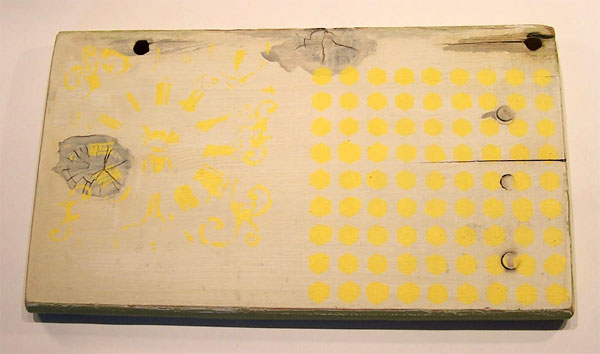
The next step is to apply some background design in a light color. I wanted to add a little interest to the background and edges without detracting too much from the lettering that would be applied later, so I chose a light yellow paint for my sample.
Choose a stencil and tape it in place on your wood sign.
Mix some light yellow paint in a little plastic cup. Do not mix any water into the paint. Dab some paint onto a plastic lid. If you don’t have a plastic lid, a little square of freezer paper taped to your work surface will serve as a disposable palette. Press your sponge or sponge brush into the paint and dab it onto the lid a few times to distribute the paint. You want a light application of paint to start out. If you are new to stenciling, you most likely will overestimate the amount of paint you need and use too much, so start with less than you think you need – you can always add more but if your paint application is too heavy it could bleed under the stencil.
Start pressing the sponge lightly into the stencil openings. Dab very gently at first and increase pressure gradually until all the open areas are filled with paint. When you are satisfied, lift the stencil.
Starting to develop the stencil design with some yellow in the background.
If you are finished with that particular stencil, put it in the large container of water to soak. If you are going to use the stencil again on another part of the sign, move it and continue stenciling until you are finished, then soak it.
When you are finished with a color, put the sponge and plastic lid in the water container for cleaning later. Do not attempt to clean the sponge or sponge brush and use it immediately for a new color – you will have to start with a clean dry sponge for the next color because water makes the paint too runny and it will bleed under the stencil.
Acrylic paint dries quickly. It won’t take long for your first layer of paint to be dry enough to work on the next layer, but if you need to speed up the drying you can hit it with a hair dryer or heat tool. Repeat the above steps with each new color until your sign is complete.
If you are using letters or numbers on your sign, you can draw a line with pencil or ruler to help you apply them in a straight line, then erase the pencil line later after the paint is dry.
Wood garden sign in progress with two paint colors in place.
Antique brass stencils with the lettering they made on my sign.
To clean your stencils and tools, swirl them around in the water to get out as much paint as possible. Squeeze all the paint you can out of the sponges and brushes. If needed clean with soap. Rinse and let them dry on a rag. Dump out the paint water and replace with fresh. Scrub your paint lids and stencils with a toothbrush to get the remaining paint off. Acrylic paint doesn’t have much of an affinity for sticking on plastic especially if soaked, but if allowed to dry prior to soaking some spots might be stubborn. If all the paint doesn’t come off it won’t affect future use so don’t worry about it. Remove as much paint as you can, rinse off stencils and lids and let dry.
When your sign is completely dry, if you are going for the distressed look rough up the design in a few spots with sandpaper. Wipe off dust.
Coat both sign and post with outdoor weatherproof wood varnish, preferably one with sunlight protection to help keep your paint colors from fading. Follow the safety directions on the container for both varnish and paint thinner as they can be dangerous if not handled properly. Do not use a sponge brush for the varnish, it will dissolve. You can avoid the hassle of dealing with brushes and rags and paint thinner by using a spray varnish instead of a brush-on product. I used a brush-on varnish because it’s more economical and I think I get a thicker coat by using a brush. Ultimately, you can make your varnish choice based on your personal application preference.
When varnish is dry, drill two holes in both sign and post to accommodate the bolts that will hold the sign together.
Connect sign to post with nuts and bolts. Place a washer behind the bolt head for a more finished look. Bolts are preferred over nails for this project so you can easily replace the post if it rots over time.
Install your sign where you want it by hammering it into the ground.
If you would like to read about how to cut your own stencils, see my article Fun with Stencils.
If you are interested in attending our Ladies’ Night on April 30, 2015 remember to RSVP (on Facebook and via email [melissa@schnarrs.com]).