Categories
DIY Outdoor Fun

Introduction to Letterboxing – Part II – Making a Personal Logbook

Introduction to Letterboxing – Part II – Making a Personal Logbook

by Carolyn Hasenfratz

Materials
*indicates items that are available at Schnarr’s
Text weight plain paper – 12 8.5 x 11 sheets
Decorative scrapbooking paper for end papers and accents
Decorative paper with letters printed on it
Heavy scrapbooking paper with a decorative design on it for the cover – 1 12 x 12 or 8.5 x 11 inch piece
*Thread or twine about the thickness of baker’s twine, kite string, 1mm hemp cord or something similar
Assortment of small beads
Metal eyelets

Tools
*Pencil
*X-Acto knife and blades
Needle tool
Large sewing needle
*Old block of scrap wood
Paper trimmer
*Scissors
*Glue stick
Squeegee or bone folder
Scrap paper
*Metal ruler
*Utility knife with new blade
Self healing cutting mat
Eyelet setter
*Hammer
Small hole punch
*Pliers

Part 2: Making the logbook

1. Take your 12 sheets of text weight paper and cut them down to 11 x 5 5/8 inches. Fold them in half.

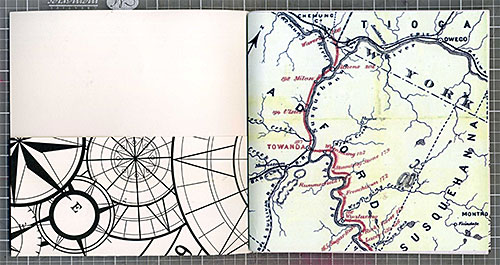
2. To make interesting endpapers for your book, take a lightweight piece of decorative paper with a map or other design on it and cut it down to 11 x 5 5/8 inches. Fold it in half as in the step above. Nest the text paper inside the endpaper piece.

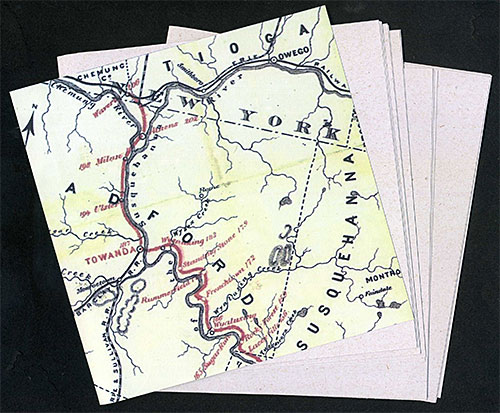
5. When you push all the nested paper pieces together at the spine, you’ll notice that the inner pages stick out at the fore edge. For a finished look, trim off the paper that sticks out using a metal ruler and a sturdy utility knife. A paper trimmer probably will not cut through all the layers cleanly on the first try and an X-acto knife might be a little too narrow and wobbly to make the cut safely. Something robust and sharp enough to cut through all the layers without having to press too hard will give you the neatest and safest results.

Before and after trimming the fore edge of the handmade journal..
Before and after trimming the fore edge. (In case you are wondering, the green dot on my ruler is there so I don’t get it mixed up with student tools when I’m teaching.)

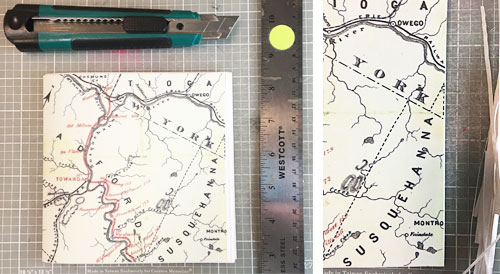
Tip: If your metal ruler is not sold with a cork backing already on it, add a strip of cork to the back of yours to prevent slippage of your ruler while cutting. This extra bit of effort will pay off by possibly preventing injuries. If you shave off the side of your finger with a utility knife or craft knife you will never neglect to do this again! (Ask me how I know!)

4. Select a piece of decorative paper that is heavier in weight, like light cardstock, to use for the cover. Cut it down to 8 1/2 x 11 inches. From the bottom long edge, make pencil marks 2 3/4 inches up on the inner facing side.

5. Fold up at markings to make built-in pockets for the inside front and back covers. Fold cover in half and nest other papers inside.

The book is starting to come together!

6. Place a piece of scrap wood on your work surface. Go to the middle of your book and spread it open. Place the book with the inside facing up and with the needle tool poke four holes through all the layers of paper, one near the top, one near the bottom, and two close together in the middle.

7. Cut a piece of heavy thread or cord up to 1 mm thick to a length of 34 inches and thread a sharp, sturdy needle with it. Starting on the outside of your book at the middle hole, bring the thread in, leaving about 7″ trailing on the outside of the book. Bring the thread out again at the bottom, in again at the middle through one of the two holes, out again at the top and in again at the middle, making a figure 8 pattern. If the needle is difficult to pull through the holes pulling with pliers can help you get it through. Tie off your cord at the spine and if there is any excess cord left tie it at the middle also and let the ends trail.

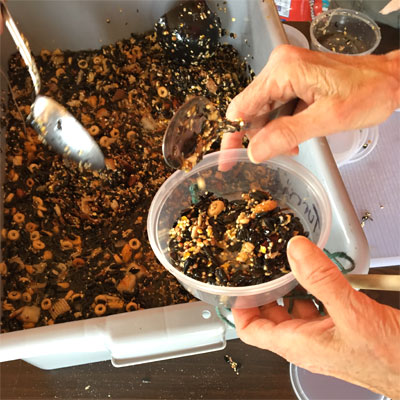
8. String beads onto the ends of your cords as accents and tie double or triple knots as needed at the ends of your cords to hold them on.

9. Cut two 2 inch x 6 inch pieces from another pattern of decorative cardstock. Fold them in half lengthwise. Apply glue from a glue stick to the inside of the folded piece and press in place over the fore edge. Burnish your glue job well between pieces of clean scrap paper.

10. Punch two holes at each pocket with the small hole punch. Use an eyelet setter and hammer to spread the back of the eyelet out to fasten the sides of the pockets securely.

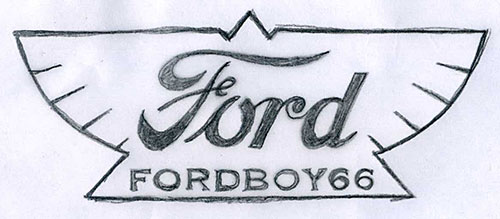
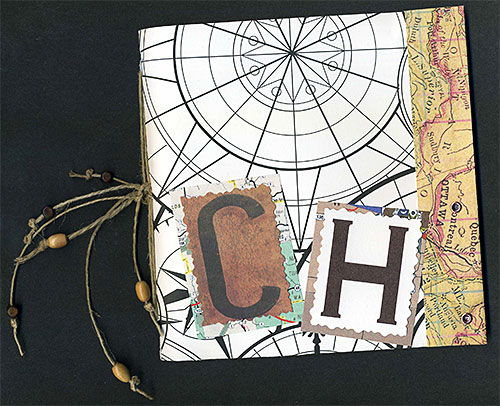
11. Cut two initial letters from letter printed cardstock or paper and mount on pieces of slightly larger decorative paper to give them a border. Glue to the front of the book and burnish.

Look for Letterboxes

Go to either the Atlasquest web site or the Letterboxing North America web site and create a profile for yourself. Search for letterboxes near you. I like to print out the clues and then keep them in a three-ring binder. I also keep in this binder maps and other information about the places I’m interested in searching. I search for a lot more letterboxes than I actually find so it’s not uncommon for me to make multiple attempts on a letterbox.

If you have a smartphone, look for an application called Clue Tracker. You can use this app to search the databases of either Atlas Quest or Letterboxing North America to find boxes near you while you’re on the go.

Have fun out there!

Categories
DIY Outdoor Fun

Introduction to Letterboxing – Part I – Carving a Personal Stamp

Introduction to Letterboxing – Part I – Carving a Personal Stamp

by Carolyn Hasenfratz

What is Letterboxing? It’s a fun outdoor hobby that is kind of like a lower-tech version of Geocaching. Letterboxers hide small, weatherproof boxes in publicly accessible places (like parks) and distribute clues to finding the box in printed catalogs, on one of several web sites, or by word of mouth. Individual letterboxes contain a notebook and a rubber stamp, preferably hand carved or custom made. Finders make an imprint of the letterbox’s stamp in their personal notebook, and leave an impression of their personal signature stamp on the letterbox’s “visitors’ book” or “logbook” — as proof of having found the box and letting other letterboxers know who has visited. Many letterboxers keep careful track of their “find count”.

To begin looking for letterboxes, you need a simple toolkit – a personal signature stamp, a stamping ink pad to carry with you, a personal logbook to carry with you and some hunting clues. In this class I will show you how to make the signature stamp and in the next segment you’ll learn how to make the logbook. You can buy the stamping ink pad from a craft supplier. Clues are available on web sites and at least one mobile app.

Materials
*indicates items that are available at Schnarr’s
*Tape
Tracing paper
Rubber carving material
Rubber stamping ink pad
*Ziploc bags

Tools
Pencil
Ball point pen
*X-Acto knife and blades
Carving tool with interchangeable tips with v-gouges and u-gouges in different sizes
*Scissors
Squeegee or bone folder
Scrap paper
*Metal ruler

Part 1: Making the stamp

Letterboxers choose a trail name and typically carve a personal rubber stamp that incorporates their trail name or relates to their trail name. Here is what my personal stamp looks like.

I intended to use the trail name “Jeep Girl” because that was my CB handle in my Route 66 club. I carved my stamp before I checked one of the letterboxing web sites and discovered that “Jeep Girl” was already taken, so I changed my letterboxing trail name to “Jeep Girl 66”. I recommend that when you are considering trail names to check to see if the one you want is already taken. Here are the web sites to perform those searches:
Atlasquesthttps://www.atlasquest.com
Letterboxing North Americahttp://letterboxing.org

1. Once you know what your trail name is going to be, create a stamp design to complement it. You can draw your design by hand or on a computer if you have access to computer graphics software. My fiance Tom needed a stamp to go along with his trail name “fordboy66” so here is a design I came up with using computer graphics tools inspired by the Ford logo from 1912.

While you are designing your stamp, keep in mind what size your carving is going to be. My stamp is pretty big so that the details were easy to carve. Draw or print out your design at the actual size that you want your stamp to be.

2. Next tape a piece of tracing paper over your design and trace using a relatively soft pencil that’s been sharpened really well. You want to be able to capture detail but use soft graphite if you can so that the design will be easy to transfer to the rubber.

3. Lay your tracing graphite side down onto your rubber carving material and tape in place. Draw over your lines again from the other side with the pencil to transfer your drawing to the rubber. Lift a portion of the tracing paper to see how well the design has transferred before you move it. You can also rub all over the paper with a squeegee or bone folder to make sure you went over all the lines.

4. Remove your tracing and set aside. Go over the pencil lines on the rubber one more time with a ball point pen so that when you are working your design won’t be rubbed off. If possible, choose an ink color that is close to the color you’ll be stamping because for the first few printings a little ball point pen ink is probably going to get into your stamp print. The pen ink will wear off in time.

With so many redrawings needed to get your design transferred, some imperfections will creep in. Part of the charm of Letterboxing is the hand-carved quality of the stamps, so please don’t see this as a defect. Fun and adventure are what is important – high quality carvings are appreciated but not a requirement. People of all skill levels can make a carving that is good enough for the job.

If you have any text in your stamp design, the words should look backwards on the rubber before you start cutting. Double check before you start to make sure your text will print the right way when you use the stamp.

5. Cut away the negative portions of your design (the “white” space) and leave the positive areas, the parts you want to print (or the “black” lines). I find the easiest way to carve is to outline by cutting around the design elements with an X-acto knife, then making another cut a little further out with the knife forming a channel that is shaped like a “V”.

Design elements of the stamp have been outlined with an X-acto knife.

Then I cut away large areas with a v-gouge, one of the tips included in a linoleum cutter tool set.

I’ve written a very detailed tutorial on rubber stamp carving if you need more information. http://www.limegreennews.com/howcarv.html

If your carving material is thin, you might need to mount it on a piece of clear acrylic block to stiffen it and get a good print. You can temporarily attach the rubber to the acrylic block with double-sided tape.

6. Wash and dry your stamp. Test your stamp by pressing it on your ink pad and then onto paper. Once you are satisfied with your carving, you can store it in a Ziploc bag along with your ink pad to keep ink from getting on you when you carry it around.

Here is what the new stamp looks like when printed with blue stamping ink.

Stay tuned for Part II – Making a Personal Logbook!

Categories
Backyard Wildlife DIY

Make Suet Cakes for Outdoor Birds

Make Suet Cakes for Outdoor Birds

by Carolyn Hasenfratz

What you will need
*indicates items available at Schnarr’s
Suet or some other kind of food grade fat that gets solid
*Bird seed
Dried fruits (optional)
Chopped nuts (optional)
Grains (optional)
Leftover bread, cereal and crackers (optional)
*Dried mealworms
*Twine
*Scissors
Long thin knife (doesn’t have to be very sharp – could be something like a fettling knife for ceramics or something similar)
Clean food containers for molding
*Spatula and *mixing spoon
*Mixing bowl
Double boiler setup – *saucepan, *temperature resistant glass measuring cup
*Hot pot pad, *oven mitt, *jar lifter or other tool for lifting hot containers safely

I am a member of the St. Louis Master Gardener program and I do some of my volunteer work at Litzinger Road Ecology Center. LREC offers enrichment and training sessions for volunteers to increase our knowledge. Sometimes we get to take part in fun “crafty” activities that have an ecological benefit. We made bird suet cakes one day at LREC and later I also experimented with making some at home.

Feeding birds in our backyards is a way to get a good look at birds up close while providing them with a nutritional food bonus to make their lives a little easier. Suet and fats are good foods for many birds when it is late winter and natural food sources are low – fats are also most likely to attract birds who eat a lot of insects, the kind of birds you particulary want in your yard to provide free pest control services. At the time I am writing this we may be done with freezing temperatures during the day but we may still have some below freezing temperatures at night. You know how our weather is in the St. Louis area – it could be 85 degrees or 25 degrees tomorrow (or both) and no one would be shocked! Suet and fats can melt and turn rancid in warm weather but if you double-render the fat you can place suet outdoors in temperatures over 70 degrees F, according to the book “The All-Season Backyard Birdwatcher” by Marcus H. Schneck.

Before beginning to heat the fat, please read the safety precautions in my article Make Old Wax Candles Into New Candles. Any safety issues that might come up while melting fat are pretty much the same as with wax. I’m not sure if the melting temperatures are the same. Keep a close watch on your fat to make sure it doesn’t overheat. If you’ve ever had an unexpected flare-up from hot bacon grease you know hot fat is something to treat with care!

In my example I used bacon fat and some beef fat trimmings that the butcher at Whole Foods gave to me. I had gone to Whole Foods with the intent of buying some suet but they didn’t have any. Suet is a type of fat that comes from around the kidneys. Just plain beef fat will work too.


Melting beef fat to make suet cakes

I experimented with a couple of different ways of rendering the beef fat. First I chopped it into smaller pieces then I put some of it in a food processor to partially grind. A meat grinder would be better for this but I don’t have one. I put the ground fat in the double boiler to melt down. A double boiler is used to heat things that scorch or burn easily. At home many of us use such a setup to melt things like wax and candy. Place a saucepan on top of the stove and partly fill it with water. Set a glass heat-resistant measuring cup containing the fat in the pan of water and slowly heat the water until the fat melts.

I also experimented with putting some fat pieces into a glass temperature-resistant measuring cup and microwaving the pieces for about a minute to a minute and a half at a time. Either way the fat melted fine and I strained out and discarded the tough pieces and little meat pieces that were left behind and poured the fat into a glass dish to harden.

I let the fat cool until it was hard, then I re-melted it. The hardening and remelting makes it double-rendered and ready for warmer spring temperatures.


Molding the suet cakes and adding twine for hanging

After the fat is melted, you can mix things in it that are tasty treats for birds – leftover baked goods, grains, nuts, chopped dried fruits, cereal, dried mealworms, and of course, bird seed. I molded my cakes in cleaned used food containers and popped them out after they were hard. You can buy pre-made suet cakes (at Schnarr’s!) that are made to go into a pre-made metal mesh holder with a hanger. When you make your own suet cakes, you have to work out a way to hang them. I drilled holes through the middles with a long thin knife and threaded twine through the holes to tie the cakes in place outdoors.

The remaining photos were taken at Litzinger Road Ecology Center on the day we made suet cakes. We were all asked to bring in stuff from our pantries to add to the bird food mixture.


Additives for bird suet cakes

At LREC, we had a quantity of donated food containers to use so we made holes in the sides of them to accomodate a hanging string.


Making holes in plastic food containers with a hot nail

You can easily make holes in plastic by heating a nail in a candle flame. Hold the nail in a pair of pliers to keep from burning your hands and be careful around open flames!


Hanging string for bird suet cake

We made knots in the strings to keep them from slipping through the hole. Before filling the containers with food mixture, for extra security we pulled the stings in slightly so the fat mixture would harden around the string and help hold it in place.


Bird food mixture in a plastic food container

After filling with food mixture, all we had to do was wait for the fat to harden. Then our suet feeders were ready to hang outdoors!

Categories
Lawns

Staying Ahead of Crabgrass

Forsythia bush in bloom

Staying Ahead of Crabgrass

by Frank Blair

One of the questions I hear every year at this time is “when do I apply crabgrass preventer to my lawn?” The proper timing for application of crabgrass preventer is related more to temperature and weather than the calendar.

Crabgrass is a low growing invasive annual weed. Because it is an annual, and grows from seed each year, the best way to control crabgrass is to us a pre-emergent herbicide to prevent the seed from germinating.

When the temperature of the soil reaches 55 to 60 degrees for several consecutive days, crabgrass seeds begin to germinate. The timing on this can vary widely from year to year and from place to place within your own lawn.

So how does one know when exactly to apply pre-emergent? Well, the most accurate method is to actually “take your lawn’s temperature”, every couple of days, using an instant read probe-type thermometer. But really now, who wants to do that? Another perfectly reasonable method is to watch for the forsythia shrubs (pictured) to bloom. If you time your pre-emergent application to this harbinger of spring you will almost always be well ahead of crabgrass germination. The crabgrass preventers we sell at Schnarr’s will prevent crabgrass and other annual weeds from germinating, and can remain active in the soil for an entire season.

A word or two of caution, if you are seeding your lawn, or you seeded late last fall, most crabgrass preventers will keep grass seed from germinating and damage young grass plants. If this is the case, let us know when you come by to pick up your pre-emergent and we’ll provide a product that can be used when seeding.

Enjoy the spring weather!
Frank

Categories
Uncategorized

Exploring Where Art and Science Meet at the Donald Danforth Plant Science Center

Exploring Where Art and Science Meet at the Donald Danforth Plant Science Center

by Carolyn Hasenfratz

The Arts and the Sciences were more closely interconnected with each other at earlier times in human history than they are now. Although I’m a trained artist, not a trained scientist, I have had a layperson’s interest in science since  before I even started first grade. I enjoy microscopic and close-up images of things like cells, rock crystal structures, lichens, moss, mold and more. In earth science classes, I was inspired by dendritic patterns, astronomy subjects and maps. Imagery influenced by those things has come up in my artwork from time to time for many years. Venture Cafe Night: 39N recently hosted an event at the Donald Danforth Plant Science Center with the theme Science of Creativity – I had to check that out. I also submitted some of my science-inspired art journal pages for a slide show. Venture Café St. Louis is a nonprofit organization dedicated to “connecting innovators to make things happen” by sponsoring events and 39 North is a district promoting “academic and corporate AgTech research and innovation”. Venture Cafe events are kind of like a mini-convention and happy hour where you can attend activities and presentations while mingling with interesting people.

In the cafe guests were given coloring pages and blank mini canvases to color and draw science imagery. A slide show of beautiful close-ups of structures from plants and animals was there to view for inspiration.

In the theater after presentations about microscopic art and business funding, there was another slide show on view with artwork that different artists and scientists had submitted ahead of time. Organizers had prepared two slides with three of my art journal pages on each. They did a great job selecting pages that looked good together. It was pretty cool to see my images projected at such a large size!

My art journal pages were made with pencils, markers, pens and collage work. What do they mean? I like to work in my art journal as a stress-relief activity so when making some of these pages I was thinking about the effects of stress on the human body and mind. Sometimes I don’t have to think at all, just play with the colors and shapes – that is a very relaxing and restorative activity that I enjoy very much.

Here is a link to the complete slide show so you can see the other artists’ work:
Art X Science

More photos of the event are in a Venture Cafe Facebook album:
Venture Cafe Night: 39N – February 20, 2018

In 2017 I went on a tour of the Donald Danforth Plant Science Center with other volunteers from the Litzinger Road Ecology Center. We toured greenhouses and areas where experiments are conducted and stored.

Of special interest to me being so into the visuals of science was a look into the microscopy lab and a gallery of  images that were probably made for science reasons but double as stunning and amazing visual art.