Categories
DIY Home Decor Storage and Organizing Ways With Wood

Make a Wood Storage Crate

Make a Wood Storage Crate

by Carolyn Hasenfratz Winkelmann
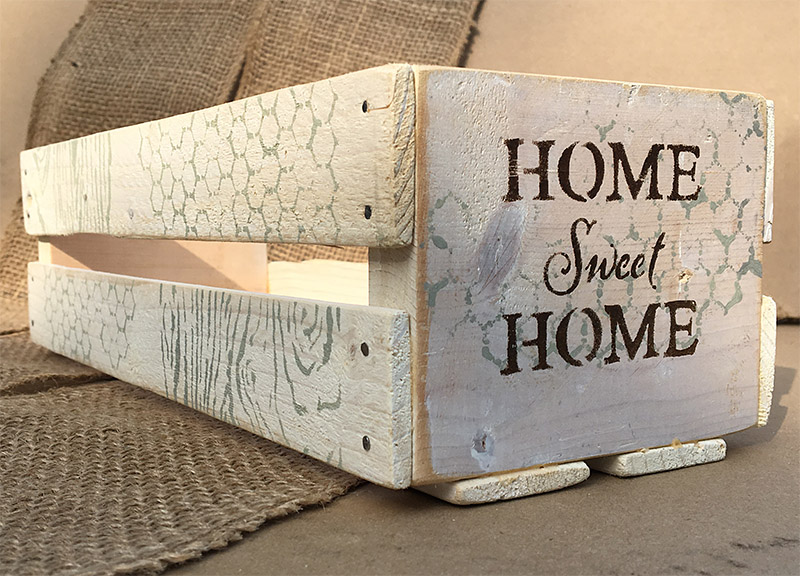
Wood crate decorated with stencil designs

This project was inspired by a card box my husband Tom and I made for our nautical-themed wedding reception last summer. I made a lot of stuff for the wedding and I was literally working until the last minute at the church figuring out how to attach my homemade veil to my head! I finished my jewelry the day before! Two or three nights before the wedding I had set aside time to assemble this card box. I had already cut the pieces out but needed to nail it together and decorate it. I came down with what I thought was a terrible cold and I asked Tom to assemble the box for me. He came through and did a great job! I recovered quickly from whatever I had (if I actually really had anything other than stress) and was feeling fine the next day so I did the decoration in a hurry.
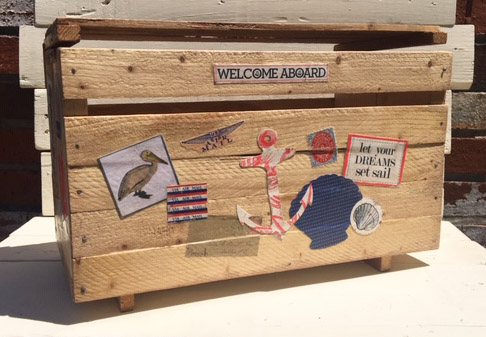
Card box we made for our wedding last summer with decoupage decoration

I painted the above crate-style card box with a wash of brown paint to “antique” after applying decoupage decoration. For the following storage crate project I’m going to experiment with applying a light colored paint wash on unsanded wood to be sanded, assembled and then decorated with stencils.

Materials
*Six pieces of lath wood (1 1/2″) cut to 12″ long
*Two pieces of 1/2″ thick wood cut to 4 1/4″ x 3 1/2″
*Tiny nails
*Paint rags
*Wood glue
*Acrylic paint
*Painters tape or masking tape

Tools
*Pencil
*Ruler
*Saw
*Paintbrush
*Paint water container and small paint mixing container
*Drill
*Tiny drill bit
*Hammer
Small sponges (or *large sponges cut up)
*Assorted stencils (available at Schnarr’s Webster)

*indicates items available at Schnarr’s

If you want a more refined look you can substitute lattice strips for lath wood, they are similar in size and thickness with a smoother surface and fewer irregularities.

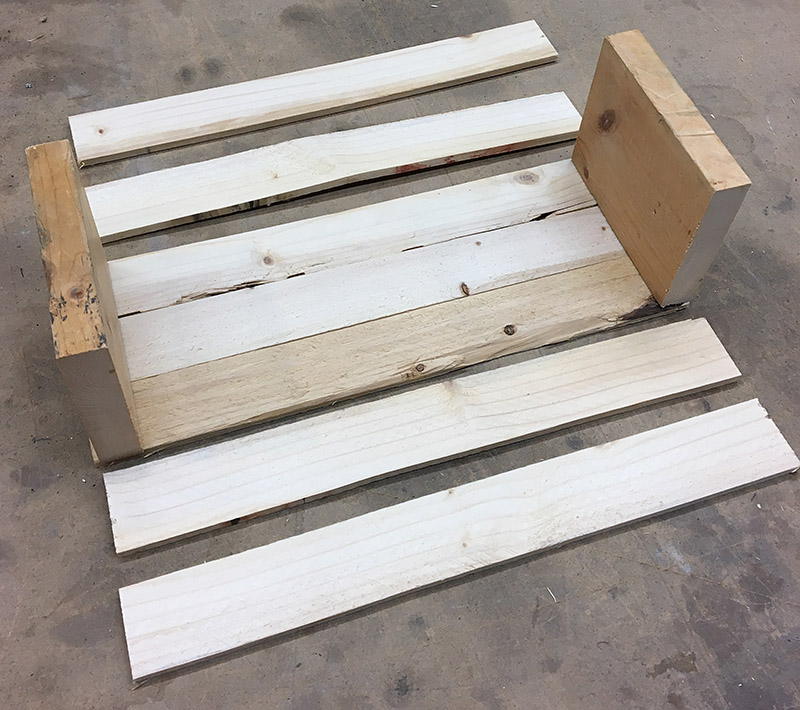
Cut pieces of wood ready to paint, sand and assemble

Instructions

1. Paint your wood pieces with a wash of white acrylic paint. A wash is paint with water added to thin it out and make it semi-translucent.

2. After paint is dry, sand the rough spots with all-purpose sandpaper and sand the edges to bring out a little more of the natural wood color. The effect of sanding the edges is subtle but adds a lot of visual interest.

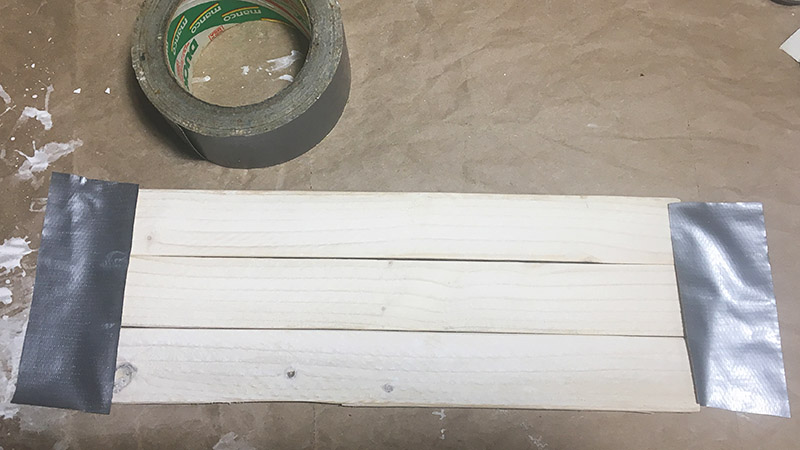
Wood slats taped down to work surface

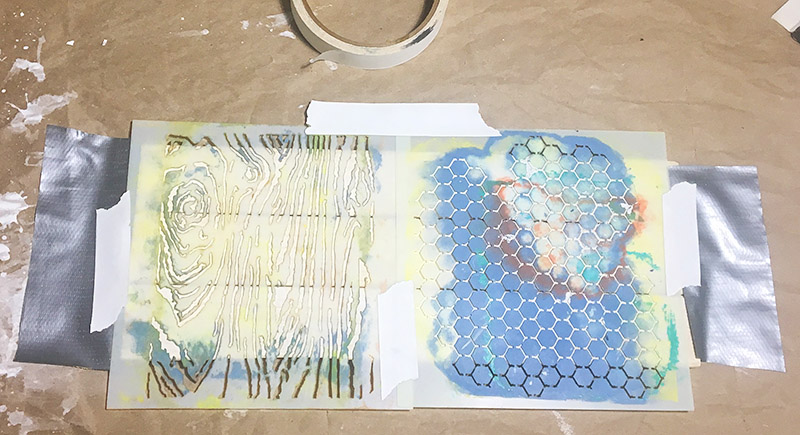
3. Take three of the 12″ slats at a time and tape them down onto your work surface. Normally for stenciling projects I use painters tape or masking tape, but I was out of both so in the pictures you will see me using duct tape and drafting tape as substitutes.

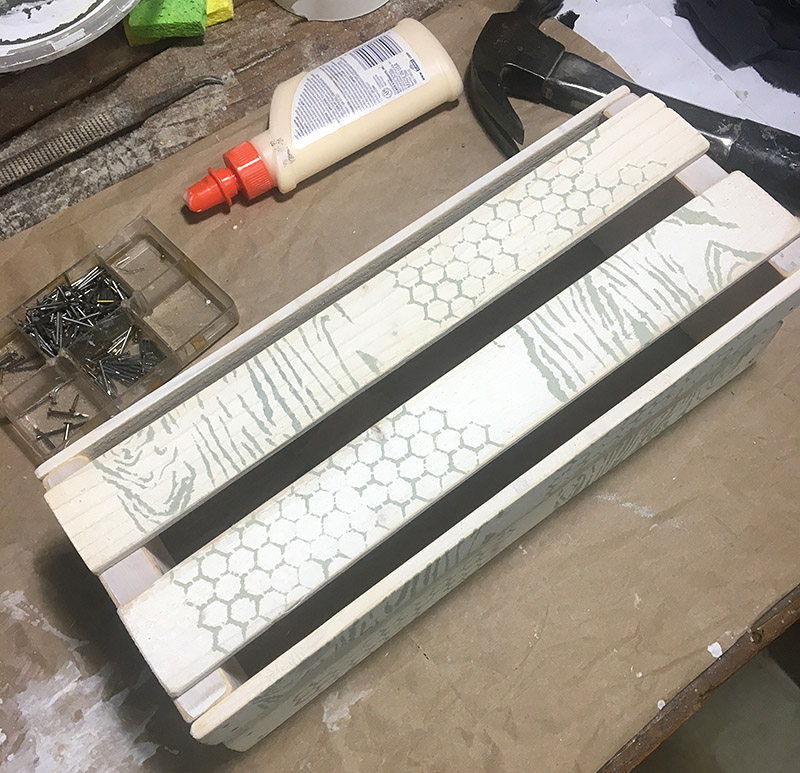
4. Tape stencils in place on your work surface over the wood. Choose a light to medium color of paint and dab the paint through the stencil openings with a sponge.

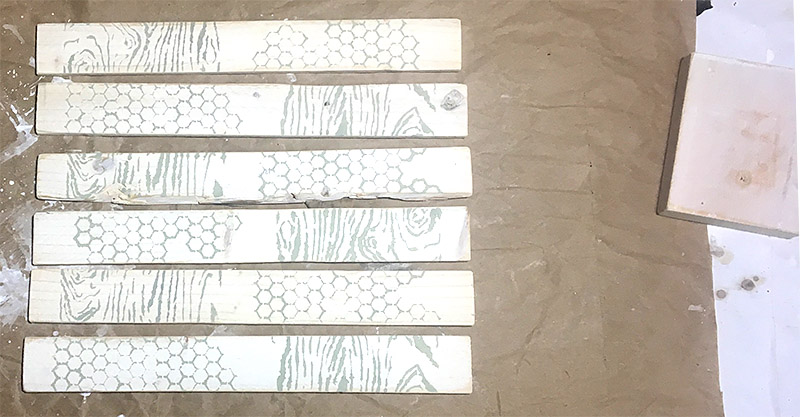
5. Lift the stencils and let the paint dry. I rearranged my wood pieces on the work surface to see what they would look like if I turned every other piece around 180 degrees so that the stencil designs would be scrambled. I liked the effect!

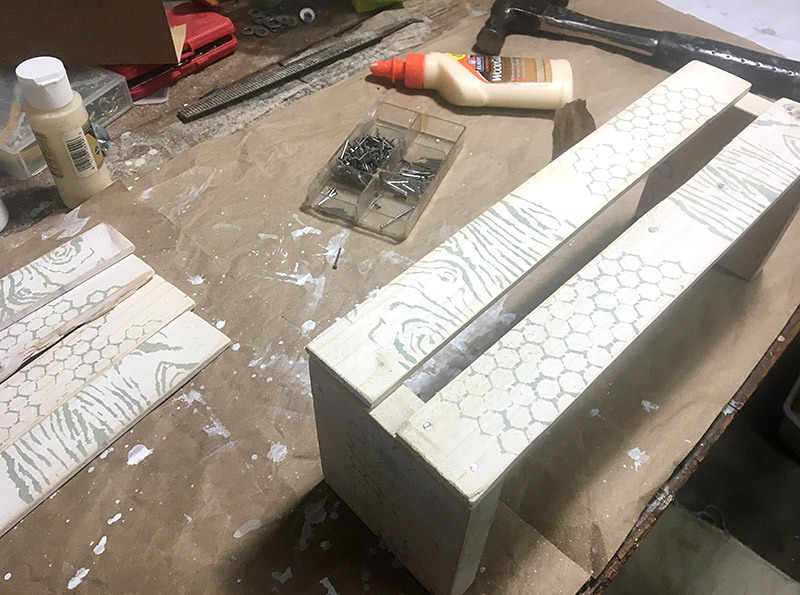
6. Set the two end blocks on your work surface and position two side slats across them. Add a dab of wood glue at each point where the wood will connect for extra strength.

7. Drill two pilot holes at the end of each wood strip with the tiny drill bit. Hammer in nails and repeat until both wood strips are nailed securely to the end blocks. Repeat steps 6 and 7 for the other side, then for the bottom.

I only stenciled one side of these wood strips, so for the bottom of the crate I ended up turning them over so you could see the design if you looked down into the box. You could stencil both sides or have the design facing down while the box is in use if you prefer.

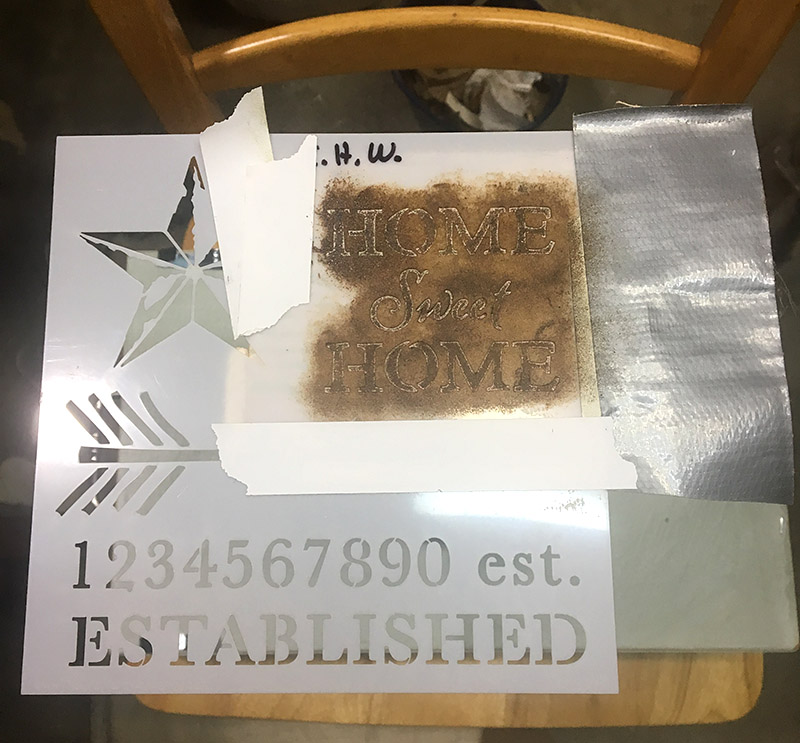
8. Next I stenciled onto each end of the crate. I set the crate on end on a chair to bring it to a more convenient work height. Tape the stencil down and if necessary, mask out the parts of the template you don’t want to use with tape. It’s easy to accidentally sponge into areas you didn’t intend.

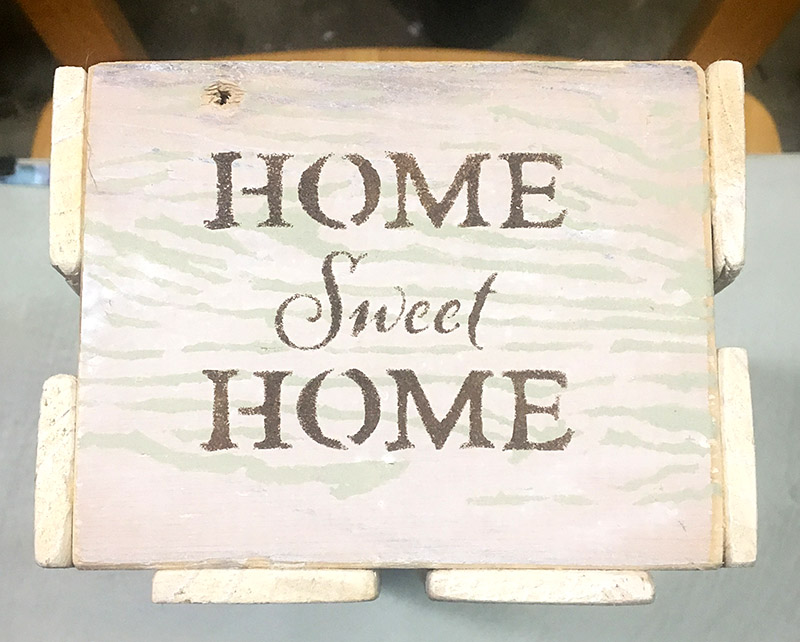
Here is what one of the ends looks like after the final stencil. You can really change the look of the crate depending on what stencils and colors you choose to use. You can also make crates in different sizes to fit different needs. They make great baskets for gift giving too. Have fun!


Additional Resources

If you want some more home decor inspiration here are some additional resources:

Spring 2019 Mood Board – yes spring 2019 is done by now but a lot of these looks have been around for several years and should be good for inspiration for awhile yet. There is a lot of raw wood, tin, burlap and looks that you could easily recreate with hardware store items.

Summer 2019 Mood Board – wood, tin, twine, rope, seaglass, oh yeah!
Categories
DIY Home Decor Ways With Wood

Upcoming DIY Class at Schnarr’s – Stenciled Letter Blocks July 19, 2018

Upcoming DIY Class at Schnarr’s – Stenciled Letter Blocks July 19, 2018

Stenciled Letter Blocks – $20.00 Class

Join us at Schnarr’s Hardware in Webster Groves to decorate wood blocks with paint, stencils and mixed media to create fun home decor. Spell out words, make initial blocks. house numbers or dates to enhance a festive occasion. All supplies included.

CLASS DETAILS
Thursday, Jul 19 2018
05:30:00 PM
Price: $20.00

For More Class information or to Sign Up – Click here


Categories
Backyard Wildlife DIY Gardening Sustainability Upcycling Ways With Wood

Upcoming DIY Class at Schnarr’s: Build a Pollinator House on May 17


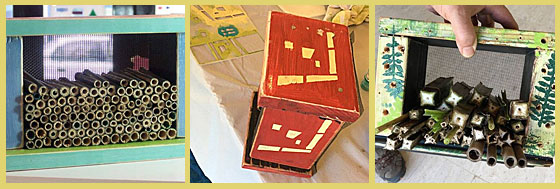
Three wood pollinator houses with stenciled decoration


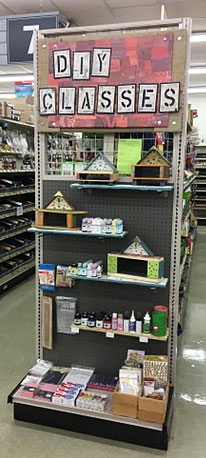
Pollinator houses on display on endcap

As part of the series of DIY Classes at Schnarr’s Hardware in Webster Groves, Carolyn Hasenfratz will be teaching you how to make, decorate and fill a Pollinator House for your garden. Such houses are sometimes called Bee Houses or Bug Houses. They provide nesting and hibernating space for beneficial insects that bring life, color, pollinating services and natural pest control for your garden. We’ll have paint and stencils available for you to play with so you can give your house a personal touch.

Space in this class is limited to four people and the cost is only $20 per person including materials. Class time is 5:30 pm on May 17, 2018. Register now at this link:
Build a Pollinator House

If you can’t make it to the class, we have instructions for making two styles of pollinator houses published on the Schnarr’s blog:
Making a Pollinator House – Part 1
Making a Pollinator House – Part 2

Stop by Schnarr’s in Webster to see some of Carolyn’s prototype pollinator houses on display. These samples are for sale in case you’d prefer to buy one rather than make your own.

Categories
DIY Sustainability Upcycling

Decorate Gift Packages with Stencils and Chalk

Decorate Gift Packages with Stencils and Chalk

by Carolyn Hasenfratz

Decorate Gift Packages with Stencils and Chalk

In this tutorial I’ll show you how to make your own stencils from recycled food container lids and use them to decorate personalized gift packages. Many of the stencil designs I used in my demo were traced from nostalgic Christmas cookie cutters that were passed down to me from parents and grandparents. They bring back a lot of happy memories of doing holiday crafts and baking with my Mom. Most of the time making things in preparation for the Holiday was more fun for me than the actual event!

I designed this project to be something you can do with kids, but I think anyone who enjoys being a little bit playful and making eco-friendly packaging would enjoy this – I know that I had a great time!

Part 1 – Making the Stencils

Tools and Materials – *indicates available at Schnarr’s
Self-healing cutting mat
*X-acto knife or craft knife and blades
*Sharpie marker
Cookie cutters
*Pencil
Cleaned plastic food container lids
*Scissors

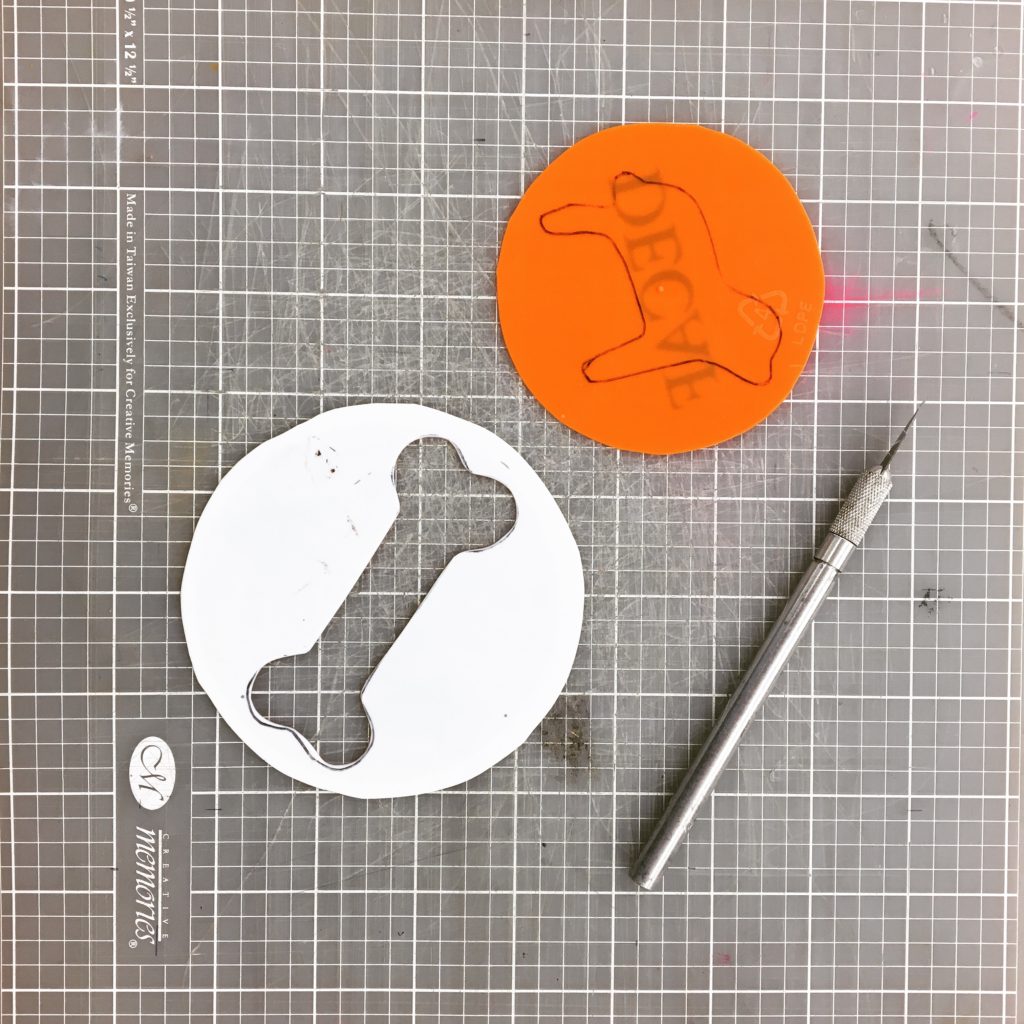
1. Take an old plastic food container lid and cut off the rim.

2. Choose a cookie cuttter or some other object to use as a template and trace around it with pencil on a piece of paper. Or if you have no such object, draw a simple shape of your choice.

3. Place the food lid piece over the drawing and trace the outline with a permanent marker. Cut out the shape with a craft knife, scissors, or some combination of the two.


Part 2 – Applying Chalkboard Paint to the Paper

Tools and Materials – *indicates available at Schnarr’s
*Kraft paper or the backs of recycled grocery bags
*Chalkboard paint
*Small sponges
*Painter’s tape or *masking tape
Cleaned plastic food container lids

1. If you are using the backs of recycled grocery bags, you can get a lot of the folds and wrinkles out of them first by ironing them between pieces of clean scrap paper. Spread paper down on your work surface and tape edges to hold in place.

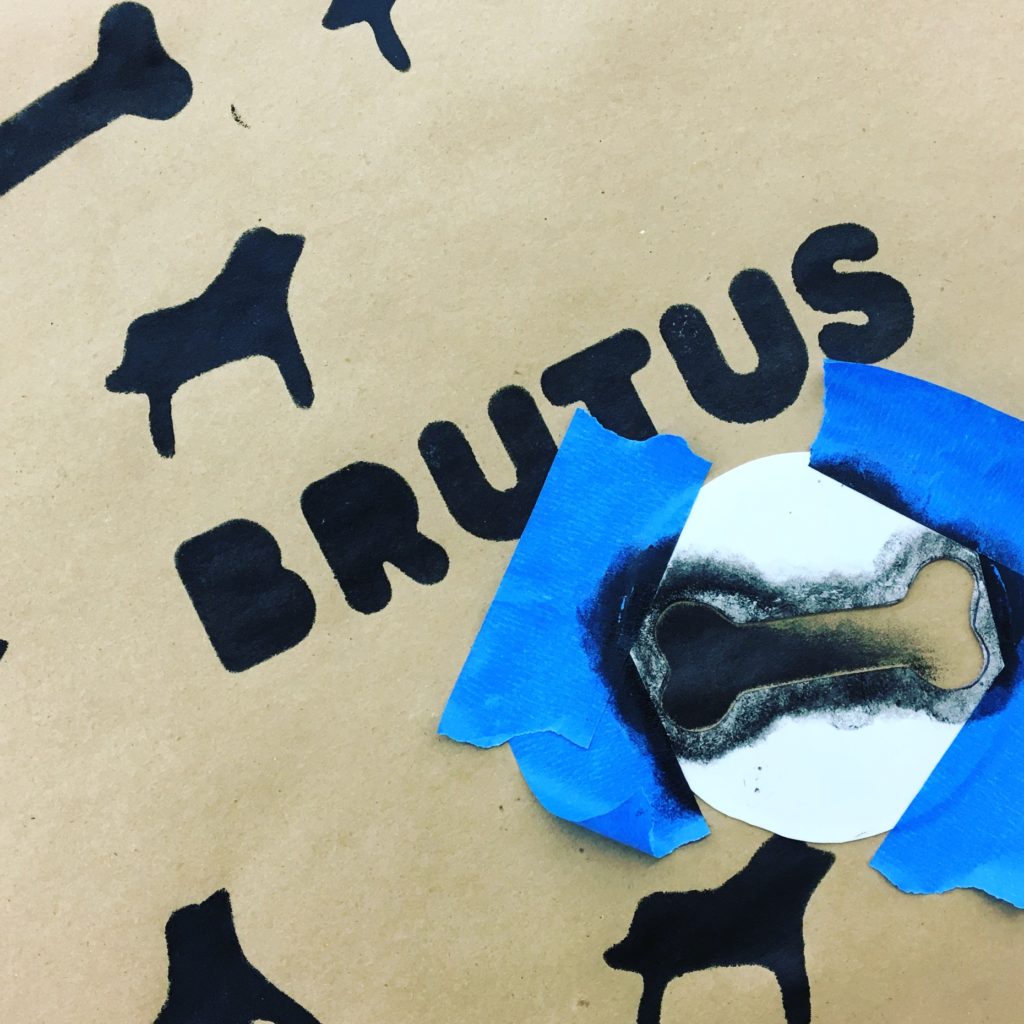
2. Dab some chalkboard paint onto an old food lid and dip a small sponge into it. Place your stencil on the paper and tape down if necessary to hold it steady. Dab the sponge gently inside the cutout area and slowly apply the paint. Increase the amount of pressure and paint if necessary to get full coverage. If you apply the paint gently and gradually, you can avoid applying too much and having it bleed under the stencil.

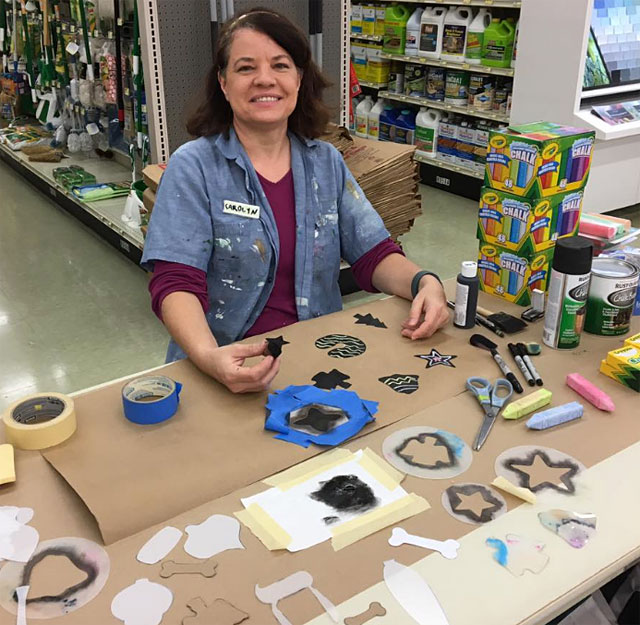
Here I am stencling chalkboard paint onto the kraft paper. I recommend that you apply the chalk after wrapping the package, but in this demo I drew with chalk on some of the shapes while I was still stenciling so that people would see the possibilities of the chalkboard paint.

3. Lift stencil straight up to avoid smearing and repeat until the whole piece of paper is covered to your satisfaction. Let the paper dry.

4. Wrap the package after the paint is dry.


Part 3 – Adding More Decoration

Tools and Materials – *indicates available at Schnarr’s
Colored chalk
Stickers
*Markers
*Ribbon
*Baker’s twine or decorative string
*Bows
*Gift tags
Spray fixative (optional)


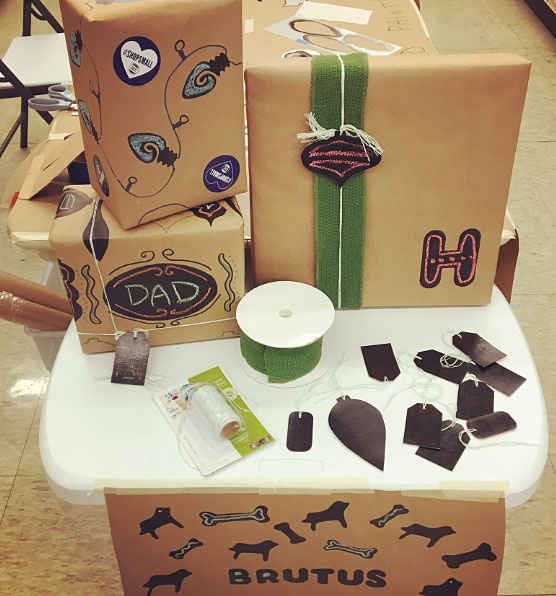
Here is a selection of wrapped boxes and decorating materials to give you an idea of how you can combine markers, stickers, ribbon, twine and tags with your chalked designs.

Tip: If your package is going to get handled a lot before presenting, you can spray your chalk work with spray fixative to protect it. Spray fixative is a product artists sometimes use to protect pencil, chalk, pastel and other media that might smear, and it is available at art supply stores.

Drawing with both markers and chalk is great fun!


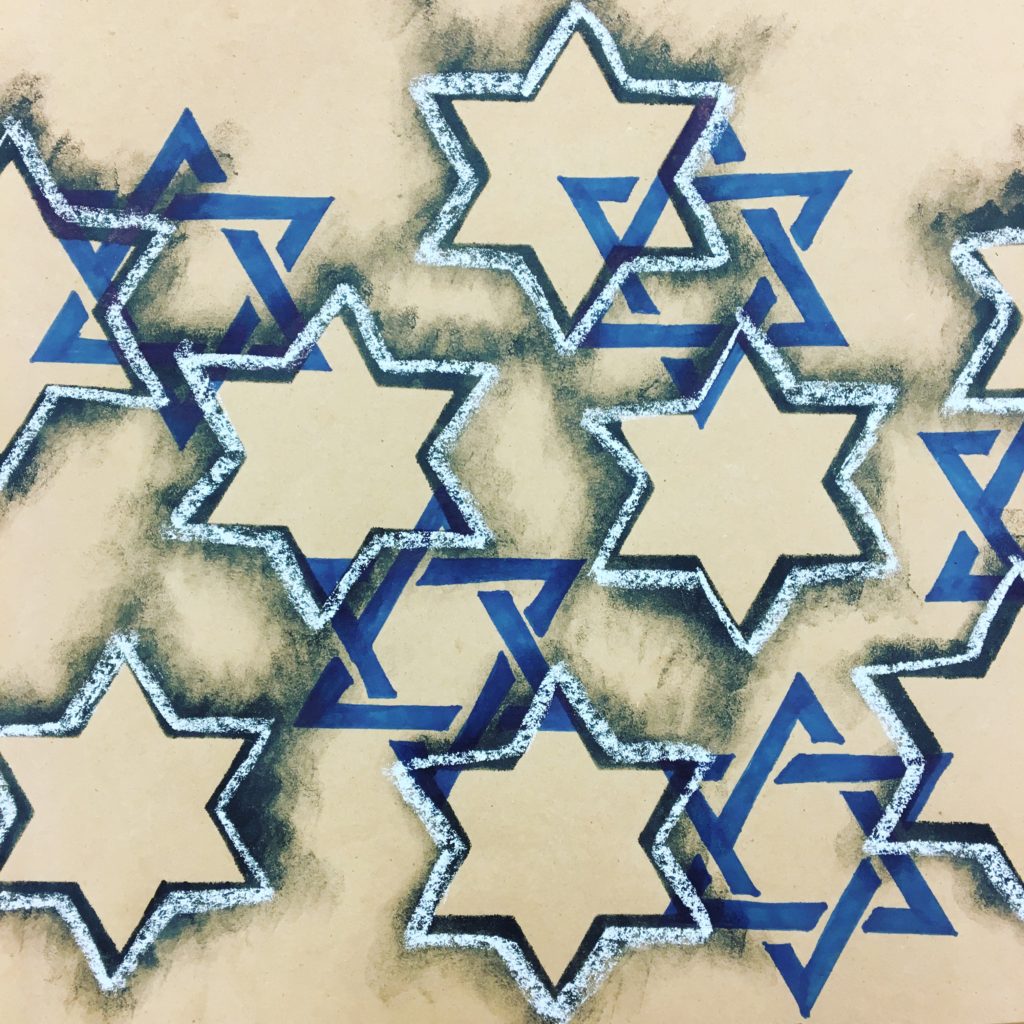
On this sample, I sponged the chalkboard paint around a cutout star that was left over when I made a six-pointed star stencil. Combined with royal blue marker drawn through another stencil and light blue chalk I made a Hanukkah design.

Part 4 – Making Gift Tags

Tools and Materials – *indicates available at Schnarr’s
Scrap chipboard or cardstock
*Chalkboard paint
*Paintbrush
Stencils
*Scissors
*Pencil
*Ribbon
*Baker’s twine or decorative string
Hole punch
Spray fixative (optional)

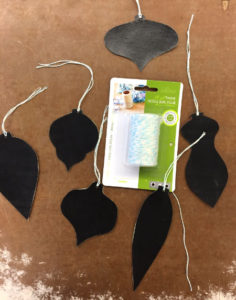
It’s easy to make chalkboard gift tags to go along with your chalk-enhanced gift packages.

1. Paint some chalkboard paint onto one side of some scrap chipboard or card stock and let dry.

2. Use your stencils to trace shapes onto the unpainted side with pencil and cut out. You can make your tags tag-shaped or any other shape you like that fits your theme.

3. Punch a hole at the top of your tag and attach a piece of ribbon or twine using a lark’s head knot.

4. Use chalk to write on the tag and protect with spray fixative if necessary.

Categories
DIY Home Decor Sustainability Upcycling Ways With Wood

Stencil a Sofa Shelf Made From Distressed Wood

Stencil a Sofa Shelf Made From Distressed Wood

by Carolyn Hasenfratz

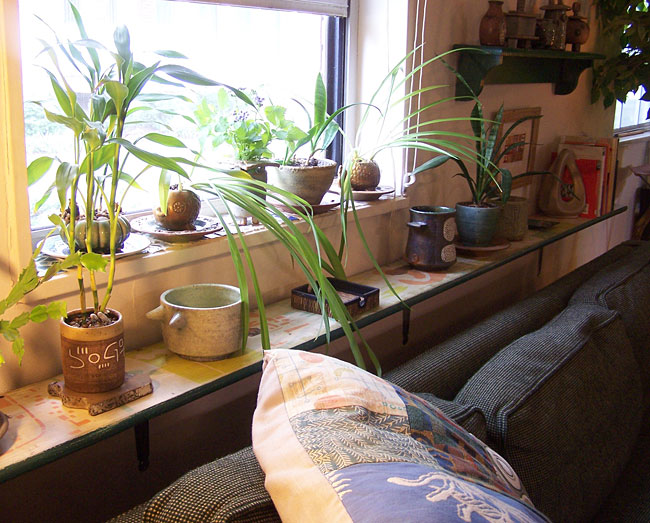
Sofa shelf made from distressed wood

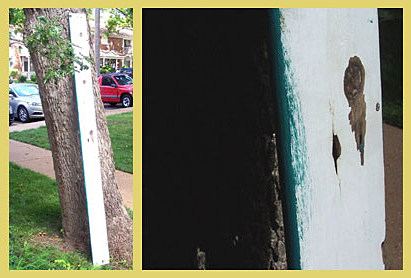
This project was made from the same stash of distressed wood that I used for the previous project Stencil a Wood Garden Sign. I kept aside a couple of intact large planks so I could make some interesting shelving. The wood was bare on one side and had partially peeling white paint over green on the other side. I decided to use the white side as a ground for some stencils I cut that were inspired by a mid-century modern building I saw on vacation last summer.

Tools and Supplies
* indicates items that are available at Schnarr’s
Distressed wood plank the length of your sofa
Sandpaper*
Dust mask*
Drop cloth for work surface*
Water based paint* for large areas
Acrylic craft paints for stenciling
Decorative stencils
Water based clear satin wood varnish*
Rags*
Paintbrush*
Assorted size old food containers for mixing paint and varnish
Sponges*
Old food container lids to use as palette while stenciling
Masking tape or painters tape*
Shelf brackets*
Screws*

Instructions

1. Put on a dust mask and sand your wood plank to remove rough edges and peeling paint. It’s always a good idea to wear a dust mask to keep from breathing small particles but I think it is even more important when working with old salvaged wood. You don’t know what that wood was treated with, what is in the old paint and it could be moldy as well. After sanding, wipe off the dust with a damp rag.

2. My wood plank already had a satisfactory ground color, white, on what would become the top surface. If your plank does not already have a ground color that you like, you can apply one. House or wall paint is a good choice. One technique that is really effective with the distressed look is to paint a contrasting color under the ground color. Some random sanding here and there later to expose the different layers of paint will simulate the effect of an old piece of wood that has been painted multiple times.

3. Apply a contrasting color to the sides and bottom of the board. As you can see, when you paint surfaces where two colors come together at a corner, it’s easy to slop a little paint over where you don’t want it. One reason that I love the distressed look so much is that when you sand off paint to conceal your mistakes, it looks like part of the design. If you are trying to paint precise corners or lines they don’t look good unless they are perfect, but with a distressed effect you can be a little sloppy!

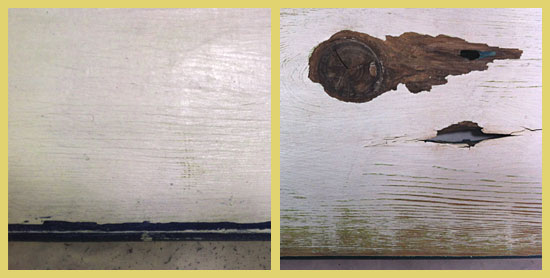
My distressed board with closeup of paint job

4. Next put your dust mask on again and sand the corners and edges of your board to expose the wood in those places. Then check to see if any paint is beyond the corner where it is supposed to be, such my example below on the left.

Sanding in process

Sand away any paint that is in the wrong place, such as the excess paint that I removed from the top of the board. As I sanded the excess paint off, I exposed some of the wood grain on the front of the board and some of the green paint that is under the white paint. If you are using a really beat up piece of wood like I did in my sample, you can make some artistic decisions about sanding other areas. If there was a rough spot that I found pleasing, such as wood grain, I sanded such spots to enhance the texture. If there were spots that were not pleasing, such as dirty spots or flaking paint, I sanded to remove those unwanted areas of paint.

5. Decide what design you want to stencil on the top side of your shelf. I designed stencils specifically for this project but I have and will use them in lots of other projects as well. If you would like detailed information on how to cut your own stencils, see my article Fun With Stencils.

6. Apply craft paint through your chosen stencils in the colors of your choice. If you are new to stenciling on wood, please see my article Stencil a Wood Garden Sign for detailed instructions.

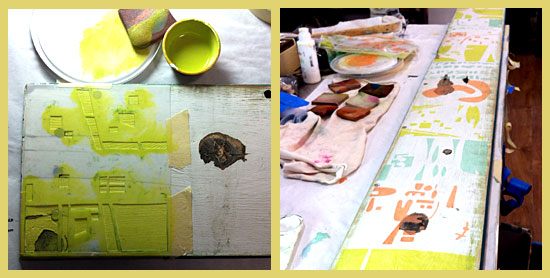
Stenciling in process

7. When stenciled paint is dry, to further enhance the distressed look mix up a paint/varnish/water mixture. Here is how – in a small container, mix some paint until you get a shade of dark brown that you like. In another larger container, mix a half and half solution of water and satin finish water based wood varnish. Gradually mix in some of the brown paint until you get a stain that you like – test by brushing on an inconspicuous spot. It should be dark enough to tone down your design a little bit and give it a weathered look, but not so dark that it obscures it. When the mix is right, stain/varnish your whole board and let dry.

8. Attach brackets of your choice to the wall behind your sofa, and set shelf in place. You’re done!

Categories
DIY Gardening Home Decor Upcycling

Decorate a Terra Cotta Plant Pot with Acrylic Paint and Stencils

Decorate a Terra Cotta Plant Pot with Acrylic Paint and Stencils

by Carolyn Hasenfratz

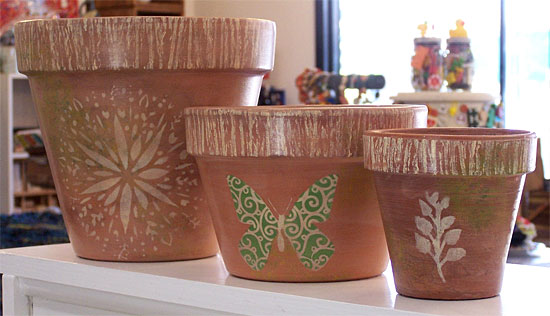
Terra cotta pots decorated with paint and stencils

Supplies and Materials
*Indicates items available at Schnarr’s
Terra cotta pot*
Acrylic paint*
Water-based varnish or sealer*
Small containers for mixing paint (can be disposable cleaned food containers)
Rags for cleanup*
Paintbrushes*
Water container*
Sponges*
Decorative stencils
Letter and number stencils*
Palette knife for paint mixing
Palette (could be a proper artists palette or a temporary one made from freezer paper*)
Sandpaper* (optional)
Memory Essentials Get Rollin’ tool
Memory Essentials Bits and Pieces
Optional – heat tool for speeding up drying between steps if you need to
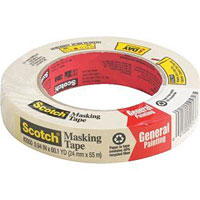
Masking tape*
Optional – disposable plastic gloves* if you want to keep paint off your hands
Drop cloth* for work surface

Painting and stenciling terra-cotta pots is a fun and inexpensive way to enhance your patio or garden decor. Younger and older crafters alike can join in. Small decorated pots can be used as party favors. Medium-sized pots might provide the base for a table centerpiece. A large pot could function as a gift basket that you can fill with items for a loved one who likes gardening. Gardeners can always use extra small items such as gloves* (they tend to wear out with regularity), seeds*, bulbs*, bug repellent*, gardener’s soap, hand lotion*, sunscreen*, lip balm* and plant tags*. You can also throw in a gift card* so they can get exactly what they want!

You can use either a brand-new terra cotta pot or a used one. I kind of like a used one for this project because I’m going for an artificially aged or distressed look and and that’s easier to achieve if the pot already features some stains from being used. A brand new pot will work also.

Directions

1. Clean and dry your pot.

2.Using your acrylic paints, mix a terra cotta color that is lighter than your pot. Good colors to use in the mix are white, brown, orange and maybe red.

3. Put some water-based varnish in a small container and mix in some of the light terra cotta color. Brush some inside your pot to see how translucent it is. I used a stiff brush that was about 1″ wide. You should be adding a light, translucent haze of color in which you can see some brush strokes. Paint the whole inside of the pot and let dry. This step achieves two objectives – it seals the inside of the pot and tests your mixture to make sure it’s right – not too opaque and not too transparent. Normally one of the benefits of a terra cotta plant pot is the porosity, but since we’re applying paint to ours we don’t want water seeping through and wearing off the design over time. Set aside the remainder of the paint/varnish mixture to use later.

4. On your palette, squeeze out some green, yellow and white paint. Use a sponge to blend these colors in random ways and lightly sponge paint onto your pot in random areas. This is to simulate lime scaling and moss or algae that would normally appear on a terra cotta pot over time as it’s in use. After this paint is dry, if you need to tone it down any you can sand it lightly or sponge a litte of your translucent light terra cotta color over it.

5. The next step is to apply a loose vertical texture to the rim of the pot to accentuate it. I used a Memory Essentials Get Rollin’ tool with rubber bands on it from the set Memory Essentials Bits and Pieces. This is one of my favorite textures of all time and I’ve used it in paper crafts, fabric surface design and all kinds of random projects over the years. If you don’t have these tools you can create a similar texture tool by wrapping rubber bands or string around a wood block. Spread some cream-colored paint on your palette and run or press your tool in it then apply to the rim to make the texture. Let dry.

6. Select a stencil or stencils for applying a design to the side of your pot. You might want to use letter or number stencils to create names, initials, words or house numbers. In my examples I used decorative stencils in garden-related designs. Temporarily tape the stencils to the side of the pot with masking tape. Put some cream-colored paint on your palete (do not thin with water) and apply paint through the stencil with a dry sponge. When you’re done, pull off stencil and either wash paint from stencil immediately or put in a container of water to wash later. If your design requires more than one color, use a clean dry sponge for each color – a moist sponge will make your paint run under the stencil and mar the design. While you’re working, if you don’t want to pause and go to the sink to wash paint from your stencils, brushes and sponges at each step, throw them in the container of water until you’re ready to do cleanup at the end. Let stenciled paint dry on pot.

7. Take a look at your pot and see if you like the appearance the way it is or if you want to make it a little more distressed. Randomly hit some areas with sandpaper if you want to “age” it a bit more. Wipe off dust with a slightly damp rag.

8. Paint outside of pot with your translucent light terra cotta / varnish mixture. Let some brush marks show, but smooth them out a bit if you think they are too prominent. Turn pot over and paint the bottom to seal it. Let dry. You’re done!

For more information on stenciling, here are some of my other articles:


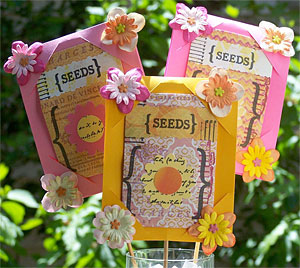
Seed packet bouquet

If you want to take the idea of using a decorated pot as table decor or a party favor a little further, here is an idea you might like from my personal blog. Make a bouquet out of seed packets with free templates that I provided for download and display it in one of your decorated pots.
Make a Seed Packet Bouquet

Categories
DIY Gardening Sustainability Upcycling Ways With Wood

Make a Garden Sign Out of a Recycled Produce Crate

Make a Garden Sign Out of a Recycled Produce Crate

What you’ll need:

Thin wood produce crate
Sturdy screwdriver or pry tool*
Saw*
Wide masking tape*
Paint*
Paintbrush*
Decorative stencils
Optional: Letter and number stencils*
Sponge or sponge brushes*
Temporary palette (freezer paper* or old plastic lid)
Drill*
Hammer*
Outdoor varnish*
Nails*
Brads*

*Available at Schnarr’s
In a previous article I described stenciling with paint on a wood garden sign. That works great if you don’t want a lot of small words but I found myself in need of some new garden signs that would require a lot of text on them. I decided to find a way to computer generate the text and put it on a weatherproof sign. In the past I had purchased produce from a co-op and had saved a couple of the thin wood crates thinking they would be useful for garden markers of some kind. I decided to make small signs from this wood and print out my text on clear acetate and attach that to the signs with brads.

I have some special gardening challenges where I live. I want to have a Permaculture garden. Different people will define Permaculture slightly different ways but the easiest way I can explain it is that I want to manage my garden in a way that works with nature instead of fighting it in order to save both labor and money. Surrounding my condo are large Oak trees which deposit mass quantities of leaves each season. The types of plants that thrive under trees are adapted to grow in the conditions created by a yearly deposit of leaf litter which is not removed but left to decay in place. However since I live in a condo, the leaves are removed by the groundskeepers which causes a lot of problems. I have mostly perennial plants which are not intended to be replaced each year. The leaf blowers make the plants look bent and bedraggled, as if they’d just been power-washed. The plants need the winter protection provided by leaves, so I have more die-off than I should. Leaf litter helps soil retain moisture and most shade-adapted plants like moist soil. When the naturally provided soil protection is stripped off, the soil dries out too much. I can see why a plant seller would be happy about this, but I’m a plant consumer and I’d rather keep the ones I have rather than keep buying new ones! To keep plants alive I have to water more which costs the condo complex money. I can and do put down mulch, but the leaf blowers blow a lot of it into the lawn which doesn’t help either my garden or the lawn to look it’s best.

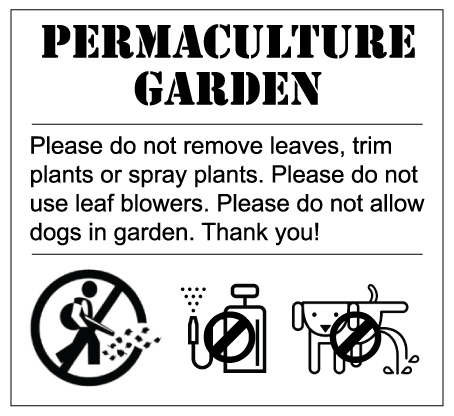
I think my garden would look a lot better and be healthier and require less maintenance if the groundskeepers would leave it alone. I have explained the situation to the condo management and they have agreed to let me deal with the leaves myself this season and keep the leaf blowers away as an experiment. Getting the agreement is one major step forward, getting the groundskeepers to comply will be another challenge. I don’t expect the groundskeepers to remember which is my garden, there are around 1,500 units where I live. So I obtained permission to install six signs to place around my garden which would read: “PERMACULTURE GARDEN. Please do not remove leaves, trim plants, or spray plants. Please do not use leaf blowers. Please do not allow dogs in garden. Thank you!” I worked this text out in computer graphics software and for good measure added icons to represent no leaf blowers, no spray and no peeing dogs. I looked online for the graphics and was amused by how many choices of “No leaf blowers” icons there are! I must not be the only person who finds they interfere with my gardening techniques.

Computer generated content for signs.

These signs will have to be somewhat prominent to be seen, so I tried to make them as attractive as possible and harmonious with my gardening style. First I pried apart the salvaged wood produce crates to get the wood pieces, then I cut them into 8 inch long sections. For each sign I placed two pieces together and held them together in the back with a piece of wide masking tape. This created a roughly square sign (8 x 7.5 inches).

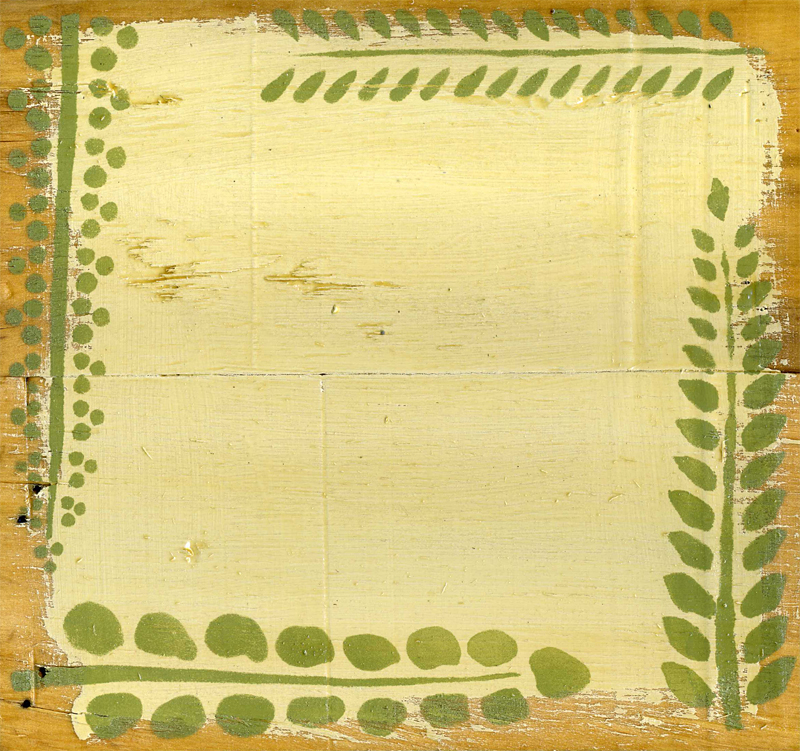
I painted a rough square of off-white paint in the middle of each sign, treating the edges very loosely for a rustic look. Then I used some medium avocado-green paint to stencil botanical designs around the edges. See my previous article Stencil a Wood Garden Sign for detailed information on how to stencil on wood. Then I painted the backs and fronts with several coats of weatherproof varnish.

Sign ground after painting, stenciling and varnishing.

Then I took my computer generated text to a copy shop and got six copies printed in reverse on clear tranparencies. The reason for printing in reverse is that I think the ink will hold up better to the weather if it’s on the back of the clear film.

Next I punched four holes in the corners of the pieces of film and drilled four corresponding holes in each sign. Then I attached the film to the wood with brads.

I purchased six wooden stakes from Schnarr’s, sanded them and varnished those as well. Then I nailed the signs to the stakes and installed them.

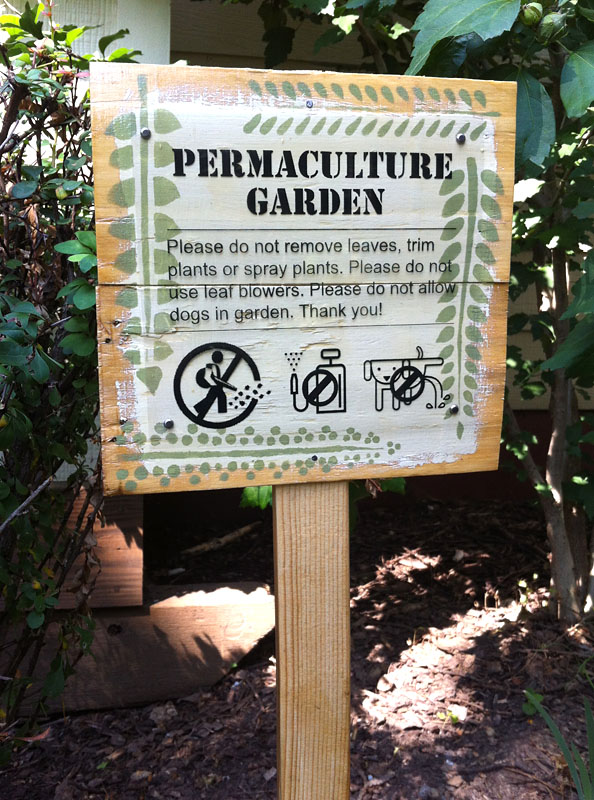
Finished garden sign.

Here is one of the six finished signs! If all goes well and I actually get the opportunity, I will write about how I chose to deal with the fall leaves and what the results were.

Categories
DIY Ladies' Night Upcycling Ways With Wood

Stencil a Wood Garden Sign

Stencil a Wood Garden Sign

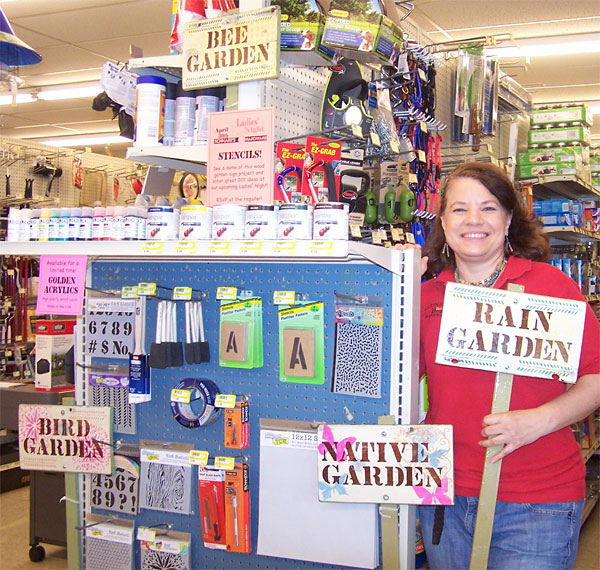
Schnarr's employee Carolyn with several finished signs and a selection of supplies you can use to make one. Carolyn will be demonstrating stenciling at our Ladies' Night on April 30, 2015.
Schnarr’s employee Carolyn with several finished wood garden signs and a selection of supplies you can use to make one. Carolyn will be demonstrating stenciling at our Ladies’ Night on April 30, 2015.

How would you like a practical and decorative wood garden sign? Stencils are handy for such a project because they are available in letters, numbers and lots of fun decorative designs.

Here are the tools and materials you will need:

Pencil
Paper
Ruler
Tracing paper
Letter or number stencils
Decorative stencils
Wood
Acrylic or latex paint
Bristle paintbrush(es)
Water container for paint brushes
Rags
Sandpaper
Dust mask
Freezer paper
Drop cloth
Wide painter’s tape or low-tack masking tape
Small disposable plastic cups
Wooden stake
Sponge brushes or sponge pieces (at least one for each color)
Plastic lids from food containers
Large water container (preferably shallow and flat)
Optional – hair dryer or heat tool
Old toothbrush
Outdoor wood varnish with sun protection
Paint thinner for cleaning brushes if using brush-on varnish
Drill
Drill bit
2 bolts
2 nuts
2 washers (optional)

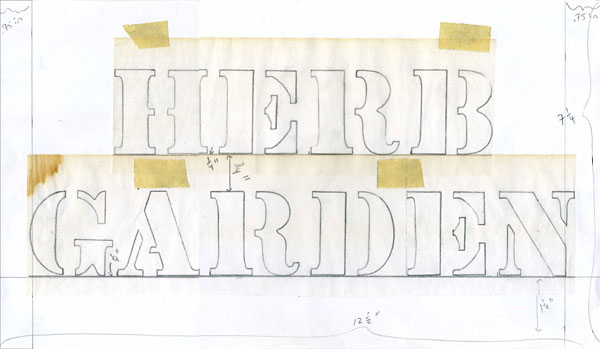
The first step in making such a sign is to decide how big it should be. If you have some scrap wood available, you could let the size of the wood pieces you have on hand determine your design. In my case, I had some used, distressed long boards that were 7 1/4 inches wide. I got out some stencil letters and decided how long my wood piece should be to fit the lettering I wanted on the sign. I worked out some lettering samples on tracing paper and taped these to a piece of paper to determine my final sign size – 7 1/4 x 16 1/2 inches.

Working out my stencil design on paper for my wood garden sign.
Working out my stencil design on paper.

If you don’t have scrap wood to start out with, you can just make your design any size you want and get your wood cut to order. Work out your design ahead of time using pencil, paper and tracing paper, then go get your wood cut or cut it to size yourself. I recommend using wood of a 3/4 to 1/2 inch thickness. If you buy a board at Schnarr’s we will cut it to length.

After the wood is cut, sand it smooth. I recommend you wear a dust mask while sanding. Wipe off the dust with a damp rag.

The next step is to decide on a base or ground color for your sign. For this project I am using all acrylic or latex water-based paints (except for the varnish layer). You can use a dark color as base and stencil on it later with light colors, or make your ground color light with darker colors stenciled on later. If you like the distressed look that I am so fond of, you can put an additional color under the ground color and let some of it show through by sanding on the corners and other strategic places on the sign. You can make the back and sides a different color like I did in my sample or make it all one color. Freezer paper or drop cloths are handy for protecting your work surface while you paint.

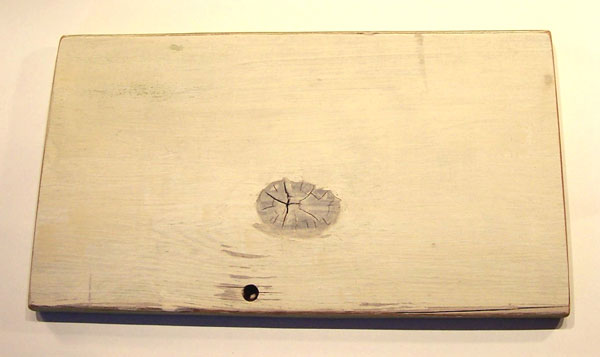
Since I was starting with distressed wood with some paint already on it, I let the existing color influence my other color choices. My scrap wood had previously been painted white over a light green. Some of the green showed through the white as I was sanding. There were a few spots where the paint had peeled away entirely showing dark wood underneath. I wanted to tone down these areas but not cover them up entirely so I decided to paint the front of my sign with an off-white wash to preserve some of the distressed look and create a more even ground for the subsequent design. After the off-white wash was dry I painted the back and sides of my sign green.

Distressed wood cut to size, painted, sanded and read for stenciling on wood garden sign..
Distressed wood cut to size, painted, sanded and read for stenciling.

For a vertical post to use for mounting my sign, I chose a wood stake available at Schnarr’s. I sanded it smooth then painted it green.

After the paint is dry, sand the edges on the sign and post to make them look distressed and wipe both with a damp cloth to get all of the dust off.

Now it’s time to actually start stenciling. Get your work area ready by placing your paints, stencils, tape, small brushes for mixing, water container, rags, small plastic cup, sponge brushes or sponges, and plastic lid where you can reach them. At your feet or on the table if there is enough room, place a large flat container filled with water. This is for placing your stencils and other tools in to soak when you are done using them. This can be a messy process so wear old clothes.

The next step is to apply some background design in a light color. I wanted to add a little interest to the background and edges without detracting too much from the lettering that would be applied later, so I chose a light yellow paint for my sample.

Choose a stencil and tape it in place on your wood sign.

Mix some light yellow paint in a little plastic cup. Do not mix any water into the paint. Dab some paint onto a plastic lid. If you don’t have a plastic lid, a little square of freezer paper taped to your work surface will serve as a disposable palette. Press your sponge or sponge brush into the paint and dab it onto the lid a few times to distribute the paint. You want a light application of paint to start out. If you are new to stenciling, you most likely will overestimate the amount of paint you need and use too much, so start with less than you think you need – you can always add more but if your paint application is too heavy it could bleed under the stencil.

Start pressing the sponge lightly into the stencil openings. Dab very gently at first and increase pressure gradually until all the open areas are filled with paint. When you are satisfied, lift the stencil.

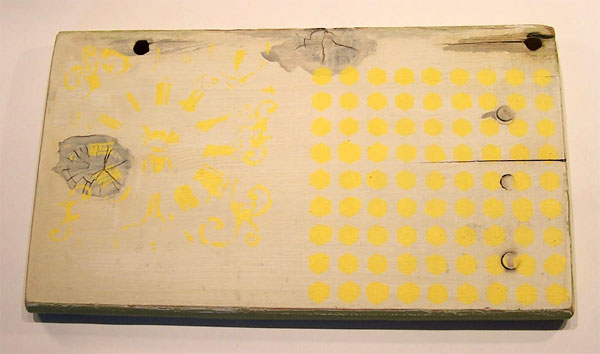
Starting to develop the stencil design with some yellow in the background for wood garden sign..
Starting to develop the stencil design with some yellow in the background.

If you are finished with that particular stencil, put it in the large container of water to soak. If you are going to use the stencil again on another part of the sign, move it and continue stenciling until you are finished, then soak it.

When you are finished with a color, put the sponge and plastic lid in the water container for cleaning later. Do not attempt to clean the sponge or sponge brush and use it immediately for a new color – you will have to start with a clean dry sponge for the next color because water makes the paint too runny and it will bleed under the stencil.

Acrylic paint dries quickly. It won’t take long for your first layer of paint to be dry enough to work on the next layer, but if you need to speed up the drying you can hit it with a hair dryer or heat tool. Repeat the above steps with each new color until your sign is complete.

If you are using letters or numbers on your sign, you can draw a line with pencil or ruler to help you apply them in a straight line, then erase the pencil line later after the paint is dry.

Wood garden sign in progress with two colors

Wood garden sign in progress with two paint colors in place.
Finished wood garden sign with stencils.
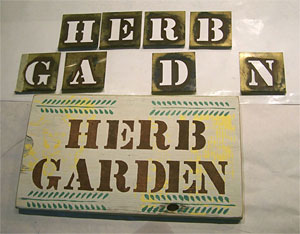
Antique brass stencils with the lettering they made on my sign.

To clean your stencils and tools, swirl them around in the water to get out as much paint as possible. Squeeze all the paint you can out of the sponges and brushes. If needed clean with soap. Rinse and let them dry on a rag. Dump out the paint water and replace with fresh. Scrub your paint lids and stencils with a toothbrush to get the remaining paint off. Acrylic paint doesn’t have much of an affinity for sticking on plastic especially if soaked, but if allowed to dry prior to soaking some spots might be stubborn. If all the paint doesn’t come off it won’t affect future use so don’t worry about it. Remove as much paint as you can, rinse off stencils and lids and let dry.

When your sign is completely dry, if you are going for the distressed look rough up the design in a few spots with sandpaper. Wipe off dust.

Coat both sign and post with outdoor weatherproof wood varnish, preferably one with sunlight protection to help keep your paint colors from fading. Follow the safety directions on the container for both varnish and paint thinner as they can be dangerous if not handled properly. Do not use a sponge brush for the varnish, it will dissolve. You can avoid the hassle of dealing with brushes and rags and paint thinner by using a spray varnish instead of a brush-on product. I used a brush-on varnish because it’s more economical and I think I get a thicker coat by using a brush. Ultimately, you can make your varnish choice based on your personal application preference.

When varnish is dry, drill two holes in both sign and post to accommodate the bolts that will hold the sign together.

Connect sign to post with nuts and bolts. Place a washer behind the bolt head for a more finished look. Bolts are preferred over nails for this project so you can easily replace the post if it rots over time.

Install your sign where you want it by hammering it into the ground.

If you would like to read about how to cut your own stencils, see my article Fun with Stencils.

If you are interested in attending our Ladies’ Night on April 30, 2015 remember to RSVP (on Facebook and via email [[email protected]]).

Available at Schnarr’s:

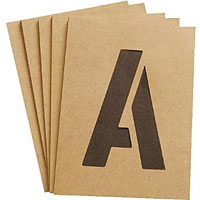
Letter and Number Stencils

Letter and Number Stencils

Masking Tape

Masking Tape

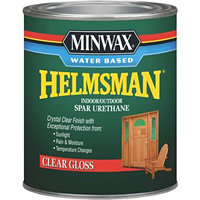
Indoor Outdoor Varnish
Indoor / Outdoor Varnish

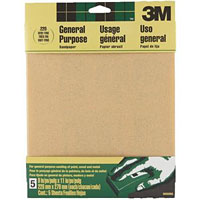
Sandpaper

Sandpaper
Sponge Brushes
Sponge Brushes

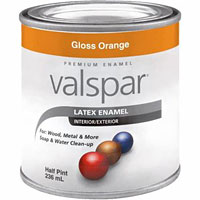
Valspar Indoor Outdoor Latex Enamel

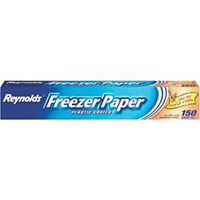
Freezer Paper

Freezer Paper

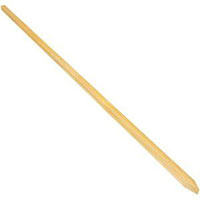
Wood Stake

Wood Stake

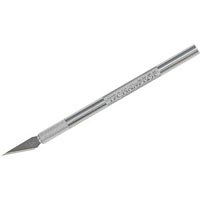
Hobby Knife
Hobby Knife

Hobby Knife Blades

Hobby Knife Blades

Dust Mask
Dust Mask

Drop Cloth
Drop Cloth