Categories
Backyard Wildlife Gardening Sustainability

Black Soldier Flies Are Powerful Allies For Humans

Black Soldier Fly larvae

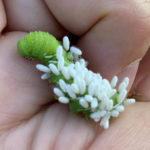
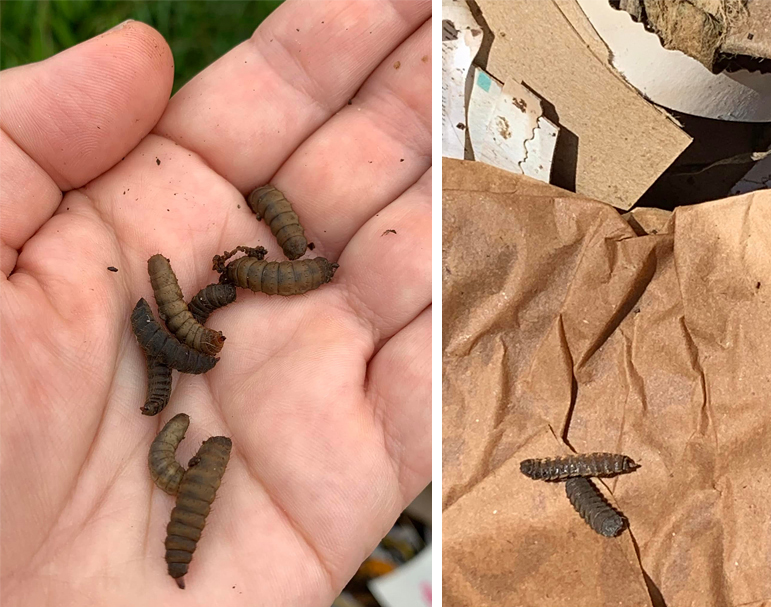
On one memorable day several years ago, I went out to my deck to put some food waste in the worm composting bucket I kept out there. I lifted the lid, then my stomach kind of churned and puckered a little as I saw that the substrate surface was – MOVING. Had I really managed to raise enough red wriggler worms in a short time to make the surface undulate like that? That didn’t seem likely. A closer look revealed that the movement was caused by something I initially thought was far more gross than worms – my worm bin had been invaded by MAGGOTS. Yes maggots, the “disgusting” larvae of flies. But wait – these didn’t look like House fly larvae. They were darker, larger, and tougher looking. I picked one up to get a good look then did an internet search to see what kind of fly they belonged to. I identified the larvae as Black Soldier Fly (Hermetia illucens), and as I learned about these flies my alarm quickly turned to delight! I had accidentally attracted one of the most beneficial insects I’d ever heard of.

What are some of the many virtues of Black Soldier Flies?

    • They are harmless to humans, in both adult and larval forms (Bader 223). Unlike many other flies known to frequent homes, gardens and farms, such as Black Flies, Deer Flies, Face Flies and Stable Flies, adult BSF do not need to bite you or cut you or your animals to get a meal of blood, mucous or meat juices (Bader 206, 210, 212, 224). As adults BSF lack the mouth parts or digestive systems to bite or consume food (Park 8). In a way, as adults they are actually less gross than butterflies – in addition to nectar, many adult butterflies love manure, bird droppings and carrion juices (Roth 73-74).
    • Black Soldier Fly larvae are known to predate on or discourage the presence of some other noxious fly species such as House flies (Bader 223, Park 4).
    • They are voracious eaters and can quickly consume large amounts of waste (Park 4).
    • The larvae are great sources of protein and theoretically could be fed as part of the diet to omnivorous pets and livestock (Park 10). If the livestock is to be consumed however, caution must be used and US law might restrict the use of BSF as feed unless their own feed is food grade and not derived from waste (Wang and Shelomi 2.5).
    • Black Soldier Flies do not transmit diseases as adults, and as larvae they assist with sanitation in a similar way to vultures – they consume waste products quickly that might otherwise become disease sources (Wang and Shelomi 1).
    • They are native to our area, so you can allow them to breed freely without concern that you are hosting an invasive species (Wang and Shelomi 1).
    • Even though at first glance the adults might resemble wasps more than flies, they don’t have stingers and cannot sting or bite.
Black Soldier Fly adults

My husband and I currently have two compost areas going in our backyard. One group of small piles is behind the little berm we built for our pond waterfall. We know we will be adding to this berm for a long time, so we just pile up yard trimmings there. When a pile is big enough we put dirt on top and plant on top of it. The other is in a black 55 gallon drum with holes in the bottom. The drum makes a useful composter, in part because the black surface heats up from the sun and helps accelerate the decomposition process. There are quicker and more efficient ways to compost of course, methods that involve turning and aeration, but so far we are doing well with removing the contents every so often and starting over if the drum gets too full. The top levels of the compost are normally not finished when harvested. We don’t mind – we have plenty of planting beds we can add it to in our own yard and at volunteer community garden sites. If enough dirt or planting medium is put on it, unfinished compost is fine to plant over. Something in the soil will eventually consume it.

The compost in the drum rots down quickly enough in the warm months that it’s usually possible to see daily progress as the level goes down. In the winter when things freeze, the process halts for awhile and sometimes we have to start a new bin until the drum starts to warm up again. Last week I noticed dramatic progress – the compost level dropped about six inches in a day or two! It wasn’t solely because things were thawing out and we’ve been having slow steady rain, although those factors helped. My heroes, the Black Soldier Fly larvae, were active again! I found a few in my pond when cleaning out leaves – they must have fallen in when looking for a place to pupate.

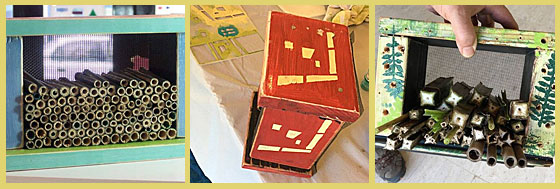
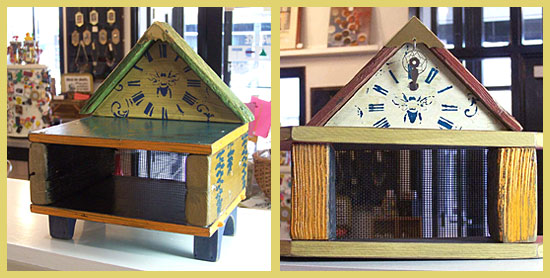
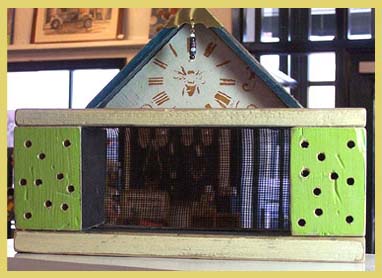
People all over the world are experimenting with efficient ways to raise Black Soldier Flies to possibly provide food for livestock and humans. For home gardeners who just want a little help breaking down waste, you might get Black Soldier Flies by accident – some food waste and a few pieces of cardboard for shelter on your compost pile could possibly attract them with no further effort on your part. If you find some, I hope you enjoy and appreciate their services! They are also available for purchase if you want some and don’t happen to attract any.

Sources for More Information

Bader, Dr. Myles H. Dr. Bader’s Pest Cures: Natural Solutions to Things That Bug You! Dr. Myles H. Bader, 2012.

Park, Haeree H. Black Soldier Fly Larvae Manual. University of Massachusetts Amherst, 2016. scholarworks.umass.edu/cgi/viewcontent.cgi?article=1015&context=sustainableumass_studentshowcase/. Accessed 25 March 2022.

Roth, Sally. Attracting Butterflies & Hummingbirds to Your Backyard. Rodale, 2001.

Wang, Yu-Shiang, and Matan Shelomi. “Review of Black Soldier Fly (Hermetia illucens) as Animal Feed and Human Food.” Foods (Basel, Switzerland) vol. 6,10 91. 18 Oct. 2017, doi:10.3390/foods6100091. www.ncbi.nlm.nih.gov/pmc/articles/PMC5664030/. Accessed 25 March 2022.

Categories
Backyard Wildlife Gardening Good Eating Sustainability

What is Eating My Mustard Greens?

What is Eating My Mustard Greens?

by Carolyn Hasenfratz Winkelmann

At my old garden, I was only allowed to grow vegetables on my small deck – I lived in a condo. My deck was in part shade so between lack of space and lack of sun I could only manage to grow a small amount of cherry tomatoes and a sad number of potatoes. Otherwise I stuck to ornamentals, herbs and wildflowers which I could get away with planting in the ground while enjoying a reasonable selection of plants that would grow in part shade.

When I got married and moved into a house in 2018, I started collecting vegetable seeds at seed swaps for my new garden which has plenty of sun. I had to do a lot of planting in a hurry so I just planted the seeds I had in the hopes that I would get a few vegetables and save a few seeds for the following year.

Lots of cherry tomatoes 
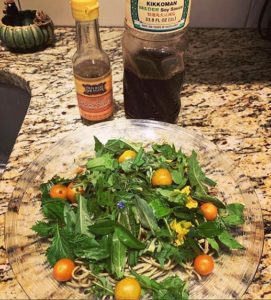
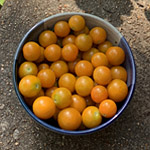
I’ve been having really good luck again with cherry tomatoes and I’m now addicted to growing leafy green vegetables so I can have fresh tasty salads that I pick myself. A few of the plants have really been chewed on by pests which is not a surprise because I don’t use pesticides. In my haste I made no effort to try companion planting to chase some of the pests away. Most herbs are not bothered much by pests so since I’m pretty new to growing vegetables I’m seeing a lot of creatures that I haven’t seen before.

Fresh picked salad with cherry tomatoes, dill, arugula, chives, romaine, mustard greens, edible flowers and wild greens.
Fresh picked salad from the backyard with cherry tomatoes, dill, arugula, chives, romaine, mustard greens, edible flowers and wild greens.

I had some Evergestis rimosalis (Cross-striped cabbageworm) on my mustard greens and some Pieris rapae (Imported cabbageworm) on my collards. I’m interested in invertebrate conservation and providing food to wild birds, so in the quest to get some vegetables I can eat I’m not going to apply poisons. I might start an additional bed of these vegetables in my fall garden and protect them with a row cover and some companion planting.

Hornworm caterpillar with parasitic wasp cocoons.I’m familiar with these little white blobs on this tomato or tobacco hornworm – those are the cocoons of tiny parasitic wasps that feed on caterpillars. The lifestyle of some of these tiny wasps is pretty horrific, and I’m saying that as a big fan of invertebrates in general! Some of them use plants as a host and some use other insects. Tiny parasitic wasps lay eggs on the bodies of caterpillars. When the tiny wasp larvae hatch, they feed on the caterpillar while it’s still alive. When they emerge they weave white cocoons where they stay until they hatch into adult wasps. The caterpillar they have been feeding on is eventually doomed though it might not die right away.

Even though their lifestyle kind of turns my stomach, these wasps are beneficial so I’m going to put this caterpillar back out in the garden. When the adults emerge they can continue their work of preying on garden pests. If you are going to destroy any caterpillars, it’s recommended that you leave the parasite-infested ones in the garden to add to nature’s arsenal of natural controls. The adult wasps of this type are not social and they do not sting. Some of the adults are so small I’m not even sure what kind I have in the garden. I have swarms of tiny and medium sized insects all over my masses of herbs that are in flower, such as Dill, Garlic Chives, Peppermint, Bronze Fennel and more. Herbs that get clusters of small flowers are worth growing just to get into your garden all the beneficial insects that are attracted to them.

Categories
Backyard Wildlife DIY Gardening Sustainability Upcycling Ways With Wood

Upcoming DIY Class at Schnarr’s: Build a Pollinator House on May 17


Three wood pollinator houses with stenciled decoration


Pollinator houses on display on endcap

As part of the series of DIY Classes at Schnarr’s Hardware in Webster Groves, Carolyn Hasenfratz will be teaching you how to make, decorate and fill a Pollinator House for your garden. Such houses are sometimes called Bee Houses or Bug Houses. They provide nesting and hibernating space for beneficial insects that bring life, color, pollinating services and natural pest control for your garden. We’ll have paint and stencils available for you to play with so you can give your house a personal touch.

Space in this class is limited to four people and the cost is only $20 per person including materials. Class time is 5:30 pm on May 17, 2018. Register now at this link:
Build a Pollinator House

If you can’t make it to the class, we have instructions for making two styles of pollinator houses published on the Schnarr’s blog:
Making a Pollinator House – Part 1
Making a Pollinator House – Part 2

Stop by Schnarr’s in Webster to see some of Carolyn’s prototype pollinator houses on display. These samples are for sale in case you’d prefer to buy one rather than make your own.

Categories
Backyard Wildlife DIY Gardening Sustainability Upcycling Ways With Wood

Make a Pollinator House – Part 2

Make a Pollinator House – Part 2

by Carolyn Hasenfratz

In my previous article Making a Pollinator House – Part 1 I explained why you might want to build a home for native bees and other beneficial insects for your garden. I also provided an example of a quick way to build a shelter out of cinder blocks, wood scraps and dried plant material. I promised to write up plans for a more attractive pollinator house. Here are instructions for building two different designs to enhance your garden’s decor as well as it’s productivity and ecological health.

Tools and Supplies
* indicates items that are available at Schnarr’s
Tracing paper
Pencil
Ruler*
Hot glue gun*
Wood hot glue sticks
1″ x 6″ x 8′ multipurpose board*
2″ x 4″ x 8′ board*
Saw*
Sandpaper*
Dust mask*
Acrylic craft paint
Paint brushes*
Water container*
Heat tool for speeding up drying (optional)
Painters tape or masking tape*
Decorative stencils
Sponges*
Drill*
Tiny drill bit*
Nails*
Window screen*
Hammer*
Wood glue*
Clear matte finish varnish*
Hardware cloth or chicken wire (optional)*

For the additional second design with the pediment, you’ll also need:
Assorted sizes of distressed wood pieces
Decorative brass box corner*
Miter saw*
3/16″ drill bit*
3/16″ dowel rod*
Wooden ball knobs or drawer pulls* with 3/16″ holes to use as feet

Mid-Century Modern style pollinator house

Instructions for Style #1 – “Mid-Century Modern” Pollinator House

1. Download the PDF document “Pollinator House Assembly Diagram”. It is sized to print out on a legal-sized piece of paper. Recreate the diagram in scale on a piece of tracing paper with pencil.

2. From the 1″ x 6″ x 8′ board, cut two 12″ x 5.5″ pieces(although the board is called 1″ x 6″ x 8′ it’s probably closer to 5.5″ so you might only have to cut the board into 12″ lengths).

3. From your 2″ x 4″ x 8′ (probably really 3.5″) board cut two 5″ segments.

4. Put on a dust mask and sand your wood pieces until smooth.

copy diagram onto wood
5. Mark each of your 12″ x 5.5″ pieces with the rectangles shown in the diagram. These will become the inner top and inner bottom of your house.


paint around edges
6. Paint a color of your choice in the border around the inner rectangle on each piece. For this step you don’t have to worry about painting precisely in the lines. Let paint dry.


7. Mark off around the middle rectangle with masking or painter’s tape on both pieces and paint black. When paint is dry, remove tape.

paint middle of boards black


8. Paint what will be the insides of your 5″ high supports black. Paint all other surfaces of your wood pieces assorted colors of your choice.

decorative stenciling
9. Decorate the top of your house and the sides of the supports with decorative stencils. I did not decorate the board edges with stenciling in my sample but you can if you want to. If you are new to stenciling on wood, see this article for tips –
Stencil a Wood Garden Sign.

10. Sand all the edges of your wood pieces so that the bare wood shows through on the corners. This gives the wood a distressed look. If you want to distress any other painted or stenciled surfaces further you can do so by roughing them up with sandpaper.

11. To assemble the house, stage the upright pieces by placing them in their footprints as indicated on the diagram on one of the 12 x 5.5″ pieces. Face the black painted sides inward and the stenciled sides facing out. If you’ve covered up your pencil lines with paint, you can use your diagram to redraw them as needed.

12. Load up your hot glue gun with wood project glue sticks and plug it in to heat up. Apply hot glue to the bottoms of the support pieces and press in place. Let glue harden.

13. Glue the other ends of the supports in place on the other 12 x 5.5″ piece. Let glue harden.

14. Place the tracing paper diagram on top of your house. Mark where the nail holes will go in pencil. Drill small pilot holes then hammer nails in. Repeat for the bottom.

15. Mix some dark brown paint with water to make a thin wash and paint over the whole house. Test first on the bottom to make sure it’s not too heavy or light. Alternately, you could use a wash of off-white paint if you’d rather have a pale wash. The purpose of the wash is to give an aged appearance to the wood – this is particularly effective when the paint clings to the corners that have been bared by sanding. Let paint dry.

16. Paint whole house with clear matte varnish.

17. Cut out a 10 x 5″ piece out of scrap window screen and nail it to the back side. This is to keep whatever materials you fill the house with from falling out the back side.

18. Fill the house from the front with materials that contain holes for pollinating insects such as native bees to live in.

Some suggestions of materials you could use to fill the house:

  • Bamboo or reed segments
  • Rocks
  • Rolled up corrugated cardboard
  • Chunks of scrap wood with holes drilled in it
  • Bundles of twigs or straw
  • Unfired ceramic clay with holes poked in it
  • Natural dried stems and reeds from the garden cut into segments
  • Dried seed pods

If necessary, cut out a piece of hardware cloth or chicken wire and nail it over the front to hold materials in.

19. Read this article for ideas on where to place the house in your garden or yard –
Making a Pollinator House – Part 1.

Depending on where you want to put your house, you may want to attach hanging hardware to it or mount it on a post. The wood pieces we used are thick enough to give you flexibility in attachment options.

Pollinator House with Pediment

Instructions for Style #2 – Pollinator House with Pediment

The prototypes I made for the second design vary somewhat in size and proportions because I used distressed wood that I had lying around. I designed the houses around what wood I had available and embellished some with found objects or hardware. If you want to build similar houses and don’t have access to distressed wood, you can use new wood.

1. Cut out two chunky pieces of wood to use as uprights and two thin pieces to use as the top and bottom.

Different pollinator house designs

2. Cut a right triangle out of wood that is 3/4 to 1″ thick for the pediment piece. A pediment is like a roof gable that is decorative rather than functional. My samples vary slightly in size but the triangles are mostly around 7 1/2″ inches on the long side and 3 3/4″ on the short sides.

3. Choose some thin, narrow wood pieces for the roof overhang. Lattice wood strips are about the right size – if you don’t have any distressed wood in that size range you can purchase some lattice strips to use. Cut these strips into approximately 6″ pieces and miter the corners.

4. Sand all wood pieces.

5. Paint the sides of your wood pieces that will become the interior with black paint.

6. Paint the other sides and parts in assorted colors of your choice.

7. Stencil a bee design or other stencil of your choice on the front of the triangle.

8. If you think any of the other wood surfaces need to be enhanced with stencil designs, decorate those also. Since many of my wood pieces were distressed and had a pronounced wood grain, knots, old nails and other irregularities I let those provide the visual interest in many areas. Antique look, vintage look, grunge or botanical stencils would be especially effective for this design.

9. Sand the edges of your wood pieces to expose the bare wood on the corners and distress any other areas that you think are in need of it.

10. Hot glue the vertical support pieces to the top and bottom of your house then nail in place.

11. To assemble the pediment section, put your two roof pieces in a miter clamp with the mitered ends butted together to make the roof point. Put a little wood glue on the ends as you do this. Position the clamped-together pieces on a block of scrap wood to brace them. Drill small pilot holes in one end and hammer in small nails. Slip a couple of nails in between from the other direction.

Creating roof peak with miter clamp and nails

12. Take your triangle pediment and apply hot glue to the top edge. On your work surface, lay the pediment down, slide the triangle part in and press in place. When the glue has hardened, hammer small nails through the roof pieces into the pediment for extra hold.

Attach roof overhang to pediment

13. Apply hot glue to the bottom of the triangle section. Place in place on top of house and let the glue harden. Drill two pilot holes at each end and drive long thin nails down into the supports below.

14. If you would like to attach wood feet to the bottom of your house, drill 3/16″ holes into the bottom of the house. Cut short pieces of 3/16″ wood dowel rod and put wood glue on both ends. Insert one end of each dowel rod piece into a hole in the house and the other end into the hole in a wooden ball knob or drawer pull.

15. Mix some dark brown paint with water to make a thin wash and paint over the whole house. Test first on the bottom to make sure it’s not too heavy or light. Alternately, you could use a wash of off-white paint if you’d rather have a pale wash. The purpose of the wash is to give an aged appearance to the wood – this is particularly effective when the paint clings to the corners that have been bared by sanding. Let paint dry.

16. Paint whole house with clear matte varnish.

17. Attach a decorative brass box corner to the roof peak.

18. Cut out a piece out of scrap window screen and nail it to the back side.

19. Fill house with nesting materials and place in a suitable location.

Here are some pictures showing how some of the other houses turned out.

Pollinator houses made with distressed wood

Pollinator houses made with distressed wood

Pollinator house made with distressed wood

Categories
Backyard Wildlife DIY Gardening Sustainability Upcycling

Making a Pollinator House – Part 1

Making a Pollinator House – Part 1

by Carolyn Hasenfratz


It’s becoming increasingly common to see structures called “Bug Houses” or “Insect Hotels” in gardens. Some people get squeamish at the mention of bugs or insects so perhaps the most appealing way to label such a structure is “Pollinator House”. Such structures are provided as a nesting and sheltering area for beneficial insects.

Most people are familiar with the pollinating actions of honeybees, bumblebees and wasps. Social bees and wasps are beneficial to the garden in many ways, not only by pollinating but in the case of wasps eating garden pests.

It’s understandable to be nervous about the idea of having colonies of stinging insects living in your garden because some of these species are very aggressive about defending their homes. If you want more pollinators in your garden fortunately there are other bees and wasps that are easier to co-exist with peacefully. If you fear you have attracted the wrong kind of bee or wasp to your garden, I recommend getting help from an expert before deciding how or if to deal with them.

I don’t mind bees and wasps because I can identify them and know how close I can safely get to them. I also don’t have any serious allergic reactions to stings. I work in the garden alongside Honeybees, Carpenter Bees, Bumblebees, Cicada Killers, Mud Daubers, Potter Wasps and others with little apprehension. Honeybees often land on me and I just stay still until they fly away. I steer clear of Yellow Jackets because I know from experience they will sting if you inadvertently disturb their nest (happened last summer in a client’s garden). I don’t attempt to eliminate them unless they are really in the way or other people are in danger. Even though I’m in the garden a lot I only get stung once every several years or so. The consequences for me are some brief anger, localized soreness and itching for a few days. The consequences for others could be far more serious and even deadly so use your best judgement.

Many of the solitary species of bees such as Mason and Leafcutter Bees like to nest in hollow plant stalks or holes in old wood. We take away many of these potential nesting sites by cleaning dead plants and old wood out of the garden. Some amount of cleanup is necessary for human safety, aesthetics and homeowners associations but we can mitigate the effects of a too-clean garden by building a Pollinator House. As an added benefit you may get other desirable insects such as ground beetles and butterflies hibernating in the structure.


Insect Hotel at Missouri Botanical Garden
Here are some suggestions about what materials to use:

  • Stones and bricks
  • Dead leaves
  • Twigs or twig bundles
  • Corrugated cardboard rolls
  • Dried seed pods
  • Paper straws
  • Hollow reeds – preferably 6-8 inches long, closed on one end
  • Drilled pieces of wood – variety of hole diameters, 3-6″ deep

The structure should be sturdily built to avoid toppling.

Where to place the house:

  • Protected from high winds
  • Partly in sun and partly in shade to meet a variety of species preferences
  • If possible near water and mud for drinking and nest building

Dad's fence is falling down
You can have a lot of fun designing your Pollinator House by creatively using materials, limited only by your imagination. I started a simple one for my Dad’s garden, custom designed to solve two problems for him.

Problem 1 – Decorative garden fence is falling apart and sagging
Problem 2 – Lots of sticks lying around from deadfall and pruning


Propping up fence with cinder blocks
Solution
I bought 12 cinder blocks and used them to prop up the ailing fence. Then I filled some of the spaces with twigs and short segments of hollow, dead plant parts from the garden. I drilled some holes in some pieces of scrap wood. A variety of hole sizes and depths are good for different species. As we get more material we’ll keep filling in the spaces in the blocks.


Filling the blocks with nesting material
The result is practical and may not score high marks in the aesthetics department. However the fence is located in the middle of a mint patch (also a superb beneficial insect attractor) and it will be partially concealed by vegetation for much of the year. If Dad agrees I think I will add shelving to the top for containers of trailing plants which will help disguise the blocks. I will probably have to work on the bases of the cinder block towers to make them straighter since the ground here is soft and did some settling after I stacked the blocks.

Dad is pleased that his fence is at least upright again and he’s happy to do his part for invertebrate conservation. Dad’s garden was designed with wildlife in mind and already supports an abundant population of beneficial insects.

Hopefully my condo association will approve a Pollinator House in my garden. I don’t know what my chances are but I do know that my Pollinator House is going to have to be pretty to even have a prayer of getting approved. I guess I will have to make it portable so I can sell it if they say no! They have previously said yes to a bird house but a bug house might be a harder sell. Stay tuned for a more aesthetically pleasing Pollinator House plan in a future newsletter!

More information about bees, wasps and insect shelters: