Categories
Backyard Wildlife Gardening

Help – My Pond is Full of Algae!

Help – My Pond is Full of Algae!

by Carolyn Hasenfratz

* = products available at Schnarr’s

This is the time of year when small lakes, ponds and water gardens sometimes get green “pea soup” water or mats of algae floating on the surface. The limiting factors for algae growth are mainly food and sunlight. If you can reduce the amount of sunlight and nutrients getting into the water, you can reduce algae growth in your water feature.

First lets look at possible food sources for the algae.

Fertilizer:
Is runoff from your lawn or garden getting into the water? Try reducing the use of artificial fertilizers in those areas. If that is not possible, try creating a rain garden or bioswale in a place that interrupts the water before it reaches the body of water you want to protect. Plants will help take up the extra nutrients before they pollute your water feature.

Plant debris:
Are leaves or other dead plant material decaying in the water? Remove plant debris that falls in ASAP.

Animal waste:
If you have fish in your pond, do you have too many fish for the size of your water feature? Do the fish get too much food? If you overcrowd the water or overfeed your aquatic animals, you will help feed algae as well as cause health problems for the animals. Uneaten food in the water is even worse for water quality than fish waste because it has more nutrients in it. Birds are another source of waste in the water. I have a small water garden specifically intended to attract birds. They bathe in it and sometimes dunk their food in the water to moisten it. Despite that activity, my water garden contains clean-looking, clear water. If you want wild birds to make use of your water feature, that doesn’t automatically mean you have to put up with water that looks like pea soup.

Filtration
Once you have addressed the sources of excess nutrients in the water, I recommend you next take a look at how the water is being filtered. Aquatic plants are great natural filters. Add more marginal and submerged plants to the water, and you will help starve out the algae. Areas around the water that support bog or marsh plants not only help filter water but they give your water feature a more natural appearance.

Artificial filters* are a great help too. I use one in my small water garden and it plays a role in keeping my water garden clean. There are lots of different kinds of filters. Follow the recommendations of the manufacturer of your filter for proper maintenance and cleaning schedules. If you have a type of filter that uses media that you rinse out, rather than replace, rinse the filter media in chlorine free water (such as old pond water that you’ve removed during water changes) so that you don’t kill the beneficial bacteria that live in the filter media. Beneficial bacteria that break down waste grow on just about every surface in the water, but are most numerous where there is porous material and the water flow is swift – conditions that exist inside a filter. These bacteria are what make most filters function. This is called biological filtration. Other types of filtration include chemical and mechanical. Many filter designs, including the sponge filter that I use, combine mechanical and biological filtration. For example the sponge picks up large particles and takes them out of circulation while the bacteria that live in the tiny holes in the sponge digest the water pollutants and turn them into less toxic substances. It’s a good idea to know which kind of filter you have and understand how it works – that will help you understand what to clean and when. For example if I squeeze out my filter’s sponge in a pail of chlorine-free water to remove the debris it’s collected and put the old sponge back in the filter, I’m doing a good thing for the water quality. If I dunked the filter parts in chlorinated water and scrubbed off the thin film that is all over the parts, I would be doing harm to my water quality because I would be removing beneficial bacteria that are helping and not in the way. This is why aquaria and bodies of water that are established and “seasoned” are much easier to keep clean. In the aquarium world, this “seasoning” is called “cycling”. If you are not familiar with cycling, learning more about how it works will help you troubleshoot your water quality.

Don’t forget – the rinse water from cleaning your filter media makes wonderful plant fertilizer!

Reduce sunlight
If you’ve done everything you can to reduce the amount of nutrients in your water, next see if there is a way you can cut down on the amount of sunlight that reaches the water. If you have a small water garden like mine that is portable when empty, you can move it from full sun to part shade and use it for growing part-shade aquatic plants. If you can’t move your water feature, what can you do?

Add shade plants around the edges:
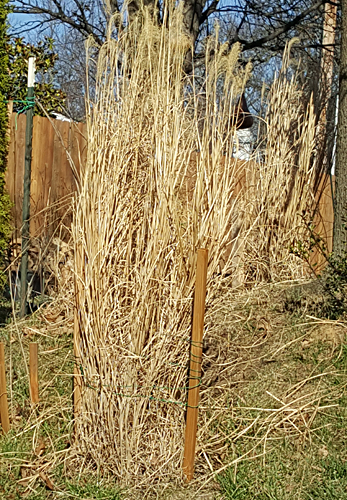
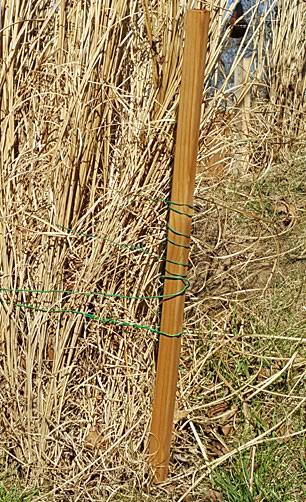
Grow some plants around the edges of the pond that will help cast some shade on the water, if not for a whole day, just part of the day. You could use small trees, bushes, rushes, big annuals with large leaves and many others. Choose plants that can tolerate waterlogged areas or having “wet feet” or add some container plants around the margins.

Grow floating plants:
Water lilies, lotus, water lettuce, water hyacinth, duckweed and many other lovely plants either float right on the surface or emerge at the surface and help provide shade. If you are experimenting with plants that are not native, make sure they don’t get discarded in natural bodies of water. Some floating plants can cause other problems if they cover the entire surface of the water – no more than 50% of the water surface should be covered with plants. Duckweed is an example of a plant that sometimes can blanket the entire surface. This inhibits the exchange of gasses at the water’s surface and can compromise the amount of oxygen in the water. Remove the excess growth and use it as mulch or put it in the compost! That way any overgrowth will be a boon to your garden instead of a nuisance.

More suggestions

Add more oxygen:
Speaking of oxygen, if possible try to increase the amount of oxygen in the water. The addition of a bubbler, fountain or waterfall will help agitate water at the surface and bring in more oxygen. Oxygen is important for the health of the aquatic community as a whole, including the aerobic bacteria that are doing most of the work of keeping the water clean. At Schnarr’s we sell pumps* that can be used to power waterfalls and fountains.

Add minnows:
Small fish like minnows eat some of the algae and as a bonus keep mosquito larvae out of the water as well. Their small size means they produce small amounts of fish waste. Koi or goldfish are wonderful animals with many good qualities but they produce a lot of waste and need a lot of space and clean water to thrive.

UV sterilizers:
A friend of mine struggled with algae in his koi pond until he added a UV sterilizer to his recirculating waterfall. It was effective. He might have been able to avoid the expense by stocking his fish at more reasonable levels but he liked a LOT of fish and was willing to do the extra maintenance required.

Chemical filtration:
You can purchase an algaecide* to kill the algae. This will likely be a short-lived solution because the dead algae will decay and add more dead organic matter to the water which will probably cause either another outbreak of algae later, a drop in oxygen, a toxic ammonia spike or all of those conditions. Addressing the reason the algae is there in the first place is more effective in the long run but it may take some time to notice improvement. An algaecide might work well in a situation where you need a quick fix now but later conditions are not that important. I don’t recommend you use algaecide if you have fish or other aquatic animals that you care about in the water because a sudden deterioration in water quality can cause a die-off. Algaecide makes more sense in something like a small decorative water fountain or other feature that is not intended to support aquatic life.

Safe first aid for an algae-infested pond:

  • If practical, perform a 20% water change while vacuuming the bottom with a gravel washer device. This is very easy to do for small water gardens like mine, not possible in a large pond or lake. Use of Clear-Water Pond Clay* 24 hours before you vacuum the gravel will help small particles fall to the bottom where they can be picked up.
  • Clean filter medium if you have a filter or add a filter.
  • If practical add a bubbler or some device to agitate water surface.
  • If you have floating mats of “hair” algae, rake off if possible and use in compost.
  • Inoculate the water feature with a live culture of beneficial bacteria – this may not work if you are using a UV sterilizer or if the water is not well aerated. You can buy wet and dry bacteria cultures designed for ponds or request some used gravel from a friend who has an established freshwater aquarium or pond.
  • Get some terra cotta plant pots* and scrub well with plain water, no soap or bleach. Do not use if they have ever been used with chemicals that are not pond safe.
  • Fill plant pots with rinsed lava rock*.
  • Place pots in pond and stack almost to water level to use as a plant stand.
  • Set a planter* containing aquatic plants on top of the stack. These could be fully aquatic plants or bog plants as long as the roots can reach the water to take nutrients out of it. Use pots to adjust the water level to what the particular plant needs.

If you don’t want to bother with plants, just add permeable, pond-safe containers of lava rock and if possible place them in a spot where the current is faster. Lava rock is a terrific natural filter medium because it contains many tiny holes for beneficial bacteria to live. Give the bacteria a good home and they will do a lot of your filtration for you.

Additional water garden tips:

The guys who produced this podcast taught me most of what I know about water quality. I think I have listened to every podcast that is archived on their site, and that’s a lot! (The rest I learned from decades of aquarium keeping!) Podcast on Starting a Pond – by the Bailey Brothers

My article on making an indoor water garden:
Create an Indoor Water Garden

Festive lighting tips for your water garden:
Luminous Decor with Flameless Candles: Idea #1
Luminous Decor with Flameless Candles: Idea #2

Categories
Backyard Wildlife Gardening Outdoor Fun Sustainability

Aquatic Macro Invertebrates at Litzinger Road Ecology Center

Aquatic Macro Invertebrates at Litzinger Road Ecology Center

Aquatic Macro Invertebrates are animals without a backbone that live in water and can be seen with the naked eye. I’ve had an interest in these creatures ever since I can remember. When I was young I caught a variety of water invertebrates such as water beetles, clams, crawdads and snails and attempted to maintain them in my aquariums. I was thrilled when my brother’s aquarium started to grow hydra even though they predate on tiny fish, because I’d read about them but never thought I’d see any. I currently have small colonies of freshwater shrimp in three of my aquariums. Many aquatic invertebrates are insects that live part of their life cycles in water but have an adult flying stage.

When the Litzinger Road Ecology Center offered a training workshop for volunteers on how Aquatic Macro Invertebrates are used to monitor water quality, of course I had to attend. Master Naturalist and Stream Team member Cliff Parmer taught us some Aquatic Entomology facts then we went outside to Deer Creek to learn how to take a scientific sample of water invertebrates.

sampling aquatic invertebrates
Volunteer collectors chose two spots in the stream for collecting samples – one in a riffle, and one in a calm area. The stream bottom was disturbed while a seine caught the small animals that were swept downstream.


collecting water invertebrates
We examined the contents of the seine for small invertebrates which we placed in ice cube trays filled with stream water.


aquatic invertebrates in Deer Creek
Here are some of our finds – there is a nice leech in there (yuck). One of the animals in the right tray is a Mayfly nymph – something I was happy to see because the purpose of sampling is to check water quality. Mayfly nymphs are one of the animals found only in healthier streams. Stream team sample findings are reported to the Missouri Department of Conservation so they can use the data to check stream health.


identifying aquatic invertebrates
Although macro invertebrates can be seen with the naked eye, a microscope is useful to see small details to help identify each species. We were provided with identification charts to show us what to look for.


Mother crawdad with babies under the tail
I used my childhood crawdad catching skills to hand-catch the most “Macro” invertebrate of the day – a large mother crawdad with tiny babies clinging to the underside of her tail. We released all the animals back into the water after we had a look at them.

If your garden has a water feature, at some point you may encounter aquatic invertebrates. A common example is the mosquito, very undesirable and needs to be eliminated. A strain of BT (Bacillus thuringiensis) will kill mosquitoes without harming any other life forms (except some gnats, which I don’t think anyone will be sad about – except maybe hummingbirds which eat them). Most other aquatic invertebrates are harmless or downright beneficial. For example, dragonflies live the first stages of their lives in water and are one of the best predators of mosquito larvae. When dragonflies emerge as flying adults they have a voracious appetite for adult flying mosquitoes – they also add beauty and color to the garden. Others, like caddisfly larvae or water beetles are not exactly beautiful in a conventional sense but have interesting lifestyles that are fun to observe and study.

Even if your garden does not include a water feature, there are ways that your garden can impact aquatic invertebrates. Water that runs off your garden and yard into a storm sewer is eventually released into natural bodies of water. If you can keep excess pesticides and fertilizer out of storm runoff you can help invertebrates to survive. Excess fertilizer harms invertebrates by causing algae blooms that reduce oxygen in the water and kill off more sensitive animals. Life forms higher up on the food chain such as fish and birds depend on a steady supply of invertebrates for food.

If your property is adjacent to a body of water, you can further aid the water quality by implementing a riparian corridor or creek corridor vegetative buffer. Such a corridor does many things for water quality, including temperature regulation. By cooling the water, streamside vegetation helps maintain higher oxygen levels in the water.

Backyard wildlife increases my enjoyment of the outdoors and my garden. If you feel the same way, an appreciation for small but vital water animals can be rewarding!

Categories
Gardening

Tim’s Tips – Successful planting and care of trees

Tim’s Tips – Successful planting and care of trees

by Tim Wittmaier

1. Make sure the tree you’re planting is suitable for the conditions.

Ask yourself:

  • Is this tree right for this zone?
  • How much sunlight does it need?
  • What is the mature size of the tree? Does it have enough room to grow?
  • Is the soil type suitable?
  • Can I provide the right amount of water?
  • Does the site have good drainage? If not, can this tree tolerate sitting in water?

2. Apply 2-4 inches of mulch or compost in at least a 3 foot in diameter circle around the tree. Keep mulch 4″ away from the bark and don’t make a mulch volcano – aim for a donut shape rather than a volcano shape. You can mulch all the way out to the drip line or beyond if you want to – this will reduce competition from grasses or other plants and help the tree grow faster.

3. When planting the tree, the top of the root ball should be planted 4″ above the ground, but no more. Dig the hole at least twice as wide as it is deep.

4. If the root ball is wrapped in burlap that has been treated to not decompose or is synthetic, remove the burlap. Otherwise loosen burlap from around the trunk, and spread out but do not remove. Cover burlap with soil or mulch so it does not wick moisture away.

5. Cut all ropes around the root ball, natural or synthetic.

6. When transporting a tree in the bed of a truck or trailer, cover it with a tarp so that it doesn’t get dried out. Don’t let the tree sit under a tarp in the sun for an extended time. Don’t grab the trunk to lift up the root ball.

7. If planting a tree susceptible to sun scald, protect it by wrapping the trunk with a light colored wrap or painting it white with latex paint.

8. Protect the trunks of small trees from rabbits and deer.

9. Don’t hit the trunk with weed eaters or lawn mowers. Mulch can help make sure machinery doesn’t get too close.

10. Be aware of what pests and diseases your tree is susceptible to and treat if necessary.

11. Get a soil test and feed your tree with fertilizer if necessary. Don’t use more chemical fertilizer than you need. An excess of organic fertilizer is unlikely to do any harm.

12. Don’t prune without a specific purpose in mind and follow the pruning timing and techniques best for the tree species you have. Pruning is not the same for all trees and every tree doesn’t necessarily need it. Do prune out dead wood and look for structural problems that need correcting – much easier to do when the tree is small.

Categories
Gardening

Bringing color into a shady spot

Bringing color into a shady spot

by Carolyn Hasenfratz

I recently had a client ask me how to get more color into his shady yard. If you have a lot of shade in your garden and want a lot of color, that’s a challenge. Most flowering shade plants don’t bloom as heavily as plants for sun. Here are some ideas to help you get some color even with this limitation.

Bright colored foliage
In a shady garden, foliage that is golden in color (in reality more like lime green) or variegated with gold, cream, silver, pink or red is a great advantage. You wouldn’t want to use such bright foliage in the whole garden but an accent here and there looks fantastic. Some plants that do well in shade such as Hosta, Coleus, Lamium, Heuchera and Caladium feature many great foliage colors. There are groundcovers with beautifully colored foliage too.

Annuals for shade
Annuals tend to bloom for longer periods of time than perennials because they are trying to make as many seeds as possible to compensate for their shorter life. If constant color is a high priority try to include a lot of annuals in your design. Of course some of the plants we grow as annuals are actually perennials in warmer areas. Plant families to take a look at include Begonia, Nicotiana, Coleus, Torenia and Viola. Impatiens used to be my favorite shade annual but they are not recommended right now due to Impatiens Downey Mildew (IDM). Until a cure is found, you are likely wasting your money and possibly helping spread the disease if you buy Impatiens.

Perennials for shade
This is the category that I have the most personal experience growing. The main disadvantage to focusing on perennials is that they usually bloom only for short periods of time so much of the year you’ll just be looking at foliage. With careful planning using succession plantings and companion plants you can enjoy their brief period of color and let other plants be the focus at other times. In the perennials category you will have many more plant choices than with annuals. For maximum interest try to choose shade perennials that also have attractive or evergreen foliage.

In my part-shade conditions, the following plants with colorful flowers are very reliable – Wild Sweet William, Bee Balm, Columbine, Astilbe, Spiderwort, Vinca, Cranesbill, Golden Ragwort, Barren Strawberry and Lobelia. Of the above, I think Astilbe would be best suited to a garden that has more of a manicured look than a “wild” or informal look. I have an Astilbe that is as least 8 years old and has never spread or multiplied. Of the above choices it has the best foliage also, in my opinion.

I periodically walk the shady spots at Missouri Botanical Garden to get ideas for what to plant in my own part shade conditions. While I haven’t tried to grow these personally, from seeing them in use I think Brunnera, Caltha, Dicentra, Helleborus, Ligularia and Pulmonaria would be good plants to consider.

Spring ephemerals
Spring ephemerals are plants that die back when spring is over and the weather starts to get hot. This is also when trees really leaf out, so spring ephemerals are used to getting sun while they can and storing up their food for the next year early. You won’t get color all year with these, but since the foliage dies down for summer, they won’t be taking up space above ground while other plants are dominant. They are a good addition if your shade comes from trees – perhaps not so great if you have building shade. Examples of spring ephemerals are Mertensia, Chionodoxa, Narcissus and Scilla.

A touch of white
So far in this article I have focused on flowers that are a color and not white. Shade plants with white flowers are common so my focus here is to direct people to colors. However, I’ve found that in garden designs or any other kind of design, a touch of white here and there does add some pizazz. Don’t be afraid to try a little white to help your other colors “pop”.

The plants above are recommended for people who live in the St. Louis area, who have shade and whose highest priority is color. You may have other criteria that are just as important – Missouri native, food for wildlife, low-maintenance, deer-resistant, likes water, tolerates drought, etc. Try the MOBOT plant finder to narrow down your choices and learn about new possibilities – Plant Finder

Categories
Gardening Lawns Sustainability

MSD’s Project Clear and Our Local Water Issues

MSD’s Project Clear and Our Local Water Issues

by Carolyn Hasenfratz

The Metropolitan Sewer District has been working hard on outreach to inform the public about Project Clear. In their own words, Project Clear is the “planning, design and construction of MSD’s initiative to improve water quality and alleviate many wastewater concerns in the St. Louis region.” MSD operates in both St. Louis City and County.

What are some examples of wastewater concerns in our region? Flooding, erosion, water pollution and sewer backups are some issues that affect many of our neighbors if not ourselves. MSD deals with both stormwater, which is intended to discharge directly into the natural environment, and wastewater, which needs to be treated at a wastewater treatment plant before release. MSD is undertaking large scale projects right now that are estimated to take 23 years to complete.

The budget for this work is 4.7 billion – the largest infrastructure investment so far in the history of our region. For official information about the project and about your own flood risk, see these resources:

The first sewers in the St. Louis region were built in the 1850s. The amount of development present now is of course much greater than then and there are a lot more impermeable surfaces generating runoff. The existing system cannot cope with the demands being placed on it. MSD conducted a pilot program to test the effects of green infrastructure and came to the conclusion that the conversion of 400 acres from impermeable to permeable surfaces is equal to a 2 billion dollar savings in spending on wastewater infrastructure. Greenscaping has many other benefits – more oxygen, more pleasant and healthful surroundings, crime reduction, noise abatement, habitat for wildlife, temperature regulation – the benefits go way beyond just financial.

MSD is requesting help from the public with the wastewater issues they are working on. It’s in all of our best interests to do what we can to assist because the MSD projects are going to take decades to complete. Even if our own property is properly insured against damage, we will pay for water damage all over the region one way or the other in fees and taxes. In addition, cleaning up after a water disaster is no fun. It’s stinky, messy and time-consuming.

Some water management challenges are inevitable because of the geography and geology of where we live, but we all have the power to mitigate these problems by a small amount. If we each do a little bit we can help each other save money. What can we as individuals do to prevent erosion, flooding, water pollution and sewer backups?

  • If your residential downspout is connected to your wastewater sewer line, disconnect it and direct the stormwater from the downspout elsewhere. My understanding is that this is going to be mandatory soon if it isn’t already so you might as well get started now. MSD will inspect your property on request to see if your downspout is improperly hooked up. Call (314) 768-6260 for assistance. MSD will pay the cost of disconnecting your downspout from the wastewater line. If you’ve ever thought that a rain garden or rain barrel was an intriguing idea, there has never been a better time to put one in! A rain barrel will help cut down on your water bill if you use it to water your garden, and natural rainwater sans chlorine and chloramines is better for your plants. Redirecting this water reduces the overload
    on wastewater lines and prevents sewer backups. I suspect some of the downspouts at my condo are hooked up wrong and I know my neighbor whose unit is lower in elevation than mine has had a sewer backup before – so I find what MSD is saying about this credible.
  • Utilize rainscaping improvements on your property such as making surfaces water-permeable and protecting erosion-prone areas. There are rainscaping small grants available for residents in certain areas. Rainscaping has many benefits – prevents flood damage and erosion, improves water quality and recharges underground aquifers.
  • Explore opportunities to re-use some of your gray water. This may also cut your costs because in some places you are charged for how much water goes out of your household through the sewers as well as for how much comes in – my understanding is that’s the case where I live. My water bill is included in my condo fee so I don’t see it but that’s what I’ve been told.
  • Keep fats, oils and grease out of the sewer system by disposing in the trash and not down the drain. To help you remember here is a catchphrase – COOL it, CAN it, TRASH it. Improper disposal can cause sewer backups and water
    quality problems.
  • Don’t use the sink or toilet to dispose of garbage.
  • Use compost as much as you can in your landscape – compost absorbs water and slows velocity.
  • Join a grass-roots effort to encourage the adoption of greenscaping and rainscaping practices.
  • Join a stream cleanup sponsored by the Open Space Council,
    River Des Peres Watershed Coalition, and others.
  • Join a volunteer storm drain marking project.
  • Join a Stream Team.

Additional water management resources:

Categories
Gardening Sustainability Upcycling

Do you have discarded woody plant material? Try making a Bonsai!

Do you have discarded woody plant material? Try making a Bonsai!

by Carolyn Hasenfratz

When I was in college studying art, I took printmaking and ceramics classes. Some of the finest printmaking and ceramics in the world come from Japan and our professors exposed me to many beautiful examples and concepts. I made sketches at the Japanese Garden and turned some of them into prints. Several of my friends from ceramics class and I went on a multi-year Japanese kick. We made tea bowls and sake sets and acquired a taste for the appropriate beverages. We learned the Raku firing method. We started attending the Japanese Festival at Missouri Botanical Garden every year and bought all of the Japanese-influenced objects d’art and books that we could afford on our student budgets.

We greatly admired Bonsai and made lots and lots of Bonsai planters, many of which we sold at our pottery sales. I kept several for myself to experiment with Bonsai growing. I killed four Bonsai trees in a row before giving up. A college student schedule and lifestyle just doesn’t lend itself very well to Bonsai care I guess – my cacti collection had a much better survival rate! I still like making ceramic planters that would work for Bonsai – it’s a shape I just kind of naturally go to while wheel throwing though in recent years if I didn’t sell the planters I mainly just used them for dish garden type plantings.

Bonsai are not a particular species of tree – they are plants, usually woody, that are trained to grow at diminutive sizes but in the proportions of mature plants to create the illusion of a natural scene. Woody plants can be trained by wire and selective pruning to assume the shape of a craggy, aged and venerable tree, a popular style influenced by Japan’s natural mountainous terrain. This training takes a long time – decades, perhaps even longer than a human lifetime to achieve the desired effect. Any gardener has to learn patience but Bonsai gardening is a particularly good example of how Japanese culture promotes the long view of things. In my ceramics class we learned about how to age clay for better handling. We were taught how to speed up the process. To emphasize the benefits of aging clay we were taught about how Japanese potters made clay for the next generation while making use of clay that the precious generation had made for them. That’s an impressive attitude. If I make a Bonsai I’m pleased at the thought that future generations might enjoy it but I also want to get some enjoyment out of it in my own lifetime! One way to shorten the amount of training time required is to choose plant stock that features unusually thickened or distorted trunks or branches.

Sometimes plants that don’t look right for their intended purpose can be suitable for Bonsai. For example, this Privet bush (Ligustrum vulgare ‘Cheyenne’) was removed and replaced because it didn’t look right in the hedge where it had been growing. Back in the day I had read my Bonsai book so many times that I still remember some of the criteria for selecting good Bonsai stock.

Privet bush with bonsai potential

This plant looks bad in a hedge but in my opinion it would make a great Bonsai!

When I saw this bush I thought of three things:

  • Craggy, twisted shape – check
  • Woody plant – check
  • Small leaves – check

This plant has Bonsai potential! It was going to be discarded, so it’s not a big loss if I kill it. I’m going to try not to though!

Try making a Bonsai

My Bonsai experiment

Here are the results of my attempting to turn a twisted looking, stunted privet bush into a Bonsai. I looked through my Bonsai book to decide what style of Bonsai was best suited to my plant material. There may be as many Bonsai styles as there are varieties of Koi, with corresponding Japanese names that I don’t know. I decided that since my bush had a long, prominent root system, the rock-clasping style would be appropriate. I read several articles online about rock-clasping Bonsai, and there seemed to be as many different ways of doing it as there were articles. In the rock-clasping style, roots are trained to grow exposed over a rock and become a major focus of the planting. One recommendation that came up more than once was to pack sand or some other substrate around both root and rock and put plastic wrap around the base, then remove the plastic and the sand from around the root and rock in a year or two to give it a chance to develop the thickness that will make the tree look old.

Since I also had some moss that I had collected from a site where it was being eradicated, I decided to use soil over my root and rock and overplant with moss. Both moss and Bonsai like frequent watering. Then after a couple of years I’ll remove the moss and replant it elsewhere and see how my root is doing under the soil.

I studied the shape of my bush and held it up to different rocks to see which would complement the shape of the bush. I refined the shape by pruning and held the bush roots on the rock with strips of old cut up fabric – these should rot away in time after the roots have grown enough to hold the bush in place.

Each article I read had a different recommendation for a soil mixture so I just decided to look at what I had on hand and do my best to make a well-draining and nutritious mixture. I used 1/3 potting soil, 1/3 earthworm castings, and 1/3 Flourite, a type of fired clay ground into small chips that is meant to give plants better drainage and supply them with iron. It’s usually used with aquatic plants. I don’t know if it’s common to use it for terrestrial plants but I didn’t have any sand or Turface on hand (a clay product that is great for improving soil drainage) so I decided to try it.

After I packed the soil around the rock and roots, I put the moss on top and wrapped it in plastic for a week, similar to what is done to keep new cuttings moist. If all goes well, I’ll see the rock again in a couple of years when I check to see what my roots look like!

Moss around base of Bonsai

Categories
Gardening

Start of Spring “Philosophies”

Start of Spring “Philosophies”

by Don Stuewe

Humorous humor… maybe… These two fronts walk into an isobar… weather humor????

It is near the end of the “winter season”; and for me of going to public libraries or public spaces with big windows facing south. The winter trick of paging through garden books and magazines while absorbing the sun’s rays in a comfortable chair is almost over (also known as the poor man’s southern vacation). You can plan (and adjust, and readjust) what plant is going to be placed in various locations (mentally works… you do not have to physically diagram your plans). Think about the proportion of existing mature plants in relationship to their “neighbors” …also known as the “Scorsese look” (from Hollywood movie director Martin Scorsese’s super bushy eyebrows… you can trim (or divide) to reduce proportion). Decide what bush or tree will block out the line of sight to your neighbor’s windows to make a natural privacy fence. Figuring out plant, bush, and tree layouts to “trick” the perspective of making the optical illusion of your backyard look bigger. This planning takes my mind off of daily concerns – a positive version of “take a trip and never leave the farm”.

Be gentle to your body when getting back into the swing of things. Do not go physically hard the first day. Do increase your physical exertion length of time gradually. There was an article that said as you get older, the initial stiffness-weariness appears mostly in the second day after a lengthy non-active period – not so much in the first day afterwards (something about the aging process). Break up the routine… spring clean-up for a half-hour, then prepare garden beds for half an hour, rotating the use of muscle groups. Mother Nature has a rhythm that can be patient… if you let yourself be patient.

We are still about a week from the last average frost day – April 15. The horticulture universe has dry, gallows humor sometimes – last frost coinciding with taxes due date. There is still time to start seeds in containers… NOTE: If you watch the projected weather forecast for overnight lows, you can leave the seed containers outside. If the overnight temperature is 40 degrees or less, bring seed containers into house (or garage). Leaving the containers with green growth outside also strengthens the stems (the stems will be stronger from the gentle winds). If you are in an experimental mode and a gambler (do not mind a frost failure) – plant the seeds in the ground now in non-prominent location – hedge your freezing temperature bet in case it does not work.

Remember… enjoy the process and learn to tell horticulture jokes for the laughs (more positive karma in the horticulture world).

Categories
Gardening

Tim’s Tips – Choosing the Right Mulch

Tim’s Tips – Choosing the Right Mulch

by Tim Wittmaier

Hardwood MulchMulches I Recommend

Type of Mulch – Compost
Reasons to Use It – Breaks down and puts organic matter in the soil and keeps the weeds out if it is applied 3″ thick. May prevent plant diseases. You can make your own if you know how.
Possible contraindications – Not long-lasting.

Type of Mulch – Hardwood Mulch
Reasons to Use It – Long lasting and looks attractive. Smothers weeds well.
Possible contraindications – Applying too much can smother plants.

Type of Mulch – Shredded Bark
Reasons to Use It – Breaks down in a season or two and contributes to soil health by increasing organic matter and aiding beneficial soil organisms. Attractive and weed free. May help smother small weeds.

Mulches To Avoid

Type of Mulch – Dyed
Reasons Not to Use It – It is poor as an organic matter additive – it breaks down slowly and can rob growing plants of nitrogen. Often contains nails and other debris from ground-up trash wood which can be from pallets, old decking, demolished buildings or pressure treated lumber. May contain Chromium, Copper and Arsenic.

Type of Mulch – Cypress and Cedar
Reasons Not to Use It – Poor as weed control, over-rated. Possible source of insect contamination from the Southern states. We will already have enough insect problems because of the warm winter – no reason to risk bringing in more.

Type of Mulch – Hot
Reasons Not to Use It – It’s still breaking down and the temperature can get too hot for plants if spread during warm weather. Allow to cool off before applying.

Type of Mulch – Rubber
Reasons Not to Use It – Collects too much heat for plants because it’s made out of tires. It is useful for kid’s playgrounds however.

Categories
Gardening

Gardening Suggestions for Late March and Dividing Perennials


Gardening Suggestions for Late March and Dividing Perennials

by Don Stuewe

Now is the time to start many outdoor plants from seed in indoor containers. The seed packets should tell you how long before the average last frost date to start germinating your seeds. In Missouri that date is approximately April 15. I’m going to be trying many colors and sizes of Sunflower varieties this year in test dirt plots in my backyard. The price is right – seeds are very inexpensive! Another resource for St. Louis area planting times is the calendar on the Schnarr’s blog.

Garden centers are not as busy right now with servicing customers… take the opportunity to ask questions of employees before the spring rush.

Dividing mature perennial plants

As plants mature they increase in diameter and quantity of leaves. There is a quick rhyme that explains this concept for perennial plants – sleep, creep, and leap. Here is an explanation of the rhyme.

  • First year in the soil, the plant sleeps (just maintains – does not improve)
  • Second year the plant creeps (improves a little bit)
  • The third year is leap (a very noticeable improvement)

Editor’s note: having noticed many of my perennials flowering for the first time in the third year, this rhyme makes a lot of sense to me!

Five to ten years after initial planting, the plant often looks overgrown or encroaches onto adjacent plant “space”. This is noticeable on commercial properties and public land near roads and highways.

My introduction to dividing plants was happenstance. I had a lot of time on my hands. For inquiring minds, I was laid off from my job – the company moved out of state. The previous owner of our residential property had many Hostas in various locations. The variety was Lancifollia (very common – everybody’s grandma has a ton of them). I divided them up and put them in new places. If there was failure, I would not mind because of the many plants remaining. The success rate was very high even in dividing in the “not recommended” months. This was the beginning of my “hands on” horticulture interest. It is fun to divide plants and share with other people (accumulating positive karma in the horticulture world). And you still have the remainder of the original plant to enjoy.

When dividing plants, try making different size portions. You will learn by trial and error the minimum size of root mass to succeed in growing a new division. If you take off a large portion because you want the new division in a new location to look robust right from the beginning you will have to water more.

I have divided good size clumps of grasses in Missouri’s July and August heat while watering aggressively with a garden hose. Editor’s note: I too have transplanted in the “wrong” months and have often gotten away with it by watering a lot.

NOTE: For scale, the following pictures include two 12 oz cans of pop, a one inch wide silver yardstick on a 36 inch two by six wood piece, and a yellow carpenter’s framing square that is 16 inches on the short leg by 24 inches on the long leg.


Name of Image


I used “moderately beefy” stakes…


Name of Image


… and green coated electrician’s wire (blends in with green grass color) to support the tall grasses after planting. You can also buy green twine at Schnarr’s.


Name of Image


NOTE: The two previous pictures are same plant. I did this in an obscure corner in the back yard (if there was marginal results – the grass would not be in a prominent location) and the results were excellent. The next year’s growth should be “creep” (from the rhyme).

NOTE: Some root systems are dense and very “anchored” in the soil. I have used a six foot digging shovel and jumped on the shovel (to create more force) to shear through the root system. People have used a wood axe and a chain saw to cut through roots. A Sawz-all power tool, with a pruning blade available at Schnarr’s, also known as reciprocating saw, is a good choice.


Clump of grass


Another way to explain root system density is that it is similar to root bound plants in containers. It is important to cut away very dense excess root growth that develops when the roots follow the shape of a container instead of spreading outward like they are supposed to.

Gardener’s Mantra… dig a hole… roots go in first. That is all people need to know! Don’t let the Master Gardener’s detailed instructions intimidate you! Experiment – have fun with it – enjoy the warming weather!

Categories
Gardening Lawns

Tim’s Tips – Mid-March

Tim’s Tips – Mid-March

by Tim Wittmaier

Now is a good time to go after cool season weeds in your beds, mainly Henbit and Chickweed. These weeds can take over bare spots of ground. In the warm season, these weeds will die then reappear in the fall.

Roundup Pro
You can remove weeds by mechanical means such as a garden hoe, or use a chemical. Non-chemical treatments of weeds can work but sometimes are not practical considering the labor needed to treat the area affected. I recommend Roundup Pro because it includes a surfactant that helps the herbicide stick to the weed. You can mix an herbicide using Dawn as surfactant also.

Moles in your lawn are slowed down by pre-emergent herbicides and fertilizer. They don’t like the smell and the chemical odors will deter their mating for awhile. Moles have a very keen sense of smell. For a more permanent mole solution I recommend spring-loaded mole traps.

Milorganite
Milorganite fertilizer has a bonus effect – the smell repels rabbits and deer for awhile.

You can probably reseed lawns earlier than normal this year but it’s still a little early. Wait until the ground temperature is 50 degrees or above through the night. If you have no choice but to seed now, use a rye grass. If you have used any pre-emergent herbicide, wait three weeks to seed or your seed may not come up.

The intermittent warm temperatures may tempt you to accelerate some spring tasks but you still have to be vigilant about the possibility of more freezing temperatures.

Keep an eye out for plants that did not survive the dry winter or have salt damage.