Categories
Backyard Wildlife Gardening Sustainability

Black Soldier Flies Are Powerful Allies For Humans

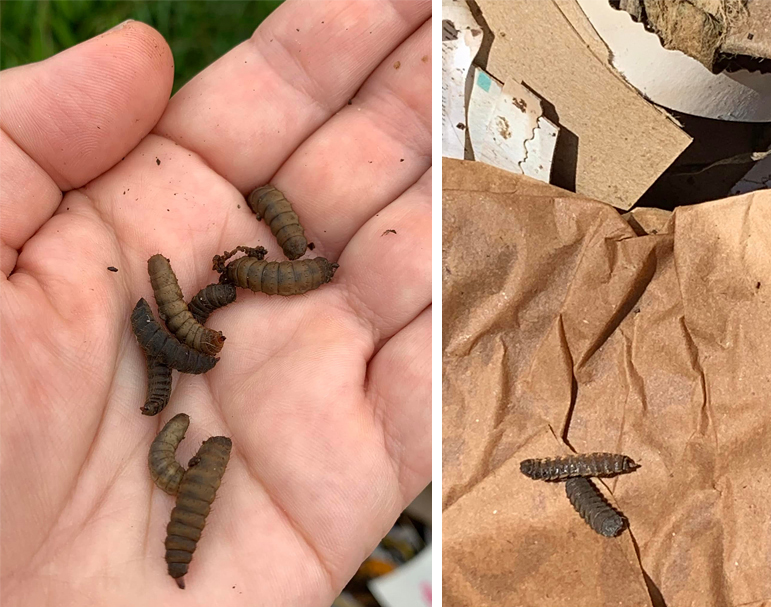
Black Soldier Fly larvae

On one memorable day several years ago, I went out to my deck to put some food waste in the worm composting bucket I kept out there. I lifted the lid, then my stomach kind of churned and puckered a little as I saw that the substrate surface was – MOVING. Had I really managed to raise enough red wriggler worms in a short time to make the surface undulate like that? That didn’t seem likely. A closer look revealed that the movement was caused by something I initially thought was far more gross than worms – my worm bin had been invaded by MAGGOTS. Yes maggots, the “disgusting” larvae of flies. But wait – these didn’t look like House fly larvae. They were darker, larger, and tougher looking. I picked one up to get a good look then did an internet search to see what kind of fly they belonged to. I identified the larvae as Black Soldier Fly (Hermetia illucens), and as I learned about these flies my alarm quickly turned to delight! I had accidentally attracted one of the most beneficial insects I’d ever heard of.

What are some of the many virtues of Black Soldier Flies?

    • They are harmless to humans, in both adult and larval forms (Bader 223). Unlike many other flies known to frequent homes, gardens and farms, such as Black Flies, Deer Flies, Face Flies and Stable Flies, adult BSF do not need to bite you or cut you or your animals to get a meal of blood, mucous or meat juices (Bader 206, 210, 212, 224). As adults BSF lack the mouth parts or digestive systems to bite or consume food (Park 8). In a way, as adults they are actually less gross than butterflies – in addition to nectar, many adult butterflies love manure, bird droppings and carrion juices (Roth 73-74).
    • Black Soldier Fly larvae are known to predate on or discourage the presence of some other noxious fly species such as House flies (Bader 223, Park 4).
    • They are voracious eaters and can quickly consume large amounts of waste (Park 4).
    • The larvae are great sources of protein and theoretically could be fed as part of the diet to omnivorous pets and livestock (Park 10). If the livestock is to be consumed however, caution must be used and US law might restrict the use of BSF as feed unless their own feed is food grade and not derived from waste (Wang and Shelomi 2.5).
    • Black Soldier Flies do not transmit diseases as adults, and as larvae they assist with sanitation in a similar way to vultures – they consume waste products quickly that might otherwise become disease sources (Wang and Shelomi 1).
    • They are native to our area, so you can allow them to breed freely without concern that you are hosting an invasive species (Wang and Shelomi 1).
    • Even though at first glance the adults might resemble wasps more than flies, they don’t have stingers and cannot sting or bite.
Black Soldier Fly adults

My husband and I currently have two compost areas going in our backyard. One group of small piles is behind the little berm we built for our pond waterfall. We know we will be adding to this berm for a long time, so we just pile up yard trimmings there. When a pile is big enough we put dirt on top and plant on top of it. The other is in a black 55 gallon drum with holes in the bottom. The drum makes a useful composter, in part because the black surface heats up from the sun and helps accelerate the decomposition process. There are quicker and more efficient ways to compost of course, methods that involve turning and aeration, but so far we are doing well with removing the contents every so often and starting over if the drum gets too full. The top levels of the compost are normally not finished when harvested. We don’t mind – we have plenty of planting beds we can add it to in our own yard and at volunteer community garden sites. If enough dirt or planting medium is put on it, unfinished compost is fine to plant over. Something in the soil will eventually consume it.

The compost in the drum rots down quickly enough in the warm months that it’s usually possible to see daily progress as the level goes down. In the winter when things freeze, the process halts for awhile and sometimes we have to start a new bin until the drum starts to warm up again. Last week I noticed dramatic progress – the compost level dropped about six inches in a day or two! It wasn’t solely because things were thawing out and we’ve been having slow steady rain, although those factors helped. My heroes, the Black Soldier Fly larvae, were active again! I found a few in my pond when cleaning out leaves – they must have fallen in when looking for a place to pupate.

People all over the world are experimenting with efficient ways to raise Black Soldier Flies to possibly provide food for livestock and humans. For home gardeners who just want a little help breaking down waste, you might get Black Soldier Flies by accident – some food waste and a few pieces of cardboard for shelter on your compost pile could possibly attract them with no further effort on your part. If you find some, I hope you enjoy and appreciate their services! They are also available for purchase if you want some and don’t happen to attract any.

Sources for More Information

Bader, Dr. Myles H. Dr. Bader’s Pest Cures: Natural Solutions to Things That Bug You! Dr. Myles H. Bader, 2012.

Park, Haeree H. Black Soldier Fly Larvae Manual. University of Massachusetts Amherst, 2016. scholarworks.umass.edu/cgi/viewcontent.cgi?article=1015&context=sustainableumass_studentshowcase/. Accessed 25 March 2022.

Roth, Sally. Attracting Butterflies & Hummingbirds to Your Backyard. Rodale, 2001.

Wang, Yu-Shiang, and Matan Shelomi. “Review of Black Soldier Fly (Hermetia illucens) as Animal Feed and Human Food.” Foods (Basel, Switzerland) vol. 6,10 91. 18 Oct. 2017, doi:10.3390/foods6100091. www.ncbi.nlm.nih.gov/pmc/articles/PMC5664030/. Accessed 25 March 2022.
Categories
Backyard Wildlife Gardening

Why Grow Oats?

It will most likely be gone by the time anyone reads this article, but right now my garden is covered with a couple of inches of fresh snow. I haven’t put out any purchased bird seed yet this morning, but in the meantime there are plenty of birds in my yard nibbling on the seed heads of many plants that I have left standing as sources of winter food. Some of the seeds being consumed are from native wildflowers which I grow in order to enhance the utility of our garden as a habitat for beneficial insects and birds. Other seeds are from useful plants that I grow for different purposes, one of which is Oats, Avena sativa.

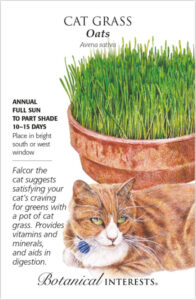
Cat Grass, aka Common Oat, Wild Oat

At Schnarr’s we sell Botanical Interests brand seeds which packages Oats as “Cat Grass”. In the past I have made extensive use of Oats as a cover crop. I was able to order from Schnarr’s a large sack packaged as “Race Horse Oats”. The Oats contained within were viable seeds and grew very well for me as a cool-season cover crop. As the Oat plants matured and produced seed, I noticed their popularity with wild birds and enjoyed the extra benefit of attracting more winged visitors in my garden.

Oats are often green at times of the year when you need something besides brown in the garden (“Cat Grass…”), so they are useful to keep in mind as an option when planning the seasonal succession of plants in your garden. However, they might not be suited to every garden. In some regions they have been reported as invasive (“Cat Grass…”) and although the dried stalks are very pretty as they arch over the garden with a full head of golden seeds, animals quickly rough up the patch trying to get at them so unfortunately the plants don’t stay pretty for very long once they are ripe.

When Oat plants finish their life cycles, they dry out and produce straw. Straw potentially has many uses in the garden such as mulch, a soil amendment, or if it’s made into bales, a growing medium. The hollow straw Oats produce is also a great material for filling houses designed as nesting sites for pollinating peaceful native bees.

Pollinator houses with straw
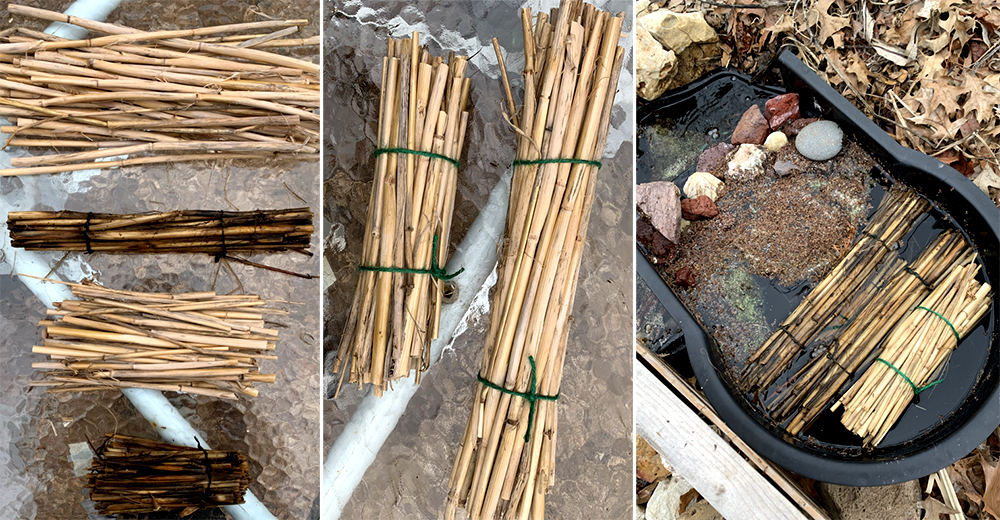
Pollinator houses with oat straw. The lower house is being filled with alternating straw and bamboo lengths to provide a variety of nest hole sizes.

Last summer my husband and I installed a small pond. We’re still working on parts of the system, especially the aesthetics, but the filters and waterfall have been functional for many months now. We’ve had a pretty mild winter overall, so on many days when it’s not freezing I’m able to run one of the filters that directs its outflow water to our small waterfall where it is further filtered with lava rock and, in season, plants as the flow trickles back down to the main section of the pond system.

In that short video above, you can see that I have bundles of floating straw in the filter. Many people are familiar with the use of Barley straw in ponds to prevent excess algae growth. I did a little research to find out if I could use Oat straw as a substitute, and although it may not be quite as effective as Barley, Oats can indeed be used as an algae treatment (Poole).

Forming straw bundles for pond filter.
Forming oat straw bundles for pond filter, sized to fit.

The straw algae treatment is more effective as a prevention than as a cure, so adding it before there is a visible algae problem is an advantage. If you have Oat straw or other straw available, try tying it in bundles to add to your pond – right now is a great time, if you’re looking for a winter task you can do for your garden. The straw looses effectiveness after a few months, so you can also use some of your winter gardening “down time” to make extra bundles for use later in the season.

Works Cited and Further Reading

Avena sativa L.” United States Department of Agriculture, 2021, plants.usda.gov/core/profile?symbol=AVSA. Accessed 28 January 2021.

“Cat Grass, Common Oat, Wild Oat.” Dave’s Garden, 2021, davesgarden.com/guides/pf/go/62227/. Accessed 28 January 2021.

Poole, Terri. “Controlling Pond Algae With Straw.” Turfgrass Matters, May 5, 1996 p. 5. archive.lib.msu.edu/tic/matnl/article/1996may5.pdf. Accessed 28 January 2021.

Rust, Kenneth. “Spring Pond Algae Invasion.” Ogden Publications, Inc., 2014, www.motherearthnews.com/homesteading-and-livestock/pond-spring-algae-invasion-zbcz1404. Accessed 28 January 2021.

Winkelmann, Carolyn Hasenfratz. “Help – My Pond is Full of Algae!” Schnarr’s Hardware Company, 2017, schnarrsblog.com/help-my-pond-is-full-of-algae/. Accessed 28 January 2021.

Categories
Backyard Wildlife Gardening Good Eating Sustainability

What is Eating My Mustard Greens?

What is Eating My Mustard Greens?

by Carolyn Hasenfratz Winkelmann

At my old garden, I was only allowed to grow vegetables on my small deck – I lived in a condo. My deck was in part shade so between lack of space and lack of sun I could only manage to grow a small amount of cherry tomatoes and a sad number of potatoes. Otherwise I stuck to ornamentals, herbs and wildflowers which I could get away with planting in the ground while enjoying a reasonable selection of plants that would grow in part shade.

When I got married and moved into a house in 2018, I started collecting vegetable seeds at seed swaps for my new garden which has plenty of sun. I had to do a lot of planting in a hurry so I just planted the seeds I had in the hopes that I would get a few vegetables and save a few seeds for the following year.

Lots of cherry tomatoes I’ve been having really good luck again with cherry tomatoes and I’m now addicted to growing leafy green vegetables so I can have fresh tasty salads that I pick myself. A few of the plants have really been chewed on by pests which is not a surprise because I don’t use pesticides. In my haste I made no effort to try companion planting to chase some of the pests away. Most herbs are not bothered much by pests so since I’m pretty new to growing vegetables I’m seeing a lot of creatures that I haven’t seen before.
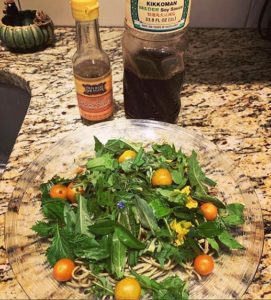
Fresh picked salad with cherry tomatoes, dill, arugula, chives, romaine, mustard greens, edible flowers and wild greens.
Fresh picked salad from the backyard with cherry tomatoes, dill, arugula, chives, romaine, mustard greens, edible flowers and wild greens.

I had some Evergestis rimosalis (Cross-striped cabbageworm) on my mustard greens and some Pieris rapae (Imported cabbageworm) on my collards. I’m interested in invertebrate conservation and providing food to wild birds, so in the quest to get some vegetables I can eat I’m not going to apply poisons. I might start an additional bed of these vegetables in my fall garden and protect them with a row cover and some companion planting.

Hornworm caterpillar with parasitic wasp cocoons.I’m familiar with these little white blobs on this tomato or tobacco hornworm – those are the cocoons of tiny parasitic wasps that feed on caterpillars. The lifestyle of some of these tiny wasps is pretty horrific, and I’m saying that as a big fan of invertebrates in general! Some of them use plants as a host and some use other insects. Tiny parasitic wasps lay eggs on the bodies of caterpillars. When the tiny wasp larvae hatch, they feed on the caterpillar while it’s still alive. When they emerge they weave white cocoons where they stay until they hatch into adult wasps. The caterpillar they have been feeding on is eventually doomed though it might not die right away.

Even though their lifestyle kind of turns my stomach, these wasps are beneficial so I’m going to put this caterpillar back out in the garden. When the adults emerge they can continue their work of preying on garden pests. If you are going to destroy any caterpillars, it’s recommended that you leave the parasite-infested ones in the garden to add to nature’s arsenal of natural controls. The adult wasps of this type are not social and they do not sting. Some of the adults are so small I’m not even sure what kind I have in the garden. I have swarms of tiny and medium sized insects all over my masses of herbs that are in flower, such as Dill, Garlic Chives, Peppermint, Bronze Fennel and more. Herbs that get clusters of small flowers are worth growing just to get into your garden all the beneficial insects that are attracted to them.

Categories
Backyard Wildlife DIY Gardening Sustainability Upcycling Ways With Wood

Upcoming DIY Class at Schnarr’s: Build a Pollinator House on May 17


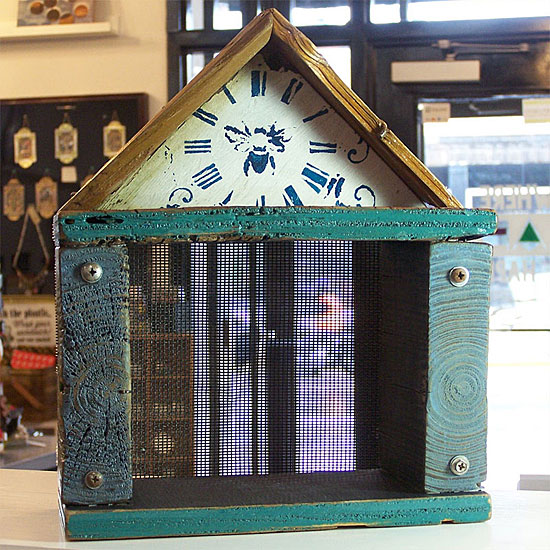
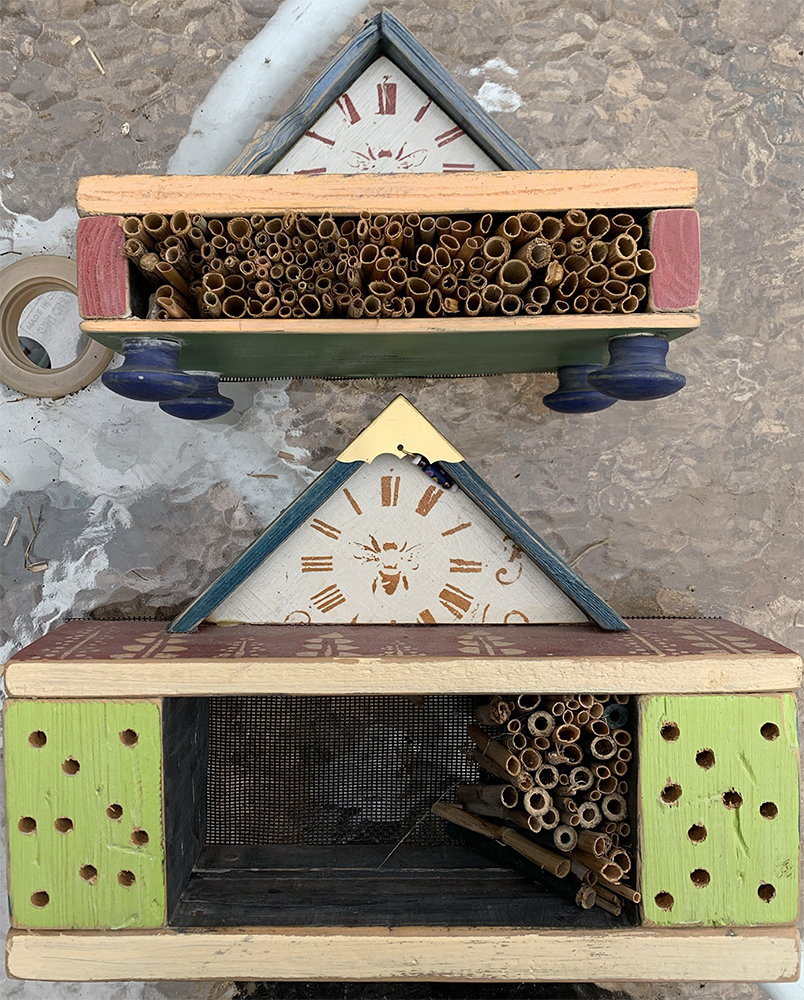
Three wood pollinator houses with stenciled decoration


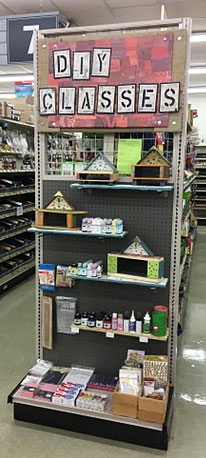
Pollinator houses on display on endcap

As part of the series of DIY Classes at Schnarr’s Hardware in Webster Groves, Carolyn Hasenfratz will be teaching you how to make, decorate and fill a Pollinator House for your garden. Such houses are sometimes called Bee Houses or Bug Houses. They provide nesting and hibernating space for beneficial insects that bring life, color, pollinating services and natural pest control for your garden. We’ll have paint and stencils available for you to play with so you can give your house a personal touch.

Space in this class is limited to four people and the cost is only $20 per person including materials. Class time is 5:30 pm on May 17, 2018. Register now at this link:
Build a Pollinator House

If you can’t make it to the class, we have instructions for making two styles of pollinator houses published on the Schnarr’s blog:
Making a Pollinator House – Part 1
Making a Pollinator House – Part 2

Stop by Schnarr’s in Webster to see some of Carolyn’s prototype pollinator houses on display. These samples are for sale in case you’d prefer to buy one rather than make your own.

Categories
Backyard Wildlife DIY

Make Suet Cakes for Outdoor Birds

Make Suet Cakes for Outdoor Birds

by Carolyn Hasenfratz

What you will need
*indicates items available at Schnarr’s
Suet or some other kind of food grade fat that gets solid
*Bird seed
Dried fruits (optional)
Chopped nuts (optional)
Grains (optional)
Leftover bread, cereal and crackers (optional)
*Dried mealworms
*Twine
*Scissors
Long thin knife (doesn’t have to be very sharp – could be something like a fettling knife for ceramics or something similar)
Clean food containers for molding
*Spatula and *mixing spoon
*Mixing bowl
Double boiler setup – *saucepan, *temperature resistant glass measuring cup
*Hot pot pad, *oven mitt, *jar lifter or other tool for lifting hot containers safely

I am a member of the St. Louis Master Gardener program and I do some of my volunteer work at Litzinger Road Ecology Center. LREC offers enrichment and training sessions for volunteers to increase our knowledge. Sometimes we get to take part in fun “crafty” activities that have an ecological benefit. We made bird suet cakes one day at LREC and later I also experimented with making some at home.

Feeding birds in our backyards is a way to get a good look at birds up close while providing them with a nutritional food bonus to make their lives a little easier. Suet and fats are good foods for many birds when it is late winter and natural food sources are low – fats are also most likely to attract birds who eat a lot of insects, the kind of birds you particulary want in your yard to provide free pest control services. At the time I am writing this we may be done with freezing temperatures during the day but we may still have some below freezing temperatures at night. You know how our weather is in the St. Louis area – it could be 85 degrees or 25 degrees tomorrow (or both) and no one would be shocked! Suet and fats can melt and turn rancid in warm weather but if you double-render the fat you can place suet outdoors in temperatures over 70 degrees F, according to the book “The All-Season Backyard Birdwatcher” by Marcus H. Schneck.

Before beginning to heat the fat, please read the safety precautions in my article Make Old Wax Candles Into New Candles. Any safety issues that might come up while melting fat are pretty much the same as with wax. I’m not sure if the melting temperatures are the same. Keep a close watch on your fat to make sure it doesn’t overheat. If you’ve ever had an unexpected flare-up from hot bacon grease you know hot fat is something to treat with care!

In my example I used bacon fat and some beef fat trimmings that the butcher at Whole Foods gave to me. I had gone to Whole Foods with the intent of buying some suet but they didn’t have any. Suet is a type of fat that comes from around the kidneys. Just plain beef fat will work too.


Melting beef fat to make suet cakes

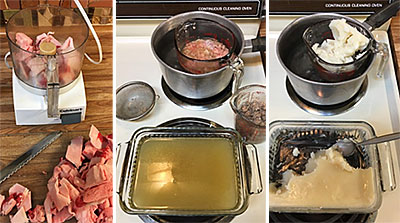
I experimented with a couple of different ways of rendering the beef fat. First I chopped it into smaller pieces then I put some of it in a food processor to partially grind. A meat grinder would be better for this but I don’t have one. I put the ground fat in the double boiler to melt down. A double boiler is used to heat things that scorch or burn easily. At home many of us use such a setup to melt things like wax and candy. Place a saucepan on top of the stove and partly fill it with water. Set a glass heat-resistant measuring cup containing the fat in the pan of water and slowly heat the water until the fat melts.

I also experimented with putting some fat pieces into a glass temperature-resistant measuring cup and microwaving the pieces for about a minute to a minute and a half at a time. Either way the fat melted fine and I strained out and discarded the tough pieces and little meat pieces that were left behind and poured the fat into a glass dish to harden.

I let the fat cool until it was hard, then I re-melted it. The hardening and remelting makes it double-rendered and ready for warmer spring temperatures.


Molding the suet cakes and adding twine for hanging

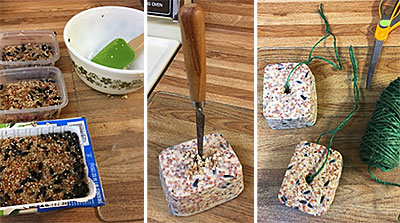
After the fat is melted, you can mix things in it that are tasty treats for birds – leftover baked goods, grains, nuts, chopped dried fruits, cereal, dried mealworms, and of course, bird seed. I molded my cakes in cleaned used food containers and popped them out after they were hard. You can buy pre-made suet cakes (at Schnarr’s!) that are made to go into a pre-made metal mesh holder with a hanger. When you make your own suet cakes, you have to work out a way to hang them. I drilled holes through the middles with a long thin knife and threaded twine through the holes to tie the cakes in place outdoors.

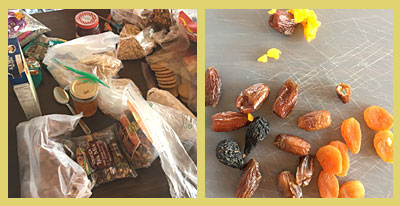
The remaining photos were taken at Litzinger Road Ecology Center on the day we made suet cakes. We were all asked to bring in stuff from our pantries to add to the bird food mixture.


Additives for bird suet cakes

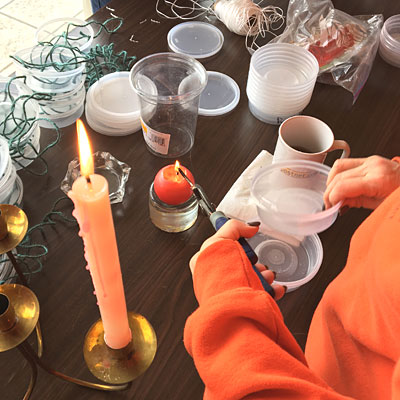
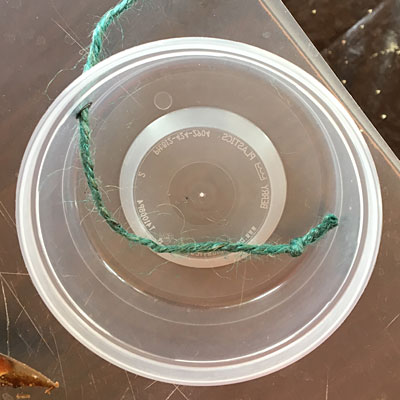
At LREC, we had a quantity of donated food containers to use so we made holes in the sides of them to accomodate a hanging string.


Making holes in plastic food containers with a hot nail

You can easily make holes in plastic by heating a nail in a candle flame. Hold the nail in a pair of pliers to keep from burning your hands and be careful around open flames!


Hanging string for bird suet cake

We made knots in the strings to keep them from slipping through the hole. Before filling the containers with food mixture, for extra security we pulled the stings in slightly so the fat mixture would harden around the string and help hold it in place.


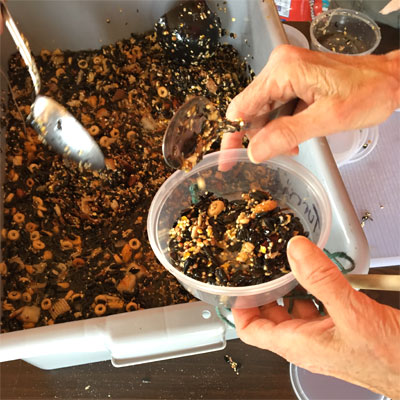
Bird food mixture in a plastic food container

After filling with food mixture, all we had to do was wait for the fat to harden. Then our suet feeders were ready to hang outdoors!

Categories
Backyard Wildlife Gardening

Help – My Pond is Full of Algae!

Help – My Pond is Full of Algae!

by Carolyn Hasenfratz

* = products available at Schnarr’s

This is the time of year when small lakes, ponds and water gardens sometimes get green “pea soup” water or mats of algae floating on the surface. The limiting factors for algae growth are mainly food and sunlight. If you can reduce the amount of sunlight and nutrients getting into the water, you can reduce algae growth in your water feature.

First lets look at possible food sources for the algae.

Fertilizer:
Is runoff from your lawn or garden getting into the water? Try reducing the use of artificial fertilizers in those areas. If that is not possible, try creating a rain garden or bioswale in a place that interrupts the water before it reaches the body of water you want to protect. Plants will help take up the extra nutrients before they pollute your water feature.

Plant debris:
Are leaves or other dead plant material decaying in the water? Remove plant debris that falls in ASAP.

Animal waste:
If you have fish in your pond, do you have too many fish for the size of your water feature? Do the fish get too much food? If you overcrowd the water or overfeed your aquatic animals, you will help feed algae as well as cause health problems for the animals. Uneaten food in the water is even worse for water quality than fish waste because it has more nutrients in it. Birds are another source of waste in the water. I have a small water garden specifically intended to attract birds. They bathe in it and sometimes dunk their food in the water to moisten it. Despite that activity, my water garden contains clean-looking, clear water. If you want wild birds to make use of your water feature, that doesn’t automatically mean you have to put up with water that looks like pea soup.

Filtration
Once you have addressed the sources of excess nutrients in the water, I recommend you next take a look at how the water is being filtered. Aquatic plants are great natural filters. Add more marginal and submerged plants to the water, and you will help starve out the algae. Areas around the water that support bog or marsh plants not only help filter water but they give your water feature a more natural appearance.

Artificial filters* are a great help too. I use one in my small water garden and it plays a role in keeping my water garden clean. There are lots of different kinds of filters. Follow the recommendations of the manufacturer of your filter for proper maintenance and cleaning schedules. If you have a type of filter that uses media that you rinse out, rather than replace, rinse the filter media in chlorine free water (such as old pond water that you’ve removed during water changes) so that you don’t kill the beneficial bacteria that live in the filter media. Beneficial bacteria that break down waste grow on just about every surface in the water, but are most numerous where there is porous material and the water flow is swift – conditions that exist inside a filter. These bacteria are what make most filters function. This is called biological filtration. Other types of filtration include chemical and mechanical. Many filter designs, including the sponge filter that I use, combine mechanical and biological filtration. For example the sponge picks up large particles and takes them out of circulation while the bacteria that live in the tiny holes in the sponge digest the water pollutants and turn them into less toxic substances. It’s a good idea to know which kind of filter you have and understand how it works – that will help you understand what to clean and when. For example if I squeeze out my filter’s sponge in a pail of chlorine-free water to remove the debris it’s collected and put the old sponge back in the filter, I’m doing a good thing for the water quality. If I dunked the filter parts in chlorinated water and scrubbed off the thin film that is all over the parts, I would be doing harm to my water quality because I would be removing beneficial bacteria that are helping and not in the way. This is why aquaria and bodies of water that are established and “seasoned” are much easier to keep clean. In the aquarium world, this “seasoning” is called “cycling”. If you are not familiar with cycling, learning more about how it works will help you troubleshoot your water quality.

Don’t forget – the rinse water from cleaning your filter media makes wonderful plant fertilizer!

Reduce sunlight
If you’ve done everything you can to reduce the amount of nutrients in your water, next see if there is a way you can cut down on the amount of sunlight that reaches the water. If you have a small water garden like mine that is portable when empty, you can move it from full sun to part shade and use it for growing part-shade aquatic plants. If you can’t move your water feature, what can you do?

Add shade plants around the edges:
Grow some plants around the edges of the pond that will help cast some shade on the water, if not for a whole day, just part of the day. You could use small trees, bushes, rushes, big annuals with large leaves and many others. Choose plants that can tolerate waterlogged areas or having “wet feet” or add some container plants around the margins.

Grow floating plants:
Water lilies, lotus, water lettuce, water hyacinth, duckweed and many other lovely plants either float right on the surface or emerge at the surface and help provide shade. If you are experimenting with plants that are not native, make sure they don’t get discarded in natural bodies of water. Some floating plants can cause other problems if they cover the entire surface of the water – no more than 50% of the water surface should be covered with plants. Duckweed is an example of a plant that sometimes can blanket the entire surface. This inhibits the exchange of gasses at the water’s surface and can compromise the amount of oxygen in the water. Remove the excess growth and use it as mulch or put it in the compost! That way any overgrowth will be a boon to your garden instead of a nuisance.

More suggestions

Add more oxygen:
Speaking of oxygen, if possible try to increase the amount of oxygen in the water. The addition of a bubbler, fountain or waterfall will help agitate water at the surface and bring in more oxygen. Oxygen is important for the health of the aquatic community as a whole, including the aerobic bacteria that are doing most of the work of keeping the water clean. At Schnarr’s we sell pumps* that can be used to power waterfalls and fountains.

Add minnows:
Small fish like minnows eat some of the algae and as a bonus keep mosquito larvae out of the water as well. Their small size means they produce small amounts of fish waste. Koi or goldfish are wonderful animals with many good qualities but they produce a lot of waste and need a lot of space and clean water to thrive.

UV sterilizers:
A friend of mine struggled with algae in his koi pond until he added a UV sterilizer to his recirculating waterfall. It was effective. He might have been able to avoid the expense by stocking his fish at more reasonable levels but he liked a LOT of fish and was willing to do the extra maintenance required.

Chemical filtration:
You can purchase an algaecide* to kill the algae. This will likely be a short-lived solution because the dead algae will decay and add more dead organic matter to the water which will probably cause either another outbreak of algae later, a drop in oxygen, a toxic ammonia spike or all of those conditions. Addressing the reason the algae is there in the first place is more effective in the long run but it may take some time to notice improvement. An algaecide might work well in a situation where you need a quick fix now but later conditions are not that important. I don’t recommend you use algaecide if you have fish or other aquatic animals that you care about in the water because a sudden deterioration in water quality can cause a die-off. Algaecide makes more sense in something like a small decorative water fountain or other feature that is not intended to support aquatic life.

Safe first aid for an algae-infested pond:

  • If practical, perform a 20% water change while vacuuming the bottom with a gravel washer device. This is very easy to do for small water gardens like mine, not possible in a large pond or lake. Use of Clear-Water Pond Clay* 24 hours before you vacuum the gravel will help small particles fall to the bottom where they can be picked up.
  • Clean filter medium if you have a filter or add a filter.
  • If practical add a bubbler or some device to agitate water surface.
  • If you have floating mats of “hair” algae, rake off if possible and use in compost.
  • Inoculate the water feature with a live culture of beneficial bacteria – this may not work if you are using a UV sterilizer or if the water is not well aerated. You can buy wet and dry bacteria cultures designed for ponds or request some used gravel from a friend who has an established freshwater aquarium or pond.
  • Get some terra cotta plant pots* and scrub well with plain water, no soap or bleach. Do not use if they have ever been used with chemicals that are not pond safe.
  • Fill plant pots with rinsed lava rock*.
  • Place pots in pond and stack almost to water level to use as a plant stand.
  • Set a planter* containing aquatic plants on top of the stack. These could be fully aquatic plants or bog plants as long as the roots can reach the water to take nutrients out of it. Use pots to adjust the water level to what the particular plant needs.

If you don’t want to bother with plants, just add permeable, pond-safe containers of lava rock and if possible place them in a spot where the current is faster. Lava rock is a terrific natural filter medium because it contains many tiny holes for beneficial bacteria to live. Give the bacteria a good home and they will do a lot of your filtration for you.

Additional water garden tips:

The guys who produced this podcast taught me most of what I know about water quality. I think I have listened to every podcast that is archived on their site, and that’s a lot! (The rest I learned from decades of aquarium keeping!) Podcast on Starting a Pond – by the Bailey Brothers

My article on making an indoor water garden:
Create an Indoor Water Garden

Festive lighting tips for your water garden:
Luminous Decor with Flameless Candles: Idea #1
Luminous Decor with Flameless Candles: Idea #2

Categories
Backyard Wildlife Gardening Outdoor Fun Sustainability

Aquatic Macro Invertebrates at Litzinger Road Ecology Center

Aquatic Macro Invertebrates at Litzinger Road Ecology Center

Aquatic Macro Invertebrates are animals without a backbone that live in water and can be seen with the naked eye. I’ve had an interest in these creatures ever since I can remember. When I was young I caught a variety of water invertebrates such as water beetles, clams, crawdads and snails and attempted to maintain them in my aquariums. I was thrilled when my brother’s aquarium started to grow hydra even though they predate on tiny fish, because I’d read about them but never thought I’d see any. I currently have small colonies of freshwater shrimp in three of my aquariums. Many aquatic invertebrates are insects that live part of their life cycles in water but have an adult flying stage.

When the Litzinger Road Ecology Center offered a training workshop for volunteers on how Aquatic Macro Invertebrates are used to monitor water quality, of course I had to attend. Master Naturalist and Stream Team member Cliff Parmer taught us some Aquatic Entomology facts then we went outside to Deer Creek to learn how to take a scientific sample of water invertebrates.

sampling aquatic invertebrates
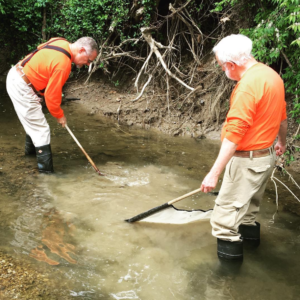
Volunteer collectors chose two spots in the stream for collecting samples – one in a riffle, and one in a calm area. The stream bottom was disturbed while a seine caught the small animals that were swept downstream.


collecting water invertebrates
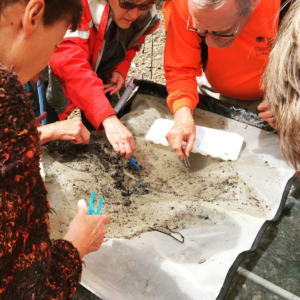
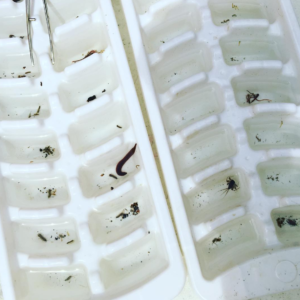
We examined the contents of the seine for small invertebrates which we placed in ice cube trays filled with stream water.


aquatic invertebrates in Deer Creek
Here are some of our finds – there is a nice leech in there (yuck). One of the animals in the right tray is a Mayfly nymph – something I was happy to see because the purpose of sampling is to check water quality. Mayfly nymphs are one of the animals found only in healthier streams. Stream team sample findings are reported to the Missouri Department of Conservation so they can use the data to check stream health.


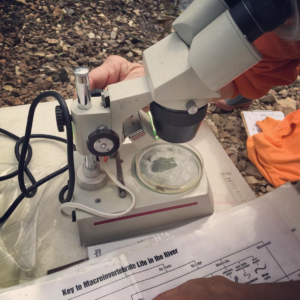
identifying aquatic invertebrates
Although macro invertebrates can be seen with the naked eye, a microscope is useful to see small details to help identify each species. We were provided with identification charts to show us what to look for.


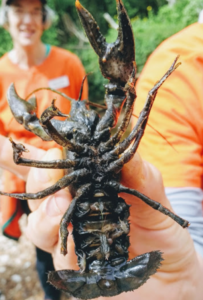
Mother crawdad with babies under the tail
I used my childhood crawdad catching skills to hand-catch the most “Macro” invertebrate of the day – a large mother crawdad with tiny babies clinging to the underside of her tail. We released all the animals back into the water after we had a look at them.

If your garden has a water feature, at some point you may encounter aquatic invertebrates. A common example is the mosquito, very undesirable and needs to be eliminated. A strain of BT (Bacillus thuringiensis) will kill mosquitoes without harming any other life forms (except some gnats, which I don’t think anyone will be sad about – except maybe hummingbirds which eat them). Most other aquatic invertebrates are harmless or downright beneficial. For example, dragonflies live the first stages of their lives in water and are one of the best predators of mosquito larvae. When dragonflies emerge as flying adults they have a voracious appetite for adult flying mosquitoes – they also add beauty and color to the garden. Others, like caddisfly larvae or water beetles are not exactly beautiful in a conventional sense but have interesting lifestyles that are fun to observe and study.

Even if your garden does not include a water feature, there are ways that your garden can impact aquatic invertebrates. Water that runs off your garden and yard into a storm sewer is eventually released into natural bodies of water. If you can keep excess pesticides and fertilizer out of storm runoff you can help invertebrates to survive. Excess fertilizer harms invertebrates by causing algae blooms that reduce oxygen in the water and kill off more sensitive animals. Life forms higher up on the food chain such as fish and birds depend on a steady supply of invertebrates for food.

If your property is adjacent to a body of water, you can further aid the water quality by implementing a riparian corridor or creek corridor vegetative buffer. Such a corridor does many things for water quality, including temperature regulation. By cooling the water, streamside vegetation helps maintain higher oxygen levels in the water.

Backyard wildlife increases my enjoyment of the outdoors and my garden. If you feel the same way, an appreciation for small but vital water animals can be rewarding!

Categories
Backyard Wildlife Gardening

How to Raise Mealworms For Your Backyard Birds

How to Raise Mealworms For Your Backyard Birds

by Carolyn Hasenfratz

Late winter and early spring are good seasons to attract desirable bird species to your yard. Birds are not brooding eggs yet because they need to wait until later in spring when there is enough insect food to feed their young. However, they are now engaged in, well, getting engaged! In other words many birds are scouting out nest sites and selecting mates if they haven’t done that already.

You can entice birds to think your property is a good place to raise families by managing it with good bird habitat in mind – some ideas are in my previous article “Gardening for the Birds”. Some of the most sought-after backyard bird species are heavy insect eaters. Many dried and live mealworms are purchased to attract Eastern Bluebirds. Although they tend to be rare in urban and suburban areas, I saw one at the Litzinger Road Ecology Center a couple of weeks ago, so I know they are present in Ladue in places where the habitat is suitable.

Dried mealworms, which can be purchased at Schnarr’s, are more convenient than live mealworms and possibly more acceptable to those who are squeamish. If you would like to try raising your own however, I’ll tell you how. It’s so easy, I started raising mealworms by accident! For years I’ve raised plenty for my pet birds, newt and fish and there are enough left over to share with the outdoor birds also.


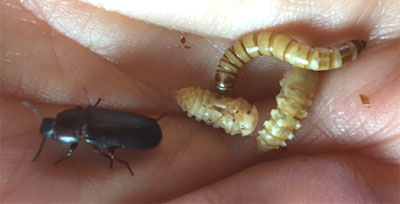
Mealworm larva, pupae and adult

Life stages of the mealworm beetle in my hand – one larva, two pupae and one adult

Mealworms are not actually worms. They are larvae of a species of beetle, usually Tenebrio molitor L. My indoor and outdoor birds will happily consume all three forms of the beetle – adult, pupae, and larvae. When you purchase live mealworms in a store, they are usually larvae only and they are refrigerated to slow down their development into pupae and adults. To get adults who will lay eggs and make more mealworms, you need only to store the larvae at room temperature and give them food and a little moisture!

To begin, acquire a container that is steep sided so the adult beetles can’t escape. An unused 10-gallon aquarium is ideal. Place an inch or so of some kind of “meal” product on the floor of the aquarium. I use a combination of oatmeal, chicken food, and flaxseed meal. These creatures are not that picky so you can use what is cheap and available – I’ve seen an exhibit at the zoo of mealworm beetles consuming styrofoam!

Place a couple of pieces of bark or wood on top of the meal for hiding places. You don’t need a light, they don’t like it. I only use a light to see when it’s time to harvest some larvae. Nor do you need a lid because the adult beetles don’t fly. Buy a container of live mealworms and dump the contents into your mealworm container. Every couple of days, add a little more food and something with moisture that the larvae can “drink” from. Good choices are a piece of carrot or potato, or leftover pieces and rinds from fruits and vegetables that aren’t too odoriferous. You can also buy a special gelatin-like product that is designed for “watering” crickets. Avoid a dish of water because the insects might fall in and drown. If the substrate gets wet and moldy, replace with dry substrate.

When nutritious foods are fed to a prey animal like mealworms and crickets, that is called “gut loading”. In theory, the better you feed your mealworms the more nutrition you’ll be passing along to the eventual bird consumers. Cat food contains protein and amino acids that are very good for insectivorous and omnivorous birds. My two pet European Starlings’ staple food is made from 1/3 chicken food and 2/3 cat food. They are picky about what size food particles they will eat so there are always lots of leftovers that are given to my mealworms and quickly devoured.

Eventually the larvae will develop into adult beetles that will lay eggs. Lift up the wood pieces periodically to see how many insects are hiding under there. When you think you have a high enough population to start harvesting, go ahead and take some. You will get a feel for how many you can take and how often over time.

If you get a fruit fly infestation, try moving the mealworm container to place where a few tiny flies are not that bothersome, like a garage. You can also set up a fruit fly trap (available at Schnarr’s) near the mealworms to catch the flies.

Raising mealworms may seem “gross” at first but it’s a great way to see and teach the life cycle of insects. If you have young family members they might be intrigued by this activity and develop an interest in animals and science. I started aquarium keeping when I was eight years old and I already liked bugs at that age. Besides fish I loved to keep lizards, toads and praying mantises. Seeing the mealworms I bought for my pets turn into pupae was really interesting! If you give a little squeeze to a pupa that is alive it will wiggle, which is an amazing thing for a kid to see!

Categories
Backyard Wildlife DIY Gardening Sustainability Upcycling Ways With Wood

Make a Pollinator House – Part 2

Make a Pollinator House – Part 2

by Carolyn Hasenfratz

In my previous article Making a Pollinator House – Part 1 I explained why you might want to build a home for native bees and other beneficial insects for your garden. I also provided an example of a quick way to build a shelter out of cinder blocks, wood scraps and dried plant material. I promised to write up plans for a more attractive pollinator house. Here are instructions for building two different designs to enhance your garden’s decor as well as it’s productivity and ecological health.

Tools and Supplies
* indicates items that are available at Schnarr’s
Tracing paper
Pencil
Ruler*
Hot glue gun*
Wood hot glue sticks
1″ x 6″ x 8′ multipurpose board*
2″ x 4″ x 8′ board*
Saw*
Sandpaper*
Dust mask*
Acrylic craft paint
Paint brushes*
Water container*
Heat tool for speeding up drying (optional)
Painters tape or masking tape*
Decorative stencils
Sponges*
Drill*
Tiny drill bit*
Nails*
Window screen*
Hammer*
Wood glue*
Clear matte finish varnish*
Hardware cloth or chicken wire (optional)*

For the additional second design with the pediment, you’ll also need:
Assorted sizes of distressed wood pieces
Decorative brass box corner*
Miter saw*
3/16″ drill bit*
3/16″ dowel rod*
Wooden ball knobs or drawer pulls* with 3/16″ holes to use as feet

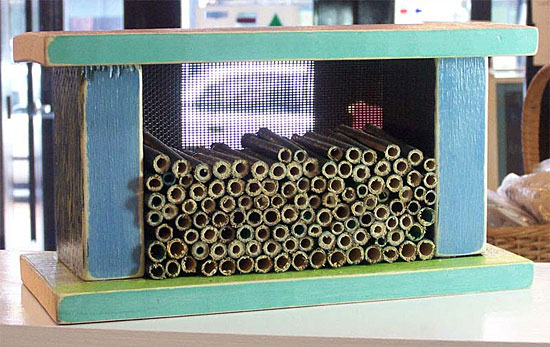
Mid-Century Modern style pollinator house

Instructions for Style #1 – “Mid-Century Modern” Pollinator House

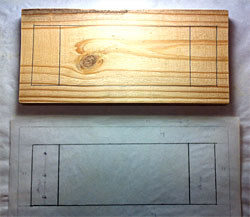
1. Download the PDF document “Pollinator House Assembly Diagram”. It is sized to print out on a legal-sized piece of paper. Recreate the diagram in scale on a piece of tracing paper with pencil.

2. From the 1″ x 6″ x 8′ board, cut two 12″ x 5.5″ pieces(although the board is called 1″ x 6″ x 8′ it’s probably closer to 5.5″ so you might only have to cut the board into 12″ lengths).

3. From your 2″ x 4″ x 8′ (probably really 3.5″) board cut two 5″ segments.

4. Put on a dust mask and sand your wood pieces until smooth.

copy diagram onto wood
5. Mark each of your 12″ x 5.5″ pieces with the rectangles shown in the diagram. These will become the inner top and inner bottom of your house.


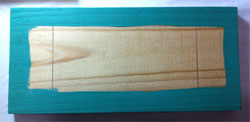
paint around edges
6. Paint a color of your choice in the border around the inner rectangle on each piece. For this step you don’t have to worry about painting precisely in the lines. Let paint dry.


7. Mark off around the middle rectangle with masking or painter’s tape on both pieces and paint black. When paint is dry, remove tape.

paint middle of boards black


8. Paint what will be the insides of your 5″ high supports black. Paint all other surfaces of your wood pieces assorted colors of your choice.

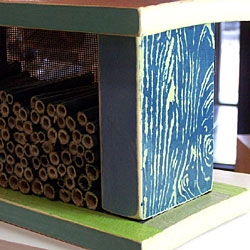
decorative stenciling
9. Decorate the top of your house and the sides of the supports with decorative stencils. I did not decorate the board edges with stenciling in my sample but you can if you want to. If you are new to stenciling on wood, see this article for tips –
Stencil a Wood Garden Sign.

10. Sand all the edges of your wood pieces so that the bare wood shows through on the corners. This gives the wood a distressed look. If you want to distress any other painted or stenciled surfaces further you can do so by roughing them up with sandpaper.

11. To assemble the house, stage the upright pieces by placing them in their footprints as indicated on the diagram on one of the 12 x 5.5″ pieces. Face the black painted sides inward and the stenciled sides facing out. If you’ve covered up your pencil lines with paint, you can use your diagram to redraw them as needed.

12. Load up your hot glue gun with wood project glue sticks and plug it in to heat up. Apply hot glue to the bottoms of the support pieces and press in place. Let glue harden.

13. Glue the other ends of the supports in place on the other 12 x 5.5″ piece. Let glue harden.

14. Place the tracing paper diagram on top of your house. Mark where the nail holes will go in pencil. Drill small pilot holes then hammer nails in. Repeat for the bottom.

15. Mix some dark brown paint with water to make a thin wash and paint over the whole house. Test first on the bottom to make sure it’s not too heavy or light. Alternately, you could use a wash of off-white paint if you’d rather have a pale wash. The purpose of the wash is to give an aged appearance to the wood – this is particularly effective when the paint clings to the corners that have been bared by sanding. Let paint dry.

16. Paint whole house with clear matte varnish.

17. Cut out a 10 x 5″ piece out of scrap window screen and nail it to the back side. This is to keep whatever materials you fill the house with from falling out the back side.

18. Fill the house from the front with materials that contain holes for pollinating insects such as native bees to live in.

Some suggestions of materials you could use to fill the house:

  • Bamboo or reed segments
  • Rocks
  • Rolled up corrugated cardboard
  • Chunks of scrap wood with holes drilled in it
  • Bundles of twigs or straw
  • Unfired ceramic clay with holes poked in it
  • Natural dried stems and reeds from the garden cut into segments
  • Dried seed pods

If necessary, cut out a piece of hardware cloth or chicken wire and nail it over the front to hold materials in.

19. Read this article for ideas on where to place the house in your garden or yard –
Making a Pollinator House – Part 1.

Depending on where you want to put your house, you may want to attach hanging hardware to it or mount it on a post. The wood pieces we used are thick enough to give you flexibility in attachment options.

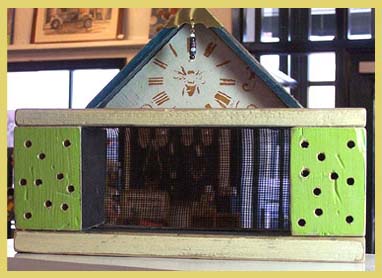
Pollinator House with Pediment

Instructions for Style #2 – Pollinator House with Pediment

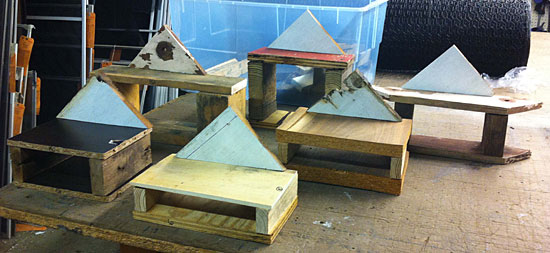
The prototypes I made for the second design vary somewhat in size and proportions because I used distressed wood that I had lying around. I designed the houses around what wood I had available and embellished some with found objects or hardware. If you want to build similar houses and don’t have access to distressed wood, you can use new wood.

1. Cut out two chunky pieces of wood to use as uprights and two thin pieces to use as the top and bottom.

Different pollinator house designs

2. Cut a right triangle out of wood that is 3/4 to 1″ thick for the pediment piece. A pediment is like a roof gable that is decorative rather than functional. My samples vary slightly in size but the triangles are mostly around 7 1/2″ inches on the long side and 3 3/4″ on the short sides.

3. Choose some thin, narrow wood pieces for the roof overhang. Lattice wood strips are about the right size – if you don’t have any distressed wood in that size range you can purchase some lattice strips to use. Cut these strips into approximately 6″ pieces and miter the corners.

4. Sand all wood pieces.

5. Paint the sides of your wood pieces that will become the interior with black paint.

6. Paint the other sides and parts in assorted colors of your choice.

7. Stencil a bee design or other stencil of your choice on the front of the triangle.

8. If you think any of the other wood surfaces need to be enhanced with stencil designs, decorate those also. Since many of my wood pieces were distressed and had a pronounced wood grain, knots, old nails and other irregularities I let those provide the visual interest in many areas. Antique look, vintage look, grunge or botanical stencils would be especially effective for this design.

9. Sand the edges of your wood pieces to expose the bare wood on the corners and distress any other areas that you think are in need of it.

10. Hot glue the vertical support pieces to the top and bottom of your house then nail in place.

11. To assemble the pediment section, put your two roof pieces in a miter clamp with the mitered ends butted together to make the roof point. Put a little wood glue on the ends as you do this. Position the clamped-together pieces on a block of scrap wood to brace them. Drill small pilot holes in one end and hammer in small nails. Slip a couple of nails in between from the other direction.

Creating roof peak with miter clamp and nails

12. Take your triangle pediment and apply hot glue to the top edge. On your work surface, lay the pediment down, slide the triangle part in and press in place. When the glue has hardened, hammer small nails through the roof pieces into the pediment for extra hold.

Attach roof overhang to pediment

13. Apply hot glue to the bottom of the triangle section. Place in place on top of house and let the glue harden. Drill two pilot holes at each end and drive long thin nails down into the supports below.

14. If you would like to attach wood feet to the bottom of your house, drill 3/16″ holes into the bottom of the house. Cut short pieces of 3/16″ wood dowel rod and put wood glue on both ends. Insert one end of each dowel rod piece into a hole in the house and the other end into the hole in a wooden ball knob or drawer pull.

15. Mix some dark brown paint with water to make a thin wash and paint over the whole house. Test first on the bottom to make sure it’s not too heavy or light. Alternately, you could use a wash of off-white paint if you’d rather have a pale wash. The purpose of the wash is to give an aged appearance to the wood – this is particularly effective when the paint clings to the corners that have been bared by sanding. Let paint dry.

16. Paint whole house with clear matte varnish.

17. Attach a decorative brass box corner to the roof peak.

18. Cut out a piece out of scrap window screen and nail it to the back side.

19. Fill house with nesting materials and place in a suitable location.

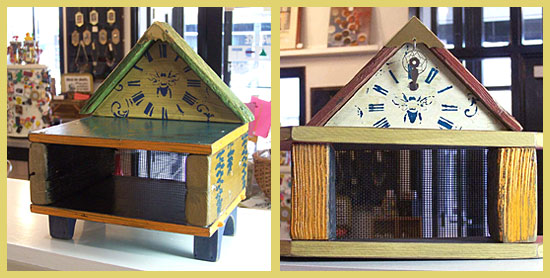
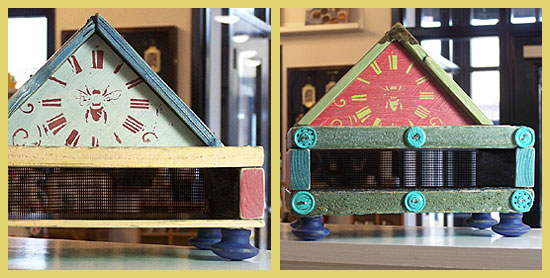
Here are some pictures showing how some of the other houses turned out.

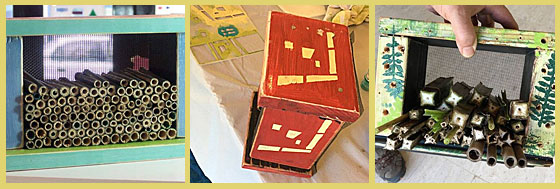
Pollinator houses made with distressed wood

Pollinator houses made with distressed wood

Pollinator house made with distressed wood

Categories
Backyard Wildlife Gardening Sustainability

What To Do If You Find a Bird That Needs Help

What To Do If You Find a Bird That Needs Help

by Carolyn Hasenfratz

I can tell by the amount of food and feeders that we sell that Schnarr’s customers love their backyard birds! Many of us will encounter at some point a bird that is sick or injured or a baby that appears to be abandoned. Right now some birds are starting their second brood of the summer so baby bird season is not over yet!

Baby birds are very vulnerable if they fall or are pushed out of the nest. If you feel compelled to intervene, I totally understand why – that’s how I came to be living with two European Starlings – it’s a long story! Having been through the situation of finding a baby bird more than once, I’ve done a lot of reading and learning from experience and here is what I recommend.

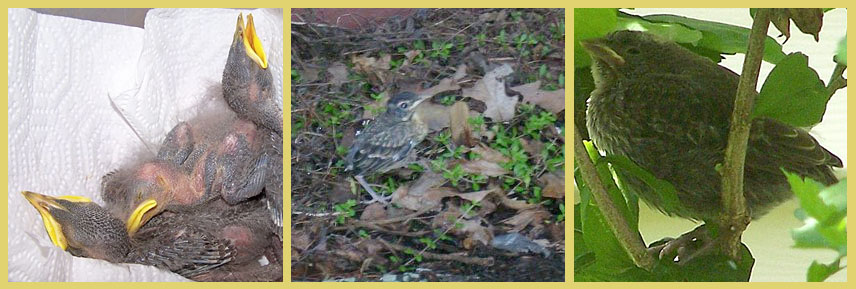
First determine if the bird is a nestling or a fledgling. A nestling will not be fully feathered and will not be able to run away. It needs to be back in a nest ASAP. Try to put the bird back in the original nest if you can and if you know the parents are alive. It’s a myth that the smell of humans will cause the parent birds to abandon it – most birds can’t smell.

Sometimes it’s not possible to put the bird back in the original nest – you can’t find it, you can’t reach it, or it’s been destroyed. If that’s the case you have the following options.

One plan is to make a makeshift nest and put it in a place where the parents can find it and it is safe from predators. If the bird is a species that nests in a cavity, you can look up nest box plans online specifically for that species and build one. I’ve been successful in getting a Starling family to move to a homemade nest box after the babies fell out of a dryer vent. Observe the nest to see if the parents find the baby and start feeding it. If they don’t, take the bird to a wild bird rehab center. It’s hard to say how long you should wait before giving up on the effort to re-involve the parents. The necessary feeding intervals of baby birds can vary depending on how old they are – if in doubt you could call a wild bird rehab center for advice. It’s easy for baby birds to get dehydrated if they go too long without food because most of them don’t drink liquids but get their moisture from their squishy bug diet. Don’t attempt to give the baby bird water or liquids unless you know the right way – it’s very easy to accidentally kill a baby bird by giving it water without knowledge of the correct procedure.

It’s time-consuming to make and observe a makeshift nest – if you have the time, you might find it worthwhile to put in the effort. You’ll learn a lot while doing it and it’s very rewarding! If you don’t have the time or the interest, just take the bird to the nearest wild bird rehab center right away. If it’s one of the three species not protected by federal laws (Pigeons, House Sparrows or European Starlings) the rehabber might either euthanize it or refuse to accept it. In that case you will have a difficult choice to make and having been in that position, I wouldn’t envy you! I chose to raise the five-day-old Starling I found in 2009 rather than let it be killed but everyone does not have the means or desire to take on the job of raising a baby bird. It can be done with the correct knowledge but it’s a big commitment. Raising a baby bird and releasing it to the wild later sounds like a good idea but is not an option if the bird has been raised alone and if you want the bird to survive – it will not have learned survival skills from the parents. It may not know how to act around other wild birds and could fail to be accepted by a wild flock. A protected species (not one of the three mentioned) is not legal to keep without a permit and you must take it to a licensed rehabber to help it.

Nestlings and Fledglings
The baby birds on the left are nestlings and the other two examples are fledglings.

If the bird is fully feathered and can run away and perch, it’s a fledgling. Most fledglings do not need any help. It’s not uncommon for baby birds to leave the nest before they can fly well. The fledgling will be somewhat vulnerable until it can fully fly but the parents should be feeding it and trying to keep it away from danger. The best way to help it is to put it on a perch off the ground (if you can catch it). If you have cats or dogs keep them indoors for a week or so. It’s not good for the health of pet cats to let them outside in any circumstances, but if you must let yours out try not to do so until the fledglings are flying.

If you find a bird that is sick or injured, it will need care no matter what age it is, so in that case try to get it to a rehabber as soon as possible. If a bird does not look sick but has been caught by a dog or cat, it needs antibiotics within a day or so or it is probably doomed. When birds are to the point of showing signs of illness or injury they are in bad shape – their instinct is to hide their infirmity as long as possible so they are not caught by predators or rejected by their flocks. Speaking of sick birds, it is my understanding is that a thorough hand-washing after handling is sufficient precaution in case the bird does have something a human can catch, like Salmonella. I am not a vet or a scientist so get more information on diseases if you are concerned. Many bird-borne diseases are species-specific and can’t be caught by humans. However, if you have disposable gloves on hand it’s smart to wear them for extra protection.

The best way to transport a bird to a rehabber is to put it in a box with soft nest-like materials and cover the box. Make sure it can breathe if it’s boxed or wrapped. The bird will likely be terrified and if it’s confined it will be less likely to injure itself. Handle it as little as possible and try not to expose it to loud noises.

If the bird is really large, like a hawk, heron, goose or pea fowl (which I once rescued believe it or not!), get advice from the Humane Society or other knowledgeable group before attempting to transport. My handling of the peahen I found went very smoothly but without good instructions and remembering to remain calm I might have had trouble! Some large birds can cause serious injuries with talons or beaks if not handled carefully. The peahen I transported had some mean-looking spurs but fortunately did not attempt to use them on me!

For more advice from the experts, please see these links:
I Found A Baby Bird. What Do I Do?
Songbirds
Ducklings or goslings
Birds of prey, vultures, herons, pelicans or swans

Information on raising House Sparrows and Starlings:
Sparrows and Starlings
www.starlingtalk.com – Everything you need to know about raising Starlings and if you want to, living with them permanently