Categories
Gardening

Let’s Purge the Spurge! Part 1

Let’s Purge the Spurge! Part 1

by Carolyn Hasenfratz

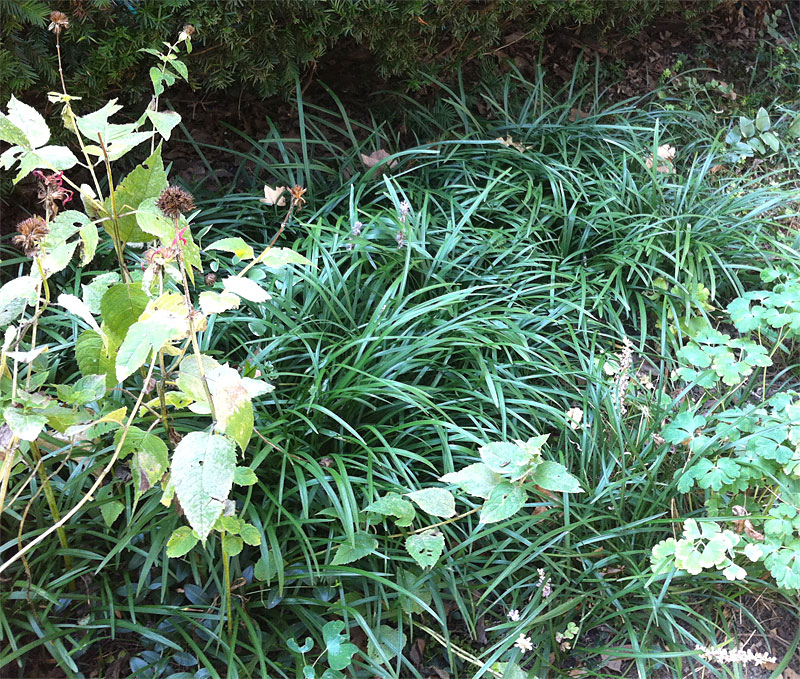
One of my frequent landscaping tasks in summer is weeding at clients’ properties. Many of the weeds can be hand-pulled, but on a recent occasion there was such an abundance of Prostrate Spurge (Euphorbia maculata) that it was hopeless to try to pull it in a reasonable amount of time.

After consulting with my colleague, we decided to turn over the soil in the badly infested spots with a spade and bury the spurge rather than try to hand pull it.


Controlling Prostrate Spurge

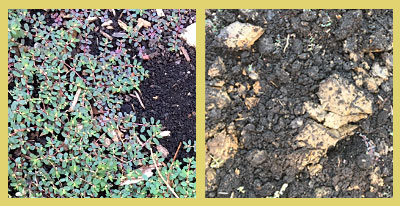
At the left is a spurge-infested patch, and on the right is how it looks after the soil is turned over with a spade. Since we are not going to plant anything here, we don’t need to take the time to break up the clay chunks – nature will do the job over time.

There are benefits to turning the soil over:

  • Weeds often are able to reach down with taproots and pull nutrients out of hard-packed soil and clay that other plants can’t reach. You can see from the photo above that there is only a thin layer of good soil here with clay underneath. By burying the weeds and letting them decompose, we are returning the nutrients to the soil rather than removing them and discarding them.
  • Prostrate Spurge likes compacted soils and by making the soil less compacted we are making it less hospitable to future Spurge.
  • The area in question is in a restaurant drive-thru so among the weeds were an abundance of cigarette butts thrown from cars. It sure takes less time to bury the butts than pick them all up!

Turning over the soil has some disadvantages too:

  • Bare soil exposed without mulch or existing vegetation is an invitation to weeds so this area needs to be mulched right away. Since the old mulch in this bed was about gone, it was due for a fresh application anyway.
  • Turning over the soil exposes possibly buried weed seeds to sunlight and may make them sprout when they otherwise would have lain dormant. Some weed seeds remain viable for up to 100 years! Quick action needs to be taken to prevent a fresh infestation.

We are planning a three inch application of mulch in this bed to suppress and slow down weeds. The mulch will also keep the soil more workable and make it easier to pull future weeds. We don’t think the mulch alone will be enough to control the weeds to the extent we’d like.

In addition to the mulch, we are going to conduct a test of two different preventative measures to see which is most effective and long-lasting. In one half of the bed, we are going to apply a pre-emergent herbicide. On the other half, we are going to put down a layer of cardboard under the mulch to smother any weeds I may have missed plus future weeds that might sprout. The cardboard blocks light getting to the weed seeds. It eventually breaks down and feeds the soil but buys you quite a bit of time – several months to year. Using the cardboard or other layers of organic matter is called “Lasagna Gardening” or “Sheet Composting” and I use it extensively with good results in my own garden. It wouldn’t be practical to try in every circumstance but our test will show whether or not it works well enough to use in some commercial situations. Stay tuned for updates on what happens!

Categories
Gardening Sustainability

Lasagna Gardening

Lasagna Gardening

What is Lasagna gardening? No, it’s not growing delicious tomatoes and herbs that you can put in your lasagna, though you may eventually be able to do just that depending on your conditions. Lasagna gardening, also known as sheet composting, is an organic gardening method that entails covering the ground with layers of materials of organic origin and allowing them to naturally break down over time. The benefits of this method are less time and labor spent weeding and tilling, creating healthy soil for healthier plants, and reaping the many benefits of compostable materials instead of wasting them.

If you are thinking of starting a new garden bed next spring, fall is a good time to begin it and lasagna gardening is a good method to use if your chosen ground is covered with vegetation that you want to kill off. I’m demonstrating with a section of a shade garden that is covered with liriope. I like it but I have too much of it so I want to get a section ready to put in something new later. If you’ve ever tried to dig up lirope you can imagine how much time I will save by just smothering it! This method works for grassy areas also or any piece of ground covered with unwanted vegetation. Here is what my section of garden looked like before I started.

Liriope that I want to smother with lasagna gardening.
Ironically, the Liriope that I want to smother with lasagna gardening is the best looking plant in this section right now. The Bee Balm on the left and the Columbine on the right are not at their best in late summer. Next spring they will be gorgeous!

First gather up all the compostable materials that you can. The first layer consists of cardboard, paper, newspapers and other recyclable paper based products. I have been saving for a couple of months so there is more than enough for this section.

Mark off the space that will become your garden. You can transplant the vegetation already on the spot if you need it elsewhere. If it’s ok to kill it, just cover the area with several layers of cardboard and paper without leaving gaps in between. If it’s windy, wet the paper as you go – I dunked mine in a bin of water before applying. The paper will block the light and kill the vegetation underneath which will decompose and eventually become plant food.

Lasagna gardening helped me get some good use out of junk mail, product packaging, and other unwanted paper products.
Lasagna gardening helped me get some good use out of junk mail, product packaging, and other unwanted paper products. This is about five grocery bags full.

Wet the layer after you’re done applying it if it’s not already wet. This helps jump start the decomposition process.

Build subsequent layers by alternating green and brown compostable materials. Examples of brown materials are dried leaves, shredded paper, and dried dead plant materials. Green materials are grass clippings and fruit and vegetable scraps from your kitchen. Layering the green in between the brown helps to break the pile down faster, but it will eventually break down even if you have a small amount of green materials in comparison to brown. Add in whatever else you would normally put in the compost – eggshells, coffee grounds, and the like. In my case since I live in a condo community where people walk their dogs nearby, I didn’t want interesting odors to attract them to my garden so I left out the kitchen scraps and used only paper and cardboard.

If you want to do some fall planting, you can put soil and fertilizer on top of your compostables and plant now. If you are planting on top of tree roots, don’t make your layer more than 8 inches thick as anything deeper may kill tree roots, according to the book “Making the Most of Shade” by Larry Hodgson. If there are no tree roots to damage, you can make the lasagna 12 inches thick. I don’t know what I’m going to plant yet or whether I’m going to plant in spring or fall, so I topped off mine with wood chip mulch.

Wood chip mulch protects the lasagna gardening area until I'm ready to plant.
Wood chip mulch protects the lasagna gardening area until I’m ready to plant.

When I’m ready to plant I plan to just add soil on top of the mulch, because my lasagna is nowhere near 8 inches thick yet and it won’t hurt to make the new bed deeper. I’ll add nitrogen-rich organic fertilizer at the time to accelerate the breakdown of the wood chips.