Categories
DIY Upcycling

Making Fun and Useful Things From Recycled Materials

Making Fun and Useful Things From Recycled Materials

by Carolyn Hasenfratz

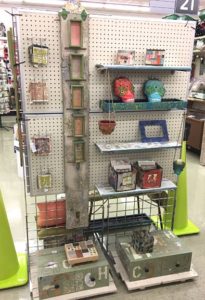
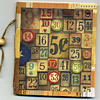
Fall Art WalkAt right is a photo of my display at Schnarr’s Hardware in Webster Groves, Missouri at 40 East Lockwood. You can view my work from October 6 – October 15 2017 as part of the Old Webster Fall Art Walk. Look for the lime green cones outside Schnarr’s and other businesses in Old Webster to see where exhibits for the art walk are located.

One of my favorite things to do is to find interesting salvaged materials and apply my creativity to see what I can make out of them. Don’t get me wrong, a trip to the craft store or hardware store is always a treat but sometimes all-new materials don’t give me the same satisfaction that I get from bringing something old back to life. Some materials I use are hand-me-downs or old items of mine that are no longer useful. If I can’t use a whole object that is being discarded I often scavenge parts from it. I’ve made myself some really nice things out of stuff that I picked up off of the curb on trash day. Garage sales and thrift stores sometimes yield fun supplies and I also like to look for interesting materials at non-profits that specialize in keeping things out of landfills such as Leftovers, Etc. and Perennial.


Do you want some ideas for repurposing materials? I’ve written tutorials about how I made many of the items in the show. For inspiration, check out some of my projects!

Antique Key Necklace
Recycled materials – skeleton key, upcycled chain, thrift store beads
TutorialSkeleton Key Necklace


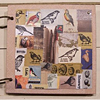
Birding Journal
Recycled materials – matt board, scrap paper, found images
TutorialHandmade Birding Journal


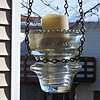
Insulator Votive Candle Lantern
Recycled materials – Glass insulator
TutorialMake an Insulator Votive Candle Lantern


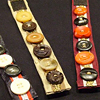
Button Bracelets
Recycled materials – buttons, trim, ribbon
TutorialButton Headband and Bracelet


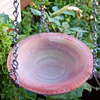
Butterfly Feeder
Recycled materials – glass dish, metal rings
TutorialUpcycled Butterfly Feeder


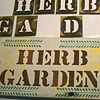
Wood Garden Sign
Recycled materials – wood plank
TutorialStencil a Wood Garden Sign


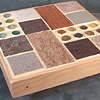
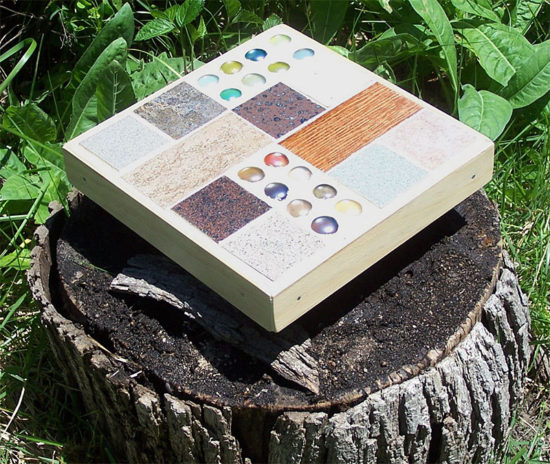
Mosaic Plant Stand
Recycled materials – wood, paper backing glass blobs, tiles
TutorialBuild a Mosaic Plant Stand


Dia De Los Muertos Skull
Recycled materials – fabric, beaded trim, floral embellishments, chipboard
TutorialDia De Los Muertos Skull


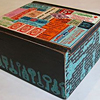
Upcycled Tea Box
Recycled materials – Wood tea box, found images
TutorialVintage Look Box


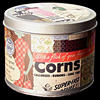
Upcycled Metal Tin
Recycled materials – metal tin, found images, recycled ribbon
TutorialUpcycle a Metal Tin With Decoupage


Mini Album
Recycled Materials – scrap paper and cardstock
TutorialMake a Mini Album

Categories
Sustainability Upcycling

Old Webster Fall Art Walk Opens Friday!

Starting on Friday, October 6th, Schnarr’s Hardware in Webster Groves in the Old Webster Business District will host artist and Schnarr’s employee Carolyn Hasenfratz during the Old Webster Fall Art Walk. You can see all different kinds of artwork in various businesses by taking a self-guided walking tour in the area.

On Saturday October 7 and Saturday October 14 from 12-4 pm, Carolyn will be at Schnarr’s in Webster demonstrating art projects you can do with items from a hardware store. On the 7th there will be a demonstration of Stamping and Printing with Found Objects and on the 14th Carolyn will make fall greeting cards while you watch. Carolyn’s display will be viewable when the store is open from October 6 through October 15. Stop by to see examples of things she has made from repurposed and recycled materials such as distressed wood, salvaged hardware, reclaimed ceramic tiles, scrap fabric and much more.

For more information about the Art Walk, go to: https://oldwebsterartwalk.com/

Categories
DIY Sustainability Upcycling

Stamping and Printing with Found Objects

Stamping and Printing with Found Objects

by Carolyn Hasenfratz

Create a piece of original artwork while learning how to print with found objects. You’ll also learn some basic monoprinting techniques while creating a background for your composition.

Materials and Supplies
Masa printmaking paper
*Scrap plexiglass
*Scrap wood blocks
Scrap chipboard
Scrap mesh
Scrap textured wallpaper
*Acrylic varnish
Used mailing envelopes lined with bubble wrap
*Thumbtacks
Baren (printmaking tool sold at art supply stores)
Printing registration frame (can be built from instructions online)
Small tabletop printing press (sold at art supply stores)
Brayers – hard and soft (sold at art supply stores)
Dye-based rubber stamping ink
*Acrylic paint
Palette knife
Pie plate or other cleaned shallow food container
*Small sponge pieces
*Water container
*Ball point pens
*Rags for cleanup
*Double sided tape
*Painters tape
*Craft/X-acto knife and blades
*Cork pieces
Scrap paper
*Scissors
Recycled plastic file folders
Heat tool (optional)
5 x 7 inch wood blocks

foam from cleaned food containers

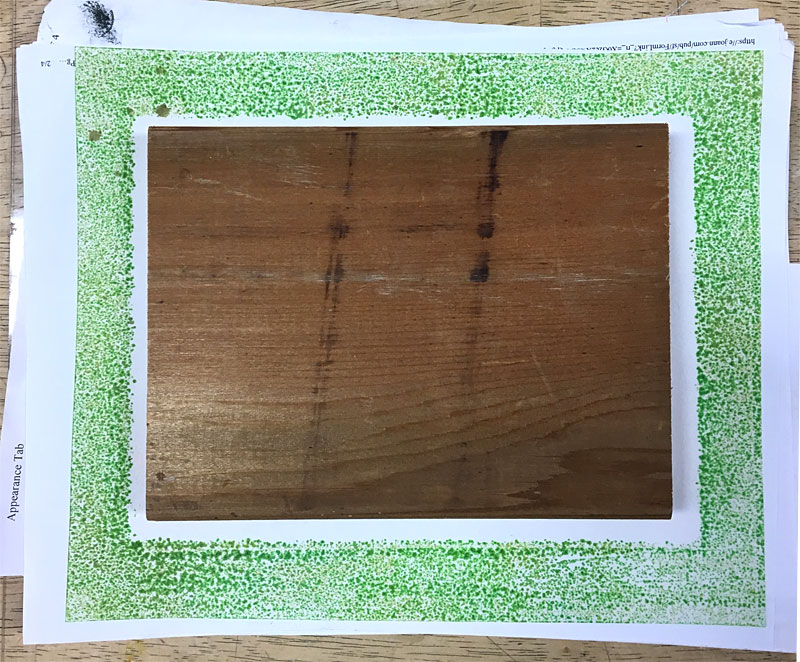
Cut out a piece of scrap paper 8 x 10 inches. In this middle of this page, draw a 5 x 7 inch rectangle. This will be a guide to use while designing and printing.

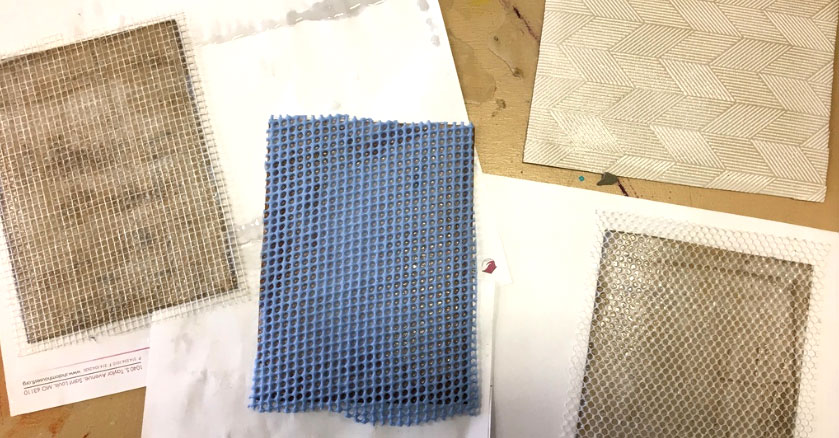
Cut out a few pieces of scrap chipboard the size of the inner rectangle in your schematic, 5 x 7 inches. Using a white glue or wood glue, glue some scrap materials to the front such as mesh placemats, mesh from food packaging or textured wallpaper scraps. After glue is dry, coat the textured surface with acrylic varnish and let dry. This is for durability and so the ink washes off after printing. Trim around the chipboard if needed.

From Masa printmaking paper or some other printmaking paper of your choice, Cut some 8 x 10 inch sheets and some 5 x 7 inch sheets.

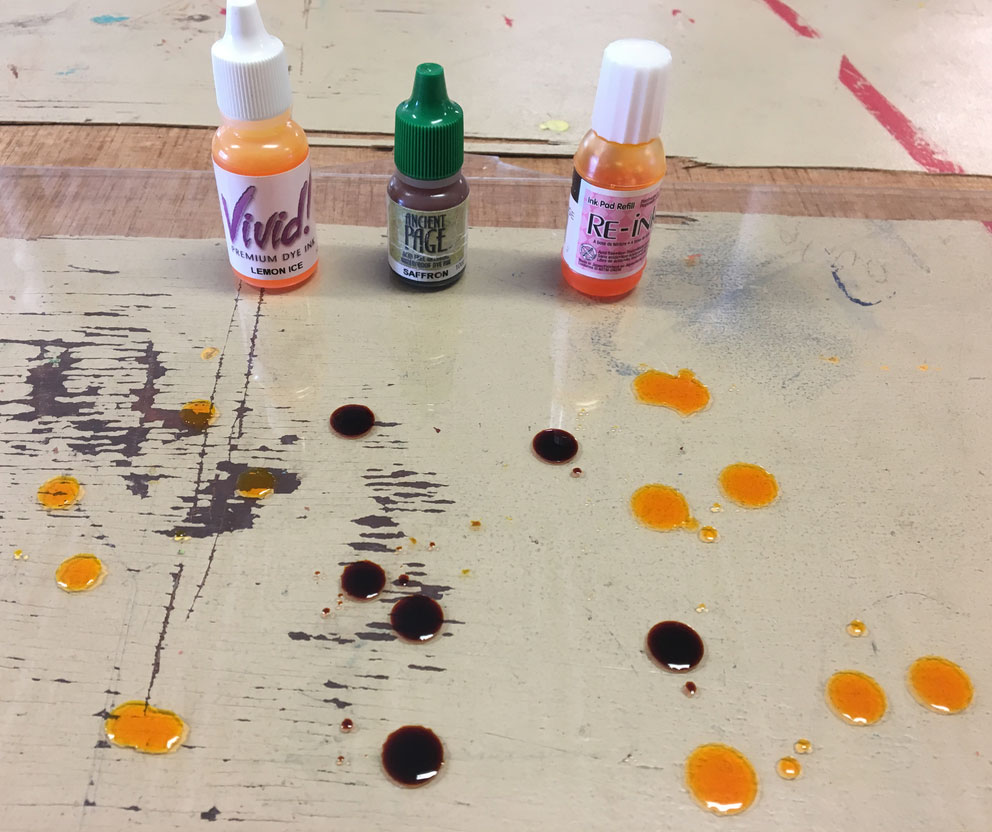
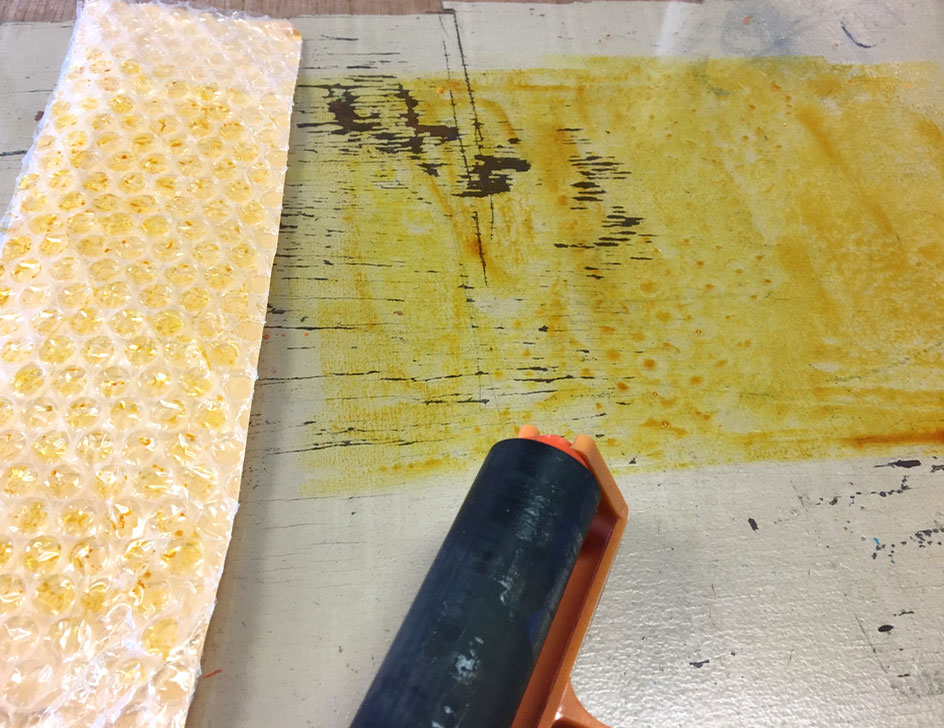
Squirt some light-colored dye-based ink onto a piece of plexiglass. You can use one color or a blend of multiple colors. Roll out an area of color with a brayer that is at least as big as the smaller of your two pieces of paper. If you use plexiglass as a temporary palette and work surface as I did in part of my demo, you can put your schematic drawing under the plexiglass to use as a guide.

Tip: if you use waterproof dye-based ink, you can apply water based media to your design later without smearing or blending the ink.

If you color the image in some way after printing, it is called a hand-colored print. If you have interest, experiment with painting and drawing media, stamping, stenciling or collage to turn your print into a mixed media piece.

Cut out a shape of your choice from a piece of bubble-wrap lined envelope. Place this shape down on your area of color. Roll over the back of it with a brayer. Lift bubble wrap and set aside with ink still on it. Do not clean the bubble wrap yet.

Take one of your  5 x 7 inch pieces of paper and place it face down on the inked area. The rougher side of Masa paper is considered the face but you can try both sides if you want to see which effect you like better.

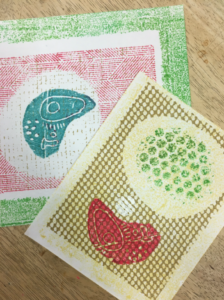
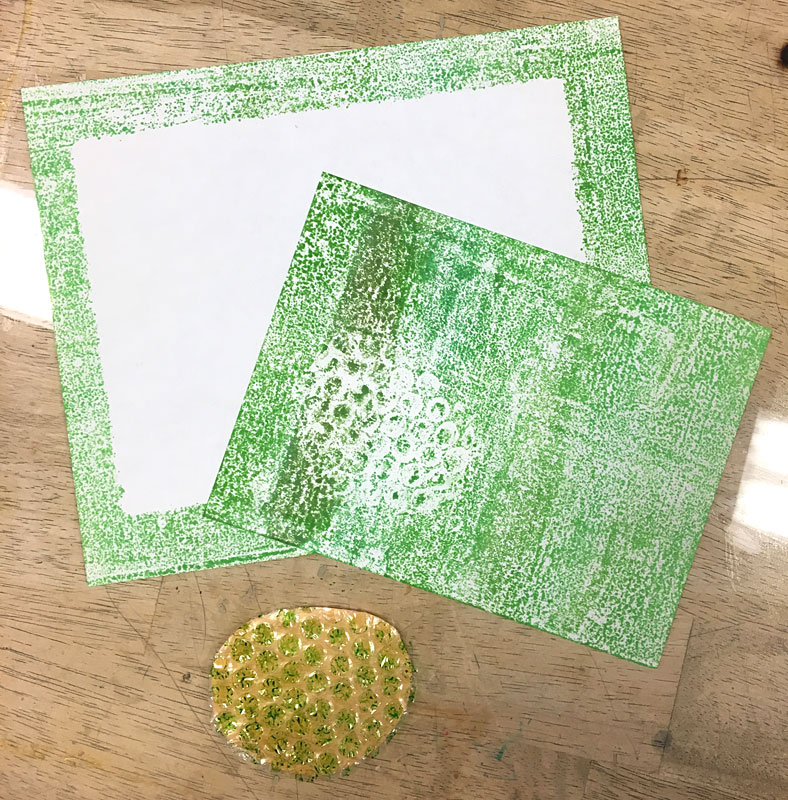
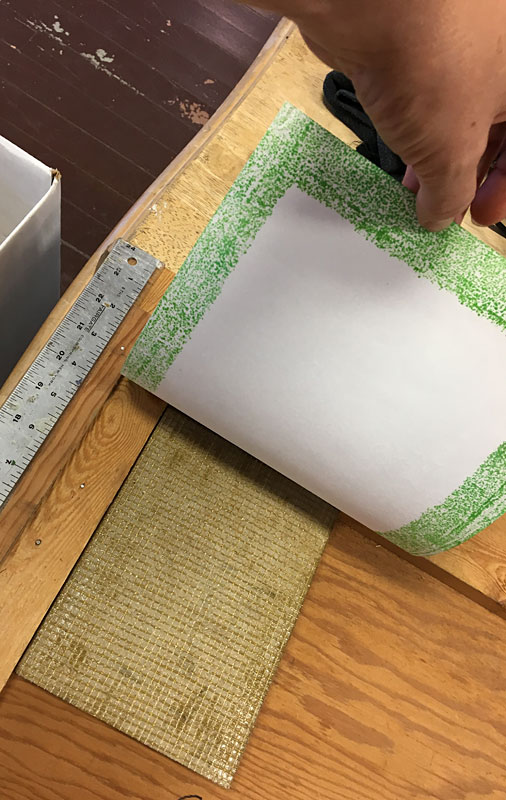
Take one of the 8 x 10 inch pieces of paper and place it face down over the back of the first piece of paper. Put a piece of scrap paper over all and rub with the baren. Lift up your paper pieces. You should now have one small piece with a monoprinted background design on it and a larger piece with a white space in the middle of a monoprinted frame.

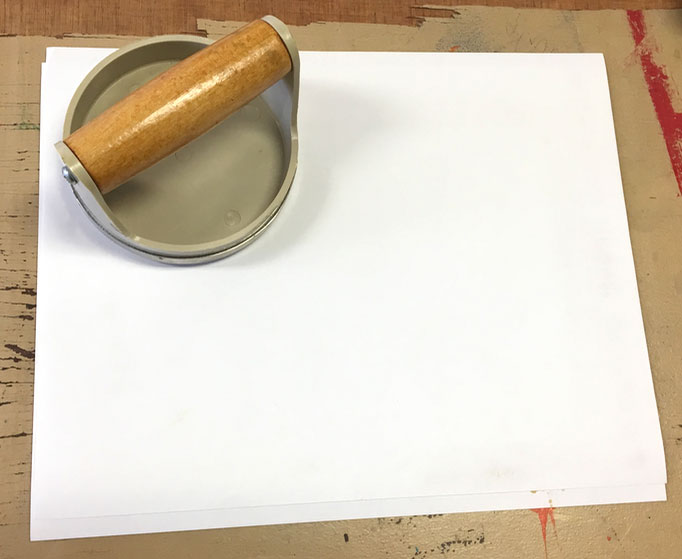
This picture shows a printmaking tool called a baren. It’s used to rub the back of the paper to help the ink transfer to the front of the paper evenly.

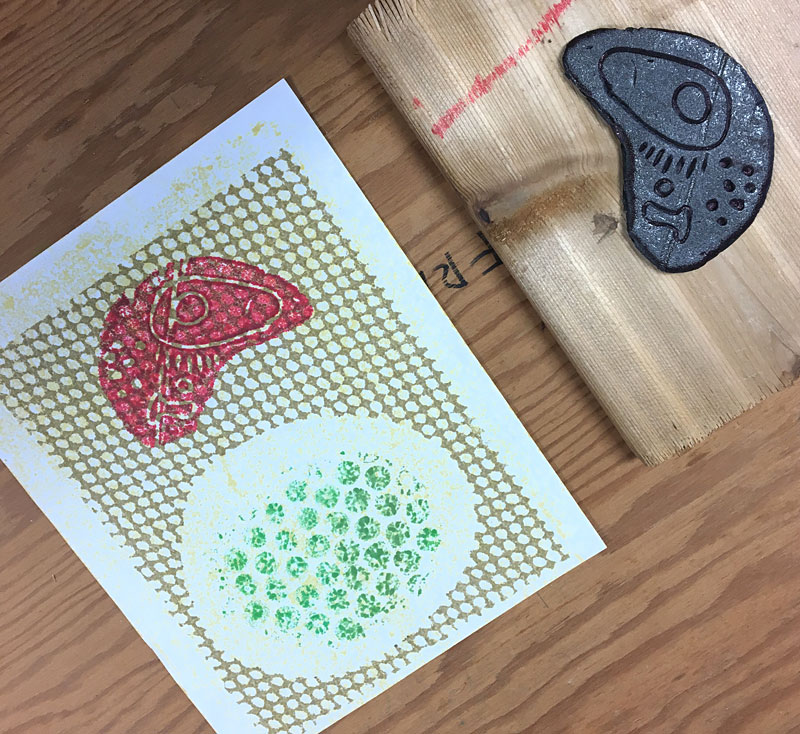
The texture of the bubble wrap has been transferred onto the background piece. This is just one way you can make marks in ink that’s been rolled out on a plate. You can draw into it with a rubber stylus, press rubber stamps into it and experiment with a myriad of found objects to see what kinds of marks they make in the ink. A monoprint is a one-off – you don’t have to worry about trying to duplicate it to make an edition.

Tip – you can also use pigment rubber stamping ink or block printing ink for printing. You can get finer details and markings with pigment stamping ink than with dye-based ink. Pigment ink will take longer to dry, however, perhaps several days unless you speed up the drying with a heat tool.

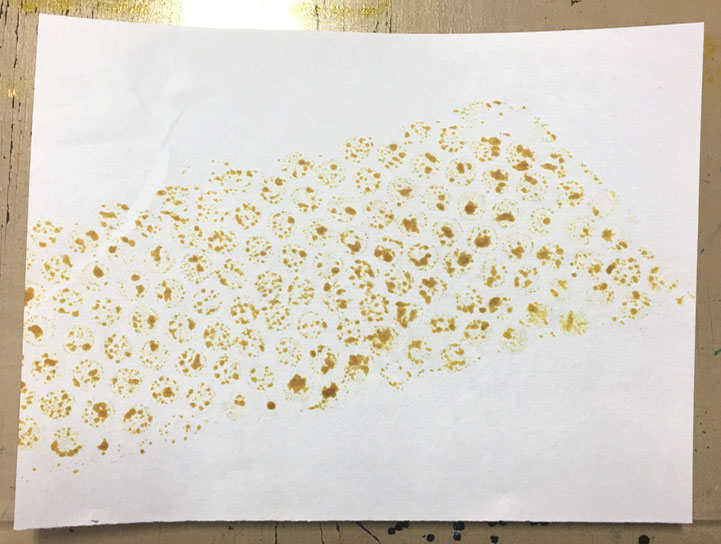
Take another blank piece of paper and place your inked up bubble wrap on it ink side down to the paper. Roll over the back of the bubble wrap piece with a brayer and lift up.

At this stage we have three pieces of paper with different areas printed. Add additional layers of colors and designs. Use increasingly darker colors for subsequent layers to add depth to your piece. To make your design more lively I recommend letting a little bit of white show through in one or more spots as you add layers.

Use a brayer to roll out a slightly darker color of your choice. Choose one of the four blocks of wood with a texture plate taped to the front. Roll some color onto one of the texture plates. To lift ink up, roll fast – to lay ink down, roll slow. Roll in different directions to help get an even application of ink over the whole design.

Tip – do test prints on scrap paper to get a feel for how much ink you need before doing a “good” print.

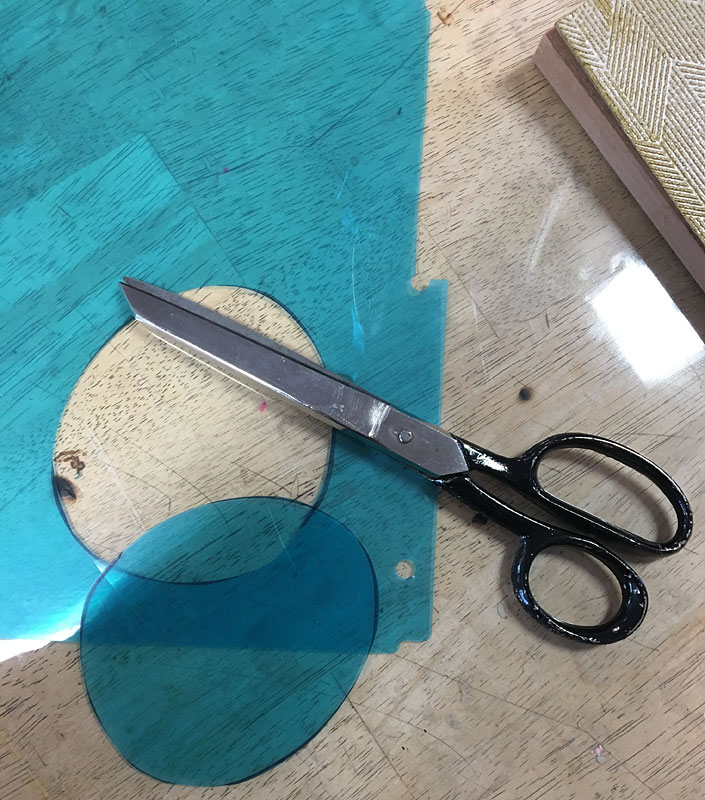
Cut out a shape of your choice from a piece of recycled plastic folder. Use this piece of plastic as a mask if you want to leave any areas unprinted. Slip the mask between printing block and paper when it’s time to print.

How can you print with an inked design mounted on a wood block? Here are some methods to try.

A. By “stamping” with the block – put a stack of old newspaper or scrap paper on your work surface so it has a little “give” – you’ll get a better print that way. Press your block straight down on the paper and apply as much pressure as you can without moving the block. Take care to apply pressure to the edges and center of the block. Lift straight up.

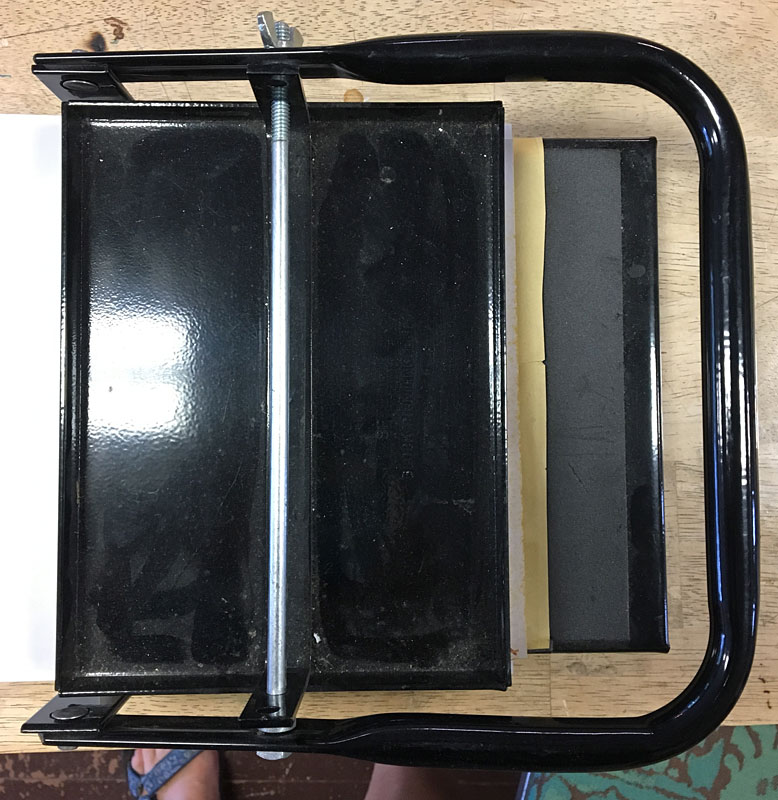
B. With a tabletop printing press – the model shown was purchased from an art supply company.

C. With a block printing frame – you can made one for yourself with wood and a big clipboard clip – the ruler built into my sample is optional. These frames are terrific for block print registration and keeping your print from moving while rubbing. Look online for plans if you want to build one. Rub the back of your print with a large spoon or a baren to transfer the ink to the paper. Take care to rub all parts and pay special attention to the middle or edges since those areas tend to get missed.

Another way of making a design from a recycled item is to take a piece of scrap foam from a cleaned food tray and cut it to a shape of your choice. Draw into the foam with a ball point pen, keeping in mind that whatever lines you draw will be a negative space that won’t print. Tape this shape to a wood block with double sided tape. Ink the shape and print with the method of your choice.

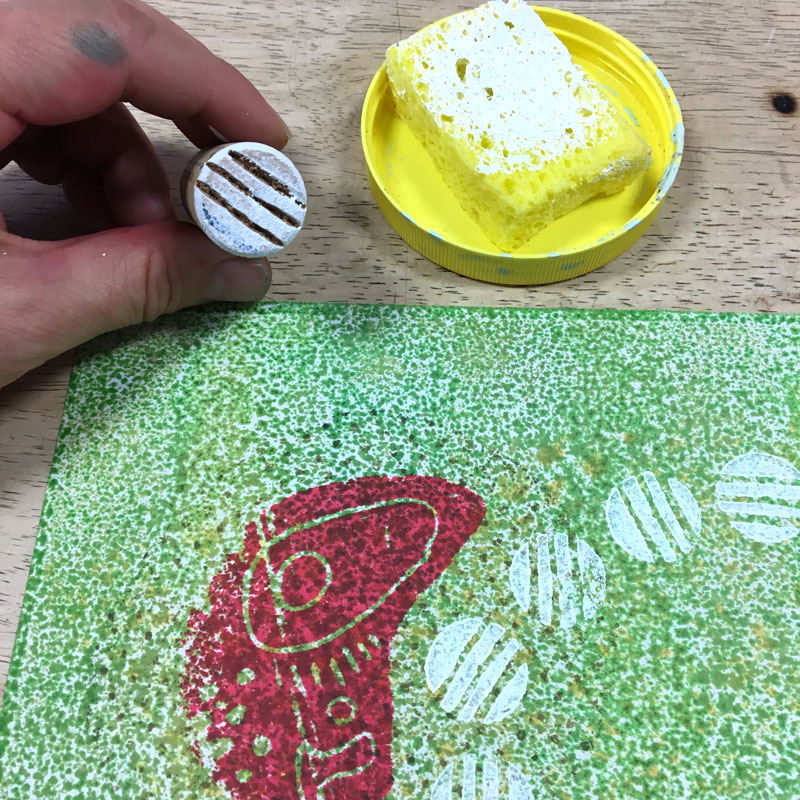
A very simple way of printing is to take a piece of cork and draw a simple design on it. Cut around it with a craft knife to make a stamp.

Stamp cutting safety tips:

  • Aim knife blade away from yourself while cutting
  • Use sharp blades to decrease chance of blade slipping

To print with a cork stamp, place a small, slightly damp sponge on a pie plate or in an old lid. Mix up a little acrylic paint of your choice and dab some on the sponge with a palette knife. Acrylic paint is usually fairly opaque unless it is diluted. Small stamps applied with opaque paint are a great way to add a finishing touch to a print made with translucent inks. Press your cork stamp into the sponge and to some test prints on scrap paper. Stamp your cork stamp on your prints.

Tip – Rubber erasers and rubber carving material are also good for making your own stamps. Read my tutorial for instructions – http://www.limegreennews.com/howcarv.html

For more printmaking tips, see my Pinterest board. It includes a link to building a block printing registration frame: https://www.pinterest.com/chasenfratz/printmaking/

Categories
DIY Sustainability Upcycling

Make Laundry Detergent From Soap Bar Scraps

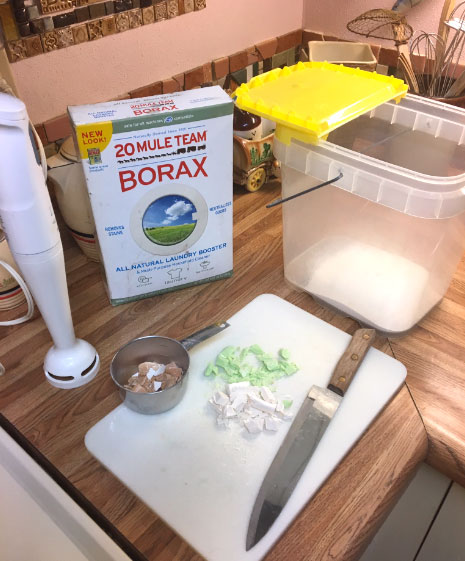
Make laundry soap from bar soap scrapsWhen a bar of soap gets worn down and is near the end of its usefulness, it’s considerably less appealing than when it was new. The scent has faded, it’s brittle or soggy – time to throw it out, right? Do you have some soap bars you don’t like? Do you have a collection of little motel soaps that you don’t know what to do with? You could throw these soaps out, but I prefer to save up my soap scraps and make them into laundry soap. It’s fun to do and probably uses supplies and equipment that you already have on hand or can obtain for little cost.

What You’ll Need
* = available at Schnarr’s
Small bucket with lid*
Stick blender
Knife*
Cutting board*
Borax*
Soap bar scraps
Measuring cups*

Instructions

  1. Put one cup dry Borax into the bucket.
  2. Cut up soaps and add 2 cups soap pieces to the bucket.
  3. Add 6 cups of water.
  4. Blend all well with the stick blender. If you have more soap pieces and room in the bucket, add more ingredients in the same proportions until your bucket is about 2/3 full. After blending well, let the mixture sit for awhile and see if the liquid thickens. If so add more water until it’s roughly the consistency of liquid laundry detergent.
  5. Use 1 cup of the new mixture per load of laundry.
Categories
Gardening Sustainability Upcycling

Do you have discarded woody plant material? Try making a Bonsai!

Do you have discarded woody plant material? Try making a Bonsai!

by Carolyn Hasenfratz

When I was in college studying art, I took printmaking and ceramics classes. Some of the finest printmaking and ceramics in the world come from Japan and our professors exposed me to many beautiful examples and concepts. I made sketches at the Japanese Garden and turned some of them into prints. Several of my friends from ceramics class and I went on a multi-year Japanese kick. We made tea bowls and sake sets and acquired a taste for the appropriate beverages. We learned the Raku firing method. We started attending the Japanese Festival at Missouri Botanical Garden every year and bought all of the Japanese-influenced objects d’art and books that we could afford on our student budgets.

We greatly admired Bonsai and made lots and lots of Bonsai planters, many of which we sold at our pottery sales. I kept several for myself to experiment with Bonsai growing. I killed four Bonsai trees in a row before giving up. A college student schedule and lifestyle just doesn’t lend itself very well to Bonsai care I guess – my cacti collection had a much better survival rate! I still like making ceramic planters that would work for Bonsai – it’s a shape I just kind of naturally go to while wheel throwing though in recent years if I didn’t sell the planters I mainly just used them for dish garden type plantings.

Bonsai are not a particular species of tree – they are plants, usually woody, that are trained to grow at diminutive sizes but in the proportions of mature plants to create the illusion of a natural scene. Woody plants can be trained by wire and selective pruning to assume the shape of a craggy, aged and venerable tree, a popular style influenced by Japan’s natural mountainous terrain. This training takes a long time – decades, perhaps even longer than a human lifetime to achieve the desired effect. Any gardener has to learn patience but Bonsai gardening is a particularly good example of how Japanese culture promotes the long view of things. In my ceramics class we learned about how to age clay for better handling. We were taught how to speed up the process. To emphasize the benefits of aging clay we were taught about how Japanese potters made clay for the next generation while making use of clay that the precious generation had made for them. That’s an impressive attitude. If I make a Bonsai I’m pleased at the thought that future generations might enjoy it but I also want to get some enjoyment out of it in my own lifetime! One way to shorten the amount of training time required is to choose plant stock that features unusually thickened or distorted trunks or branches.

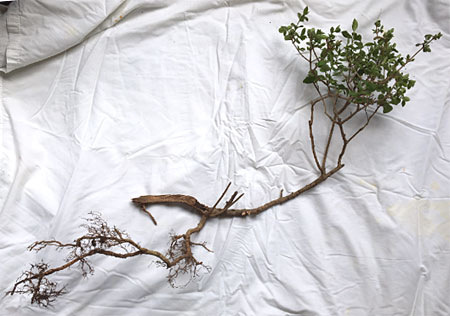
Sometimes plants that don’t look right for their intended purpose can be suitable for Bonsai. For example, this Privet bush (Ligustrum vulgare ‘Cheyenne’) was removed and replaced because it didn’t look right in the hedge where it had been growing. Back in the day I had read my Bonsai book so many times that I still remember some of the criteria for selecting good Bonsai stock.

Privet bush with bonsai potential

This plant looks bad in a hedge but in my opinion it would make a great Bonsai!

When I saw this bush I thought of three things:

  • Craggy, twisted shape – check
  • Woody plant – check
  • Small leaves – check

This plant has Bonsai potential! It was going to be discarded, so it’s not a big loss if I kill it. I’m going to try not to though!

Try making a Bonsai

My Bonsai experiment

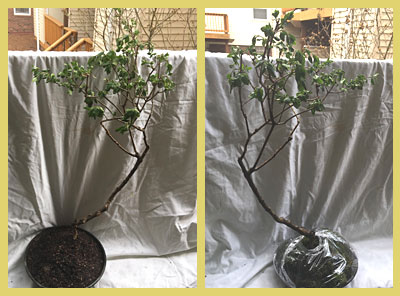
Here are the results of my attempting to turn a twisted looking, stunted privet bush into a Bonsai. I looked through my Bonsai book to decide what style of Bonsai was best suited to my plant material. There may be as many Bonsai styles as there are varieties of Koi, with corresponding Japanese names that I don’t know. I decided that since my bush had a long, prominent root system, the rock-clasping style would be appropriate. I read several articles online about rock-clasping Bonsai, and there seemed to be as many different ways of doing it as there were articles. In the rock-clasping style, roots are trained to grow exposed over a rock and become a major focus of the planting. One recommendation that came up more than once was to pack sand or some other substrate around both root and rock and put plastic wrap around the base, then remove the plastic and the sand from around the root and rock in a year or two to give it a chance to develop the thickness that will make the tree look old.

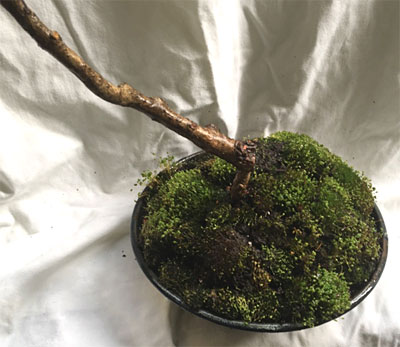
Since I also had some moss that I had collected from a site where it was being eradicated, I decided to use soil over my root and rock and overplant with moss. Both moss and Bonsai like frequent watering. Then after a couple of years I’ll remove the moss and replant it elsewhere and see how my root is doing under the soil.

I studied the shape of my bush and held it up to different rocks to see which would complement the shape of the bush. I refined the shape by pruning and held the bush roots on the rock with strips of old cut up fabric – these should rot away in time after the roots have grown enough to hold the bush in place.

Each article I read had a different recommendation for a soil mixture so I just decided to look at what I had on hand and do my best to make a well-draining and nutritious mixture. I used 1/3 potting soil, 1/3 earthworm castings, and 1/3 Flourite, a type of fired clay ground into small chips that is meant to give plants better drainage and supply them with iron. It’s usually used with aquatic plants. I don’t know if it’s common to use it for terrestrial plants but I didn’t have any sand or Turface on hand (a clay product that is great for improving soil drainage) so I decided to try it.

After I packed the soil around the rock and roots, I put the moss on top and wrapped it in plastic for a week, similar to what is done to keep new cuttings moist. If all goes well, I’ll see the rock again in a couple of years when I check to see what my roots look like!

Moss around base of Bonsai

Categories
Candles DIY Lighting Sustainability Upcycling

Make Old Wax Candles Into New Candles

Make Old Wax Candles Into New Candles

by Carolyn Hasenfratz

Votive candles made from scraps of old candles

Supplies
Candle scraps and stubs – such as taper candles, partially filled votive candles, old pillar candles
Gulf Wax*
Candle holders – empty glass candle holders, Mason jars*
Votive candle wicks
Roll of wicking string
Metal washers* – if using wicking string
Essential oils – optional
Candle coloring dyes – optional

Tools
Hot plate* or stove top
Shallow pan that can take heat from burner
Cutting board*
Thin non-serrated sturdy knife – best if somewhat sharp but not extremely so for safety
Assorted sizes of foil pie plates
Pot holders and oven mitts
Pyrex glass measuring cups*
Jar lifter*
Pliers*
Clothes pins*
Metal spoons
Fire extinguisher*
Metal lid that fits over your melting setup
Trivets and hot pot pads
Thermometer*

* indicates available at Schnarr’s

Before beginning, please read and heed these wax melting safety precautions:

1. Do not allow pets or young children around the wax melting area. If you choose to allow older children to participate, supervise them closely.

2. Keep a fire extinguisher and a metal lid that will fit over your melting setup nearby. In the unlikely event that a wax fire occurs, you can try to smother the fire with the lid and if that doesn’t work, use the fire extinguisher. Make sure you have read the instructions for an oil or grease fire beforehand because a wax fire is similar. You should not use water on a wax fire.

3. Do not leave the melting wax unattended. Do not allow the water pan to go dry.

4. Replace the water in the boiling pan when it gets lower. Pyrex glass measuring cups will withstand the infusion of cooler water without cracking but empty glass holders of unknown origin may not be able to take rapid temperature changes. To prevent cracking, remove non-heat resistant glass containers from the boiling pan when adding new cooler water.

5. A jar lifter is a good tool for lifting jars from the boiling pan safely, but some containers may be too small for the jar lifter tool. I’ve made do with pliers in a pinch. If you choose to pick up a glass container by the edge with pliers, be aware that thin glass containers may crack under the stress. This has not happened to me, but be ready just in case by holding the container away from you so you don’t get splashed with hot wax.

6. Observe normal cooking precautions. Keep long hair tied up and avoid loose clothing that could catch fire or things that may catch on pot handles and the like. If using an extension cord for a hot plate, tape it down and deal with any other tripping hazards you might find. Wax cools off rapidly but until it does it clings and can cause serious burns.

7. Protect your work surface from hot containers with trivets and hot pot pads.

8. Monitor the wax temperature with a thermometer and make sure the wax does not exceed 250 degrees F.

9. Wear old clothes because wax is difficult to get out of fabrics.

10. Do not leave burning candles unattended.

Ok, now that I’ve scared the heck out of you, it’s time to have some fun!

First I’ll demonstrate a couple of ways to refill votive candle holders.

A really easy way to refill a votive candle holder is to take an old taper candle or long tall candle and cut it into a section short enough to fit the candle holder. If there are any gaps between the candle and the sides of the container, melt some wax and pour it in between to fill it in. I don’t know what will happen if you attempt to mix soy wax with paraffin wax – the experiments in this article were all done with paraffin wax.

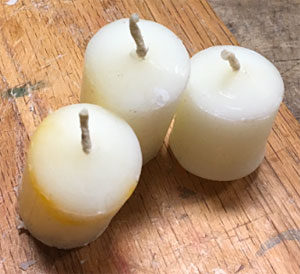
Tops of longer candles trimmed down to the height of a votive candle holder

This picture shows three tops of long tall pillar candles that have been cut down to votive candle height. After trimming these stubs, I cut up some chunks of Gulf Wax for melting. I was making these votives for a support group I belong to that has a member with allergies, so I chose unscented stubs and avoided adding fragrances or color to the melted portion.

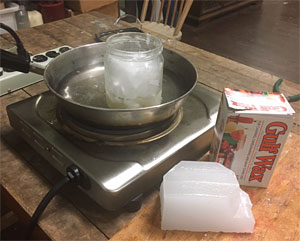
Here is one example of a double boiler setup at Perennial, a community studio where I do some of my work. Placing your melting container in water rather than directly on a burner decreases the risk of fire, produces more even heat and prevents scorching of the wax. I brought a pan of water to the simmering point with the glass jar of wax pieces in it. As you know from reading the safety precautions above, there is some risk in using a random jar and not a Pyrex measuring cup for this, but most of the time it will work if you don’t shock the glass with sudden temperature changes. I forgot to bring my Pyrex with me on this occasion so I made do with what was there.

Melting paraffin wax using the double-boiler method

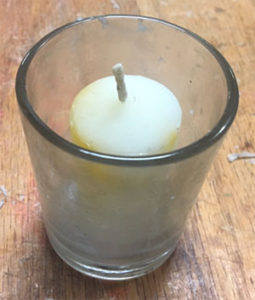
When my wax was melted, I dipped the bottom end of the candle stub in wax and pressed it into the empty votive candle holder. This held the stub in place long enough to pour wax around it. To pour, I picked up the glass jar with a jar lifter tool, being careful to hold it away from me in case I dropped it or the glass broke.


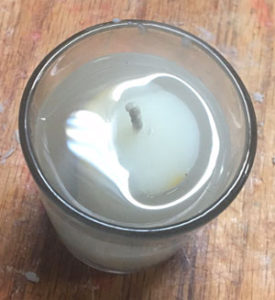
Here is a candle with some fresh new Gulf wax poured around it. I poured just up to where the wick emerges from the candle stub.


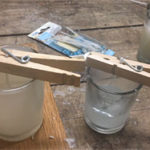
If you don’t have candle stubs available, you can refill votive candles with melted wax poured around purchased votive candle wicks, available at craft stores. Melt the wax as before and hold the wicks in place with clothespins as shown in the picture. Leave the clothespins in place until the wax is solid so that your wicks don’t migrate from the center. Your candles will burn better and more safely if the wick is centered.

I came back to Perennial later to make more candles, this time intending to experiment with fragrances and colors. I brought my Dad with me – he’s the one who had turned me on to candle burning when I was very young. We used to sit around the dinner table and watch pillar candles burn after eating. Dad used to let me put metallic crayons in them so I could watch the little mica flakes swirl around the base of the flame. Now I know that crayons are not good for candles because they clog the wick, but wow that was fun!

Dad and I brought to the workshop all the candle stubs and partially filled glass candle holders that we had lying around from our homes. Combined with a new package of Gulf Wax that I bought and the donated old candles and wax chunks available at Perennial, we had enough for hours of fun.

Dad had some tall glass candle holders he wanted to refill. To fill each candle, he tied a piece of wick to a washer to weigh it down and suspended the top of the wick over the mouth of the candle holder with a clothespin. He filled his candles with many layers of different colors in a sort of ombre effect. While he worked on that I experimented with colored chunks around taper candle pieces.

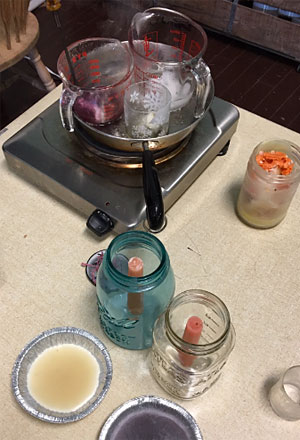
As you can see from the photo, I remembered to bring my Pyrex glass measuring cups this time. If you set the cups so that the handles are toward the outside edge of your pan, they may be cool enough to pick up with your bare hand but if they are not use a pot holder or oven mitt.

My first step was to get the wax out of a bunch of half melted container candles in glass. I set the partly filled containers in the double boiler before turning up the heat to avoid shocking the glass. When the wax was melted, I pulled out the old candle wick and metal pieces with pliers and then poured the wax into small pie plates. I kept the wax sorted by color and fragrance so that the colors and fragrances in my new candles could be coordinated and not clash too much. Perennial has a refrigerator so I put the wax into the freezer to speed up hardening so I could cut it later.

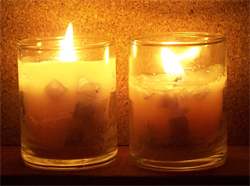
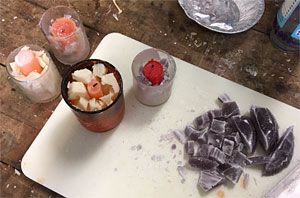
I had a few small glass container candles to fill so I repeated my technique of using sections of tapers cut down to the container height. Then I filled in around them with cut up wax chunks in preparation for filling in the spaces with a matrix of a contrasting wax color. The creamy white chunks shown had a fragrance already in them that was tobacco and vanilla. To my freshly poured wax portion I added Sweetgrass and Woodsmoke fragrances that I thought would blend well.

The purple chunks are from lavender scented candles, so to the matrix wax I added my own blend of relaxing essential oils that already includes lavender. For some of my favorite essential oil blends, see this web page of mine that contains a lot of information about my experiments with essential and fragrance oils.

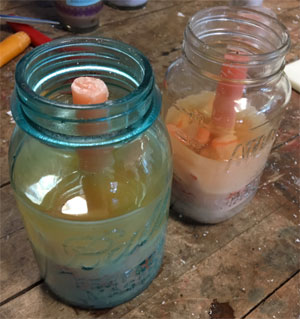
I decided to also make a couple of large candles out of old Mason jars to use as insect repelling candles outdoors. I dipped two taper candles cut to the right length in melted wax then pressed them into the bottoms of the Mason jars. I poured a little melted wax around the tapers for extra hold.

I un-molded more of my colored melted wax pieces and cut them into chunks. Then I distributed them between the two Mason jar candles around the central taper. I melted more wax and poured it to fill in between the chunks. Right before pouring, I added an insect-repelling essential oil blend to the off white wax to make these into insect repelling candles for the patio or the summer camp site. As these candles burn down, the colored chunks will create a pleasing decorative effect. I didn’t add any additional dyes to the wax for the projects shown, I just used what colors of scrap wax were on hand, but if you want to add colors use candle wax dye colors purchased from a craft store.

To clean out your containers, pour the extra wax out into one of your pie plates, then wipe out with a rag or paper towel. Discard rag or paper towel. Clean containers with alcohol if a more thorough cleaning is needed.


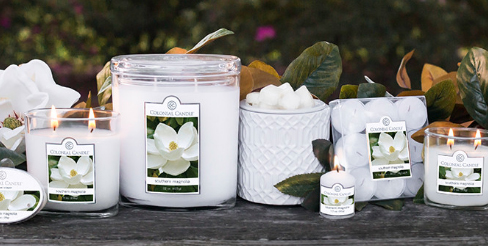
If you'd rather buy ready-made candles, Colonial Candles are sold at Schnarr's Hardware in Webster Groves!
If you’d rather buy ready-made candles, Colonial Candles are sold at Schnarr’s Hardware in Webster Groves!
Categories
DIY Upcycling

Skeleton Key Necklace

Skeleton Key Necklace

by Carolyn Hasenfratz

Antique key necklaceThis necklace project is great for anyone who likes the vintage or upcycled look in jewelry.

Tools and materials
* indicates items that are available at Schnarr’s
Skeleton key*
Vinegar* (optional)
Salt (optional)
Can of clear sealing spray* (could be acrylic or polyurethane)
Round nose pliers
Chain nose pliers (small long nose*, needle nose* or flat nose* pliers would also work)
Side cutters (When they’re sold as jewelry tools, these are called side cutters but the diagonal cut pliers* found at Schnarr’s are very similar. You can also buy long nose pliers that include a cutter. These aren’t as good for close in cutting as the side or diagonal cut pliers, but for this project they will probably be adequate. If you only want to buy one tool for this project and don’t care if your loops are perfectly round, you can get by with just the long nose pliers if they include a cutter. For perfectly round loops you will need round nose pliers in addition.)
Split ring pliers
An assortment of crystal, pearl and glass beads
Copper or gold colored seed beads
Headpins (6), eyepins (8), split rings (4) and large jump rings (4) in metal color or colors of your choice
1mm beading cord
Scissors*
Glue*
Crimping cord ends
Clasp
If you like, you can substitute metal craft chain* for the beading cord and then you would not need the cord ends.

Instructions

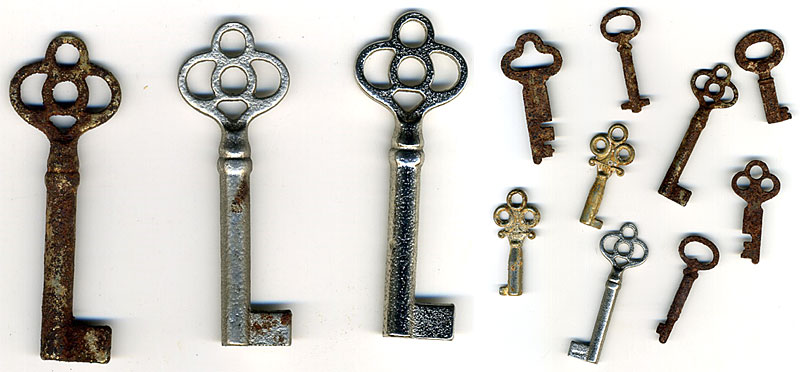
1. First select a skeleton key to be the focal point of your necklace. If you’re lucky you might find an antique key that looks just right. Vintage metal parts are in such demand that craft retailers sell a variety of replicas. You can also buy a brand new skeleton key from Schnarr’s. Decide if you want to simulate an antique patina. To artificially age your key soak it in a cup or so of vinegar with a teaspoon of salt added overnight. Let dry and rinse well with water. Let key dry thoroughly and spray with a clear coating.

vintage and new keys with varying degrees of patina
On the left are three new skeleton keys from Schnarr’s. The rightmost key is new, the other two were left in the antiquing solution for varying amounts of time. The right picture is of a variety of keys, mostly genuinely older ones that I soaked in the vinegar and salt mixture. Mixing new and old keys together can help make a better patina on the new keys. If you don’t have any old keys to mix with the new, try soaking them with bits of rusty metal scraps.

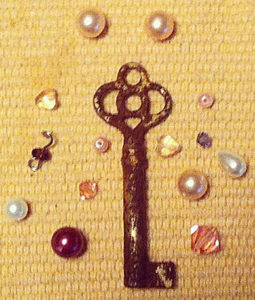
2. Put your key down on your work surface and select small beads that complement your key. Arrange beads around it to see if you like how they look and how you would like them to hang. You can also add charms if you have any.

Arrange beads around the key

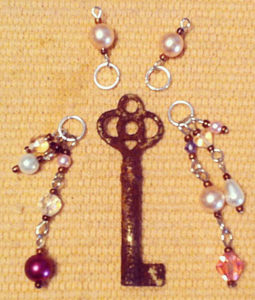
3. Make dangles for each side of the key by stringing beads onto eyepins and headpins. Make some of your dangles longer by connecting headpin sections to eyepin sections. Use gold or copper colored seed beads as accents and spacers for the pearl, crystal and glass beads.

Thread beads onto headpins and eyepins and attach to key with jump rings.
Thread beads onto headpins and eyepins and attach to key with jump rings

4. Attach dangles to the lower openings of the key on either side.

5. Select a large jump ring and attach it to the top loop of your key. Run a piece of chain through the jump ring to suspend the key as a pendant on the chain. Variation: if using beading cord, thread two additional pearl beads onto eyepins and use them as a transition from the jump rings at the top of the key to the beading cord.

6. Attach clasp to the chain ends with jump rings. If using beading cord, attach split rings to the pearl segments and attach a doubled piece of 1 mm cord to the split ring with a lark’s head knot.

7. If using beading cord, attach the clasp by crimping the cord ends with cord end findings, using a dot of glue to help hold them in place. Attach a split ring to each end then a clasp to one end. You’re done!

If you need a source for the jewelry supplies, try my online store or a local craft supply retailer.

See my Pinterest site and past lesson plans for more jewelry design ideas and other craft projects.
www.pinterest.com/chasenfratz/
www.limegreennews.com/lessons.html

We also have a lot of great projects on the Schnarr’s Pinterest site!

Categories
DIY Gardening Home Decor Upcycling Ways With Wood

Build a Mosaic Plant Stand

Build a Mosaic Plant Stand

by Carolyn Hasenfratz

Make a Mosaic Plant Stand

In this article I’ll show you how to make a stand to show off a special container plant. Raising a planter off of its surface can really enhance the appearance of a single specimen or help you create an attractive container plant grouping by providing elevation to some containers. Such a stand may also help protect the surface underneath by allowing air circulation under the pot so the surface can dry out between waterings. This stand is designed for both indoor and outdoor use. It is designed to let water from the plants run off, rather than catching it. This stand can also be used as a sturdy trivet indoors or outdoors.

Tools and Supplies
* indicates items that are available at Schnarr’s
8 x 8″ x 1/2″ board*
Lattice wood strips 1 1/4″ wide*
Saw*
Miter saw*
Sandpaper*
Dust mask*
Pencil or pen
Ruler*
Hot glue gun*
Wood hot glue sticks
Drill*
Tiny drill bit*
Nails*
Hammer*
Wooden ball knobs or drawer pulls with 3/16″ holes to use as feet (Wood drawer pulls are available at Schnarr’s Webster Groves store)
Wood glue*
3/16″ drill bit*
3/16″ dowel rod*
An assortment of ceramic tiles and/or glass pieces that are about 1/4″ thick
Palette knife or putty knife*
Ceramic tile cement*
Old plastic lid
Tile grout*
Water container*
Mixing container for grout (can be an old food container)
Rags*
Disposable gloves*
Bucket* of water for cleanup
Tile and grout sealer*

Instructions

1. Cut an 8 x 8″ square out of 1/2″ thick plywood.

2. Cut four 8 1/4″ lengths out of a piece of 1 1/4″ wide lattice wood. Miter the corners at a 45 degree angle as you cut.

3. Put on dust mask and sand the rough edges off of your wood pieces.

4. On the inside edge of each mitered piece draw a line 1/4″ from the top.

Mitered wood strip with drawn line

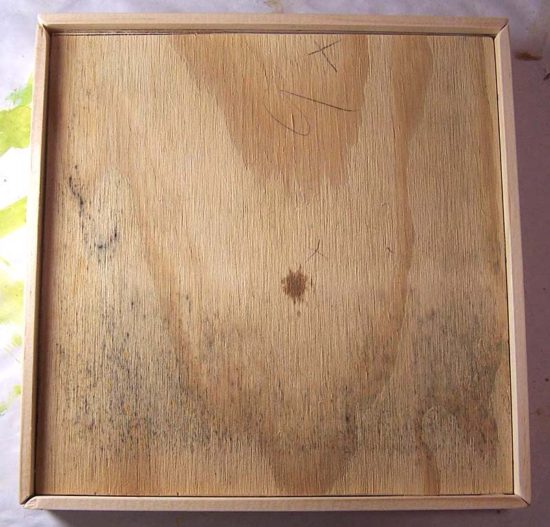
5. Glue mitered pieces to the edges of the 8 x 8″ block using hot glue as the adhesive and your drawn line as a guide to help line them up. You should end up with a 1/4″ lip all the way around, creating a tray that will hold your tile pieces.

1/4 inch lip around edge

6. As a reinforcement to the glue, drill a couple of small pilot holes on each side of the tray and hammer nails in for a strong hold.

7. Choose four wooden ball knobs or wooden drawer pulls with 3/16″ holes. Place them in the corners of the bottom of your tray. Draw around the base of each with pencil to indicate where their footprint will be. Set knobs aside.

8. Switch to a 3/16″ drill bit and drill a hole in the center of each drawn circle. Try not to go all the way through the wood but if you accidentally do it’s no big problem.

9. Cut short segments (about 1″) from a 3/16″ in diameter piece of wooden dowel rod to make pegs. Insert pegs into holes in wood and thread knobs onto pegs to make sure they are not too long and that there is no gap between the knob and the bottom of the tray. When satisfied, remove, dab wood glue onto each end of each peg, and re-insert into holes. Place knobs over pegs and press in place. Let wood glue dry. I left the wood unpainted in my sample but if you want to you can paint or stain the wood and give a waterproof clear coating like spar varnish.

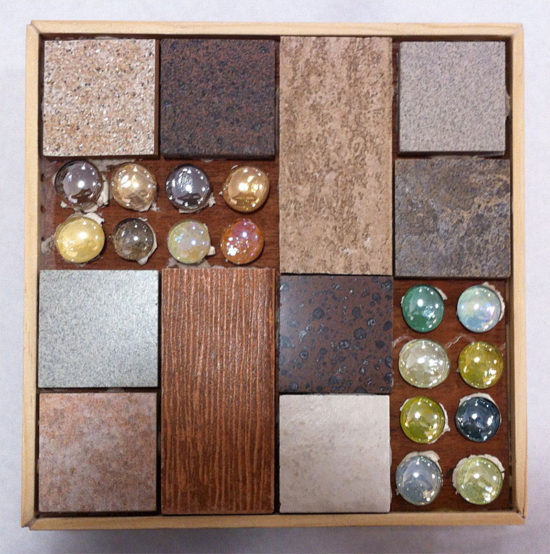
10. Get out your tiles and arrange in the tray to make an arrangement that is pleasing to you. For my sample I used tiles I salvaged from Leftovers, Etc. and some translucent glass blobs which were backed with colored paper. Try to leave a litte bit of space between each piece.

11. Once you have decided on an arrangement, scoop a small quantity of ceramic tile cement out of the container and place on an old plastic lid. Keep container closed so the rest of your cement doesn’t dry out. Use palette knife or putty knife to apply cement to the back of each pice and press in place. If any tile pieces are thinner than the others, you can put some extra cement on the back to build up the height. Let cement dry for the time period indicated on the container.

Tiles glued down and before grouting

12. When cement is dry you’re ready to apply grout. Grouting is very messy – I recommend you wear old clothes and protect your work surface and floor. Have plenty of clean rags on hand and a small bucket of water for cleanup. Don’t be surprised if you need a bath when you’re done!

13. Put some grout in a small plastic tray, such as one left over from a microwave dinner. Add water until it’s about the consistency of soft cream cheese – a little at a time to make sure you don’t add too much. Stir it with your putty knife as you add the water. Try to only mix up small amounts at a time so it does not start to set up before you’ve applied it.

14. Put on your disposable gloves, and use a rag to pick up a portion of tile cement. Smear it around to fill the cracks between tiles. The rags will help protect your hands from sharp pieces if there are any. The thin disposable gloves will protect your hands from being irritated, dried out or discolored by the grout, but alone they will not protect you from cuts.

After the tray is grouted, go back over it with a succession of fresh rags to remove the grout from the surface of the tiles. Dampen the rag with a little water toward the end to get them really cleaned off if needed. Be careful not to dispose of any grout in your sink – it could clog the drain. Dispose of any rags that are really soaked with grout – I put mine in the compost. If some are only slightly dirty, you may be able to re-use them by rinsing them in a bucket of water. If you do that, dump the dirty water out in the yard, don’t put it down the drain.

15. Let the grout dry, then apply tile and grout sealer. You’re done!

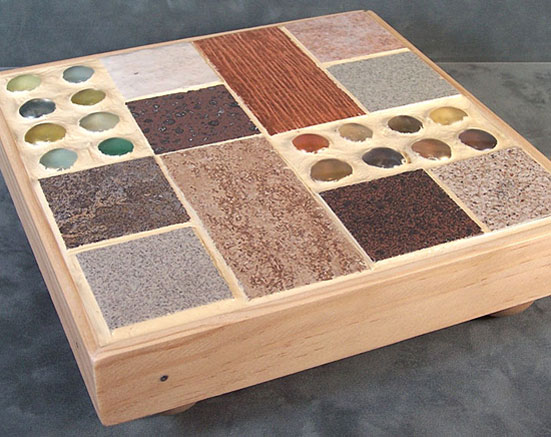
Finished mosaic plant stand

Categories
DIY Home Decor Sustainability Upcycling Ways With Wood

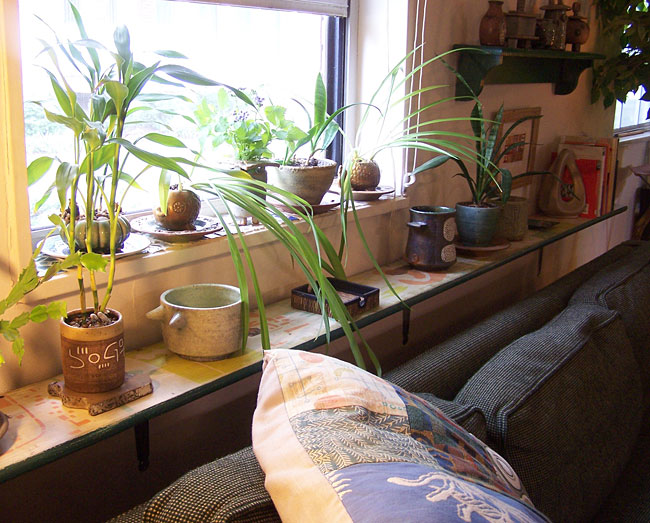
Stencil a Sofa Shelf Made From Distressed Wood

Stencil a Sofa Shelf Made From Distressed Wood

by Carolyn Hasenfratz

Sofa shelf made from distressed wood

This project was made from the same stash of distressed wood that I used for the previous project Stencil a Wood Garden Sign. I kept aside a couple of intact large planks so I could make some interesting shelving. The wood was bare on one side and had partially peeling white paint over green on the other side. I decided to use the white side as a ground for some stencils I cut that were inspired by a mid-century modern building I saw on vacation last summer.

Tools and Supplies
* indicates items that are available at Schnarr’s
Distressed wood plank the length of your sofa
Sandpaper*
Dust mask*
Drop cloth for work surface*
Water based paint* for large areas
Acrylic craft paints for stenciling
Decorative stencils
Water based clear satin wood varnish*
Rags*
Paintbrush*
Assorted size old food containers for mixing paint and varnish
Sponges*
Old food container lids to use as palette while stenciling
Masking tape or painters tape*
Shelf brackets*
Screws*

Instructions

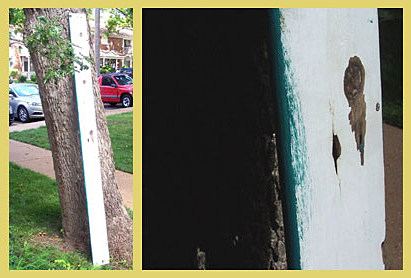
1. Put on a dust mask and sand your wood plank to remove rough edges and peeling paint. It’s always a good idea to wear a dust mask to keep from breathing small particles but I think it is even more important when working with old salvaged wood. You don’t know what that wood was treated with, what is in the old paint and it could be moldy as well. After sanding, wipe off the dust with a damp rag.

2. My wood plank already had a satisfactory ground color, white, on what would become the top surface. If your plank does not already have a ground color that you like, you can apply one. House or wall paint is a good choice. One technique that is really effective with the distressed look is to paint a contrasting color under the ground color. Some random sanding here and there later to expose the different layers of paint will simulate the effect of an old piece of wood that has been painted multiple times.

3. Apply a contrasting color to the sides and bottom of the board. As you can see, when you paint surfaces where two colors come together at a corner, it’s easy to slop a little paint over where you don’t want it. One reason that I love the distressed look so much is that when you sand off paint to conceal your mistakes, it looks like part of the design. If you are trying to paint precise corners or lines they don’t look good unless they are perfect, but with a distressed effect you can be a little sloppy!

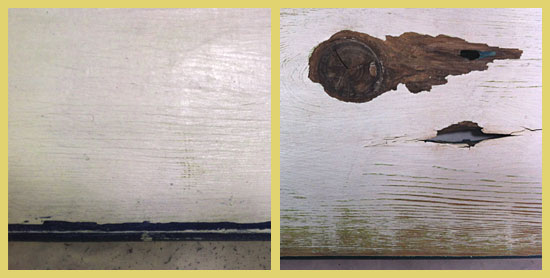
My distressed board with closeup of paint job

4. Next put your dust mask on again and sand the corners and edges of your board to expose the wood in those places. Then check to see if any paint is beyond the corner where it is supposed to be, such my example below on the left.

Sanding in process

Sand away any paint that is in the wrong place, such as the excess paint that I removed from the top of the board. As I sanded the excess paint off, I exposed some of the wood grain on the front of the board and some of the green paint that is under the white paint. If you are using a really beat up piece of wood like I did in my sample, you can make some artistic decisions about sanding other areas. If there was a rough spot that I found pleasing, such as wood grain, I sanded such spots to enhance the texture. If there were spots that were not pleasing, such as dirty spots or flaking paint, I sanded to remove those unwanted areas of paint.

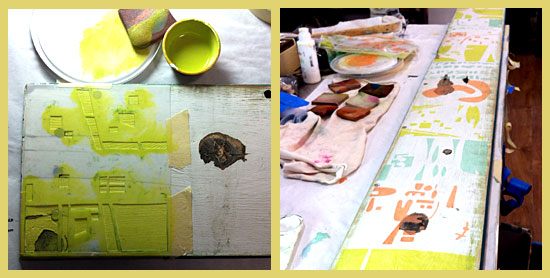
5. Decide what design you want to stencil on the top side of your shelf. I designed stencils specifically for this project but I have and will use them in lots of other projects as well. If you would like detailed information on how to cut your own stencils, see my article Fun With Stencils.

6. Apply craft paint through your chosen stencils in the colors of your choice. If you are new to stenciling on wood, please see my article Stencil a Wood Garden Sign for detailed instructions.

Stenciling in process

7. When stenciled paint is dry, to further enhance the distressed look mix up a paint/varnish/water mixture. Here is how – in a small container, mix some paint until you get a shade of dark brown that you like. In another larger container, mix a half and half solution of water and satin finish water based wood varnish. Gradually mix in some of the brown paint until you get a stain that you like – test by brushing on an inconspicuous spot. It should be dark enough to tone down your design a little bit and give it a weathered look, but not so dark that it obscures it. When the mix is right, stain/varnish your whole board and let dry.

8. Attach brackets of your choice to the wall behind your sofa, and set shelf in place. You’re done!

Categories
Backyard Wildlife DIY Gardening Sustainability Upcycling Ways With Wood

Make a Pollinator House – Part 2

Make a Pollinator House – Part 2

by Carolyn Hasenfratz

In my previous article Making a Pollinator House – Part 1 I explained why you might want to build a home for native bees and other beneficial insects for your garden. I also provided an example of a quick way to build a shelter out of cinder blocks, wood scraps and dried plant material. I promised to write up plans for a more attractive pollinator house. Here are instructions for building two different designs to enhance your garden’s decor as well as it’s productivity and ecological health.

Tools and Supplies
* indicates items that are available at Schnarr’s
Tracing paper
Pencil
Ruler*
Hot glue gun*
Wood hot glue sticks
1″ x 6″ x 8′ multipurpose board*
2″ x 4″ x 8′ board*
Saw*
Sandpaper*
Dust mask*
Acrylic craft paint
Paint brushes*
Water container*
Heat tool for speeding up drying (optional)
Painters tape or masking tape*
Decorative stencils
Sponges*
Drill*
Tiny drill bit*
Nails*
Window screen*
Hammer*
Wood glue*
Clear matte finish varnish*
Hardware cloth or chicken wire (optional)*

For the additional second design with the pediment, you’ll also need:
Assorted sizes of distressed wood pieces
Decorative brass box corner*
Miter saw*
3/16″ drill bit*
3/16″ dowel rod*
Wooden ball knobs or drawer pulls* with 3/16″ holes to use as feet
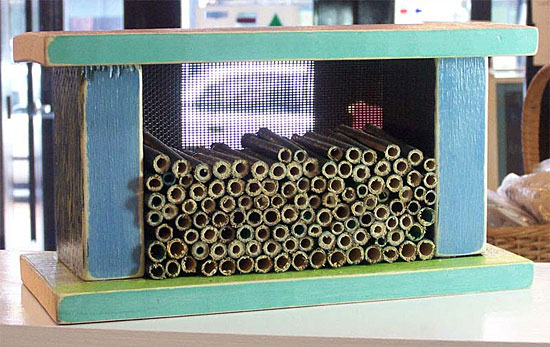
Mid-Century Modern style pollinator house

Instructions for Style #1 – “Mid-Century Modern” Pollinator House

1. Download the PDF document “Pollinator House Assembly Diagram”. It is sized to print out on a legal-sized piece of paper. Recreate the diagram in scale on a piece of tracing paper with pencil.

2. From the 1″ x 6″ x 8′ board, cut two 12″ x 5.5″ pieces(although the board is called 1″ x 6″ x 8′ it’s probably closer to 5.5″ so you might only have to cut the board into 12″ lengths).

3. From your 2″ x 4″ x 8′ (probably really 3.5″) board cut two 5″ segments.

4. Put on a dust mask and sand your wood pieces until smooth.
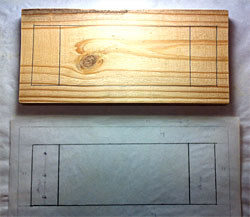
copy diagram onto wood
5. Mark each of your 12″ x 5.5″ pieces with the rectangles shown in the diagram. These will become the inner top and inner bottom of your house.
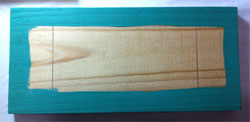

paint around edges
6. Paint a color of your choice in the border around the inner rectangle on each piece. For this step you don’t have to worry about painting precisely in the lines. Let paint dry.


7. Mark off around the middle rectangle with masking or painter’s tape on both pieces and paint black. When paint is dry, remove tape.

paint middle of boards black


8. Paint what will be the insides of your 5″ high supports black. Paint all other surfaces of your wood pieces assorted colors of your choice.
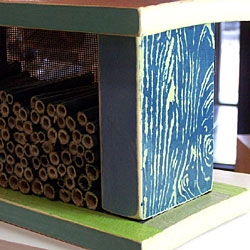
decorative stenciling
9. Decorate the top of your house and the sides of the supports with decorative stencils. I did not decorate the board edges with stenciling in my sample but you can if you want to. If you are new to stenciling on wood, see this article for tips –
Stencil a Wood Garden Sign.

10. Sand all the edges of your wood pieces so that the bare wood shows through on the corners. This gives the wood a distressed look. If you want to distress any other painted or stenciled surfaces further you can do so by roughing them up with sandpaper.

11. To assemble the house, stage the upright pieces by placing them in their footprints as indicated on the diagram on one of the 12 x 5.5″ pieces. Face the black painted sides inward and the stenciled sides facing out. If you’ve covered up your pencil lines with paint, you can use your diagram to redraw them as needed.

12. Load up your hot glue gun with wood project glue sticks and plug it in to heat up. Apply hot glue to the bottoms of the support pieces and press in place. Let glue harden.

13. Glue the other ends of the supports in place on the other 12 x 5.5″ piece. Let glue harden.

14. Place the tracing paper diagram on top of your house. Mark where the nail holes will go in pencil. Drill small pilot holes then hammer nails in. Repeat for the bottom.

15. Mix some dark brown paint with water to make a thin wash and paint over the whole house. Test first on the bottom to make sure it’s not too heavy or light. Alternately, you could use a wash of off-white paint if you’d rather have a pale wash. The purpose of the wash is to give an aged appearance to the wood – this is particularly effective when the paint clings to the corners that have been bared by sanding. Let paint dry.

16. Paint whole house with clear matte varnish.

17. Cut out a 10 x 5″ piece out of scrap window screen and nail it to the back side. This is to keep whatever materials you fill the house with from falling out the back side.

18. Fill the house from the front with materials that contain holes for pollinating insects such as native bees to live in.

Some suggestions of materials you could use to fill the house:

  • Bamboo or reed segments
  • Rocks
  • Rolled up corrugated cardboard
  • Chunks of scrap wood with holes drilled in it
  • Bundles of twigs or straw
  • Unfired ceramic clay with holes poked in it
  • Natural dried stems and reeds from the garden cut into segments
  • Dried seed pods

If necessary, cut out a piece of hardware cloth or chicken wire and nail it over the front to hold materials in.

19. Read this article for ideas on where to place the house in your garden or yard –
Making a Pollinator House – Part 1.

Depending on where you want to put your house, you may want to attach hanging hardware to it or mount it on a post. The wood pieces we used are thick enough to give you flexibility in attachment options.
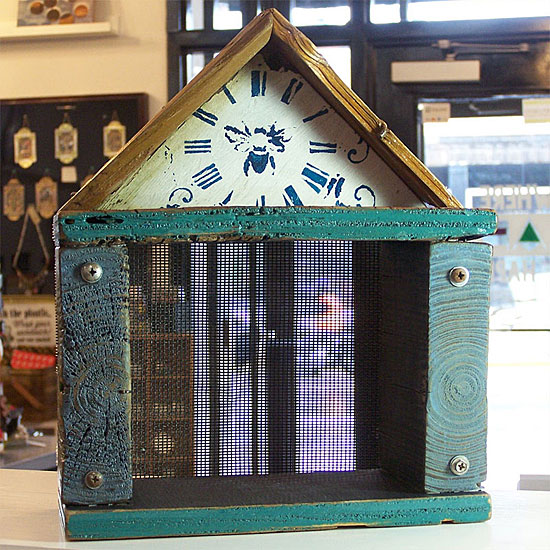
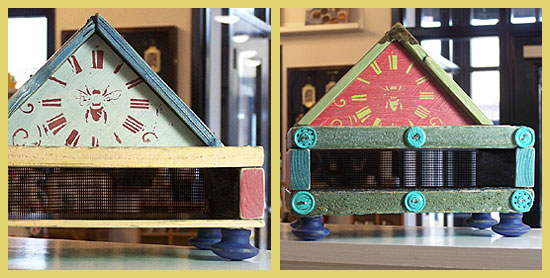
Pollinator House with Pediment

Instructions for Style #2 – Pollinator House with Pediment

The prototypes I made for the second design vary somewhat in size and proportions because I used distressed wood that I had lying around. I designed the houses around what wood I had available and embellished some with found objects or hardware. If you want to build similar houses and don’t have access to distressed wood, you can use new wood.

1. Cut out two chunky pieces of wood to use as uprights and two thin pieces to use as the top and bottom.
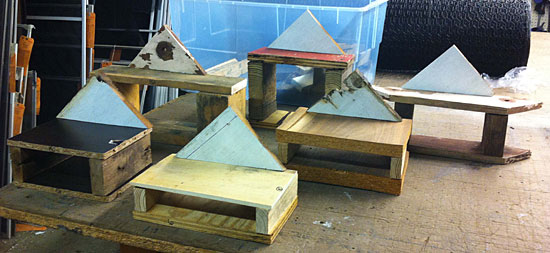
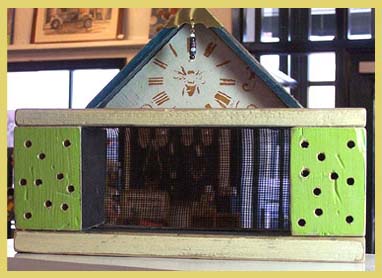
Different pollinator house designs

2. Cut a right triangle out of wood that is 3/4 to 1″ thick for the pediment piece. A pediment is like a roof gable that is decorative rather than functional. My samples vary slightly in size but the triangles are mostly around 7 1/2″ inches on the long side and 3 3/4″ on the short sides.

3. Choose some thin, narrow wood pieces for the roof overhang. Lattice wood strips are about the right size – if you don’t have any distressed wood in that size range you can purchase some lattice strips to use. Cut these strips into approximately 6″ pieces and miter the corners.

4. Sand all wood pieces.

5. Paint the sides of your wood pieces that will become the interior with black paint.

6. Paint the other sides and parts in assorted colors of your choice.

7. Stencil a bee design or other stencil of your choice on the front of the triangle.

8. If you think any of the other wood surfaces need to be enhanced with stencil designs, decorate those also. Since many of my wood pieces were distressed and had a pronounced wood grain, knots, old nails and other irregularities I let those provide the visual interest in many areas. Antique look, vintage look, grunge or botanical stencils would be especially effective for this design.

9. Sand the edges of your wood pieces to expose the bare wood on the corners and distress any other areas that you think are in need of it.

10. Hot glue the vertical support pieces to the top and bottom of your house then nail in place.

11. To assemble the pediment section, put your two roof pieces in a miter clamp with the mitered ends butted together to make the roof point. Put a little wood glue on the ends as you do this. Position the clamped-together pieces on a block of scrap wood to brace them. Drill small pilot holes in one end and hammer in small nails. Slip a couple of nails in between from the other direction.

Creating roof peak with miter clamp and nails

12. Take your triangle pediment and apply hot glue to the top edge. On your work surface, lay the pediment down, slide the triangle part in and press in place. When the glue has hardened, hammer small nails through the roof pieces into the pediment for extra hold.

Attach roof overhang to pediment

13. Apply hot glue to the bottom of the triangle section. Place in place on top of house and let the glue harden. Drill two pilot holes at each end and drive long thin nails down into the supports below.

14. If you would like to attach wood feet to the bottom of your house, drill 3/16″ holes into the bottom of the house. Cut short pieces of 3/16″ wood dowel rod and put wood glue on both ends. Insert one end of each dowel rod piece into a hole in the house and the other end into the hole in a wooden ball knob or drawer pull.

15. Mix some dark brown paint with water to make a thin wash and paint over the whole house. Test first on the bottom to make sure it’s not too heavy or light. Alternately, you could use a wash of off-white paint if you’d rather have a pale wash. The purpose of the wash is to give an aged appearance to the wood – this is particularly effective when the paint clings to the corners that have been bared by sanding. Let paint dry.

16. Paint whole house with clear matte varnish.

17. Attach a decorative brass box corner to the roof peak.

18. Cut out a piece out of scrap window screen and nail it to the back side.

19. Fill house with nesting materials and place in a suitable location.

Here are some pictures showing how some of the other houses turned out.
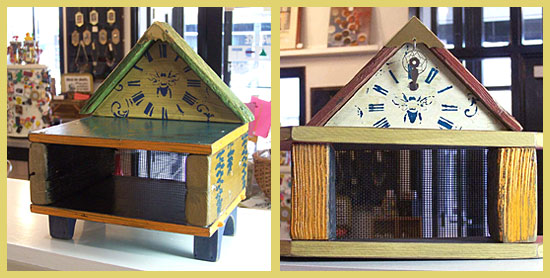
Pollinator houses made with distressed wood

Pollinator houses made with distressed wood

Pollinator house made with distressed wood