Make a Pollinator House – Part 2
by Carolyn Hasenfratz
In my previous article Making a Pollinator House – Part 1 I explained why you might want to build a home for native bees and other beneficial insects for your garden. I also provided an example of a quick way to build a shelter out of cinder blocks, wood scraps and dried plant material. I promised to write up plans for a more attractive pollinator house. Here are instructions for building two different designs to enhance your garden’s decor as well as it’s productivity and ecological health.
Tools and Supplies
* indicates items that are available at Schnarr’s
Tracing paper
Pencil
Ruler*
Hot glue gun*
Wood hot glue sticks
1″ x 6″ x 8′ multipurpose board*
2″ x 4″ x 8′ board*
Saw*
Sandpaper*
Dust mask*
Acrylic craft paint
Paint brushes*
Water container*
Heat tool for speeding up drying (optional)
Painters tape or masking tape*
Decorative stencils
Sponges*
Drill*
Tiny drill bit*
Nails*
Window screen*
Hammer*
Wood glue*
Clear matte finish varnish*
Hardware cloth or chicken wire (optional)*
For the additional second design with the pediment, you’ll also need:
Assorted sizes of distressed wood pieces
Decorative brass box corner*
Miter saw*
3/16″ drill bit*
3/16″ dowel rod*
Wooden ball knobs or drawer pulls* with 3/16″ holes to use as feet
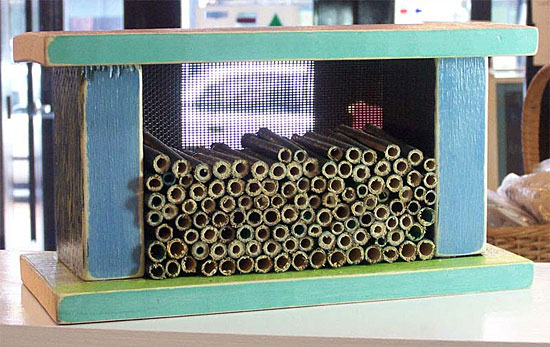
Instructions for Style #1 – “Mid-Century Modern” Pollinator House
1. Download the PDF document “Pollinator House Assembly Diagram”. It is sized to print out on a legal-sized piece of paper. Recreate the diagram in scale on a piece of tracing paper with pencil.
2. From the 1″ x 6″ x 8′ board, cut two 12″ x 5.5″ pieces(although the board is called 1″ x 6″ x 8′ it’s probably closer to 5.5″ so you might only have to cut the board into 12″ lengths).
3. From your 2″ x 4″ x 8′ (probably really 3.5″) board cut two 5″ segments.
4. Put on a dust mask and sand your wood pieces until smooth.
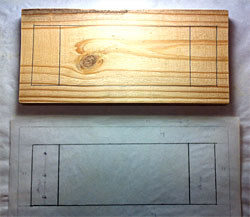
5. Mark each of your 12″ x 5.5″ pieces with the rectangles shown in the diagram. These will become the inner top and inner bottom of your house.
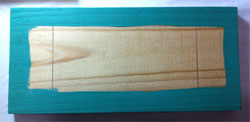
6. Paint a color of your choice in the border around the inner rectangle on each piece. For this step you don’t have to worry about painting precisely in the lines. Let paint dry.
7. Mark off around the middle rectangle with masking or painter’s tape on both pieces and paint black. When paint is dry, remove tape.

8. Paint what will be the insides of your 5″ high supports black. Paint all other surfaces of your wood pieces assorted colors of your choice.
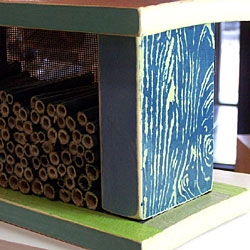
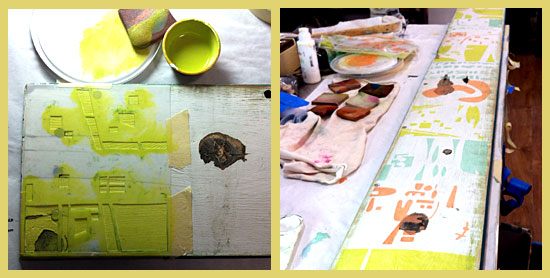
9. Decorate the top of your house and the sides of the supports with decorative stencils. I did not decorate the board edges with stenciling in my sample but you can if you want to. If you are new to stenciling on wood, see this article for tips –
Stencil a Wood Garden Sign.
10. Sand all the edges of your wood pieces so that the bare wood shows through on the corners. This gives the wood a distressed look. If you want to distress any other painted or stenciled surfaces further you can do so by roughing them up with sandpaper.
11. To assemble the house, stage the upright pieces by placing them in their footprints as indicated on the diagram on one of the 12 x 5.5″ pieces. Face the black painted sides inward and the stenciled sides facing out. If you’ve covered up your pencil lines with paint, you can use your diagram to redraw them as needed.
12. Load up your hot glue gun with wood project glue sticks and plug it in to heat up. Apply hot glue to the bottoms of the support pieces and press in place. Let glue harden.
13. Glue the other ends of the supports in place on the other 12 x 5.5″ piece. Let glue harden.
14. Place the tracing paper diagram on top of your house. Mark where the nail holes will go in pencil. Drill small pilot holes then hammer nails in. Repeat for the bottom.
15. Mix some dark brown paint with water to make a thin wash and paint over the whole house. Test first on the bottom to make sure it’s not too heavy or light. Alternately, you could use a wash of off-white paint if you’d rather have a pale wash. The purpose of the wash is to give an aged appearance to the wood – this is particularly effective when the paint clings to the corners that have been bared by sanding. Let paint dry.
16. Paint whole house with clear matte varnish.
17. Cut out a 10 x 5″ piece out of scrap window screen and nail it to the back side. This is to keep whatever materials you fill the house with from falling out the back side.
18. Fill the house from the front with materials that contain holes for pollinating insects such as native bees to live in.
Some suggestions of materials you could use to fill the house:
- Bamboo or reed segments
- Rocks
- Rolled up corrugated cardboard
- Chunks of scrap wood with holes drilled in it
- Bundles of twigs or straw
- Unfired ceramic clay with holes poked in it
- Natural dried stems and reeds from the garden cut into segments
- Dried seed pods
If necessary, cut out a piece of hardware cloth or chicken wire and nail it over the front to hold materials in.
19. Read this article for ideas on where to place the house in your garden or yard –
Making a Pollinator House – Part 1.
Depending on where you want to put your house, you may want to attach hanging hardware to it or mount it on a post. The wood pieces we used are thick enough to give you flexibility in attachment options.
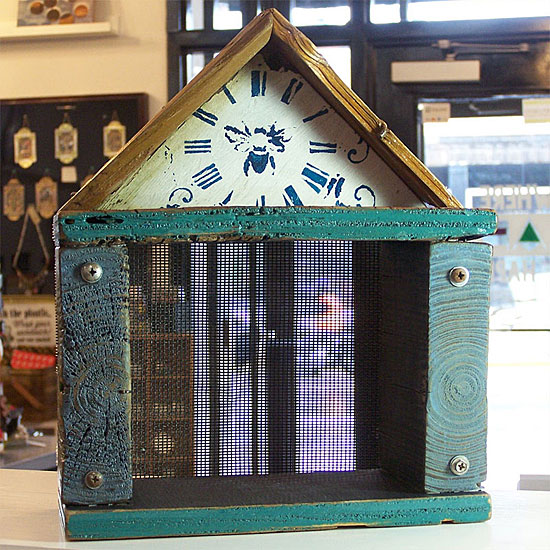
Instructions for Style #2 – Pollinator House with Pediment
The prototypes I made for the second design vary somewhat in size and proportions because I used distressed wood that I had lying around. I designed the houses around what wood I had available and embellished some with found objects or hardware. If you want to build similar houses and don’t have access to distressed wood, you can use new wood.
1. Cut out two chunky pieces of wood to use as uprights and two thin pieces to use as the top and bottom.
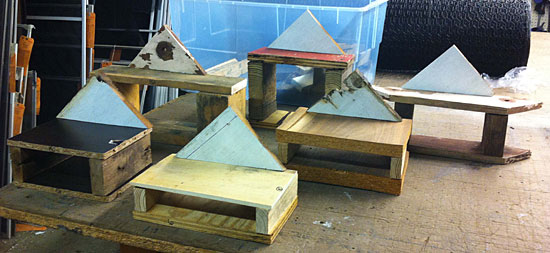
2. Cut a right triangle out of wood that is 3/4 to 1″ thick for the pediment piece. A pediment is like a roof gable that is decorative rather than functional. My samples vary slightly in size but the triangles are mostly around 7 1/2″ inches on the long side and 3 3/4″ on the short sides.
3. Choose some thin, narrow wood pieces for the roof overhang. Lattice wood strips are about the right size – if you don’t have any distressed wood in that size range you can purchase some lattice strips to use. Cut these strips into approximately 6″ pieces and miter the corners.
4. Sand all wood pieces.
5. Paint the sides of your wood pieces that will become the interior with black paint.
6. Paint the other sides and parts in assorted colors of your choice.
7. Stencil a bee design or other stencil of your choice on the front of the triangle.
8. If you think any of the other wood surfaces need to be enhanced with stencil designs, decorate those also. Since many of my wood pieces were distressed and had a pronounced wood grain, knots, old nails and other irregularities I let those provide the visual interest in many areas. Antique look, vintage look, grunge or botanical stencils would be especially effective for this design.
9. Sand the edges of your wood pieces to expose the bare wood on the corners and distress any other areas that you think are in need of it.
10. Hot glue the vertical support pieces to the top and bottom of your house then nail in place.
11. To assemble the pediment section, put your two roof pieces in a miter clamp with the mitered ends butted together to make the roof point. Put a little wood glue on the ends as you do this. Position the clamped-together pieces on a block of scrap wood to brace them. Drill small pilot holes in one end and hammer in small nails. Slip a couple of nails in between from the other direction.

12. Take your triangle pediment and apply hot glue to the top edge. On your work surface, lay the pediment down, slide the triangle part in and press in place. When the glue has hardened, hammer small nails through the roof pieces into the pediment for extra hold.

13. Apply hot glue to the bottom of the triangle section. Place in place on top of house and let the glue harden. Drill two pilot holes at each end and drive long thin nails down into the supports below.
14. If you would like to attach wood feet to the bottom of your house, drill 3/16″ holes into the bottom of the house. Cut short pieces of 3/16″ wood dowel rod and put wood glue on both ends. Insert one end of each dowel rod piece into a hole in the house and the other end into the hole in a wooden ball knob or drawer pull.
15. Mix some dark brown paint with water to make a thin wash and paint over the whole house. Test first on the bottom to make sure it’s not too heavy or light. Alternately, you could use a wash of off-white paint if you’d rather have a pale wash. The purpose of the wash is to give an aged appearance to the wood – this is particularly effective when the paint clings to the corners that have been bared by sanding. Let paint dry.
16. Paint whole house with clear matte varnish.
17. Attach a decorative brass box corner to the roof peak.
18. Cut out a piece out of scrap window screen and nail it to the back side.
19. Fill house with nesting materials and place in a suitable location.
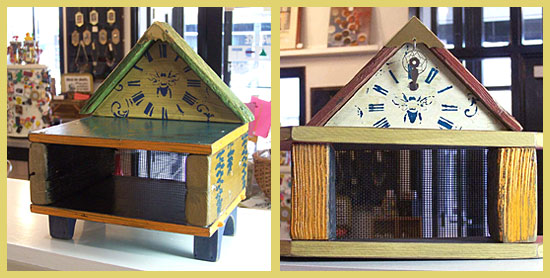
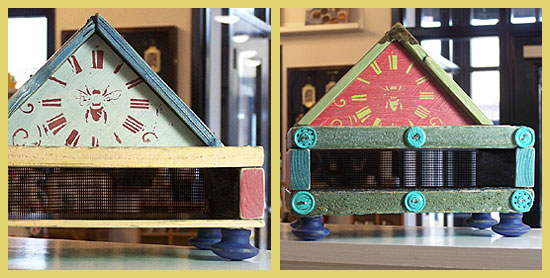
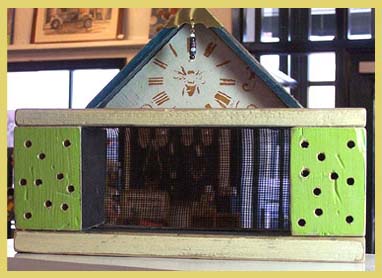
Here are some pictures showing how some of the other houses turned out.
 Tools and Materials

