Categories
Backyard Wildlife DIY Gardening Sustainability Upcycling

Making a Pollinator House – Part 1

Making a Pollinator House – Part 1

by Carolyn Hasenfratz


It’s becoming increasingly common to see structures called “Bug Houses” or “Insect Hotels” in gardens. Some people get squeamish at the mention of bugs or insects so perhaps the most appealing way to label such a structure is “Pollinator House”. Such structures are provided as a nesting and sheltering area for beneficial insects.

Most people are familiar with the pollinating actions of honeybees, bumblebees and wasps. Social bees and wasps are beneficial to the garden in many ways, not only by pollinating but in the case of wasps eating garden pests.

It’s understandable to be nervous about the idea of having colonies of stinging insects living in your garden because some of these species are very aggressive about defending their homes. If you want more pollinators in your garden fortunately there are other bees and wasps that are easier to co-exist with peacefully. If you fear you have attracted the wrong kind of bee or wasp to your garden, I recommend getting help from an expert before deciding how or if to deal with them.

I don’t mind bees and wasps because I can identify them and know how close I can safely get to them. I also don’t have any serious allergic reactions to stings. I work in the garden alongside Honeybees, Carpenter Bees, Bumblebees, Cicada Killers, Mud Daubers, Potter Wasps and others with little apprehension. Honeybees often land on me and I just stay still until they fly away. I steer clear of Yellow Jackets because I know from experience they will sting if you inadvertently disturb their nest (happened last summer in a client’s garden). I don’t attempt to eliminate them unless they are really in the way or other people are in danger. Even though I’m in the garden a lot I only get stung once every several years or so. The consequences for me are some brief anger, localized soreness and itching for a few days. The consequences for others could be far more serious and even deadly so use your best judgement.

Many of the solitary species of bees such as Mason and Leafcutter Bees like to nest in hollow plant stalks or holes in old wood. We take away many of these potential nesting sites by cleaning dead plants and old wood out of the garden. Some amount of cleanup is necessary for human safety, aesthetics and homeowners associations but we can mitigate the effects of a too-clean garden by building a Pollinator House. As an added benefit you may get other desirable insects such as ground beetles and butterflies hibernating in the structure.


Insect Hotel at Missouri Botanical Garden
Here are some suggestions about what materials to use:

  • Stones and bricks
  • Dead leaves
  • Twigs or twig bundles
  • Corrugated cardboard rolls
  • Dried seed pods
  • Paper straws
  • Hollow reeds – preferably 6-8 inches long, closed on one end
  • Drilled pieces of wood – variety of hole diameters, 3-6″ deep

The structure should be sturdily built to avoid toppling.

Where to place the house:

  • Protected from high winds
  • Partly in sun and partly in shade to meet a variety of species preferences
  • If possible near water and mud for drinking and nest building

Dad's fence is falling down
You can have a lot of fun designing your Pollinator House by creatively using materials, limited only by your imagination. I started a simple one for my Dad’s garden, custom designed to solve two problems for him.

Problem 1 – Decorative garden fence is falling apart and sagging
Problem 2 – Lots of sticks lying around from deadfall and pruning


Propping up fence with cinder blocks
Solution
I bought 12 cinder blocks and used them to prop up the ailing fence. Then I filled some of the spaces with twigs and short segments of hollow, dead plant parts from the garden. I drilled some holes in some pieces of scrap wood. A variety of hole sizes and depths are good for different species. As we get more material we’ll keep filling in the spaces in the blocks.


Filling the blocks with nesting material
The result is practical and may not score high marks in the aesthetics department. However the fence is located in the middle of a mint patch (also a superb beneficial insect attractor) and it will be partially concealed by vegetation for much of the year. If Dad agrees I think I will add shelving to the top for containers of trailing plants which will help disguise the blocks. I will probably have to work on the bases of the cinder block towers to make them straighter since the ground here is soft and did some settling after I stacked the blocks.

Dad is pleased that his fence is at least upright again and he’s happy to do his part for invertebrate conservation. Dad’s garden was designed with wildlife in mind and already supports an abundant population of beneficial insects.

Hopefully my condo association will approve a Pollinator House in my garden. I don’t know what my chances are but I do know that my Pollinator House is going to have to be pretty to even have a prayer of getting approved. I guess I will have to make it portable so I can sell it if they say no! They have previously said yes to a bird house but a bug house might be a harder sell. Stay tuned for a more aesthetically pleasing Pollinator House plan in a future newsletter!

More information about bees, wasps and insect shelters:

Categories
Gardening Home Decor

Create a Moist Microclimate for Your House Plants with a Humidity Tray

Create a Moist Microclimate for Your House Plants with a Humidity Tray

by Carolyn Hasenfratz

My home contains multiple aquariums and house plants and I have a humidifier, so you’d think I have plenty of moisture in the house but even I would like a little more humidity to help my dry skin and other irritations that only happen in the winter. Many of our house plants, if they are not succulents or cacti for example, come from humid tropical climates and if you have those type of plants you might want to increase the humidity in their environment. Adding moisture to the whole home has some benefits but if you add too much you could have condensation issues. The house I grew up in always had rivers of condensation coming off the windows in winter (or blocks of ice). We did what we could to soak up the moisture with towels if it was excessive but those kind of conditions can be destructive to the area around your windows and cause mold to grow.

One way to help your plants without making the whole house into a rain forest is to create a tiny microclimate by filling a waterproof tray with gravel, moistening the gravel and setting your humidity loving house plants in it. Keep the bottoms of the pots above the water level so they don’t sit in water. Moisture will come up from the tray and if you group the humidity-loving plants together they will help keep each other moist with their transpiration. A boot tray from Schnarr’s is a great size and shape for a plant tray. We also have some small bags of decorative rock if you need some.

Categories
Gardening

Choosing Plants for Winter Interest

Choosing Plants for Winter Interest

by Carolyn Hasenfratz

I’ve known for a long time my garden could stand to look better in winter. Now is a good time to start planning for next year, because I can actually see what looks good in my garden right now and what does not. I walked my garden and made notes about what looks attractive to me. I think the dead parts of perennial plants that are dried and brown and left standing look nicer than empty space but some of my neighbors don’t agree. In winter as a compromise to keep peace I keep some dead stems standing but remove others that are in conspicuous places.

Since no one is going to mind more greenery, I want to add more plants to my garden that are still green at this time of year. First I walked my garden to see what plants I already have are still green and I will plan to add more of those to my garden during this coming growing season. I made diagrams showing where I would put them, since it’s easier to imagine where they will look good this time next year than in other seasons when there are lots of other things to distract the eye.

Another good way to get ideas for what plants look good right now is to make an outing to the Missouri Botanical Garden and pick out a section that has similar conditions to your own garden and see what is green. If you’re not sure exactly what your conditions are, explore a part of the garden that has some of the same plants that do well for you. If you’re interested in year-round flower possibilities, they always have a display of what is flowering now in the Visitor’s Center. Yes there are some plants that are in flower outdoors in mid-January, I saw some in the Bird Garden!

Before my recent Master Gardener class in Mid-January, I arrived at the garden early and walked the English Woodland Garden which is the most similar to my own conditions. I wrote down the names of four plants that not only look great right now but are native to Missouri or if not to Missouri at least to this continent. This is my wish list of plants I would like to acquire this year:

Winter Scouring RushEquisetum hyemale
Wood LilyTrillium luteum
Allegheny SpurgePachysandra procumbens
Christmas FernPolystichum acrostichoides

Other than trying to add more plants that stay green in winter, there are other options to improve your yard and garden in the cold season. Common recommendations are using evergreens and woody plants with interesting stems or bark to reduce reliance on herbaceous plants to hold the garden design together. You could also add to the hardscape with attractive features such as walls, fences and garden sculptures. The Japanese Garden at Missouri Botanical Garden is a good place to see examples of all these suggestions. The style of garden seen here features many beautiful flowers in season but flowers were never meant to be the focal point of the Japanese garden so the permanent plantings and structures found here create a landscape that can be enjoyed at any time. I took these photos after the recent snowfall in our area.

The Japanese Garden is not the only spot to appreciate winter plantings. These dried Hydrangea flowers left standing are a lovely color and look nice with a cap of snow. If you have plants with parts that look attractive dried, don’t be so quick to cut them down in the fall or you may miss out on some nice winter effects.


Something like this urn arrangement could be a lot of fun to make if you have access to natural plant material that sports different colors and textures in winter. Here the gardeners have taken advantage of attractive buds, naturally colorful branches and foliage, and dried flowers to create a subtle but beautiful arrangement. You could simulate this look with artificial plants if you don’t have natural material to use. When the rest of the landscape is either dried and brown or white with snow, subtle colors can be very effective.
Winter is something I kind of endure rather than enjoy most of the time, but I find that the more I get out in it the better mood I am in. Why not try to extend your enjoyment of your garden to another season with some of these ideas?


Categories
Backyard Wildlife Gardening

Winter Care of an Outdoor Water Garden

Winter Care of an Outdoor Water Garden

by Carolyn Hasenfratz

Depending on what kind of water feature you have, there are some winter preparations you should have already made because we are well into the season for freezing temperatures. However, if you do what I do and keep your small water garden from freezing with a bird bath de-icer, there is not much winter preparation that is necessary. Winter maintenance may be a little different, however.

Bird bath de-icer
Bird bath de-icer

The de-icer I’m using does not keep the water at tropical temperatures, it just keeps it above freezing. I moved my live plants back inside in the fall because none of the ones I have would survive winter temperatures here. If you are warming the water in any way, you may see an increase in evaporation in the winter. Check your water feature frequently and top off with new water if needed.

My current water garden fish are native Missouri minnows so they don’t need warm water – they just need at least part of the surface to be ice-free so they can get enough oxygen. If the water temperature is below 50 degrees, refrain from feeding your fish because they can’t digest the food as well and the water may get polluted. Fish are more sluggish when it’s cold and may be more vulnerable to predators – raccoons and several species of herons live in my neighborhood for example. If you don’t have an area already where fish can hide from predators, you may want to add one. You could use driftwood, rocks, artificial plants, artificial floating rocks, planting pots or anything you have on hand that is aquarium safe to build an underwater shelter.

Keeping my water garden clean is very easy in the warm months – once a week I siphon debris off of the bottom with an aquarium gravel vacuum and change 20% of the water. As I do this I also rinse out the sponge filter. My water garden is small, only 30 gallons, so this is just as easy as maintaining an aquarium. Larger water gardens would need to be managed differently. In the cold months vacuuming the bottom is not a very pleasant job so I don’t do it as often. It’s probably not as necessary in winter with the fish eating less, but you should regularly clean the filter if you have one and if you run it in winter. Periodically sweep debris out if possible with a leaf skimmer or net. If birds like to drink and bathe in your water feature they can cause a water quality issue with their waste and by dropping food in it, as can decomposing leaves and plant parts that fall in.

Categories
Backyard Wildlife Gardening Sustainability

Plant Milkweed Now to Help Monarchs

Plant Milkweed Now to Help Monarchs

by Carolyn Hasenfratz

If you have been doing any reading about gardening lately, you have probably encountered many articles urging people to plant milkweeds for Monarch butterflies whose numbers have declined at an alarming rate in recent years. At the risk of bringing up a topic again that is already well-covered, I will mention milkweeds because right now is a great time to plant them. Milkweed seeds need a period of cold in order to germinate. Last year I simulated that effect by cold-stratifying Common Milkweed and Swamp Milkweed seeds in the refrigerator – a successful effort that resulted in many new plants. This year I’m going to use nature to accomplish the task.

The photo above shows a Monarch caterpillar on the left and monarch chrysalis on the right on swamp milkweed in my garden. My proudest garden achievement of 2015!

The most recent issue of Missouri Conservationist has a timely article about planting milkweeds. They recommend planting the seeds outdoors in January or February in weed-free bare soil. Press the seeds into the soil. If planting into pots, sprinkle 1/4 inch of soil on top of the seeds and press down. Place the pot in a sunny exposed area and water regularly after the seeds sprout. Transplant after the plants have two to three sets of true leaves.

If you start milkweed seeds this winter you will probably not get any flowers from your milkweeds until next year, but caterpillars can still use them as a host plant until then. Try planting some annuals among them to add color and hide leaves that caterpillars have chewed until you get blooms. When they do flower, get ready for quite a show of winged visitors! Schnarr’s carries three varieties of Milkweed seeds – pick some up now to improve your habitat!

Categories
Gardening

Start Some of Your Spring Planting Right Now! Part 1

Start Some of Your Spring Planting Right Now! Part 1

by Carolyn Hasenfratz

I live in a condo and space is very limited. As a result I haven’t done much experimenting with starting seeds indoors so far. Over the last year I’ve been updating the Calendar on the Schnarr’s Blog with planting times of some of the seeds that we sell in the store and a few others that I grow. My source for these planting times, indoor or outdoor, is using the average first and last frost dates for the St. Louis area as a guide along with the When to Plant App published by Mother Earth News. It’s amazing how early some of these dates are. This year I want to see what kind of success I can have actually following the schedule and not just throwing some seeds in the ground when I have time!

Since I collect and save seeds from year to year, first I took inventory of what I have and used the Calendar as a guide to see when to start the seeds. Three of the seeds in my stash, Yucca filamentosa, Purple Coneflower and Columbine will be ready to plant indoors in mid-January. I refreshed my memory about starting seeds by reading some articles on the Dave’s Garden web site.

I have some work to do before I’m ready to plant but I am making sure I have on hand the following:

Seeds*
Covered growing containers with a clear lid*
Peat pellets*
Sterile seed starting soil*
Spray bottle for watering*
Plant markers*
A source of light for the seeds*
A source of heat for the seeds
Gardening journal for notes
*Available at Schnarr’s


When I get ready to plant, I’m going to make a page in my journal about each plant I’m attempting to sprout and make notes about what conditions the seeds require, then I will do my best to meet those requirements. I’m planning to make use of an aquarium that is currently empty to house some of the seeds. The aquarium light will act as both a light and heat source and the lid will help hold in moisture to create a mini-greenhouse. As an experiment, in an atrium in a building where I am renting a studio, I’m going to put some covered seed starter trays with some of the same species of seeds to see where they do better. I already have some of my house plants over there. Gardening involves a lot of trial and error – I will take good notes so in the future I will know what worked and what didn’t.


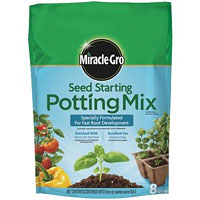
Here are some examples of seed starting supplies you can pick up at Schnarr’s:


Miracle-Gro Seed Starting Mix

Miracle-Gro Seed Starting Mix

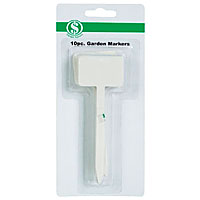
Garden Markers
Garden Markers

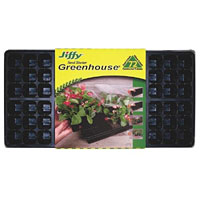
Jiffy Seed Starter Kit
Categories
Gardening

Schnarr’s Hardware is launching a new gardening newsletter

Schnarr’s Hardware is launching a new gardening newsletter

Garden Notes from Scharr's Newsletter

Our bi-weekly email will include lawn and garden ideas and fun projects with an emphasis on seasonal tips to help you enjoy your garden all year round.

If you would like to receive our new gardening email newsletter, “Garden Notes from Schnarr’s”, please click the button below and fill out the short form.

Subscribe

Categories
Backyard Wildlife Gardening

Native Plant Seeds

Native Plant Seeds

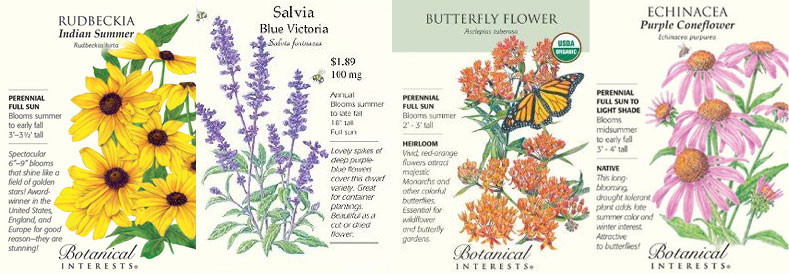
Some of the native plant seeds available at Schnarr's
Some of the native plant seeds available at Schnarr’s

In my recent article, Gardening for the Birds I suggested planting more native plants in your yard and garden to attract a more robust population of birds. Schnarr’s has several varieties of native seeds in stock and fall is a good time to plant many perennials. Next year you should be enjoying more birds if you plant some of these seeds now:

Butterfly MilkweedAsclepias tuberosa

Showy MilkweedAsclepias speciosa

Common MilkweedAsclepias syriaca

ColumbineAquilegia caerulea

Chocolate FlowerBerlandiera lyrata

RudbeckiaRudbeckia hirta

PenstemonPenstemon barbatus

Little BluestemSchizachyrium scoparium

Purple ConeflowerEchinacea purpurea

You can purchase the following native plant seeds now for planting in the spring – see our Calendar for planting times tailored to the St. Louis area. Seeds make a great holiday gift for the bird lover or gardener in your life! Great for party favors too!

SunflowerHelianthus annuus

CosmosCosmos bipinnatus

SalviaSalvia farinacea

California PoppyEschscholzia californica

Categories
Candles DIY Home Decor Lighting Outdoor Fun

Luminous Decor with Flameless Candles: Idea #3

Luminous Decor with Flameless Candles: Idea #3

What you’ll need:
Candle lantern*
Glass container
*Water Lights – special submersible flameless candles
Acrylic or glass gems, *clear or colored
*Available at Schnarr’s.

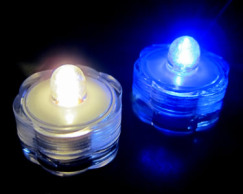
Clear water light in a drinking glass with clear and colored gems

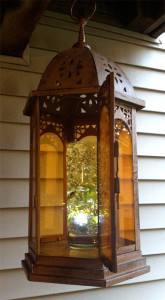
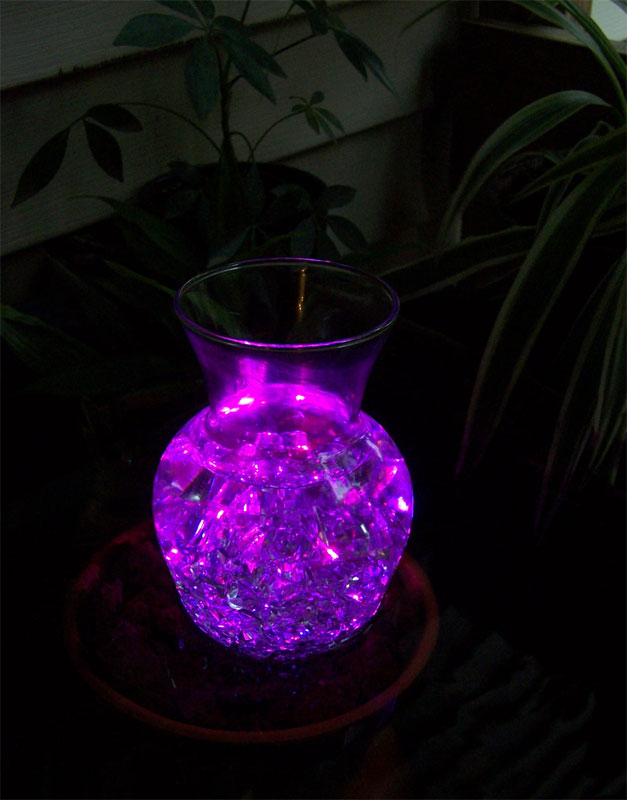
Do you have a hanging candle lantern? I have one on my deck but I’m not allowed to burn real candles in it for safety reasons. Flameless submersible Water Lights powered by batteries are the answer! Try filling a drinking glass with a clear submersible Water Light, some colored glass or plasic gems mixed with the clear plastic and add water.

What kinds of color effects can you get if you mix colored glass, plastic gems and a color-changing Water Light? Try it and see! Try different combinations for your holiday parties!

Categories
Candles DIY Home Decor Lighting Outdoor Fun

Luminous Decor with Flameless Candles: Idea #2

Decorative LED Tea LightsLuminous Decor with Flameless Candles: Idea #2

What you’ll need:
*Terra cotta plant pots
Sturdy glass container
*Water Lights – special submersible flameless candles
Acrylic or glass gems, *clear or colored
*Available at Schnarr’s.


Color-changing Water Lights displayed in a small water garden.

Submersible Water Lights come in clear and color-changing versions. Try topping off a stack of plant pots in your water feature with a clear container. Add a color-changing Water Light plus the clear acrylic gems and fill the glass container with water.

Color changing water light displayed indoors on a stand.

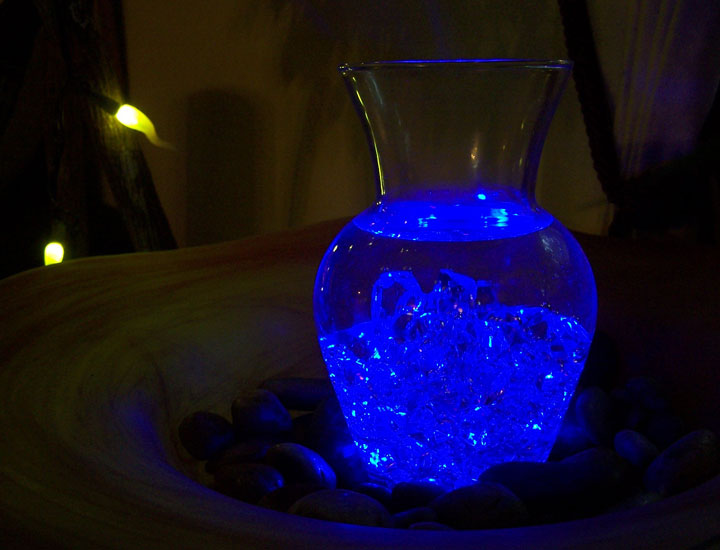
Here is another way to display a clear container with a Water Light. I placed the vase in a large bowl on a stand in my living room and added rocks as an accent. I like the way it looks next to my lighted artificial tree!