Categories
DIY Home Decor Storage and Organizing Ways With Wood

Make a Rustic Message Center

Make a Rustic Message Center

by Carolyn Hasenfratz Winkelmann

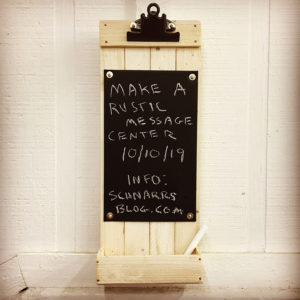
Make a Rustic Message Center from lath wood

For this message center to hang on a wall I deliberately used rough lath wood instead of smoother wood stock. I wanted to simulate the look of a utilitarian crate that is getting re-used for another purpose. I bought a bundle of new lath wood so that I would have enough for teaching and samples. You can use scrap wood that you have salvaged if you prefer. Salvaged lath wood often has bits of plaster clinging to it which is very interesting if you like the distressed look. A good source for salvaged lath wood is Perennial, a creative re-use studio where I occasionally teach. On the TV show “American Pickers”, they often pick up items for re-use that have “just the right amount of Stank on it” as they say. I know what they are talking about – it’s one of the reasons I love to work with salvaged materials mixed with new. I use a dust mask when sanding any wood, especially salvaged wood because you don’t know what’s in it or where it’s been!

Materials
Lath wood
*Small wire nails and tacks – some of them can be decorative if you choose. Recommended sizes – 19 x 1/2″ and 19 x 3/4″ (Quantity approx. eighteen 1/2″ and six 3/4″)
*Small wood screws – 4 x 1/2″ (Quantity six)
*Small washers – #6 (Quantity six)
*Chalkboard Paint
*Chalkboard Contact Paper
*Clipboard Clip (available at Schnarr’s Webster)
*Wood glue
Scrap cardboard
*Optional – White acrylic paint

Tools
*Sandpaper
*Saw
*Ruler
*Pencil
*Drill
*Tiny Drill Bit
*File
*Rags
*Paint water container
*Paint brushes
*Small clamps
Block of old wood for bracing wood while drilling and nailing
*Dust mask
*Squeegee or bone folder
*Utility knife, self healing cutting mat and *metal ruler, or paper cutter for cutting cardboard
*Phillips screwdriver
*Optional – small container for mixing paint wash
*indicates products available at Schnarr’s

Instructions

1. Cut 1 1/2 inch lath wood into the following lengths:

Four pieces – 15″
Five pieces – 6″
Two pieces – 1.5″

Use the pencil and ruler to measure and mark wood pieces, then cut.

Optional: Paint all the wood pieces on all sides with a wash of white acrylic paint and allow to dry.
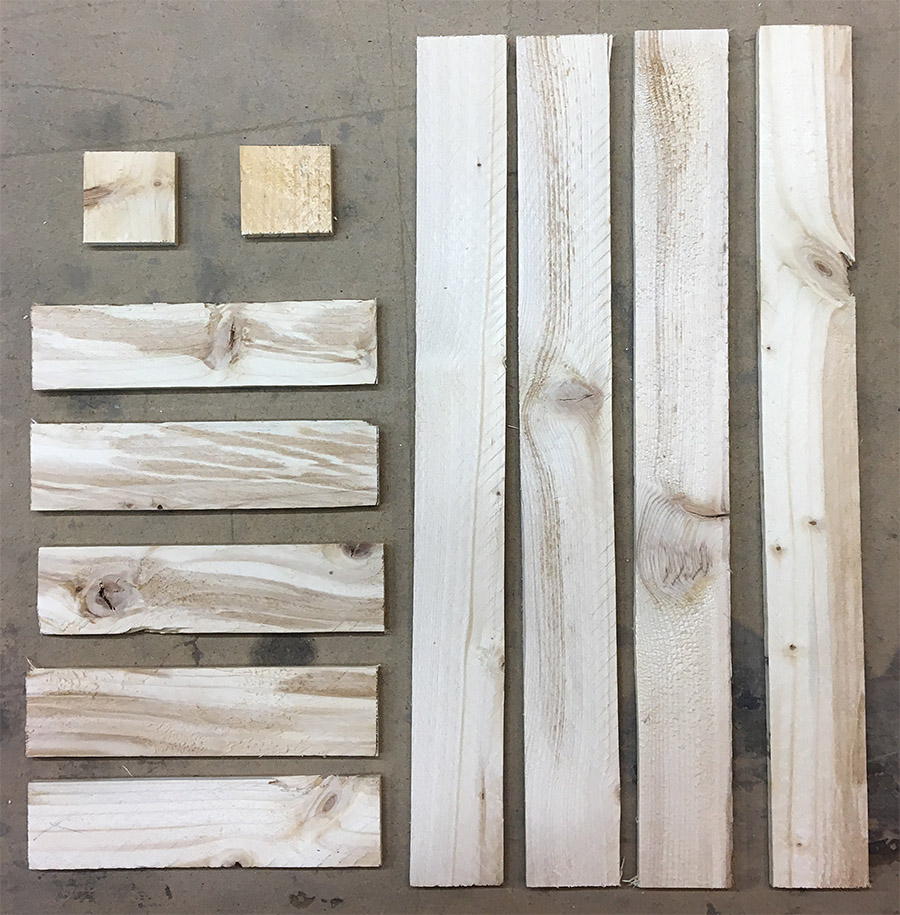
Pieces cut from lath wood
You will need to cut eleven pieces of wood for this project.

2. Sand the rough edges off of your wood pieces. You are probably wondering why I placed the step of sanding the wood pieces after painting instead of the other way around. The reason is it brings out the rustic look more because you’ll be removing some paint as you remove the rough spots on the wood.

3. Lay the four 15″ long pieces down on your work surface. Place one of the 6 inch strips about an inch and a half from the top. Add another right at the bottom of what will become the back of the message center. If it is helpful, draw a pencil line lengthwise on the wood to help you line up your nail holes. Draw little dots to show where the nail holes will go.

4. Squeeze a little wood glue on the backs of the wood cross pieces and clamp in place if you have trouble with the wood sliding around while you’re trying to work on it. If any wood glue squeezes out just wipe the excess off with a rag. Drill a little pilot hole for each nail. You don’t want the drill hole to go through all the way, it only needs to go in far enough to help the nail stay in place and to keep the wood from splitting at the surface as the nail goes in.

Hardware I used in this project - wire nails, wood screws washers and Clipboard Clips
Hardware I used in this project – wire nails, wood screws washers and Clipboard Clips

5. Hammer in your 1/2″ nails. If any poke through the front, file off the sharp parts.
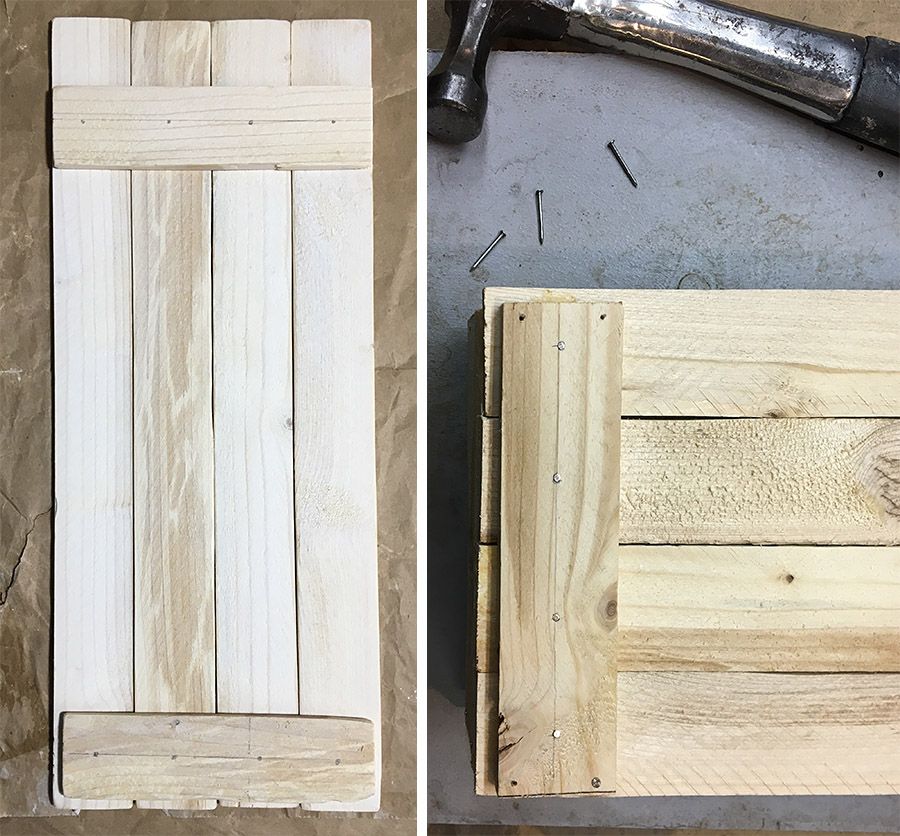
Nailing wood slats to back to hold vertical wood pieces together

6. Now start to assemble the tray that will be attached to the bottom front of the message center. Prop up one of the two small one and a half inch pieces of wood up against a piece of scrap wood. A small section of a 2 x 4 is the perfect size (2 x 4s are not really 2″ x 4″ as you can see.) Add a dab of wood glue and place a 6 inch cross piece on top, butting up the edges together. Drill a couple of pilot holes and nail in place. Repeat for the other end.

7. Add another 6″ piece to the bottom of the box and nail in place after dabbing with wood glue, then nail the whole assembly to the bottom front of the message center with 3/4″ inch long nails. It helps to prop up the other end with the 2 x 4 piece while you are nailing through the back.
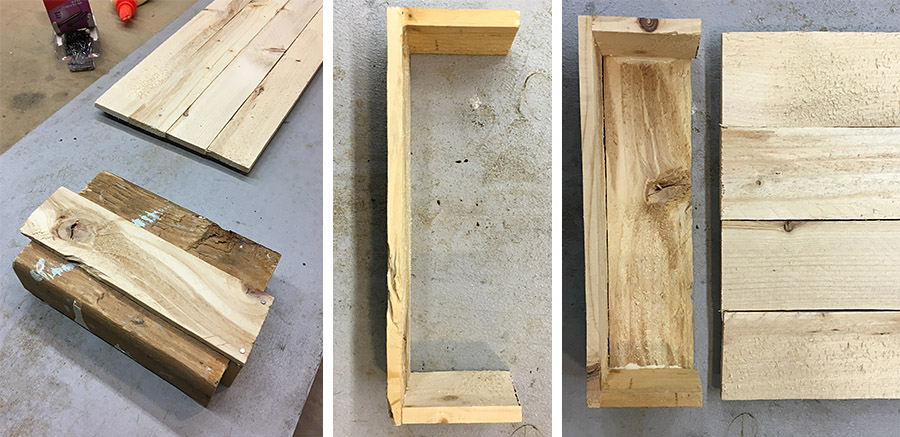
Making tray for the bottom of the message center.

8. Next make a small chalkboard for the middle front. Cut out a 5 1/2″ x 9″ piece of scrap cardboard and cover with chalkboard Contact paper. Cut the Contact paper slightly larger than the cardboard so that you can fold the edges over for a neat look. Burnish the paper with a squeegee tool to make a nice tight seal. Paint the front of the chalkboard over with chalkboard paint. (Unfortunately the Contact paper does not really take the chalk well enough by itself, but it makes an excellent base for the paint.) Let paint dry.
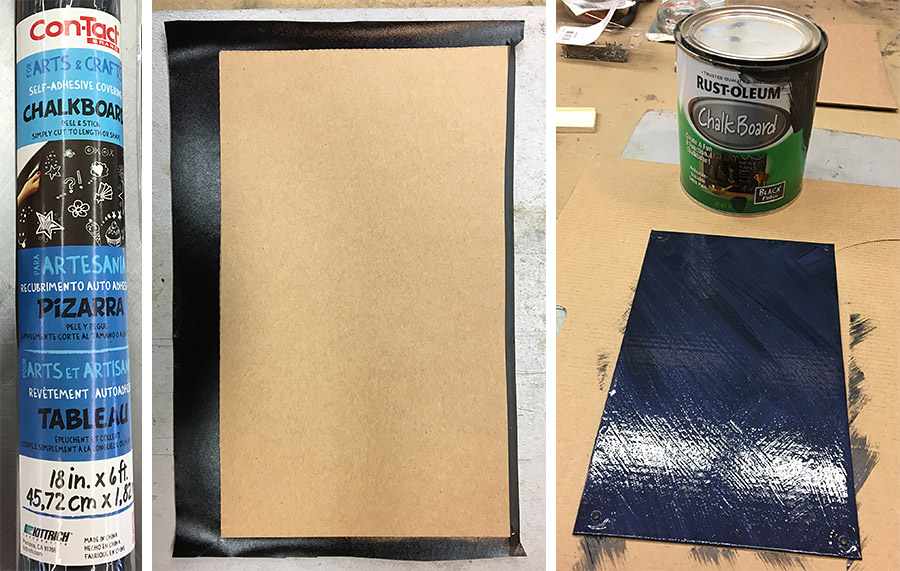
Cover a piece of scrap cardboard with contact paper, then paint over with chalkboard paint

9. Nail the last 6″ wood strip across the top front of the message center and glue and nail in place. Place the clipboard clip where you want it and make little pencil marks to indicate where to drill two holes for the screws to hold the clip on.

10. Drill the pilot holes then thread a washer on two screws and drive the screws in place.

11. Use a screw and washer on each corner of the chalkboard to attach in the middle front of the message center. You are done!
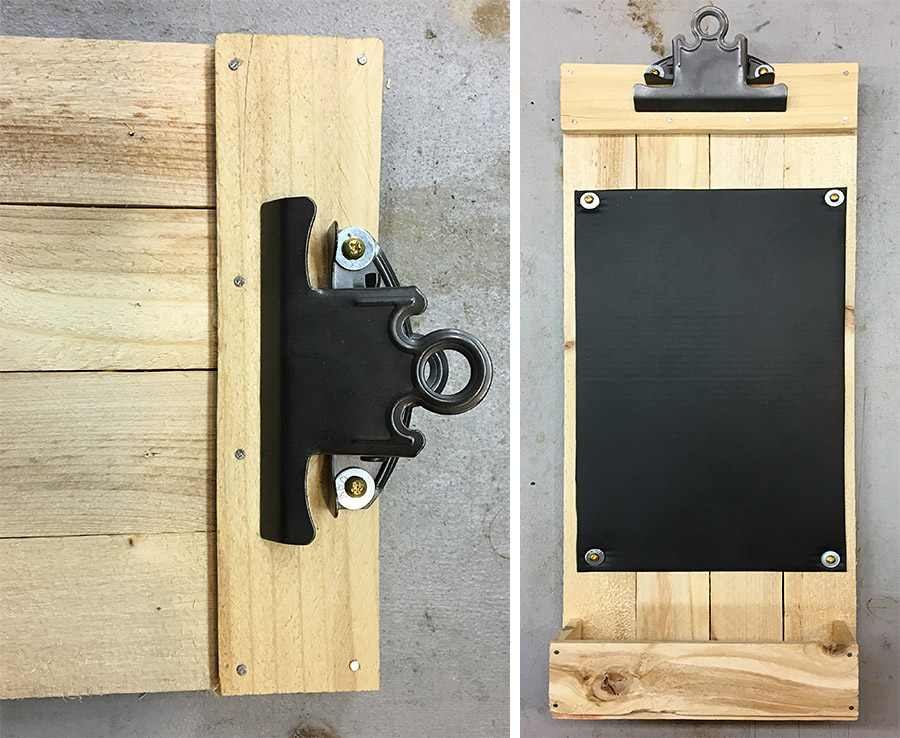
Attach the clipboard clip and you are done!
Attach the clipboard clip and chalkboard and you are done!

Do you want some more ideas for for things to make out of wood? Here is the Pinterest Board I made awhile ago that was the inspiration for this article:
Rustic Spring Ideas – this project isn’t only for spring of course, but I started working on it in February.

There are also some ideas for fun wood projects here on the Schnarr’s Pinterest site:
Ways With Wood
Categories
DIY Home Decor Storage and Organizing Ways With Wood

Make a Wood Storage Crate

Make a Wood Storage Crate

by Carolyn Hasenfratz Winkelmann

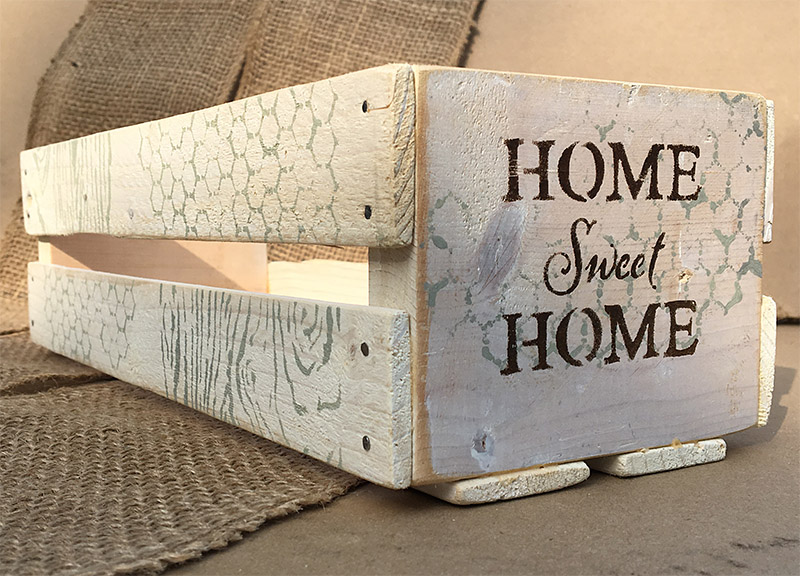
Wood crate decorated with stencil designs

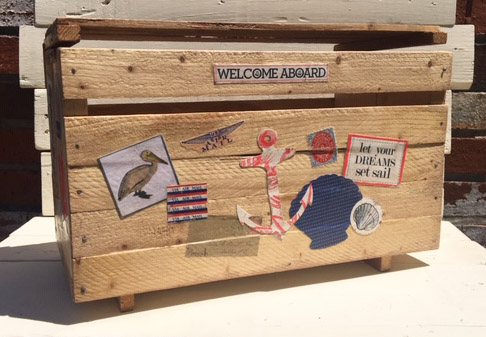
This project was inspired by a card box my husband Tom and I made for our nautical-themed wedding reception last summer. I made a lot of stuff for the wedding and I was literally working until the last minute at the church figuring out how to attach my homemade veil to my head! I finished my jewelry the day before! Two or three nights before the wedding I had set aside time to assemble this card box. I had already cut the pieces out but needed to nail it together and decorate it. I came down with what I thought was a terrible cold and I asked Tom to assemble the box for me. He came through and did a great job! I recovered quickly from whatever I had (if I actually really had anything other than stress) and was feeling fine the next day so I did the decoration in a hurry.

Card box we made for our wedding last summer with decoupage decoration

I painted the above crate-style card box with a wash of brown paint to “antique” after applying decoupage decoration. For the following storage crate project I’m going to experiment with applying a light colored paint wash on unsanded wood to be sanded, assembled and then decorated with stencils.

Materials
*Six pieces of lath wood (1 1/2″) cut to 12″ long
*Two pieces of 1/2″ thick wood cut to 4 1/4″ x 3 1/2″
*Tiny nails
*Paint rags
*Wood glue
*Acrylic paint
*Painters tape or masking tape

Tools
*Pencil
*Ruler
*Saw
*Paintbrush
*Paint water container and small paint mixing container
*Drill
*Tiny drill bit
*Hammer
Small sponges (or *large sponges cut up)
*Assorted stencils (available at Schnarr’s Webster)

*indicates items available at Schnarr’s

If you want a more refined look you can substitute lattice strips for lath wood, they are similar in size and thickness with a smoother surface and fewer irregularities.

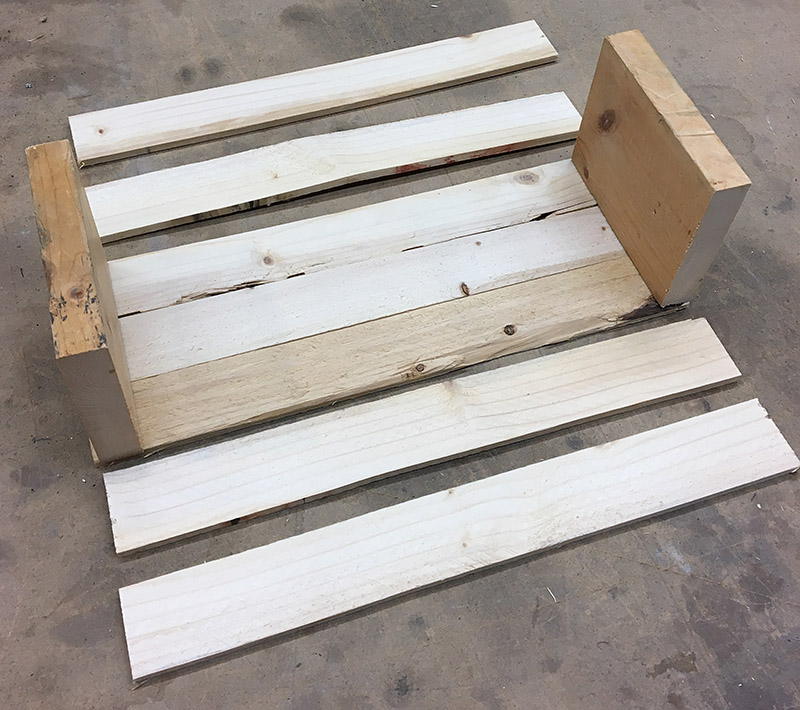
Cut pieces of wood ready to paint, sand and assemble

Instructions

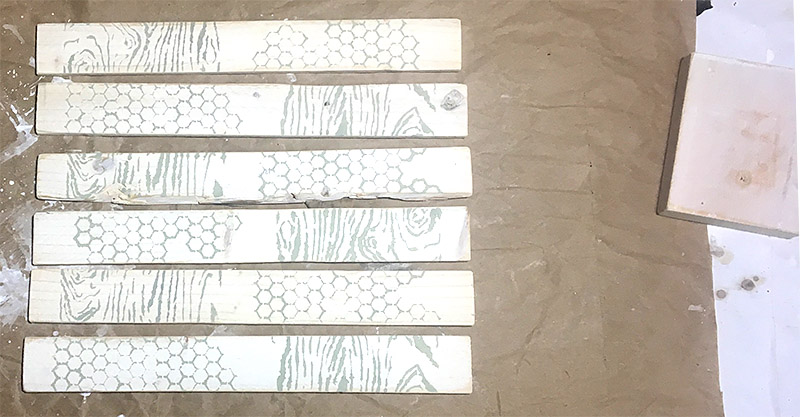
1. Paint your wood pieces with a wash of white acrylic paint. A wash is paint with water added to thin it out and make it semi-translucent.

2. After paint is dry, sand the rough spots with all-purpose sandpaper and sand the edges to bring out a little more of the natural wood color. The effect of sanding the edges is subtle but adds a lot of visual interest.

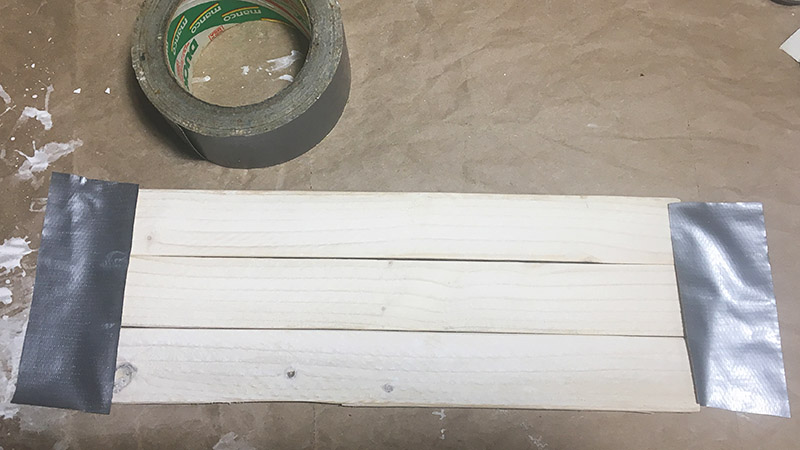
Wood slats taped down to work surface

3. Take three of the 12″ slats at a time and tape them down onto your work surface. Normally for stenciling projects I use painters tape or masking tape, but I was out of both so in the pictures you will see me using duct tape and drafting tape as substitutes.

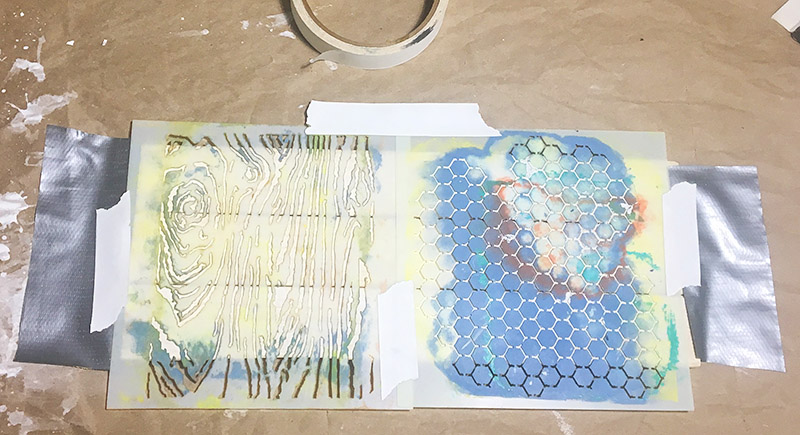
4. Tape stencils in place on your work surface over the wood. Choose a light to medium color of paint and dab the paint through the stencil openings with a sponge.

5. Lift the stencils and let the paint dry. I rearranged my wood pieces on the work surface to see what they would look like if I turned every other piece around 180 degrees so that the stencil designs would be scrambled. I liked the effect!

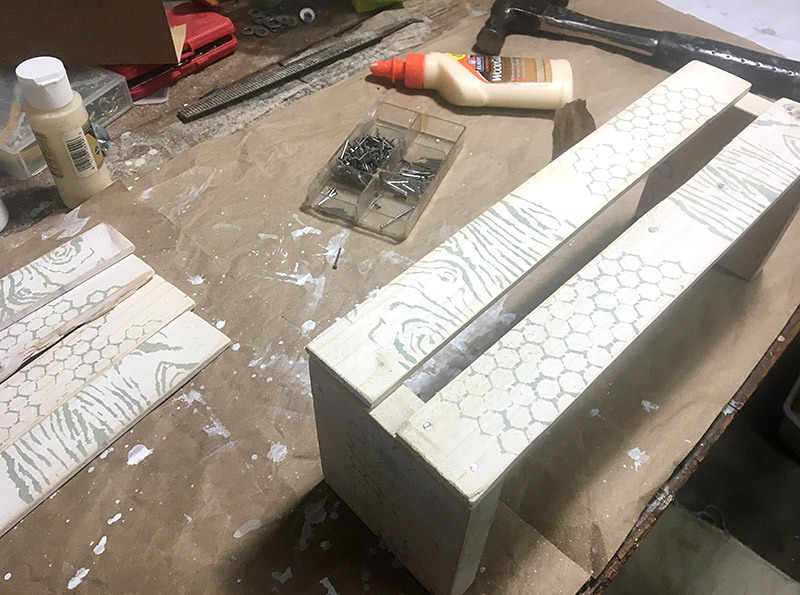
6. Set the two end blocks on your work surface and position two side slats across them. Add a dab of wood glue at each point where the wood will connect for extra strength.

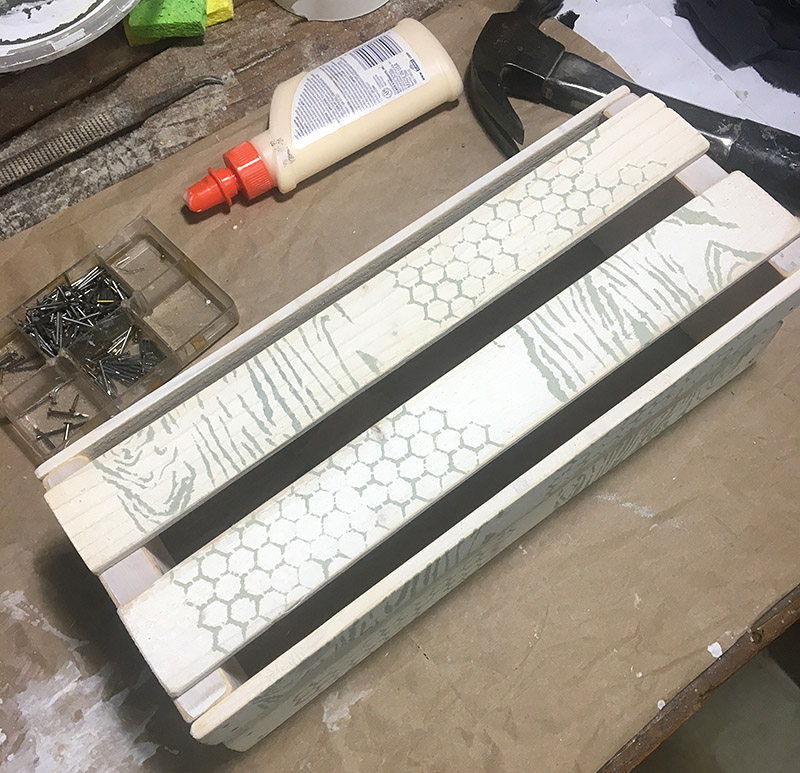
7. Drill two pilot holes at the end of each wood strip with the tiny drill bit. Hammer in nails and repeat until both wood strips are nailed securely to the end blocks. Repeat steps 6 and 7 for the other side, then for the bottom.

I only stenciled one side of these wood strips, so for the bottom of the crate I ended up turning them over so you could see the design if you looked down into the box. You could stencil both sides or have the design facing down while the box is in use if you prefer.

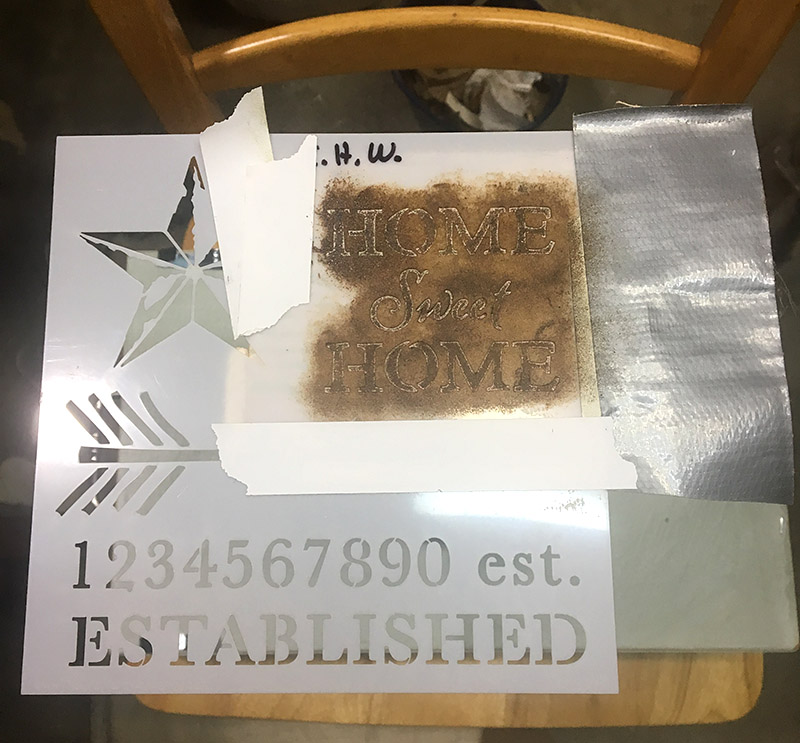
8. Next I stenciled onto each end of the crate. I set the crate on end on a chair to bring it to a more convenient work height. Tape the stencil down and if necessary, mask out the parts of the template you don’t want to use with tape. It’s easy to accidentally sponge into areas you didn’t intend.

Here is what one of the ends looks like after the final stencil. You can really change the look of the crate depending on what stencils and colors you choose to use. You can also make crates in different sizes to fit different needs. They make great baskets for gift giving too. Have fun!


Additional Resources

If you want some more home decor inspiration here are some additional resources:

Spring 2019 Mood Board – yes spring 2019 is done by now but a lot of these looks have been around for several years and should be good for inspiration for awhile yet. There is a lot of raw wood, tin, burlap and looks that you could easily recreate with hardware store items.

Summer 2019 Mood Board – wood, tin, twine, rope, seaglass, oh yeah!

Categories
DIY Home Decor Ladies' Night Storage and Organizing Uncategorized Upcycling Ways With Wood

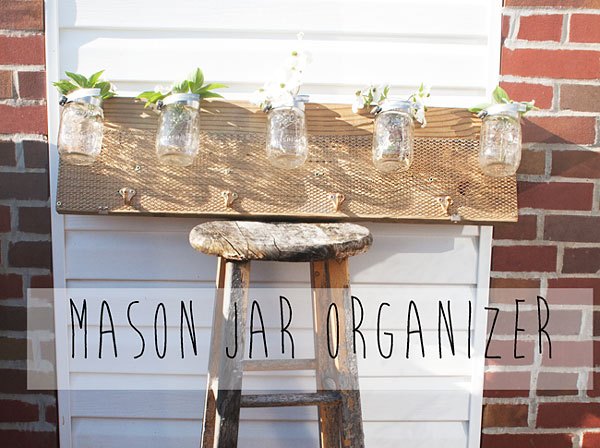
DIY Mason Jar Organizer

DIY Mason Jar Organizer

See the blog Fox and Gypsy for a DIY project mason jar orgainzer diy. SeeĀ  this project at our Ladies’ Night on April 30th, 2015!

If you want to come you can RSVP for Ladies’ Night (on Facebook and via email [[email protected]]).