Categories
Gardening Outdoor Fun

Start Your Garden Now For Health

We are often told that gardening is good for our health both mentally and physically. It is widely believed that spending time with nature, having house plants, access to windows with views of natural scenes, real and facsimile floral arrangements in our living and working spaces and even pictures of plants and flowers have the power to make people feel better. I was gifted five books on horticultural therapy for Christmas, and I now have the proof right in my hands (if I needed it) that all of these assertions are true!

Some of the physical benefits of participating in indoor or outdoor horticultural activities, and in some cases merely viewing plants or landscapes, include improved mobility, coordination, endurance, muscle conditioning, blood pressure, heart rates and respiration (Doherty 21-22, 27-28). The mind and it’s functions also respond positively to horticultural activities and subjects. Clients of horticultural therapy and people exposed to plants and aesthetic representations of plants have been known to show improvements in memory, social development, psychological development, cognitive development, relaxation and positive attitudes (Doherty 21-22, 27-28).

As I work my way through this new mini library I have been fortunate to acquire, I will learn more about why horticulture benefits us in so many ways and how to leverage the effects to the best of my ability in my own gardens, and any others that I may be asked to work on in the future. I’m currently in graduate school for Advertising and Marketing Communications at Webster University while I work part-time for Schnarr’s and don’t know what direction my life will take when the course of study is done. What I do know is that gardening will be part of my life as long as I have sufficient life in me and that any human being can benefit greatly from activities involving horticulture and plants (Doherty 24).
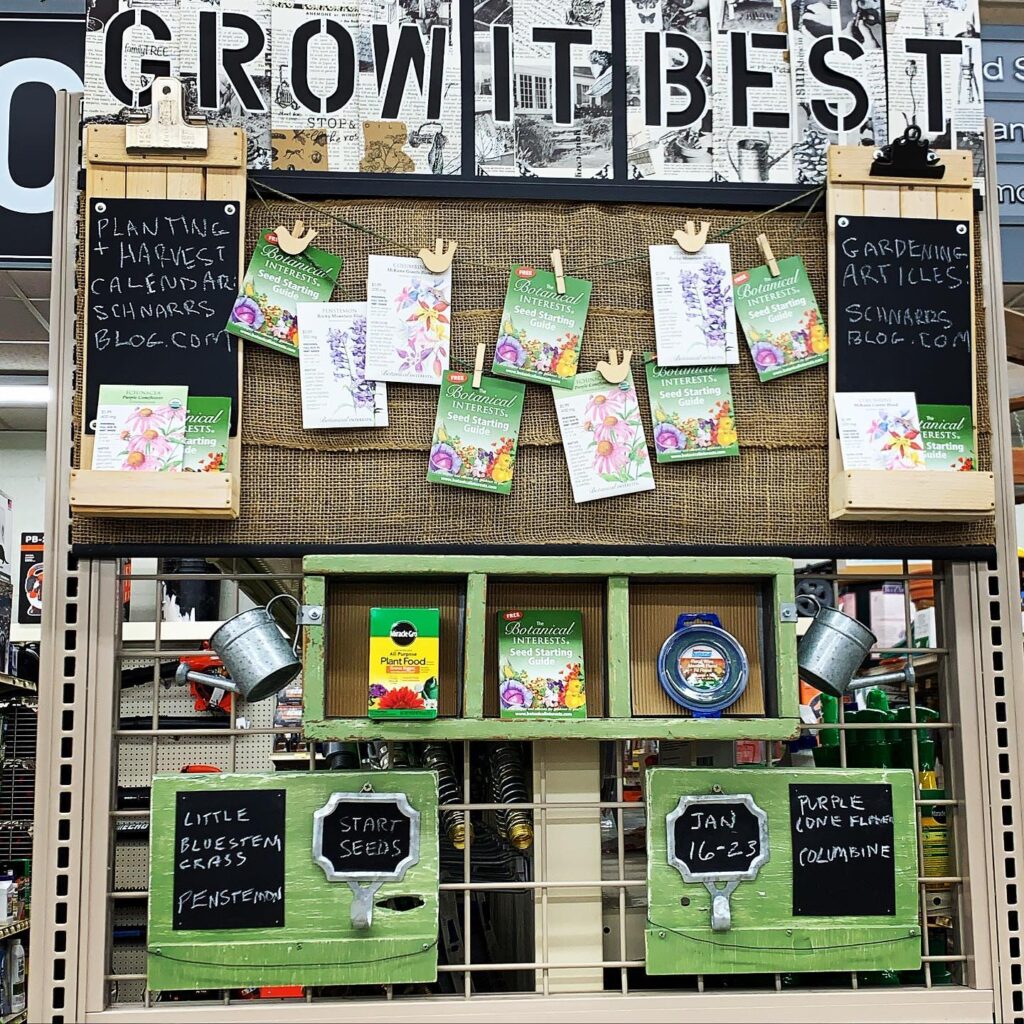
Seed starting display at Schnarr's Hardware.
Seed starting display at Schnarr’s Hardware on January 20, 2021.

In our Lawn and Garden department at Schnarr’s Webster, we’ve endeavored to make it a little easier to start your garden this year by suggesting plants that you can start from seed, and later in the season transplant and harvest, right at the time you visit the store. Each week as I change the display I hope you enjoy the new information.

You can also view the calendar we have provided on this blog that includes St. Louis area based suggestions for seed starting, transplanting outdoors and harvesting dates for various popular plants. In addition, when we hear about educational classes and events that we think sound worthwhile and have the potential to increase the value you get from your garden, we will include those on the calendar also.


Works Cited and Bibliography

Doherty, Janice Hoetker. A Calendar Year of Horticultural Therapy. Lilyflower Publishing, Inc., 2009.

Marcus, Clare Cooper and Naomi A. Sachs. Therapeutic Landscapes: An Evidence-Based Approach to Designing Healing Gardens and Restorative Outdoor Spaces. Wiley, 2014.

Simson, Sharon P, PhD and Marha C. Strauss, HTM, Editors. Horticulture as Therapy: Principles and Practice. CRC Press, 1998.

Wells, Suzanne E. MS, Editor. Horticultural Therapy and the Older Adult Population. The Haworth Press, Inc., 1997.

Winterbottom, Daniel and Amy Wagenfeld. Therapeutic Gardens: Design for Healing Spaces. Timber Press, 2015.
Categories
DIY Outdoor Fun

Introduction to Letterboxing – Part II – Making a Personal Logbook

Introduction to Letterboxing – Part II – Making a Personal Logbook

by Carolyn Hasenfratz

Materials
*indicates items that are available at Schnarr’s
Text weight plain paper – 12 8.5 x 11 sheets
Decorative scrapbooking paper for end papers and accents
Decorative paper with letters printed on it
Heavy scrapbooking paper with a decorative design on it for the cover – 1 12 x 12 or 8.5 x 11 inch piece
*Thread or twine about the thickness of baker’s twine, kite string, 1mm hemp cord or something similar
Assortment of small beads
Metal eyelets

Tools
*Pencil
*X-Acto knife and blades
Needle tool
Large sewing needle
*Old block of scrap wood
Paper trimmer
*Scissors
*Glue stick
Squeegee or bone folder
Scrap paper
*Metal ruler
*Utility knife with new blade
Self healing cutting mat
Eyelet setter
*Hammer
Small hole punch
*Pliers

Part 2: Making the logbook

1. Take your 12 sheets of text weight paper and cut them down to 11 x 5 5/8 inches. Fold them in half.

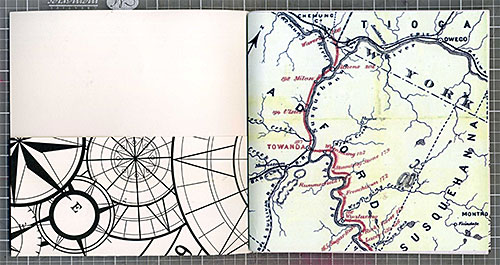
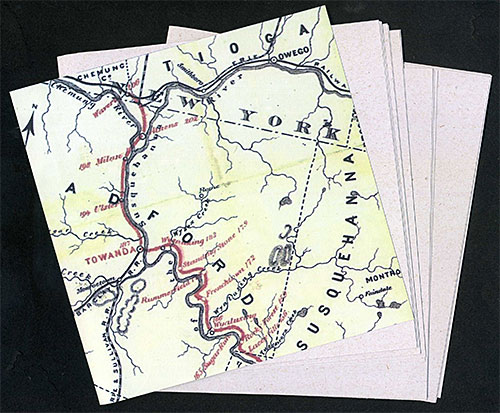
2. To make interesting endpapers for your book, take a lightweight piece of decorative paper with a map or other design on it and cut it down to 11 x 5 5/8 inches. Fold it in half as in the step above. Nest the text paper inside the endpaper piece.

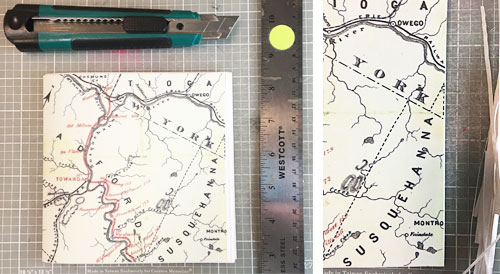
5. When you push all the nested paper pieces together at the spine, you’ll notice that the inner pages stick out at the fore edge. For a finished look, trim off the paper that sticks out using a metal ruler and a sturdy utility knife. A paper trimmer probably will not cut through all the layers cleanly on the first try and an X-acto knife might be a little too narrow and wobbly to make the cut safely. Something robust and sharp enough to cut through all the layers without having to press too hard will give you the neatest and safest results.

Before and after trimming the fore edge of the handmade journal..
Before and after trimming the fore edge. (In case you are wondering, the green dot on my ruler is there so I don’t get it mixed up with student tools when I’m teaching.)

Tip: If your metal ruler is not sold with a cork backing already on it, add a strip of cork to the back of yours to prevent slippage of your ruler while cutting. This extra bit of effort will pay off by possibly preventing injuries. If you shave off the side of your finger with a utility knife or craft knife you will never neglect to do this again! (Ask me how I know!)

4. Select a piece of decorative paper that is heavier in weight, like light cardstock, to use for the cover. Cut it down to 8 1/2 x 11 inches. From the bottom long edge, make pencil marks 2 3/4 inches up on the inner facing side.

5. Fold up at markings to make built-in pockets for the inside front and back covers. Fold cover in half and nest other papers inside.

The book is starting to come together!

6. Place a piece of scrap wood on your work surface. Go to the middle of your book and spread it open. Place the book with the inside facing up and with the needle tool poke four holes through all the layers of paper, one near the top, one near the bottom, and two close together in the middle.

7. Cut a piece of heavy thread or cord up to 1 mm thick to a length of 34 inches and thread a sharp, sturdy needle with it. Starting on the outside of your book at the middle hole, bring the thread in, leaving about 7″ trailing on the outside of the book. Bring the thread out again at the bottom, in again at the middle through one of the two holes, out again at the top and in again at the middle, making a figure 8 pattern. If the needle is difficult to pull through the holes pulling with pliers can help you get it through. Tie off your cord at the spine and if there is any excess cord left tie it at the middle also and let the ends trail.

8. String beads onto the ends of your cords as accents and tie double or triple knots as needed at the ends of your cords to hold them on.

9. Cut two 2 inch x 6 inch pieces from another pattern of decorative cardstock. Fold them in half lengthwise. Apply glue from a glue stick to the inside of the folded piece and press in place over the fore edge. Burnish your glue job well between pieces of clean scrap paper.

10. Punch two holes at each pocket with the small hole punch. Use an eyelet setter and hammer to spread the back of the eyelet out to fasten the sides of the pockets securely.

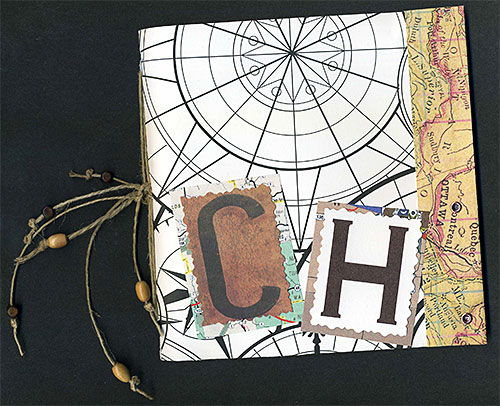
11. Cut two initial letters from letter printed cardstock or paper and mount on pieces of slightly larger decorative paper to give them a border. Glue to the front of the book and burnish.

Look for Letterboxes

Go to either the Atlasquest web site or the Letterboxing North America web site and create a profile for yourself. Search for letterboxes near you. I like to print out the clues and then keep them in a three-ring binder. I also keep in this binder maps and other information about the places I’m interested in searching. I search for a lot more letterboxes than I actually find so it’s not uncommon for me to make multiple attempts on a letterbox.

If you have a smartphone, look for an application called Clue Tracker. You can use this app to search the databases of either Atlas Quest or Letterboxing North America to find boxes near you while you’re on the go.

Have fun out there!

Categories
DIY Outdoor Fun

Introduction to Letterboxing – Part I – Carving a Personal Stamp

Introduction to Letterboxing – Part I – Carving a Personal Stamp

by Carolyn Hasenfratz

What is Letterboxing? It’s a fun outdoor hobby that is kind of like a lower-tech version of Geocaching. Letterboxers hide small, weatherproof boxes in publicly accessible places (like parks) and distribute clues to finding the box in printed catalogs, on one of several web sites, or by word of mouth. Individual letterboxes contain a notebook and a rubber stamp, preferably hand carved or custom made. Finders make an imprint of the letterbox’s stamp in their personal notebook, and leave an impression of their personal signature stamp on the letterbox’s “visitors’ book” or “logbook” — as proof of having found the box and letting other letterboxers know who has visited. Many letterboxers keep careful track of their “find count”.

To begin looking for letterboxes, you need a simple toolkit – a personal signature stamp, a stamping ink pad to carry with you, a personal logbook to carry with you and some hunting clues. In this class I will show you how to make the signature stamp and in the next segment you’ll learn how to make the logbook. You can buy the stamping ink pad from a craft supplier. Clues are available on web sites and at least one mobile app.

Materials
*indicates items that are available at Schnarr’s
*Tape
Tracing paper
Rubber carving material
Rubber stamping ink pad
*Ziploc bags

Tools
Pencil
Ball point pen
*X-Acto knife and blades
Carving tool with interchangeable tips with v-gouges and u-gouges in different sizes
*Scissors
Squeegee or bone folder
Scrap paper
*Metal ruler

Part 1: Making the stamp

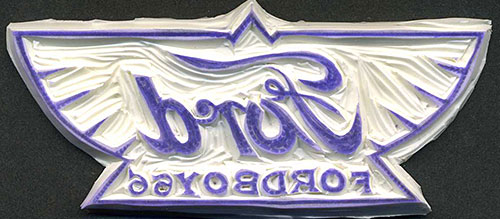
Letterboxers choose a trail name and typically carve a personal rubber stamp that incorporates their trail name or relates to their trail name. Here is what my personal stamp looks like.

I intended to use the trail name “Jeep Girl” because that was my CB handle in my Route 66 club. I carved my stamp before I checked one of the letterboxing web sites and discovered that “Jeep Girl” was already taken, so I changed my letterboxing trail name to “Jeep Girl 66”. I recommend that when you are considering trail names to check to see if the one you want is already taken. Here are the web sites to perform those searches:
Atlasquesthttps://www.atlasquest.com
Letterboxing North Americahttp://letterboxing.org

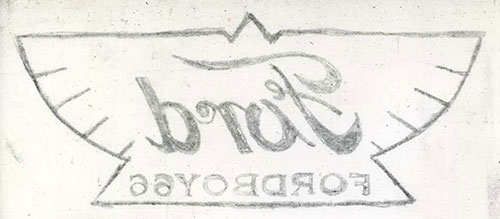
1. Once you know what your trail name is going to be, create a stamp design to complement it. You can draw your design by hand or on a computer if you have access to computer graphics software. My fiance Tom needed a stamp to go along with his trail name “fordboy66” so here is a design I came up with using computer graphics tools inspired by the Ford logo from 1912.

While you are designing your stamp, keep in mind what size your carving is going to be. My stamp is pretty big so that the details were easy to carve. Draw or print out your design at the actual size that you want your stamp to be.

2. Next tape a piece of tracing paper over your design and trace using a relatively soft pencil that’s been sharpened really well. You want to be able to capture detail but use soft graphite if you can so that the design will be easy to transfer to the rubber.

3. Lay your tracing graphite side down onto your rubber carving material and tape in place. Draw over your lines again from the other side with the pencil to transfer your drawing to the rubber. Lift a portion of the tracing paper to see how well the design has transferred before you move it. You can also rub all over the paper with a squeegee or bone folder to make sure you went over all the lines.

4. Remove your tracing and set aside. Go over the pencil lines on the rubber one more time with a ball point pen so that when you are working your design won’t be rubbed off. If possible, choose an ink color that is close to the color you’ll be stamping because for the first few printings a little ball point pen ink is probably going to get into your stamp print. The pen ink will wear off in time.

With so many redrawings needed to get your design transferred, some imperfections will creep in. Part of the charm of Letterboxing is the hand-carved quality of the stamps, so please don’t see this as a defect. Fun and adventure are what is important – high quality carvings are appreciated but not a requirement. People of all skill levels can make a carving that is good enough for the job.

If you have any text in your stamp design, the words should look backwards on the rubber before you start cutting. Double check before you start to make sure your text will print the right way when you use the stamp.

5. Cut away the negative portions of your design (the “white” space) and leave the positive areas, the parts you want to print (or the “black” lines). I find the easiest way to carve is to outline by cutting around the design elements with an X-acto knife, then making another cut a little further out with the knife forming a channel that is shaped like a “V”.

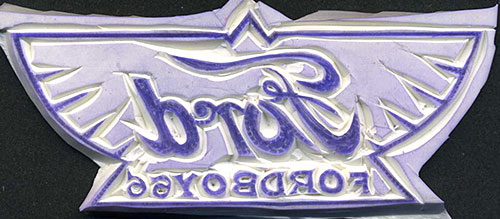
Design elements of the stamp have been outlined with an X-acto knife.

Then I cut away large areas with a v-gouge, one of the tips included in a linoleum cutter tool set.

I’ve written a very detailed tutorial on rubber stamp carving if you need more information. http://www.limegreennews.com/howcarv.html

If your carving material is thin, you might need to mount it on a piece of clear acrylic block to stiffen it and get a good print. You can temporarily attach the rubber to the acrylic block with double-sided tape.

6. Wash and dry your stamp. Test your stamp by pressing it on your ink pad and then onto paper. Once you are satisfied with your carving, you can store it in a Ziploc bag along with your ink pad to keep ink from getting on you when you carry it around.

Here is what the new stamp looks like when printed with blue stamping ink.

Stay tuned for Part II – Making a Personal Logbook!

Categories
Backyard Wildlife Gardening Outdoor Fun Sustainability

Aquatic Macro Invertebrates at Litzinger Road Ecology Center

Aquatic Macro Invertebrates at Litzinger Road Ecology Center

Aquatic Macro Invertebrates are animals without a backbone that live in water and can be seen with the naked eye. I’ve had an interest in these creatures ever since I can remember. When I was young I caught a variety of water invertebrates such as water beetles, clams, crawdads and snails and attempted to maintain them in my aquariums. I was thrilled when my brother’s aquarium started to grow hydra even though they predate on tiny fish, because I’d read about them but never thought I’d see any. I currently have small colonies of freshwater shrimp in three of my aquariums. Many aquatic invertebrates are insects that live part of their life cycles in water but have an adult flying stage.

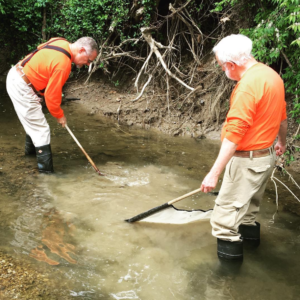
When the Litzinger Road Ecology Center offered a training workshop for volunteers on how Aquatic Macro Invertebrates are used to monitor water quality, of course I had to attend. Master Naturalist and Stream Team member Cliff Parmer taught us some Aquatic Entomology facts then we went outside to Deer Creek to learn how to take a scientific sample of water invertebrates.

sampling aquatic invertebrates
Volunteer collectors chose two spots in the stream for collecting samples – one in a riffle, and one in a calm area. The stream bottom was disturbed while a seine caught the small animals that were swept downstream.


collecting water invertebrates
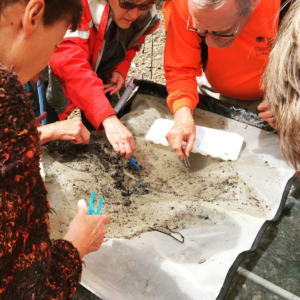
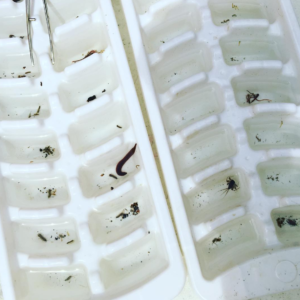
We examined the contents of the seine for small invertebrates which we placed in ice cube trays filled with stream water.


aquatic invertebrates in Deer Creek
Here are some of our finds – there is a nice leech in there (yuck). One of the animals in the right tray is a Mayfly nymph – something I was happy to see because the purpose of sampling is to check water quality. Mayfly nymphs are one of the animals found only in healthier streams. Stream team sample findings are reported to the Missouri Department of Conservation so they can use the data to check stream health.


identifying aquatic invertebrates
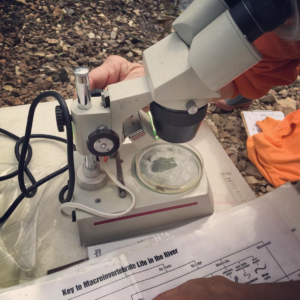
Although macro invertebrates can be seen with the naked eye, a microscope is useful to see small details to help identify each species. We were provided with identification charts to show us what to look for.


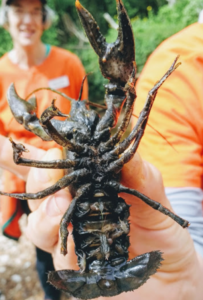
Mother crawdad with babies under the tail
I used my childhood crawdad catching skills to hand-catch the most “Macro” invertebrate of the day – a large mother crawdad with tiny babies clinging to the underside of her tail. We released all the animals back into the water after we had a look at them.

If your garden has a water feature, at some point you may encounter aquatic invertebrates. A common example is the mosquito, very undesirable and needs to be eliminated. A strain of BT (Bacillus thuringiensis) will kill mosquitoes without harming any other life forms (except some gnats, which I don’t think anyone will be sad about – except maybe hummingbirds which eat them). Most other aquatic invertebrates are harmless or downright beneficial. For example, dragonflies live the first stages of their lives in water and are one of the best predators of mosquito larvae. When dragonflies emerge as flying adults they have a voracious appetite for adult flying mosquitoes – they also add beauty and color to the garden. Others, like caddisfly larvae or water beetles are not exactly beautiful in a conventional sense but have interesting lifestyles that are fun to observe and study.

Even if your garden does not include a water feature, there are ways that your garden can impact aquatic invertebrates. Water that runs off your garden and yard into a storm sewer is eventually released into natural bodies of water. If you can keep excess pesticides and fertilizer out of storm runoff you can help invertebrates to survive. Excess fertilizer harms invertebrates by causing algae blooms that reduce oxygen in the water and kill off more sensitive animals. Life forms higher up on the food chain such as fish and birds depend on a steady supply of invertebrates for food.

If your property is adjacent to a body of water, you can further aid the water quality by implementing a riparian corridor or creek corridor vegetative buffer. Such a corridor does many things for water quality, including temperature regulation. By cooling the water, streamside vegetation helps maintain higher oxygen levels in the water.

Backyard wildlife increases my enjoyment of the outdoors and my garden. If you feel the same way, an appreciation for small but vital water animals can be rewarding!

Categories
Gardening Outdoor Fun

How I Use My Garden for Self Care

How I Use My Garden for Self Care

by Carolyn Hasenfratz

mygardenLife can be stressful at times. If we don’t take time for self care our health can suffer. I recently saw an advertisement for a workshop about gardening and holistic self care. I was not able to attend and learn some new things, but I can think of a lot of ways in which my garden already helps me with my own self care.

Exercise – That’s good for physical and mental health.

Time outdoors – Health benefits accrue from contact with nature and sunlight.

Hobby activity and learning – Observing what is going on in my garden and finding out the reasons why is great excercise for the brain. Studying for my Master Gardener tests earlier this year gave my memorization skills a big boost. If photography, sketching, painting or other visual arts are hobbies for you the garden can provide a lot of interesting subjects.

Mindfulness – I’m learning more about Mindfulness and how to practice it. The pleasant sensory experiences in a garden (taste, sight, smell, sound, touch) are a great incentive for Mindfulness exercises.

A sense of purpose – When I work on my garden, I have the satisfaction of knowing that I am learning things that I can teach to others. I’m making the vicinity healthier and more pleasant for my human neighbors. Because of the way I manage my garden I’m helping address environmental problems that affect all of us – soil erosion, soil health, flooding, overuse of pesticides, scarcity of pollinators for crops, air quality and water quality. The impact of my garden may be small but it’s more satisfying to do something than nothing. The number of beneficial non-human species that use my garden lets me know that I’m providing healthy habitat for them. I also donate some of the extra seeds I raise to non-profits.

Indoor environment improved – My gardens surround all three exterior walls of my condo so when I open the windows delicious fragrances waft in. I set vases of cut flowers and herbs around to freshen and beautify the interior. If you believe in aromatherapy, you can breathe in some herbal essential oils right from the plant! I also make potpourri from the dried herbs.

Nutrition – I harvest edible leaves and make tasty beverages from herbs in my garden. The freshness enhances both taste and nutritional value.

Personal care products – I use herbs from the garden dried or fresh in a number of personal care products such as facial masks, bath tea, soaps, face lotion, skin balm and more (some of my recipes are here). Luxury bath products do make you feel cared for and when you make your own they’re even more luxurious because they’re made to your specifications.

Spritual benefits – Many faith traditions can incorporate gardening and plants – for example mazes, grottoes, shrines, incense and more. Many people find that working in concert with nature makes them feel closer to the Creator they believe in.

According to a book I’m reading now, “The Expressive Arts Activity Book” by Suzanne Darley and Wende Heath, the arts are inherently therapeutic. Gardening is an art and many products of the garden can be used in art forms such as cooking and flower arranging. Although I don’t know much about it yet, there is a professional field called Horticultural Therapy. If you already have a garden, I encourage you to take time to enjoy it’s benefits. If you are thinking of starting one the fall is an excellent time – waiting until spring to start a garden from scratch can be a challenge!

Categories
Gardening Good Eating Outdoor Fun

You’d Be Happy Too If You Could Eat What Bugs You!

You’d Be Happy Too If You Could Eat What Bugs You!

by Carolyn Hasenfratz

You'd Be Happy Too If You Could Eat What Bugs You!

“You’d be happy too if you could eat what bugs you!” That’s what it says on a coffee cup that I bought for my Dad when I was a little kid. I chose the cup for Dad because the design was in his favorite colors, green and orange. I have to admit I liked that
it had a frog and a bug on it, two of my favorite things then and now!

I’m not yet at the point where I’m willing to experiment with eating bugs, but I’m intrigued by garden weeds that are edible. There is no doubt that gardeners are “bugged” by weeds but your attitude toward some of them might improve if you can harvest and eat them.

For example Dandelions, Wild Violets and Asiatic Dayflowers are common weeds in my garden and also delicious in a salad when young and tender. When I regularly pull the baby leaves, rinse and eat them I’m harvesting and enjoying a fresh and nutritious crop rather than dealing with something annoying. You should be very careful when foraging to make sure you’ve researched the wild plant you want to eat to make sure you have identified it correctly, are not confusing it with a poisonous look-alike and are picking it from an area that is free of toxins such as pesticides, herbicides or auto exhaust.

Unless you are extremely confident in your identification skills, my recommendation is to get some foraging instruction from an expert in person so you can actually see and taste the plants as you learn about them. To improve my skills in identifying edible wild plants, I attended a recent workshop at Litzinger Road Ecology Center given by Jan Phillips, author of Wild Edibles of Missouri. There must be a lot of interest in this topic because there were about 40 people there.

First we watched a slide presentation where we learned about some of the wild edibles available in Missouri. Did you know that you can eat Daylily buds, Plantain, Redbud flowers and Henbit? We learned about these and many more. When I was a kid my neighborhood friends and I used to eat the seed pods of the weed Yellow Wood Sorrel – we called them “pickles” because they have a tart taste. I thought we were just lucky not to be poisoned while experimenting, but it turns out that’s a well-known edible weed though some people can’t eat it because they are allergic to the oxalic acid it contains.

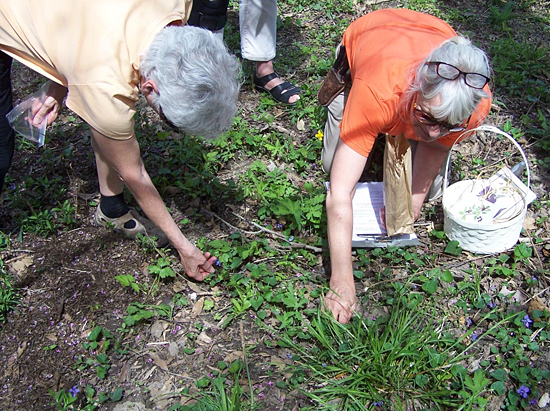
Foraging at Litzinger Road Ecology Center

After the slide show we split into groups and foraged over different areas of the property. My group picked a lot of Redbud flowers, Violets, Dandelions, Spring Beauty, Henbit and Plantain.

Eating the results

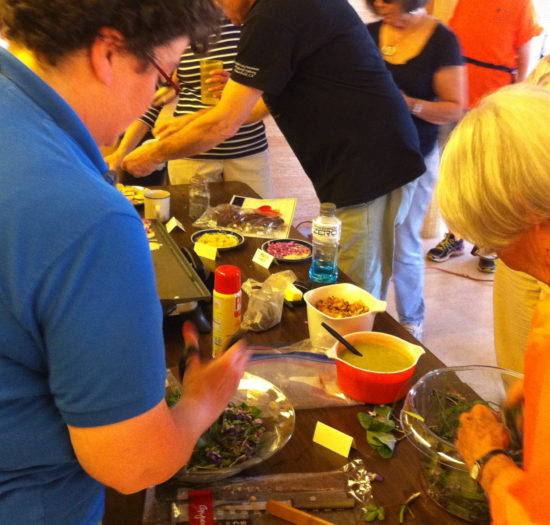
After foraging we brought our produce to the kitchen to wash and spin it. We then enjoyed some of it in salad. Chef Ryan Maher provided us with some delicious mushroom dressing to accompany the greens and flowers. Redbud and Dandelion flowers were cooked into pancakes for us to try. We enjoyed an array of other unusual treats that had been prepared ahead of time – teas brewed from things like Spicebush (that was my favorite), candied Peppermint leaves, Reindeer Lichen biscuits with Gooseberry jelly, wild nuts and more. Wild foraging is definitely a way to introduce some interesting new ingredients into your cooking!

Here is a salad recipe of mine that I like to mix with my “weed” greens.

Your favorite fresh greens from the garden
1 bulb fennel
1 cup mung bean sprouts
1 cup chopped kale (optional, if you need to boost the amount of greens)
1 cup broccoli slaw
Your favorite dressing (I mainly use vinegar and oil with a sprinkle of salt – edible weeds can be used to make flavored vinegars and tasty dressings also!)
Sprinkle dried cranberries and roasted pumpkin seeds on top

What chore sounds like more fun? Weeding, or picking some interesting food? Depending on what is growing in your garden, which task is awaiting might just depend on how you look at it!

Resources for more information on edible weeds and wild plants:
Link: Common Edible Weed Plants
Book: “Peterson Field Guide to Edible Wild Plants” by Lee Allen Peterson
Book: “Stalking the Wild Asparagus” by Euell Gibbons

Categories
Outdoor Fun

Schnarr’s can help out with your camping trip checklist!

Schnarr’s can help out with your camping trip checklist!

While making a packing list for an upcoming camping trip, I decided to make a public camping checklist with suggestions that might help out other outdoor lovers. You might be surprised at how useful a hardware store can be in outfitting yourself properly to increase your safety, comfort and fun! I wouldn’t necessarily bring all of these items on one trip but these suggestions are meant to help you create your own personalized list. *Indicates items that are available at Schnarr’s.

Camping checklist

To help you get there:

Map to campground with phone number and address written on it
Printed receipt if campsite reserved in advance
If headed for a campground that is first-come, first serve, the names, phone numbers and addresses of a couple of alternate choices
Tie-down straps*

Miscellaneous:

Cables and chargers for all your devices and batteries (*Schnarr’s carries some items in this category)
Camera and batteries*
Sunscreen*
Toilet paper* – campgrounds and outhouses sometimes run out, plus you never know when you might be way out in the woods!

Putting up the tent and items I keep in the tent:

Tent (yes I forgot this on one trip!) – We don’t carry tents in the store but you can order one from our warehouse!
Tent pegs
Rain fly
Tent poles
Hammer*
Battery powered lantern* and batteries*
Flashlights* and batteries*
Noise machine and batteries* – handy for when you’re stuck by the party campsite!
Ear plugs
Sleeping bag
Pillow
Air mattress
Sheet
Water bottle
Tissues*
Laundry bag for dirty clothes

Things to help make your campsite into a comfy temporary home:

Folding chairs*
Bug repellent*
Mosquito-repelling citronella candles*
Battery powered candles* and extra batteries*
Outdoor heater*
Large water jug*
Gas lantern (can be ordered from our warehouse)
Lantern fuel* and extra mantles*
Solar lights*
Solar shower (good to have if you’re going to a primitive campsite that lacks showers – or if the showers run out of hot water!)

Things for cooking and enjoying the campfire:

Portable grill*
Charcoal*
Matches* or lighter*
Camping stove
Stove fuel*
Funnel for stove and lantern fuel
Cookware*
Cooking utensils*
Grilling tools*
Hot dog/marshmallow forks*
Eating utensils
Kindling*
Fire starters*
Sterno fuel*
Paper plates*
Ziploc bags*
Foil* – handy for food storage and cooking over the fire
Food storage containers*
Pot scrubber*
Biodegradable dish soap*
Plastic trash bags* – not only for waste disposal, also handy for emergency storage of wet or muddy items
Paper towels*
Cooler*
Ice

For water fun:
Pool toys*
Wacky Noodles*
Inflatable air mattress*

Things to have for your emergency kit that you may or may not use:

Lubricant for tent zipper* (candle wax makes a good lubricant and candles can double as emergency lighting)
Pliers* – good for emergency repair on your tent zipper
Extra rope*
Extra tarp* or two – together with rope you can make an emergency rain fly – good for when you have to erect your tent in the rain or if your tent leaks unexpectedly. If you need to rig up a shower curtain or changing room you can do that with a tarp and some rope also (or an emergency tent like I did the time I forgot mine!).
Pocketknife*
First aid kit*
Hatchet*
Hand and foot warmers*
Weather radio* and extra batteries*
Bungee cords*
Space blanket
Emergency rain poncho*

We hope you have a lot of fun outdoors this summer!

Categories
Gardening Outdoor Fun Sustainability

Master Gardener Training Program Volunteer Activities

Master Gardener Training Program Volunteer Activities

by Carolyn Hasenfratz

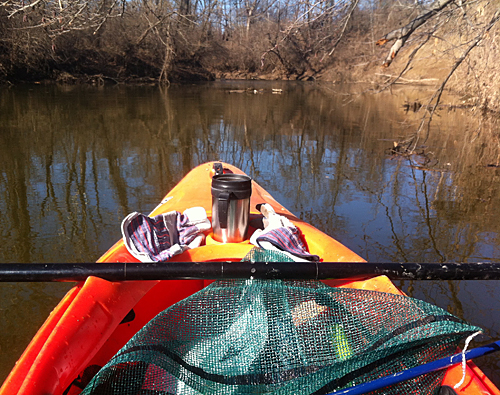
One of the requirements of the St. Louis Master Gardener Training Program is to perform at least 40 hours of volunteer work per year. We have until December to complete the hours but I thought it would be a good idea to get an early start (ok I admit it, I was dying to get my kayak out on the water). My first volunteer effort of the year was to participate in Operation Clean Stream at Simpson Lake in Valley Park on February 27, 2016.

Simpson Lake in Valley Park

Simpson Lake was a bit trashed due to the flooding in December but we made a really good dent in it. I was rewarded with sightings of a Bald Eagle and a beaver!

On St. Patrick’s Day I went on a tour of the Litzinger Road Ecology Center in Ladue with other Master Gardener trainees and made arrangements to volunteer there on a regular basis. The center is a private teaching facility owned by a foundation and managed by Missouri Botanical Garden. It is not open to the public so I thought you might enjoy seeing some photos of our tour if you have never been there.

Litzinger Road Ecology Center

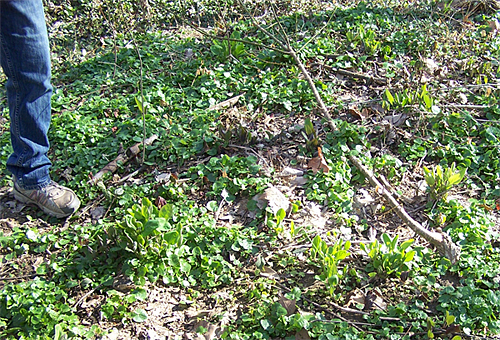
One of the major activities at the center is removing non-native plants so that native plants can flourish. This picture shows native Bluebells emerging among other plants that are slated for removal. When I start my volunteer work I have no doubt that I’ll be learning a lot more about invasive plants!

Litzinger Road Ecology Center

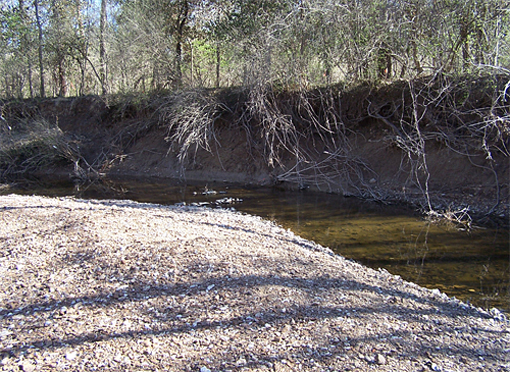
Here is a section of Deer Creek that runs through the center. At the top of the ridge there is an old railroad right-of-way that was formerly the Laclede and Creve Coeur Lake Railroad route. I knew nothing about this interesting historical tidbit until last year when I was riding my bike in the area and noticed the right-of-way and looked it up to see what it might be. As you can see from the photo, erosion is a big problem along the creek. If you own property within the watershed of Deer Creek and you would like to learn how to manage your property to reduce flooding and erosion and to improve the water quality, the Deer Creek Watershed Alliance can help you learn how to do that.

Litzinger Road Ecology Center

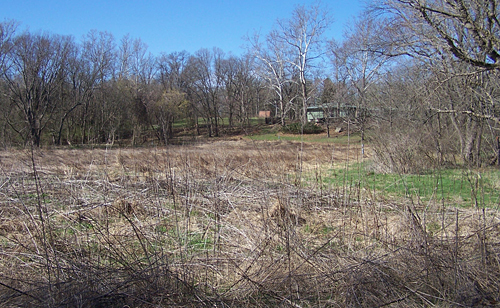
In the foreground is a prairie area and on the ridge is an exquisite Mid-Century Modern house that was formerly the home of the benefactors who donated the land for the center. It is now used as an office for the foundation.

Litzinger Road Ecology Center

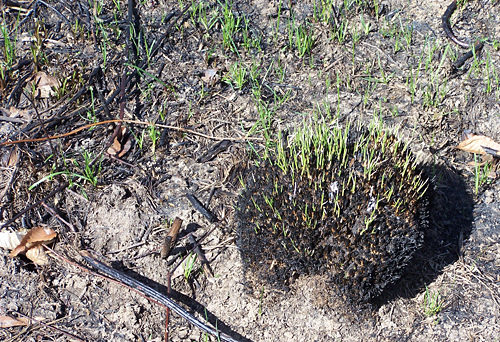
Fire is one of the tools sometimes used here for prairie management. Here is a clump of Prairie Dropseed coming back after a burn.

Litzinger Road Ecology Center

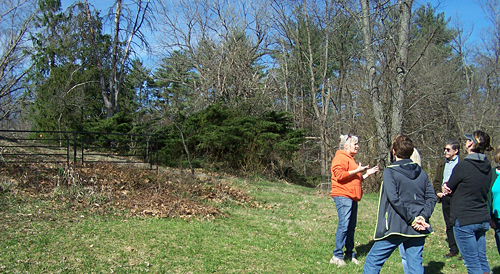
Our tour guide is pictured here explaining that a Monarch Waystation is planned for the area around the fence. The kids who come here for programs (and adults like me) should really love that when it’s done! I developed an interest in insects at a very young age and still haven’t lost it. Here and there on the grounds are “bug boards” that can be lifted up to see what’s taking shelter underneath. I loved doing that kind of thing when I was young and I still can’t resist it!

Litzinger Road Ecology Center

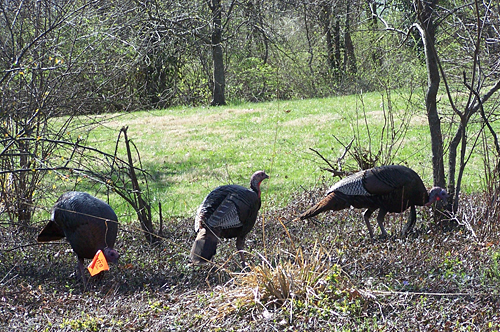
I’m also crazy about birds so seeing these gorgeous turkeys was a treat!

Litzinger Road Ecology Center

Here is a view of the circa 1964 house that shows some of the cool details.

Litzinger Road Ecology Center

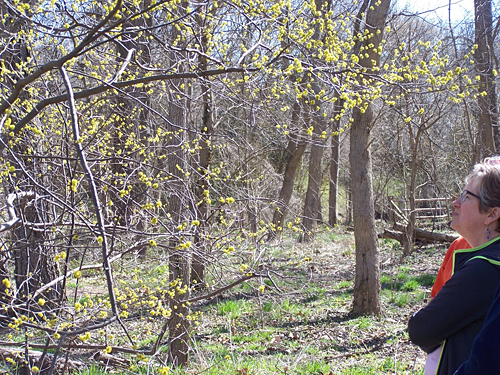
Here is a Spicebush in flower – a beautiful and desirable native plant for the St. Louis area. It’s worth considering if you are planting to help pollinators and birds because it is a host plant for the Spicebush Swallowtail butterfly.

I hope you enjoyed my virtual tour of the Litzinger Road Ecology Center! It is likely that I’ll mention some of my upcoming work here in future issues of this newsletter.

Categories
Candles DIY Home Decor Lighting Outdoor Fun

Luminous Decor with Flameless Candles: Idea #3

Luminous Decor with Flameless Candles: Idea #3

What you’ll need:
Candle lantern*
Glass container
*Water Lights – special submersible flameless candles
Acrylic or glass gems, *clear or colored
*Available at Schnarr’s.

Clear water light in a drinking glass with clear and colored gems

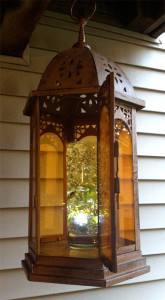
Do you have a hanging candle lantern? I have one on my deck but I’m not allowed to burn real candles in it for safety reasons. Flameless submersible Water Lights powered by batteries are the answer! Try filling a drinking glass with a clear submersible Water Light, some colored glass or plasic gems mixed with the clear plastic and add water.

What kinds of color effects can you get if you mix colored glass, plastic gems and a color-changing Water Light? Try it and see! Try different combinations for your holiday parties!

Categories
Candles DIY Home Decor Lighting Outdoor Fun

Luminous Decor with Flameless Candles: Idea #2

Decorative LED Tea LightsLuminous Decor with Flameless Candles: Idea #2

What you’ll need:
*Terra cotta plant pots
Sturdy glass container
*Water Lights – special submersible flameless candles
Acrylic or glass gems, *clear or colored
*Available at Schnarr’s.


Color-changing Water Lights displayed in a small water garden.

Submersible Water Lights come in clear and color-changing versions. Try topping off a stack of plant pots in your water feature with a clear container. Add a color-changing Water Light plus the clear acrylic gems and fill the glass container with water.

Color changing water light displayed indoors on a stand.

Here is another way to display a clear container with a Water Light. I placed the vase in a large bowl on a stand in my living room and added rocks as an accent. I like the way it looks next to my lighted artificial tree!