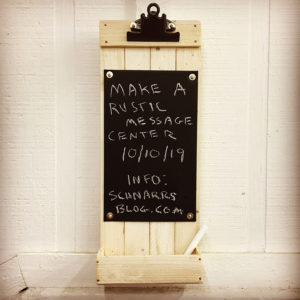
Make a Rustic Message Center
by Carolyn Hasenfratz Winkelmann
For this message center to hang on a wall I deliberately used rough lath wood instead of smoother wood stock. I wanted to simulate the look of a utilitarian crate that is getting re-used for another purpose. I bought a bundle of new lath wood so that I would have enough for teaching and samples. You can use scrap wood that you have salvaged if you prefer. Salvaged lath wood often has bits of plaster clinging to it which is very interesting if you like the distressed look. A good source for salvaged lath wood is Perennial, a creative re-use studio where I occasionally teach. On the TV show “American Pickers”, they often pick up items for re-use that have “just the right amount of Stank on it” as they say. I know what they are talking about – it’s one of the reasons I love to work with salvaged materials mixed with new. I use a dust mask when sanding any wood, especially salvaged wood because you don’t know what’s in it or where it’s been!
Materials
Lath wood
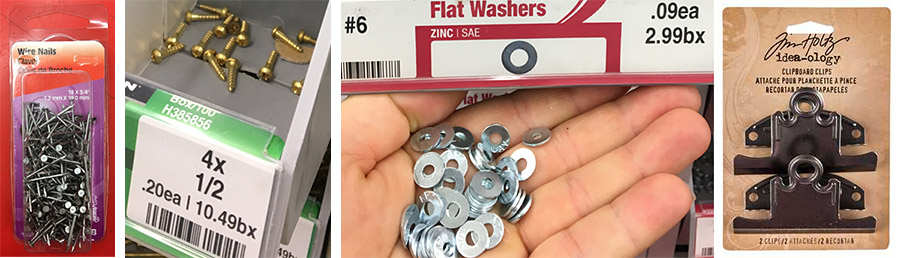
*Small wire nails and tacks – some of them can be decorative if you choose. Recommended sizes – 19 x 1/2″ and 19 x 3/4″ (Quantity approx. eighteen 1/2″ and six 3/4″)
*Small wood screws – 4 x 1/2″ (Quantity six)
*Small washers – #6 (Quantity six)
*Chalkboard Paint
*Chalkboard Contact Paper
*Clipboard Clip (available at Schnarr’s Webster)
*Wood glue
Scrap cardboard
*Optional – White acrylic paint
Tools
*Sandpaper
*Saw
*Ruler
*Pencil
*Drill
*Tiny Drill Bit
*File
*Rags
*Paint water container
*Paint brushes
*Small clamps
Block of old wood for bracing wood while drilling and nailing
*Dust mask
*Squeegee or bone folder
*Utility knife, self healing cutting mat and *metal ruler, or paper cutter for cutting cardboard
*Phillips screwdriver
*Optional – small container for mixing paint wash
*indicates products available at Schnarr’s
Instructions
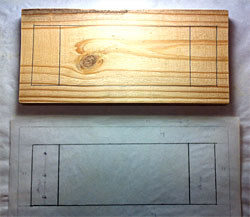
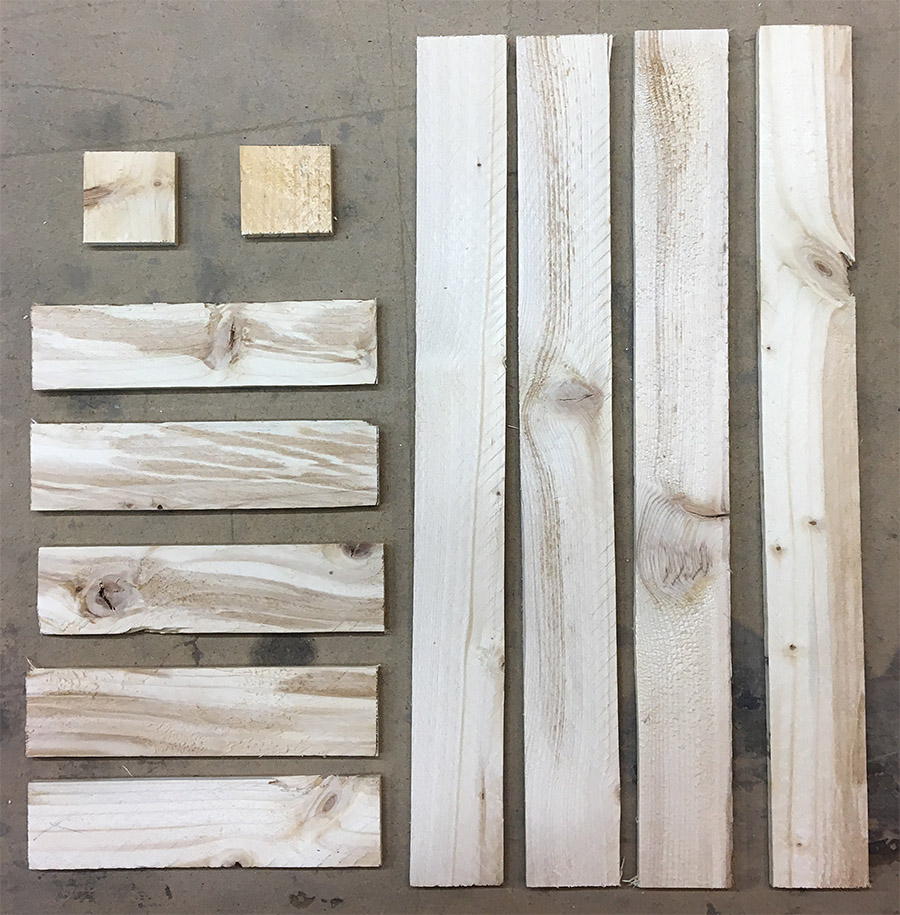
1. Cut 1 1/2 inch lath wood into the following lengths:
Four pieces – 15″
Five pieces – 6″
Two pieces – 1.5″
Use the pencil and ruler to measure and mark wood pieces, then cut.
Optional: Paint all the wood pieces on all sides with a wash of white acrylic paint and allow to dry.
2. Sand the rough edges off of your wood pieces. You are probably wondering why I placed the step of sanding the wood pieces after painting instead of the other way around. The reason is it brings out the rustic look more because you’ll be removing some paint as you remove the rough spots on the wood.
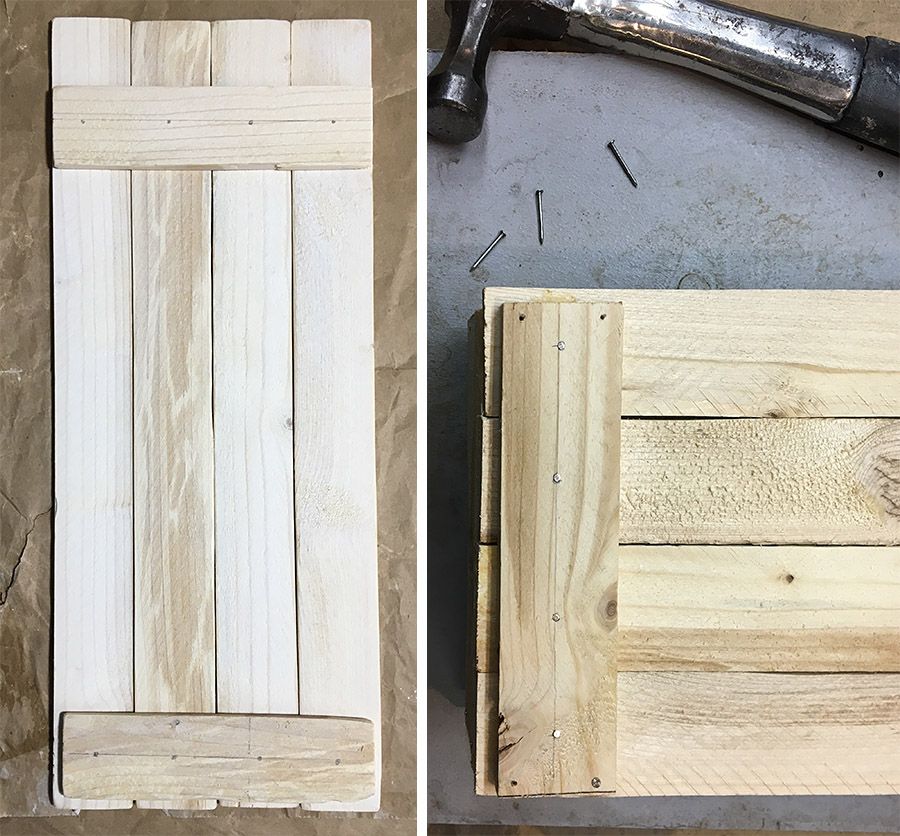
3. Lay the four 15″ long pieces down on your work surface. Place one of the 6 inch strips about an inch and a half from the top. Add another right at the bottom of what will become the back of the message center. If it is helpful, draw a pencil line lengthwise on the wood to help you line up your nail holes. Draw little dots to show where the nail holes will go.
4. Squeeze a little wood glue on the backs of the wood cross pieces and clamp in place if you have trouble with the wood sliding around while you’re trying to work on it. If any wood glue squeezes out just wipe the excess off with a rag. Drill a little pilot hole for each nail. You don’t want the drill hole to go through all the way, it only needs to go in far enough to help the nail stay in place and to keep the wood from splitting at the surface as the nail goes in.
5. Hammer in your 1/2″ nails. If any poke through the front, file off the sharp parts.
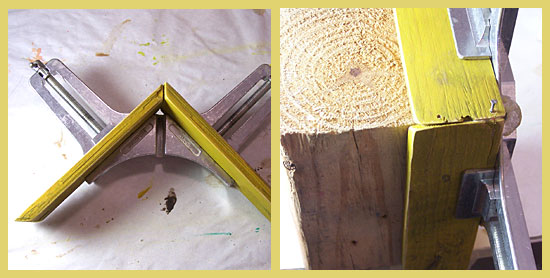
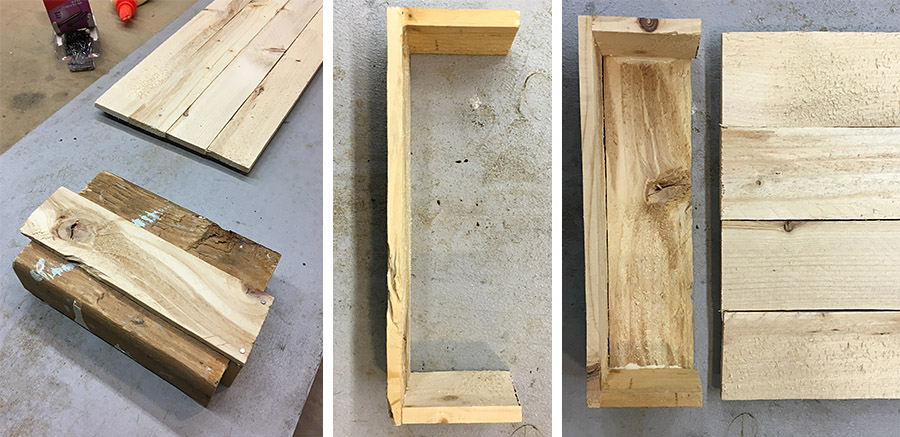
6. Now start to assemble the tray that will be attached to the bottom front of the message center. Prop up one of the two small one and a half inch pieces of wood up against a piece of scrap wood. A small section of a 2 x 4 is the perfect size (2 x 4s are not really 2″ x 4″ as you can see.) Add a dab of wood glue and place a 6 inch cross piece on top, butting up the edges together. Drill a couple of pilot holes and nail in place. Repeat for the other end.
7. Add another 6″ piece to the bottom of the box and nail in place after dabbing with wood glue, then nail the whole assembly to the bottom front of the message center with 3/4″ inch long nails. It helps to prop up the other end with the 2 x 4 piece while you are nailing through the back.
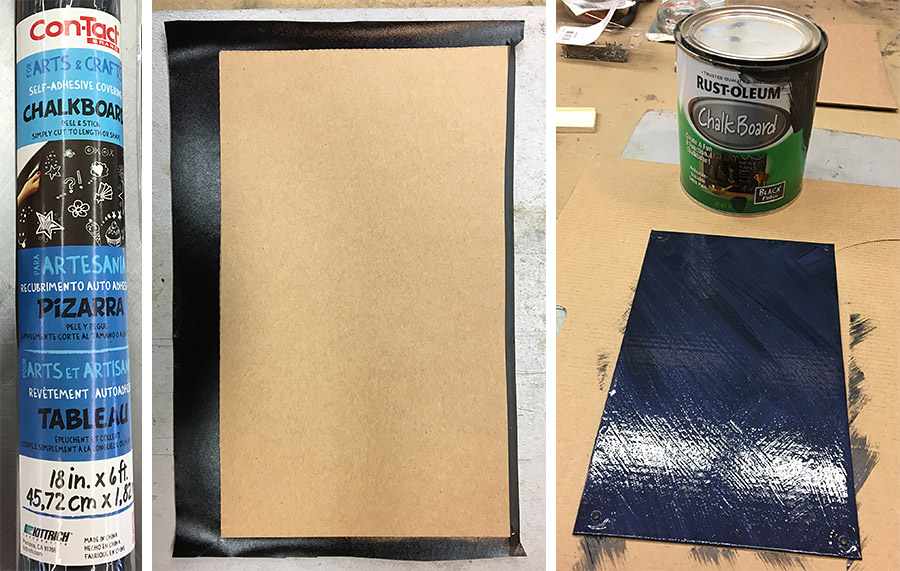
8. Next make a small chalkboard for the middle front. Cut out a 5 1/2″ x 9″ piece of scrap cardboard and cover with chalkboard Contact paper. Cut the Contact paper slightly larger than the cardboard so that you can fold the edges over for a neat look. Burnish the paper with a squeegee tool to make a nice tight seal. Paint the front of the chalkboard over with chalkboard paint. (Unfortunately the Contact paper does not really take the chalk well enough by itself, but it makes an excellent base for the paint.) Let paint dry.
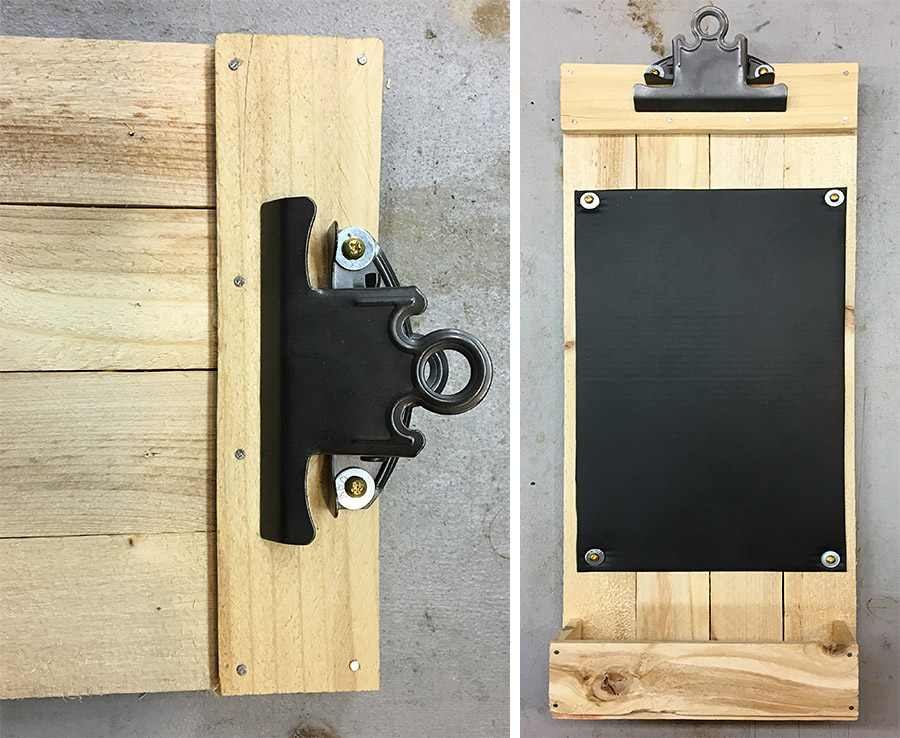
9. Nail the last 6″ wood strip across the top front of the message center and glue and nail in place. Place the clipboard clip where you want it and make little pencil marks to indicate where to drill two holes for the screws to hold the clip on.
10. Drill the pilot holes then thread a washer on two screws and drive the screws in place.
11. Use a screw and washer on each corner of the chalkboard to attach in the middle front of the message center. You are done!
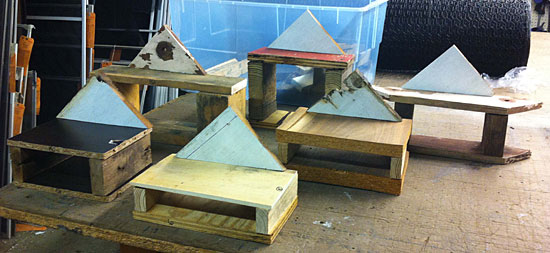
Do you want some more ideas for for things to make out of wood? Here is the Pinterest Board I made awhile ago that was the inspiration for this article:
Rustic Spring Ideas – this project isn’t only for spring of course, but I started working on it in February.
There are also some ideas for fun wood projects here on the Schnarr’s Pinterest site:
Ways With Wood