Categories
Gardening

“Is That a Weed?”

“Is that a weed?”

by Carolyn Hasenfratz Winkelmann

A client asked me that question once while we were looking at a wild spot in her yard that she wanted to convert into a garden. We were brainstorming and I was trying to get an idea of what style of garden the client might want. She asked me if a tall yellow-flowering wildflower prominent in the proposed new garden spot was a weed. A weed is a plant where you don’t want it, not a particular species, so that isn’t always an easy question to answer. In certain styles of garden that plant would have been a weed, in others it would have been appropriate. So I told her in so many words, “You get to decide whether it’s a weed or not. It may or may not look good in your new garden depending on the style”. It would have been lovely for example in a wildflower meadow or bird garden but problematic as part of a garden that depends on a manicured look.

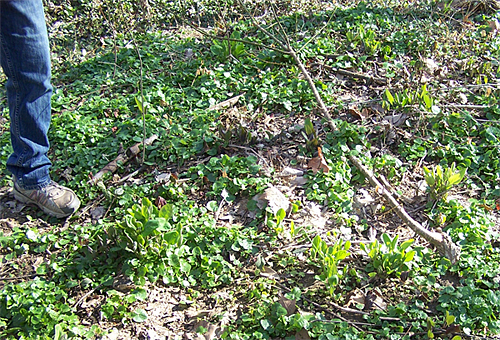
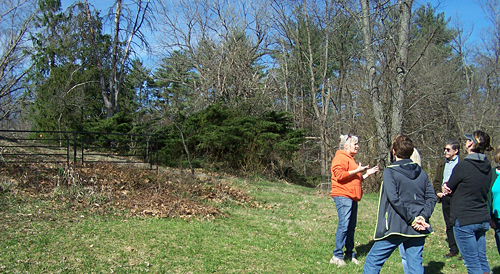
I volunteer at Litzinger Road Ecology Center and even though they specialize in growing native wildflowers, they had too much Fleabane on the patio where they didn’t want it, so in that particular spot it was a weed. I moved some to my new rock garden and I think it looks very appropriate there. It should look even better when this rock garden gets a chance to fill in a little. My husband Tom even complimented me on this plant completely unprompted! As this rock garden expands, I’m planning on planting around the tufts of moss that grow on this slope rather than removing them. I love moss and I want it in my rock garden. When this area was formerly supposed to be turf grass, moss was a problem.


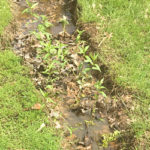
Some plants have “weed” in the name which gives you a clue about how it is sometimes regarded. This Swamp Milkweed that I just planted in part of our new rain garden could get “weedy” because it reproduces like crazy at my condo, which is where I obtained these transplants. There are many more still to bring over! These get to be large plants and when I run out of space they might become “weeds”. For now, they are a critical part of my landscape plan and I’m overjoyed to see lots of seedlings. I can welcome many more before there are too many. I’m going to try to grow multiple milkweed species because they provide critical Monarch caterpillar food.


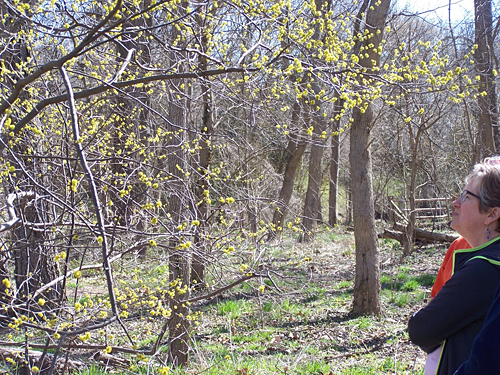
Pokeweed is another plant with weed in the name that can get “weedy”. In a wildflower garden you might want to leave one or two. It is native to Missouri and provides bird food. It is also quite pretty. I’m used to getting rid of it entirely on client sites but when weeding a wildflower garden at Litzinger Road Ecology Center the other day I asked first about each plant before removing it because I know the purposes of gardens there are much different than on most client sites. I was asked to leave one Poke plant in this case (it’s behind the native Columbine). That’s exactly what I recommended a few years ago for my Dad’s garden which was designed as a wildflower garden that is friendly to birds and pollinators. A few Poke plants are nice in a wildflower garden but too many could be a problem because they really spread a lot.


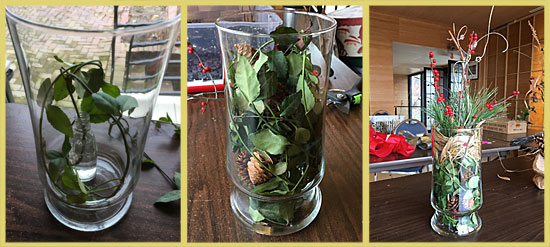
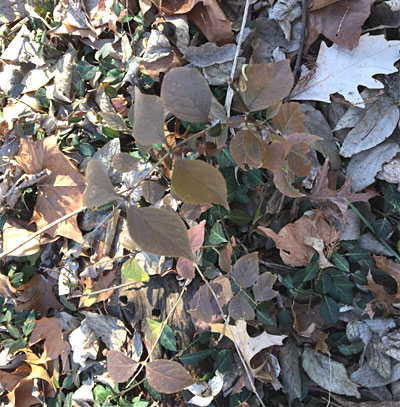
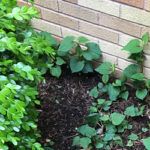
My mother-in-law has Wild Ginger that she considers weedy because her garden style doesn’t call for continuous ground cover. We associate Boxwood as shown at left of this picture with manicured garden styles so when we see it with something that looks wild or naturalized it just looks overgrown to our eye, not harmonious. My gardens are very informal though, and I’ve been digging some of this up to replace at least some of the Vinca minor at my condo. Wild Ginger is native and Vinca minor is invasive, so I’d much rather have the Wild Ginger. My mother-in-law is finding it hard to believe I want this but I’m really delighted to have it – it’s been on my wish list for years! In the right garden this could be beautiful – in the wrong one, a major maintenance headache. At one time I deliberately planted the Vinca minor because I love the flowers and it took me years to get it established, but now I have too much and it has passed into “weediness” for me.


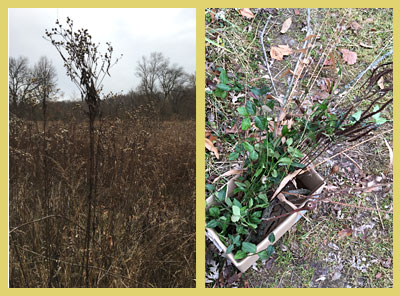
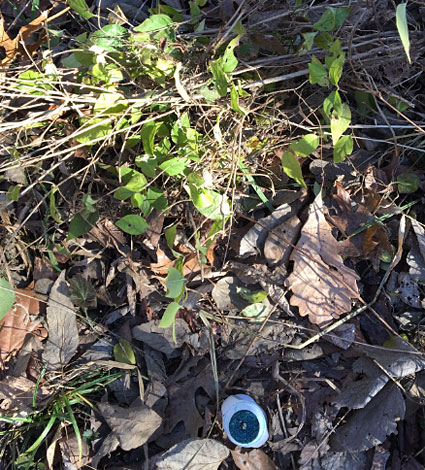
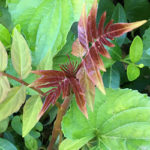
This reddish seedling came up in the garden at the condo. I like to find out what a volunteer plant is before I pull it if at all possible in case it could be interesting or useful to grow somewhere. I showed the photo to the folks at Litzinger Road Ecology Center and they said it was an invasive Tree of Heaven and to destroy it! I was hoping it was a native Sumac that I could move to our house but sadly not, it has to go.


The Importance of Plant Identification

I wrote about the previous examples of how I’m dealing with “weeds” so that you can get ideas for how to treat any volunteer plants that you didn’t expect or are not sure you want to keep. It is necessary to identify the plants so that you can get information to make an informed decision. I need to write more about plant identification but in the meantime this previous article I wrote for Schnarr’s has some identification tips in it that could help: How to Diagnose Plant Problems.

Here is a Pinterest board I started to help identify, treat and prevent weeds: Weeds

Here are some applications that can help you out with identifying plants:

Categories
Backyard Wildlife DIY

Make Suet Cakes for Outdoor Birds

Make Suet Cakes for Outdoor Birds

by Carolyn Hasenfratz

What you will need
*indicates items available at Schnarr’s
Suet or some other kind of food grade fat that gets solid
*Bird seed
Dried fruits (optional)
Chopped nuts (optional)
Grains (optional)
Leftover bread, cereal and crackers (optional)
*Dried mealworms
*Twine
*Scissors
Long thin knife (doesn’t have to be very sharp – could be something like a fettling knife for ceramics or something similar)
Clean food containers for molding
*Spatula and *mixing spoon
*Mixing bowl
Double boiler setup – *saucepan, *temperature resistant glass measuring cup
*Hot pot pad, *oven mitt, *jar lifter or other tool for lifting hot containers safely

I am a member of the St. Louis Master Gardener program and I do some of my volunteer work at Litzinger Road Ecology Center. LREC offers enrichment and training sessions for volunteers to increase our knowledge. Sometimes we get to take part in fun “crafty” activities that have an ecological benefit. We made bird suet cakes one day at LREC and later I also experimented with making some at home.

Feeding birds in our backyards is a way to get a good look at birds up close while providing them with a nutritional food bonus to make their lives a little easier. Suet and fats are good foods for many birds when it is late winter and natural food sources are low – fats are also most likely to attract birds who eat a lot of insects, the kind of birds you particulary want in your yard to provide free pest control services. At the time I am writing this we may be done with freezing temperatures during the day but we may still have some below freezing temperatures at night. You know how our weather is in the St. Louis area – it could be 85 degrees or 25 degrees tomorrow (or both) and no one would be shocked! Suet and fats can melt and turn rancid in warm weather but if you double-render the fat you can place suet outdoors in temperatures over 70 degrees F, according to the book “The All-Season Backyard Birdwatcher” by Marcus H. Schneck.

Before beginning to heat the fat, please read the safety precautions in my article Make Old Wax Candles Into New Candles. Any safety issues that might come up while melting fat are pretty much the same as with wax. I’m not sure if the melting temperatures are the same. Keep a close watch on your fat to make sure it doesn’t overheat. If you’ve ever had an unexpected flare-up from hot bacon grease you know hot fat is something to treat with care!

In my example I used bacon fat and some beef fat trimmings that the butcher at Whole Foods gave to me. I had gone to Whole Foods with the intent of buying some suet but they didn’t have any. Suet is a type of fat that comes from around the kidneys. Just plain beef fat will work too.


Melting beef fat to make suet cakes

I experimented with a couple of different ways of rendering the beef fat. First I chopped it into smaller pieces then I put some of it in a food processor to partially grind. A meat grinder would be better for this but I don’t have one. I put the ground fat in the double boiler to melt down. A double boiler is used to heat things that scorch or burn easily. At home many of us use such a setup to melt things like wax and candy. Place a saucepan on top of the stove and partly fill it with water. Set a glass heat-resistant measuring cup containing the fat in the pan of water and slowly heat the water until the fat melts.

I also experimented with putting some fat pieces into a glass temperature-resistant measuring cup and microwaving the pieces for about a minute to a minute and a half at a time. Either way the fat melted fine and I strained out and discarded the tough pieces and little meat pieces that were left behind and poured the fat into a glass dish to harden.

I let the fat cool until it was hard, then I re-melted it. The hardening and remelting makes it double-rendered and ready for warmer spring temperatures.


Molding the suet cakes and adding twine for hanging

After the fat is melted, you can mix things in it that are tasty treats for birds – leftover baked goods, grains, nuts, chopped dried fruits, cereal, dried mealworms, and of course, bird seed. I molded my cakes in cleaned used food containers and popped them out after they were hard. You can buy pre-made suet cakes (at Schnarr’s!) that are made to go into a pre-made metal mesh holder with a hanger. When you make your own suet cakes, you have to work out a way to hang them. I drilled holes through the middles with a long thin knife and threaded twine through the holes to tie the cakes in place outdoors.

The remaining photos were taken at Litzinger Road Ecology Center on the day we made suet cakes. We were all asked to bring in stuff from our pantries to add to the bird food mixture.


Additives for bird suet cakes

At LREC, we had a quantity of donated food containers to use so we made holes in the sides of them to accomodate a hanging string.


Making holes in plastic food containers with a hot nail

You can easily make holes in plastic by heating a nail in a candle flame. Hold the nail in a pair of pliers to keep from burning your hands and be careful around open flames!


Hanging string for bird suet cake

We made knots in the strings to keep them from slipping through the hole. Before filling the containers with food mixture, for extra security we pulled the stings in slightly so the fat mixture would harden around the string and help hold it in place.


Bird food mixture in a plastic food container

After filling with food mixture, all we had to do was wait for the fat to harden. Then our suet feeders were ready to hang outdoors!

Categories
Uncategorized

Exploring Where Art and Science Meet at the Donald Danforth Plant Science Center

Exploring Where Art and Science Meet at the Donald Danforth Plant Science Center

by Carolyn Hasenfratz

The Arts and the Sciences were more closely interconnected with each other at earlier times in human history than they are now. Although I’m a trained artist, not a trained scientist, I have had a layperson’s interest in science since  before I even started first grade. I enjoy microscopic and close-up images of things like cells, rock crystal structures, lichens, moss, mold and more. In earth science classes, I was inspired by dendritic patterns, astronomy subjects and maps. Imagery influenced by those things has come up in my artwork from time to time for many years. Venture Cafe Night: 39N recently hosted an event at the Donald Danforth Plant Science Center with the theme Science of Creativity – I had to check that out. I also submitted some of my science-inspired art journal pages for a slide show. Venture CafĂ© St. Louis is a nonprofit organization dedicated to “connecting innovators to make things happen” by sponsoring events and 39 North is a district promoting “academic and corporate AgTech research and innovation”. Venture Cafe events are kind of like a mini-convention and happy hour where you can attend activities and presentations while mingling with interesting people.

In the cafe guests were given coloring pages and blank mini canvases to color and draw science imagery. A slide show of beautiful close-ups of structures from plants and animals was there to view for inspiration.

In the theater after presentations about microscopic art and business funding, there was another slide show on view with artwork that different artists and scientists had submitted ahead of time. Organizers had prepared two slides with three of my art journal pages on each. They did a great job selecting pages that looked good together. It was pretty cool to see my images projected at such a large size!

My art journal pages were made with pencils, markers, pens and collage work. What do they mean? I like to work in my art journal as a stress-relief activity so when making some of these pages I was thinking about the effects of stress on the human body and mind. Sometimes I don’t have to think at all, just play with the colors and shapes – that is a very relaxing and restorative activity that I enjoy very much.

Here is a link to the complete slide show so you can see the other artists’ work:
Art X Science

More photos of the event are in a Venture Cafe Facebook album:
Venture Cafe Night: 39N – February 20, 2018

In 2017 I went on a tour of the Donald Danforth Plant Science Center with other volunteers from the Litzinger Road Ecology Center. We toured greenhouses and areas where experiments are conducted and stored.

Of special interest to me being so into the visuals of science was a look into the microscopy lab and a gallery of  images that were probably made for science reasons but double as stunning and amazing visual art.

Categories
DIY Gardening Home Decor

Making Holiday Centerpieces From Natural Materials

Making Holiday Centerpieces From Natural Materials

by Carolyn Hasenfratz

I enjoy walking around outside at any time of year. It takes more motivation to go outdoors in cold weather but I’m always glad at such times that I made the effort. A landscape that is mostly dry and brown may seem unappealing at first, but if you look closely at plants and their remains in winter you will see more textures, shapes and colors than you may have thought possible.

One way to enrich the way you see the winter landscape is to collect natural materials and use them to make centerpieces for your Holiday celebrations, or any occasion. I had the opportunity recently to join other volunteers at the Litzinger Road Ecology Center in making centerpieces for the annual Holiday party. We were provided with a variety of recycled and donated containers along with embellishments such as ribbon and floral accents. Our goal was to create arrangements of mostly natural materials from the prairie at Litzinger Road Ecology Center to make attractive centerpieces.


collecting natural materials from the prairie

After taking a quick look at the available floral supplies, we spread out around the property to look for plant materials that we wanted to use. We collected reeds, grasses, seed heads, dried flowers, branches, feathers, vines, berries, pods, snake-skin, pine cones, nuts, bark, evergreen branches and more. A few plants were still green. Others provided many variations on dried plant colors – red-brown, silvery grey, dark brown, straw yellow hues and more. Often when we are working in the field we are mindful of the identification of plants. This time we were free to concentrate mainly on what the plant materials look like and what would make attractive combinations. Tall or short, delicate or bold, feathery or solid, rough or smooth – how can one enhance the other?

It’s enjoyable to go into a craft store and buy materials that fit a preconceived idea of what you want to make – it’s also a fun creative challenge to see what you can make out of the limited materials on hand with little to no pre-planning. I decided to be a little irreverent with my arrangement and use some green invasive creeping euonymus (Euonymus fortunei) which is a plant that may not quite be as hated as invasive honeysuckle here at LREC but could be a close second! To keep the vine green until the time of the party, I placed the cut ends of the vines into small bottles of water in the bottom of the glass container I was using. This also helped provide structural support since we did not have any florist foam in our supply stash to help hold tall stems erect.


Making a holiday arrangement with invasive euonymus vines


I added a few small pine cones among the green to break up the color a little bit, then I made a small donut shape of grasses and placed it in the vase on its side to provide extra structural support at the top. Then I added some branches with red berries, a few pine needles and some tall thin strips of wood with plastic crystals on them. A few red berries fell into the vase and down into the greenery so I added a few more here and there to make it look like I put them there on purpose.


finished arrangements made from natural materials and a few embellishments

Finished arrangements made by other volunteers


Is there anything in your backyard that would look good in a Holiday arrangement? Explore with fresh eyes and you might find a new way to appreciate your garden in what we normally think of as the off-season. I recommend you take care to identify your finds if you have children or pets in the house who might eat things that they shouldn’t. Some common garden plants (and houseplants) are toxic. Have fun and see where your creativity takes you!

Categories
Gardening Sustainability

Tips for Removing Invasive Honeysuckle

Tips for Removing Invasive Honeysuckle

by Carolyn Hasenfratz

Honeysuckle is one of the last plants to drop leaves in the fall, and one of the first plants to get leaves in the spring. This makes it quite pretty to look at sometimes. A recent photo from Emmenegger Nature Park shows the light green leaves on honeysuckle growing in the understory of a forest in late November.

Honeysuckle at Emmanegger Nature Park

Unfortunately this characteristic also gives honeysuckle an advantage over other plants. Since many species of honeysuckle are not native and reseed readily, Honeysuckle can be a danger to native plants and plant diversity. Many organizations that are involved with environmental stewardship sponsor volunteer Honeysuckle removal days. I spent a couple of days volunteering recently to remove invasive Honeysuckle from Emmenegger Nature Park in Kirkwood and Litzinger Road Ecology Center in Ladue. If you remove invasive Honeysuckle from your own property you can help stop the spread to other areas. Birds really love to eat the berries and spread the seeds around to places where Honeysuckle is not wanted.

How to Identify Honeysuckle
If you need help with identification, it is very useful to participate in one or two group cleanups so that experts can show you what to look for. After an hour or two of practice you’ll be spotting it everywhere with little effort! Fall is an ideal time for removal because the leaves, being one of the last to persist in the forest, make identification easier.

Look for:
Opposite leaves
Red berries in the fall
Leaves can be green, yellowish, or red/brown depending on the time of year. You may even see it with different colored leaves on the same property on the same day.
Stems are hollow once it gets large enough – snip off a piece to check
Once stems get large enough the bark appears very groovy

Honeysuckle leaves in brown fall color

If you’re not sure whether your honeysuckle is a undesirable invasive type, you can get help with identification at Missouri Botanical Garden.

How to Remove Honeysuckle
If the plant is small enough, you may be able to just pull it out. Make sure to get the center root clump around the stem or it may grow back. It’s not necessary to get every little piece of root out.
If you can remove the root material from the premises after it’s pulled, do so. If that is not possible hang the plant in a tree off the ground so the roots dry out and die. If you leave the plant on the ground, it may regrow from the roots.
If the plant is too big to pull, dig it out if you can without damaging other plants or causing excessive disturbance of the soil.
If digging is not practical, saw the trunk off as close to the ground as you can. Treat the stub with a 20% solution of glyphosate herbicide. Glyphosate is the active ingredient in Roundup. You can apply it with a bottle that features a dauber attachment, such as a shoe polish bottle or a bingo marker. Or you can spray the glyphosate on the trunk stub. Clearly label bottles, store safely and observe all precautions. You can add dye to the solution to help you keep track of where you have already applied herbicide.
If you can’t remove all the branches from the property, cut them up into smaller pieces so that they lie flat on the ground. Contact with the ground will help the branches decompose faster.
Useful tools to have on hand are a small shovel, a pruning saw, hand pruners and loppers.

You can save yourself a lot of work over time by patrolling your property regularly and removing the Honeysuckle plants while they are still small enough to pull out easily. Once the bushes get to full size, they can still be removed but the job is a lot more labor intensive.

Honeysuckle next to a bottle of herbicide in a shoe polish bottle

Safety precautions
Wear eye protection, gloves, long sleeves and long pants. You need to protect yourself from scratches, pokes in the eye and chemicals.
Wear work boots or hiking boots with good ankle support – in the woods it’s easy to step in a hole or slip on an uneven surface.
Wear safety orange in case you are in or near a hunting area without realizing it.
Mark your tools with orange tape or paint, because they are easy to lose among the fall leaves on the ground.

After the Honeysuckle is gone, your woods might look a little bare. Don’t worry, there are native plants that can fill the gap and make a healthy as well as lovely contribution to the ecology of your property. Consider planting some of these species instead of Honeysuckle: Some recommended alternatives to bush honeysuckle and other exotic shrubs.

Here is some more information about Honeysuckle:
Bush Honeysuckle
Honeysuckles: For Better or For Worse – There are some species of Honeysuckle that are nice to have – read about them here.

Categories
Backyard Wildlife Gardening Outdoor Fun Sustainability

Aquatic Macro Invertebrates at Litzinger Road Ecology Center

Aquatic Macro Invertebrates at Litzinger Road Ecology Center

Aquatic Macro Invertebrates are animals without a backbone that live in water and can be seen with the naked eye. I’ve had an interest in these creatures ever since I can remember. When I was young I caught a variety of water invertebrates such as water beetles, clams, crawdads and snails and attempted to maintain them in my aquariums. I was thrilled when my brother’s aquarium started to grow hydra even though they predate on tiny fish, because I’d read about them but never thought I’d see any. I currently have small colonies of freshwater shrimp in three of my aquariums. Many aquatic invertebrates are insects that live part of their life cycles in water but have an adult flying stage.

When the Litzinger Road Ecology Center offered a training workshop for volunteers on how Aquatic Macro Invertebrates are used to monitor water quality, of course I had to attend. Master Naturalist and Stream Team member Cliff Parmer taught us some Aquatic Entomology facts then we went outside to Deer Creek to learn how to take a scientific sample of water invertebrates.

sampling aquatic invertebrates
Volunteer collectors chose two spots in the stream for collecting samples – one in a riffle, and one in a calm area. The stream bottom was disturbed while a seine caught the small animals that were swept downstream.


collecting water invertebrates
We examined the contents of the seine for small invertebrates which we placed in ice cube trays filled with stream water.


aquatic invertebrates in Deer Creek
Here are some of our finds – there is a nice leech in there (yuck). One of the animals in the right tray is a Mayfly nymph – something I was happy to see because the purpose of sampling is to check water quality. Mayfly nymphs are one of the animals found only in healthier streams. Stream team sample findings are reported to the Missouri Department of Conservation so they can use the data to check stream health.


identifying aquatic invertebrates
Although macro invertebrates can be seen with the naked eye, a microscope is useful to see small details to help identify each species. We were provided with identification charts to show us what to look for.


Mother crawdad with babies under the tail
I used my childhood crawdad catching skills to hand-catch the most “Macro” invertebrate of the day – a large mother crawdad with tiny babies clinging to the underside of her tail. We released all the animals back into the water after we had a look at them.

If your garden has a water feature, at some point you may encounter aquatic invertebrates. A common example is the mosquito, very undesirable and needs to be eliminated. A strain of BT (Bacillus thuringiensis) will kill mosquitoes without harming any other life forms (except some gnats, which I don’t think anyone will be sad about – except maybe hummingbirds which eat them). Most other aquatic invertebrates are harmless or downright beneficial. For example, dragonflies live the first stages of their lives in water and are one of the best predators of mosquito larvae. When dragonflies emerge as flying adults they have a voracious appetite for adult flying mosquitoes – they also add beauty and color to the garden. Others, like caddisfly larvae or water beetles are not exactly beautiful in a conventional sense but have interesting lifestyles that are fun to observe and study.

Even if your garden does not include a water feature, there are ways that your garden can impact aquatic invertebrates. Water that runs off your garden and yard into a storm sewer is eventually released into natural bodies of water. If you can keep excess pesticides and fertilizer out of storm runoff you can help invertebrates to survive. Excess fertilizer harms invertebrates by causing algae blooms that reduce oxygen in the water and kill off more sensitive animals. Life forms higher up on the food chain such as fish and birds depend on a steady supply of invertebrates for food.

If your property is adjacent to a body of water, you can further aid the water quality by implementing a riparian corridor or creek corridor vegetative buffer. Such a corridor does many things for water quality, including temperature regulation. By cooling the water, streamside vegetation helps maintain higher oxygen levels in the water.

Backyard wildlife increases my enjoyment of the outdoors and my garden. If you feel the same way, an appreciation for small but vital water animals can be rewarding!

Categories
Sustainability

Prairie Restoration at Litzinger Road Ecology Center

Prairie Restoration at Litzinger Road Ecology Center

by Carolyn Hasenfratz

I’m a volunteer at the Litzinger Road Ecology Center in Ladue. Volunteers and on some occasions the public are invited to educational events on the premises. I recently attended a session for volunteers to learn about why the prairie sections at the center are periodically burned and an introduction about how to start a fire, control the fire, and perform the burn safely.

At the time of European settlement, about 1/3 of the state of Missouri was covered by tall grass prairie. Today 70,000 acres remain and only 22,000 acres are protected, making prairie one of the most endangered ecosystems. Fire is necessary to maintain prairie. Lightning and human intervention provided the fire in historic times and in the present day.


Tallgrass Prairie at Fort Bellefontaine County Park

An example of a restored tall grass prairie at Fort Bellefontaine County Park

Here are some reasons why Native Americans in Missouri used fire:

  • Fire stimulates growth of raw shoots which attract game animals to eat them
  • Aid to visibility of enemies coming
  • Weapon against enemies
  • Herding game
  • Made travel easier

In the present day fire is used for managing remnants and for restoration. The prairie at LREC is not a remnant of prairie that was never plowed or otherwise destroyed, it is a restoration approximating to the best of our ability what used to be there. A real prairie takes thousands of years to form so a restored prairie is not exactly the same but a managed restoration can perform some of the functions of this type of ecosystem.

Purposes fire management at LREC:

  • Removal of non-native invasive plants and woody seedlings that are unwanted
  • Supports birds and other animals with food and habitat
  • Encourages forbs and grasses
  • Increases plant diversity
  • Protects against unplanned burns by removing excess fuel
  • Removes thatch and helps animals that can’t make use of the thatched areas

I’m sure many readers remember the Yellowstone Fire of 1988. That is an example of a situation that was more serious than it might have been if the land had not been managed to suppress all fire and to let fuel build up for many decades. My first visit to Yellowstone was during the 1988 fire so I remember it well!

At LREC we only burn certain sections of the prairie at one time, so animals can escape and take shelter in the unburned portions. Also we want to leave some habitat for insects, reptiles and amphibians. We try to keep from cutting down or burning stems until spring because many insects overwinter in the stems and they need a chance to escape.


Tools for starting and managing fires

We were shown tools and techniques that are used to start and manage controlled prairie fires

This year we are going to attempt to burn the “Mulch Pile Woods”. Woods are harder to burn because there is less fuel. The large piles of brush will be removed before the burn because too much fuel could set trees on fire and we only want to burn the undergrowth. Large logs and vines may also be removed before the burn. Some wood may be returned after the burn so it can continue to serve it’s natural purpose in the forest.


Mulch Pile Woods

The brush in the foreground will be removed before the burn because that is too much fuel for the type of fire desired

Settled areas are difficult to burn in. Mowing can be used for management in areas where burning is not possible. Mowed grassy areas are used around the prairie patches as a firebreak.

LREC submits burn plans to the Ladue Fire Department and the St. Louis County Health Department to make sure air quality is good enough and that the Ladue Fire Department is available for backup. We have to let them know what sections we want to burn and what the reasons are for burning. Three prairie sections are on two-year rotations.

The best conditions for burning consist of low wind speeds, humidity levels of 20-50%, air temperature of 35-65 degrees F and good air quality. LREC obtains a permit for a range of dates so they can seize a favorable opportunity when it happens. Volunteers are given 24 hours notice. This year a permit was applied for between December and May. The Ladue Fire Department comes as a backup but so far they have not needed to do anything to help out. If the Fire Department is too busy to come that day the burn will have to be postponed until they are available.

Click this link to see photos and video of previous year’s burns:

Many volunteers at LREC are eager to witness a burn or to participate in one because it’s unusual and exciting. I don’t know if I’ll be available the day it happens this year, but if I participate I’ll be sure to write about how it went.

If you would like to learn about fire safety or how to conduct a controlled burn on your own property, these resources from the Missouri Department of Conservation will help you get started:

Here are a couple of my other articles about activities at the Litzinger Road Ecology Center:

Categories
Gardening Good Eating Outdoor Fun

You’d Be Happy Too If You Could Eat What Bugs You!

You’d Be Happy Too If You Could Eat What Bugs You!

by Carolyn Hasenfratz

You'd Be Happy Too If You Could Eat What Bugs You!

“You’d be happy too if you could eat what bugs you!” That’s what it says on a coffee cup that I bought for my Dad when I was a little kid. I chose the cup for Dad because the design was in his favorite colors, green and orange. I have to admit I liked that
it had a frog and a bug on it, two of my favorite things then and now!

I’m not yet at the point where I’m willing to experiment with eating bugs, but I’m intrigued by garden weeds that are edible. There is no doubt that gardeners are “bugged” by weeds but your attitude toward some of them might improve if you can harvest and eat them.

For example Dandelions, Wild Violets and Asiatic Dayflowers are common weeds in my garden and also delicious in a salad when young and tender. When I regularly pull the baby leaves, rinse and eat them I’m harvesting and enjoying a fresh and nutritious crop rather than dealing with something annoying. You should be very careful when foraging to make sure you’ve researched the wild plant you want to eat to make sure you have identified it correctly, are not confusing it with a poisonous look-alike and are picking it from an area that is free of toxins such as pesticides, herbicides or auto exhaust.

Unless you are extremely confident in your identification skills, my recommendation is to get some foraging instruction from an expert in person so you can actually see and taste the plants as you learn about them. To improve my skills in identifying edible wild plants, I attended a recent workshop at Litzinger Road Ecology Center given by Jan Phillips, author of Wild Edibles of Missouri. There must be a lot of interest in this topic because there were about 40 people there.

First we watched a slide presentation where we learned about some of the wild edibles available in Missouri. Did you know that you can eat Daylily buds, Plantain, Redbud flowers and Henbit? We learned about these and many more. When I was a kid my neighborhood friends and I used to eat the seed pods of the weed Yellow Wood Sorrel – we called them “pickles” because they have a tart taste. I thought we were just lucky not to be poisoned while experimenting, but it turns out that’s a well-known edible weed though some people can’t eat it because they are allergic to the oxalic acid it contains.

Foraging at Litzinger Road Ecology Center

After the slide show we split into groups and foraged over different areas of the property. My group picked a lot of Redbud flowers, Violets, Dandelions, Spring Beauty, Henbit and Plantain.

Eating the results

After foraging we brought our produce to the kitchen to wash and spin it. We then enjoyed some of it in salad. Chef Ryan Maher provided us with some delicious mushroom dressing to accompany the greens and flowers. Redbud and Dandelion flowers were cooked into pancakes for us to try. We enjoyed an array of other unusual treats that had been prepared ahead of time – teas brewed from things like Spicebush (that was my favorite), candied Peppermint leaves, Reindeer Lichen biscuits with Gooseberry jelly, wild nuts and more. Wild foraging is definitely a way to introduce some interesting new ingredients into your cooking!

Here is a salad recipe of mine that I like to mix with my “weed” greens.

Your favorite fresh greens from the garden
1 bulb fennel
1 cup mung bean sprouts
1 cup chopped kale (optional, if you need to boost the amount of greens)
1 cup broccoli slaw
Your favorite dressing (I mainly use vinegar and oil with a sprinkle of salt – edible weeds can be used to make flavored vinegars and tasty dressings also!)
Sprinkle dried cranberries and roasted pumpkin seeds on top

What chore sounds like more fun? Weeding, or picking some interesting food? Depending on what is growing in your garden, which task is awaiting might just depend on how you look at it!

Resources for more information on edible weeds and wild plants:
Link: Common Edible Weed Plants
Book: “Peterson Field Guide to Edible Wild Plants” by Lee Allen Peterson
Book: “Stalking the Wild Asparagus” by Euell Gibbons

Categories
Gardening Outdoor Fun Sustainability

Master Gardener Training Program Volunteer Activities

Master Gardener Training Program Volunteer Activities

by Carolyn Hasenfratz

One of the requirements of the St. Louis Master Gardener Training Program is to perform at least 40 hours of volunteer work per year. We have until December to complete the hours but I thought it would be a good idea to get an early start (ok I admit it, I was dying to get my kayak out on the water). My first volunteer effort of the year was to participate in Operation Clean Stream at Simpson Lake in Valley Park on February 27, 2016.

Simpson Lake in Valley Park

Simpson Lake was a bit trashed due to the flooding in December but we made a really good dent in it. I was rewarded with sightings of a Bald Eagle and a beaver!

On St. Patrick’s Day I went on a tour of the Litzinger Road Ecology Center in Ladue with other Master Gardener trainees and made arrangements to volunteer there on a regular basis. The center is a private teaching facility owned by a foundation and managed by Missouri Botanical Garden. It is not open to the public so I thought you might enjoy seeing some photos of our tour if you have never been there.

Litzinger Road Ecology Center

One of the major activities at the center is removing non-native plants so that native plants can flourish. This picture shows native Bluebells emerging among other plants that are slated for removal. When I start my volunteer work I have no doubt that I’ll be learning a lot more about invasive plants!

Litzinger Road Ecology Center

Here is a section of Deer Creek that runs through the center. At the top of the ridge there is an old railroad right-of-way that was formerly the Laclede and Creve Coeur Lake Railroad route. I knew nothing about this interesting historical tidbit until last year when I was riding my bike in the area and noticed the right-of-way and looked it up to see what it might be. As you can see from the photo, erosion is a big problem along the creek. If you own property within the watershed of Deer Creek and you would like to learn how to manage your property to reduce flooding and erosion and to improve the water quality, the Deer Creek Watershed Alliance can help you learn how to do that.

Litzinger Road Ecology Center

In the foreground is a prairie area and on the ridge is an exquisite Mid-Century Modern house that was formerly the home of the benefactors who donated the land for the center. It is now used as an office for the foundation.

Litzinger Road Ecology Center

Fire is one of the tools sometimes used here for prairie management. Here is a clump of Prairie Dropseed coming back after a burn.

Litzinger Road Ecology Center

Our tour guide is pictured here explaining that a Monarch Waystation is planned for the area around the fence. The kids who come here for programs (and adults like me) should really love that when it’s done! I developed an interest in insects at a very young age and still haven’t lost it. Here and there on the grounds are “bug boards” that can be lifted up to see what’s taking shelter underneath. I loved doing that kind of thing when I was young and I still can’t resist it!

Litzinger Road Ecology Center

I’m also crazy about birds so seeing these gorgeous turkeys was a treat!

Litzinger Road Ecology Center

Here is a view of the circa 1964 house that shows some of the cool details.

Litzinger Road Ecology Center

Here is a Spicebush in flower – a beautiful and desirable native plant for the St. Louis area. It’s worth considering if you are planting to help pollinators and birds because it is a host plant for the Spicebush Swallowtail butterfly.

I hope you enjoyed my virtual tour of the Litzinger Road Ecology Center! It is likely that I’ll mention some of my upcoming work here in future issues of this newsletter.