Introduction to Letterboxing – Part II – Making a Personal Logbook
Materials
*indicates items that are available at Schnarr’s
Text weight plain paper – 12 8.5 x 11 sheets
Decorative scrapbooking paper for end papers and accents
Decorative paper with letters printed on it
Heavy scrapbooking paper with a decorative design on it for the cover – 1 12 x 12 or 8.5 x 11 inch piece
*Thread or twine about the thickness of baker’s twine, kite string, 1mm hemp cord or something similar
Assortment of small beads
Metal eyelets
Tools
*Pencil
*X-Acto knife and blades
Needle tool
Large sewing needle
*Old block of scrap wood
Paper trimmer
*Scissors
*Glue stick
Squeegee or bone folder
Scrap paper
*Metal ruler
*Utility knife with new blade
Self healing cutting mat
Eyelet setter
*Hammer
Small hole punch
*Pliers
Part 2: Making the logbook

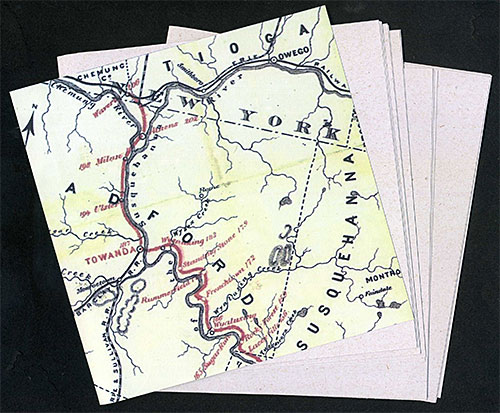
1. Take your 12 sheets of text weight paper and cut them down to 11 x 5 5/8 inches. Fold them in half.
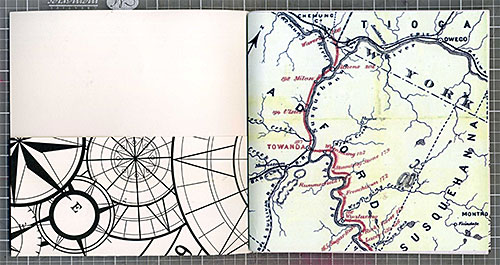
2. To make interesting endpapers for your book, take a lightweight piece of decorative paper with a map or other design on it and cut it down to 11 x 5 5/8 inches. Fold it in half as in the step above. Nest the text paper inside the endpaper piece.
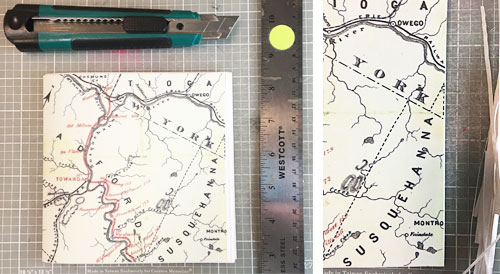
5. When you push all the nested paper pieces together at the spine, you’ll notice that the inner pages stick out at the fore edge. For a finished look, trim off the paper that sticks out using a metal ruler and a sturdy utility knife. A paper trimmer probably will not cut through all the layers cleanly on the first try and an X-acto knife might be a little too narrow and wobbly to make the cut safely. Something robust and sharp enough to cut through all the layers without having to press too hard will give you the neatest and safest results.

Tip: If your metal ruler is not sold with a cork backing already on it, add a strip of cork to the back of yours to prevent slippage of your ruler while cutting. This extra bit of effort will pay off by possibly preventing injuries. If you shave off the side of your finger with a utility knife or craft knife you will never neglect to do this again! (Ask me how I know!)
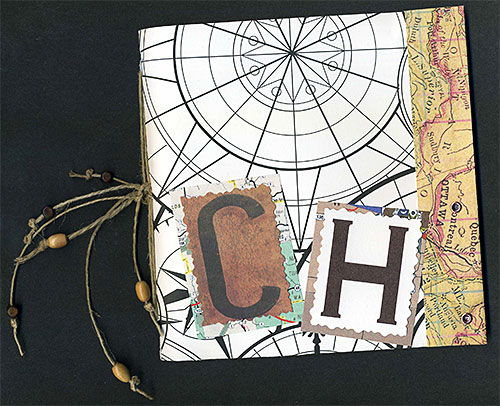
4. Select a piece of decorative paper that is heavier in weight, like light cardstock, to use for the cover. Cut it down to 8 1/2 x 11 inches. From the bottom long edge, make pencil marks 2 3/4 inches up on the inner facing side.
5. Fold up at markings to make built-in pockets for the inside front and back covers. Fold cover in half and nest other papers inside.

6. Place a piece of scrap wood on your work surface. Go to the middle of your book and spread it open. Place the book with the inside facing up and with the needle tool poke four holes through all the layers of paper, one near the top, one near the bottom, and two close together in the middle.
7. Cut a piece of heavy thread or cord up to 1 mm thick to a length of 34 inches and thread a sharp, sturdy needle with it. Starting on the outside of your book at the middle hole, bring the thread in, leaving about 7″ trailing on the outside of the book. Bring the thread out again at the bottom, in again at the middle through one of the two holes, out again at the top and in again at the middle, making a figure 8 pattern. If the needle is difficult to pull through the holes pulling with pliers can help you get it through. Tie off your cord at the spine and if there is any excess cord left tie it at the middle also and let the ends trail.
8. String beads onto the ends of your cords as accents and tie double or triple knots as needed at the ends of your cords to hold them on.
9. Cut two 2 inch x 6 inch pieces from another pattern of decorative cardstock. Fold them in half lengthwise. Apply glue from a glue stick to the inside of the folded piece and press in place over the fore edge. Burnish your glue job well between pieces of clean scrap paper.
10. Punch two holes at each pocket with the small hole punch. Use an eyelet setter and hammer to spread the back of the eyelet out to fasten the sides of the pockets securely.
11. Cut two initial letters from letter printed cardstock or paper and mount on pieces of slightly larger decorative paper to give them a border. Glue to the front of the book and burnish.
Look for Letterboxes
Go to either the Atlasquest web site or the Letterboxing North America web site and create a profile for yourself. Search for letterboxes near you. I like to print out the clues and then keep them in a three-ring binder. I also keep in this binder maps and other information about the places I’m interested in searching. I search for a lot more letterboxes than I actually find so it’s not uncommon for me to make multiple attempts on a letterbox.
If you have a smartphone, look for an application called Clue Tracker. You can use this app to search the databases of either Atlas Quest or Letterboxing North America to find boxes near you while you’re on the go.
Have fun out there!
