Categories
Gardening

Some Favorite Easy-to-Grow Plants

Some Favorite Easy-to-Grow Plants

by Carolyn Hasenfratz

Every gardener has his or her own criteria for choosing favorite plants. I started my garden in very challenging conditions – in part shade and soil that was more like concrete than soil and with a high clay content. I had to try to find plants that would survive in those conditions. I also enjoy plants that are functional, either for their qualities as a culinary or otherwise useful herb, for their role in attracting beneficial insects to the garden for pest control, or for providing habitat or food for wildlife which I like to watch and study.

This is the season for plant sales – see our calendar for gardening sales and events as well as suggested planting dates. Some plant sales feature extras raised by local gardeners. These plants may do better in your garden than a plant from a large retailer that could have been shipped from a long distance away and is not adapted to local conditions. Another reason you might want to consider buying plants from a local plant sale instead of a large retailer is that some commercial growers treat their plants with systemic pesticides that are a grave danger to bees, butterflies and other pollinators. Some consumers have purchased milkweed plants to help monarchs and ended up killing them instead! Read about it in this article: How to help monarch butterflies (without poisoning them).

If you want to add some new plants to your garden here are suggestions of some of my favorites and reasons why I’m fond of them. I live in Brentwood, MO so these plants are proven to grow in the St. Louis area. Before you go shopping, you could also try using the Missouri Botanical Garden Plant Finder to select plants that fit your conditions and criteria. For example you might want plants that flower at a certain time, have a certain color, are deer-resistant, grow in a wet area, get to a certain height or other characteristics of your own choosing. With the help of the plant finder you can make a list to bring with you so you don’t end up buying plants that aren’t right for your garden. “The right plant in the right place” is a well-known saying that is by far the most important thing to consider for gardening success!


Creeping Jenny


Creeping Jenny
Lysimachia nummularia ‘Goldilocks’

Reasons I like this plant:
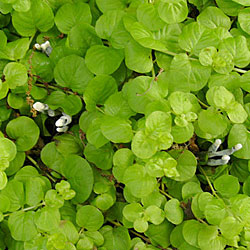
My favorite color is lime green. There are few colors that don’t look better next to lime green in my opinion and it’s an especially nice color for brightening up a shady garden. It fills in nicely around other plants and is short in stature so other plants grow well through it. Also looks nice trailing from containers or over barriers or short walls. Unfortunately the beautiful branchlike fungus shown in this picture does not always grow with it!

Possible drawbacks to this plant:
It is not native to Missouri and might need a little maintenance to keep it from spreading into areas where you don’t want it. May become invasive.


Profile for this plant on the Missouri Botanical Garden plant finder:
Creeping Jenny
Profile for this plant on the Dave’s Garden web site:
Creeping Jenny
 

Horehound

Horehound
Marrubium vulgare

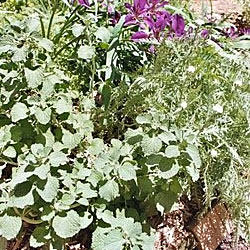
Reasons I like this plant: I’ve made homemade Horehound candy and teas to alleviate coughs from this plant and found it more effective than any over the counter cough remedy I have tried. It does need a fair amount of sugar to taste decent but delicious if sweetened enough. The leaves are pretty durable and they usually look good until well into cold weather. I’ve never seen it bothered by pests. Horehound can be grown from seed – my plants are descended from a plant that I bought for my Mom in memory of her Dad, who loved Horehound candy! We sell Horehound candy at Schnarr’s if you would like to try some without having to make your own. The Horehound is toward the front of the photo and has the wrinkly leaves.

Possible drawbacks to this plant: Not native to this continent. It is reported invasive in some areas but for me it’s not a spreader, possibly because of my part-shade conditions.
Article about this plant on the Dave’s Garden web site:
Horehound
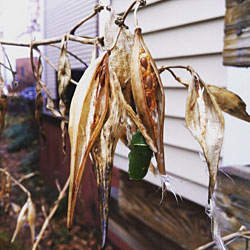


Swamp Milkweed

Swamp Milkweed
Asclepias incarnata

Reasons I like this plant: The picture shows the milkweed looking brown and dried up in the fall, but also shows what I like best about it – a monarch chrysalis! Swamp Milkweed provides food for monarch caterpillars and nectar for many other pollinators. The flowers are beautiful and in my opinion worth the plant not looking that great at the end of the season. If like me you like to watch winged wildlife this is one of my best attractors when in bloom. Try planting some tall late-flowering annuals around it to help disguise the dried up stems. It is native to Missouri and can be grown from seed.

Possible drawbacks to this plant: Not very attractive looking in late summer and fall.
Profile for this plant on the Missouri Botanical Garden plant finder:
Swamp Milkweed
Profile for this plant on the Dave’s Garden web site:
Swamp Milkweed
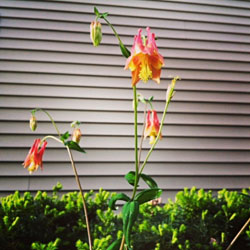


Columbine

Columbine
Aquilegia canadensis

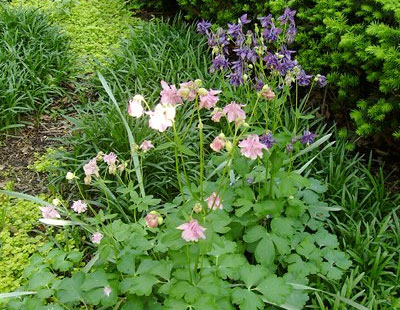
Reasons I like this plant: I have a variety of types of Columbines but a Missouri native is the one shown in the picture. Some Columbines can be grown true from seed, and they usually reseed themselves pretty readily. In a recent storm, a hybrid Columbine with larger flowers was partially knocked over but the native with the smaller flowers was not affected. That’s one drawback to oversize flowers that are sometimes bred into plants – they can be too large to be supported by the plant in rough weather. All of my Columbines, species or hybrids, attract lots of beautiful hummingbirds.

Possible drawbacks to this plant: Foliage is very pretty in spring but might be attacked by leaf miners later in the season. The plant won’t be killed but the leaves won’t look very attractive. To fix this, wait until the plant is done blooming and cut all the foliage back after you see a leaf miner infestation. The foliage will regenerate without the leaf miners and probably will not be re-infested since the time of activity for the leaf miners will be over. The MOBOT plant finder says the native species is more resistant to leaf miner than other varieties. My plant is three years old and didn’t bloom until this year. I don’t remember whether the foliage had leaf miners in previous years or not but I will check to see this year if it really is resistant. I know my other Columbines were affected as they always are. Columbines are usually short-lived so save some seeds in case it doesn’t reseed on it’s own – but it probably will!
Profile for this plant on the Missouri Botanical Garden plant finder:
Columbine
If you want to read about all the other types of Columbines just do a search for “Aquilegia”.
Profile for this plant on the Dave’s Garden web site:
Columbine
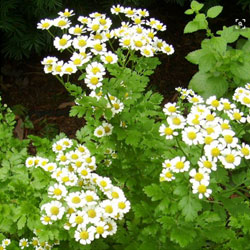
 

Feverfew

Feverfew
Tanacetum parthenium

Reasons I like this plant: It reseeds itself here and there which in my informal garden looks nice but could be a problem depending on what kind of garden you have. I like how it pops up around the garden because it doesn’t get very big and a bit of white here and there in a garden really helps the appearance in my opinion. It has a reputation for having medicinal properties. Feverfew attracts a lot of the small bees and wasps that are beneficial in the garden. Makes a nice dried flower.

Possible drawbacks to this plant: It is not native to this continent and is now considered naturalized in North America. Foliage sometimes doesn’t look good toward the end of the summer – apparently it gets attacked by some kind of sucking insect that makes it look a bit mottled but the plant does not seem to be harmed. It could get weedy, I sometimes find young plants in the lawn, but once you pull it out it’s gone, it doesn’t leave behind tubers or rhizomes or anything like that. It’s supposed to be short-lived but I’ve never noticed that because it reseeds reliably.
Article about this plant on the Dave’s Garden web site:
Feverfew
Profile for this plant on the Dave’s Garden web site:
Feverfew
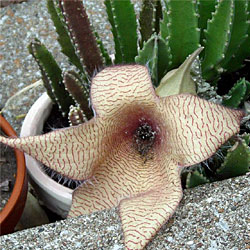
 

Stapelia

Carrion Flower or Starfish Flower
Stapelia gigantea

Reasons I like this plant: It’s very easy to care for – it doesn’t need much more than to be brought indoors during cold weather and left outside to catch rainwater in the warm months. It’s native to the deserts of South Africa and Tanzania so give it good drainage. You might want to put it in a larger pot every few years as it slowly expands. It’s a great houseplant/patio plant if you have a taste for something on the weird side! The inside of the large flowers have an unusual brain-like texture and the plant emits a smell like rotting meat to attract flies to pollinate it. A real conversation starter! When not in bloom, it looks like a nondescript green cactus-like succulent.

Possible drawbacks to this plant: It smells really bad when in bloom and would need to be moved outdoors during that time. The first time mine bloomed we thought there might be rotting chicken around and we checked the fridge and trash can!
Profile for this plant on the Missouri Botanical Garden plant finder:
Carrion Flower
Profile for this plant on the Dave’s Garden web site:
Carrion Flower
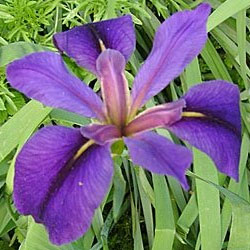
 

Iris

Louisiana Iris
Iris giganticaerulea

Reasons I like this plant: This plant is very easy-care. Mine are descendants of irises that were planted in my parents’ yard in the 1980s and went dormant for a couple of decades before reappearing when a tree near them partly died out and some of their sunlight was restored. My parents originally got them from my Dad’s aunt. I moved some to my garden and they have multiplied enough to be growing in three locations now. I’ve always liked them but recently after studying for my bulbs test I decided to research exactly what kind they are and I discovered that the original species plant is native to Louisiana and perhaps Texas also. The species is endangered in its native range. Mine appear to be a hybrid or cultivar and not the species plant but I’m not sure which one it is. Based on pictures I’ve seen online it looks a lot like the cultivar ‘Black Gamecock’.

Possible drawbacks to this plant: Needs to be divided after several years when it gets so crowded it stops blooming. The rhizomes are really large and may not be easy to remove if you ever decide you don’t want them. You also may need to thin them to stop them from spreading too much.
Profile for this plant on the Dave’s Garden web site:
Louisiana Iris ‘Black Gamecock’
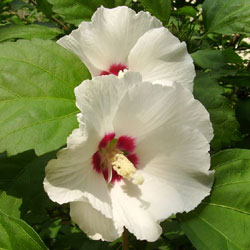
 

Rose of Sharon

Rose of Sharon
Hibiscus syriacus

Reasons I like this plant: The species plant can easily be grown from seed. Mine has both white and lavender colored flowers on it which was a nice surprise – I got the seedling from my Mom and Dad’s yard which had all lavender colored plants in it. If you like winged wildlife in your garden Rose of Sharon flowers will draw seemingly every bee, butterfly and hummingbird in the neighborhood. The seed pods will be relished by birds in the winter. The beautiful goldfinch is one of three species I’ve observed feeding on mine. Once established this plant needs almost no care. I say almost no care because my Dad prunes his. I’ve never pruned mine and it’s doing fine but now that I know a bit about how and why to prune from my Master Gardener class I may remove some branches that are rubbing together. My Dad has accidentally killed some of these plants by pruning them too much but I have never seen one die of natural causes or have a noticeable pest issue, and I grew up with bunches of these as hedges in our yard.

Possible drawbacks to this plant: It is not native to this continent and could be invasive. Produces a lot of seedlings which are not always easy to pull up because they are woody and have a long taproot. I control most of the extra seedlings with lasagna gardening around the base of the plant and pulling the seedlings when small. It’s a little extra effort to control the seedlings – not so much that it’s a problem for me but some people really hate this plant because of that.
Profile for this plant on the Missouri Botanical Garden plant finder:
Name of Plant
Profile for this plant on the Dave’s Garden web site:
Rose of Sharon
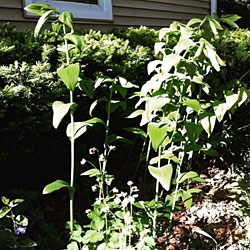
 

Solomon's Seal

Solomon’s Seal
Polygonatum biflorum

Reasons I like this plant: It’s native to Missouri and will naturalize in the right conditions. I was given four plants in a swap two years ago and this spring they finally have started to spread a little bit – I counted 17 yesterday! I have room for more so it can spread for awhile without bothering me. You are probably noticing a pattern in the kinds of plants that become my favorites – they tend to spread or naturalize. In a formal garden this may not be a good thing but I like to get extra plants because I have a lot of space to fill in an area where it’s hard to get anything to grow so I’m grateful when I find plants that like my conditions! I also like to have extras for trading stock since most of my really good plants have been acquired by trading, not purchasing. In the front garden where large oak trees shade it for a lot of the day, I need plants that look good in a woodland setting and it pleases me to find a beautiful tall plant to contrast with all the nice groundcovers I have! The large leaves almost look tropical, it doesn’t really look like a “wildflower” though that’s what it is.

Possible drawbacks to this plant: I don’t know of any other than it might spread too much for some situations.
Profile for this plant on the Missouri Botanical Garden plant finder:
Solomon’s Seal
Profile for this plant on the Dave’s Garden web site:
Solomon’s Seal
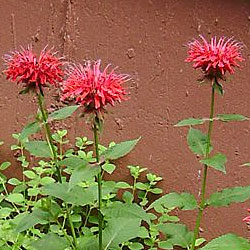
 

Bee Balm

Bee Balm
Monarda didyma

Reasons I like this plant: This plant ticks off almost all the boxes of what I really want – attracts wildlife, is native, naturalizes, is a useful herb, is fragrant, grows in part shade – and as an extra bonus – it’s RED! Red and blue are my favorite flower colors but there aren’t many plants in those colors that will grow reliably for me. I finally got this species to “take” in my garden after three tries and these days it’s spreading all over the place. A sea of red makes me happy so I am THRILLED. I finally have enough so that they will need to be thinned and I can trade some. Red is also the favorite color of hummingbirds – they will feed off of other colors of flowers if they are suitable but seeing some red helps them find the other flowers. The round seed heads look good dried and provide winter interest if you leave them standing.

Possible drawbacks to this plant: Foliage tends to look bad late in summer and is susceptible to powdery mildew. Some cultivars are supposed to be resistant. Most of my Bee Balms get the powdery mildew at least a little bit but in my case it doesn’t seem to kill the plant or spread to other species. I’m willing to put up with it to get red flowers! Once you get it in conditions it likes, it does spread a lot so in some situations that could cause maintenance issues.
Profile for this plant on the Missouri Botanical Garden plant finder:
Bee Balm
Profile for this plant on the Dave’s Garden web site:
Bee Balm
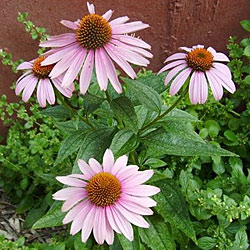
 

Purple Coneflower

Purple Coneflower
Echinacea purpurea

Reasons I like this plant: Beauty is enough reason to grow it. This is also a useful plant for supporting wildlife – bees and butterflies will enjoy the nectar and it’s famous for feeding goldfinches with the seeds. It’s native and will create new seedlings which can be transplanted if they are not in a convenient place. It took several years (about 8?) before I had enough seedlings to start moving them to other spots in the garden. There are lots of cultivars in really nice colors but they are not as vigorous as the species, so as tempting as those other colors are I’ll stick to the species!

Possible drawbacks to this plant: It’s kind of slow growing so you have to be patient. I leave the dried plants standing in the fall when I can to feed birds in the winter but some people think the dried stems are unattractive. You might have to cut them down if they are in a conspicuous spot if you have fussy neighbors. Someone will want the seeds if the birds don’t get the chance to eat them.
Profile for this plant on the Missouri Botanical Garden plant finder:
Purple Coneflower
Profile for this plant on the Dave’s Garden web site:
Purple Coneflower
 

Categories
Outdoor Fun

Schnarr’s can help out with your camping trip checklist!

Schnarr’s can help out with your camping trip checklist!

While making a packing list for an upcoming camping trip, I decided to make a public camping checklist with suggestions that might help out other outdoor lovers. You might be surprised at how useful a hardware store can be in outfitting yourself properly to increase your safety, comfort and fun! I wouldn’t necessarily bring all of these items on one trip but these suggestions are meant to help you create your own personalized list. *Indicates items that are available at Schnarr’s.

Camping checklist

To help you get there:

Map to campground with phone number and address written on it
Printed receipt if campsite reserved in advance
If headed for a campground that is first-come, first serve, the names, phone numbers and addresses of a couple of alternate choices
Tie-down straps*

Miscellaneous:

Cables and chargers for all your devices and batteries (*Schnarr’s carries some items in this category)
Camera and batteries*
Sunscreen*
Toilet paper* – campgrounds and outhouses sometimes run out, plus you never know when you might be way out in the woods!

Putting up the tent and items I keep in the tent:

Tent (yes I forgot this on one trip!) – We don’t carry tents in the store but you can order one from our warehouse!
Tent pegs
Rain fly
Tent poles
Hammer*
Battery powered lantern* and batteries*
Flashlights* and batteries*
Noise machine and batteries* – handy for when you’re stuck by the party campsite!
Ear plugs
Sleeping bag
Pillow
Air mattress
Sheet
Water bottle
Tissues*
Laundry bag for dirty clothes

Things to help make your campsite into a comfy temporary home:

Folding chairs*
Bug repellent*
Mosquito-repelling citronella candles*
Battery powered candles* and extra batteries*
Outdoor heater*
Large water jug*
Gas lantern (can be ordered from our warehouse)
Lantern fuel* and extra mantles*
Solar lights*
Solar shower (good to have if you’re going to a primitive campsite that lacks showers – or if the showers run out of hot water!)

Things for cooking and enjoying the campfire:

Portable grill*
Charcoal*
Matches* or lighter*
Camping stove
Stove fuel*
Funnel for stove and lantern fuel
Cookware*
Cooking utensils*
Grilling tools*
Hot dog/marshmallow forks*
Eating utensils
Kindling*
Fire starters*
Sterno fuel*
Paper plates*
Ziploc bags*
Foil* – handy for food storage and cooking over the fire
Food storage containers*
Pot scrubber*
Biodegradable dish soap*
Plastic trash bags* – not only for waste disposal, also handy for emergency storage of wet or muddy items
Paper towels*
Cooler*
Ice

For water fun:
Pool toys*
Wacky Noodles*
Inflatable air mattress*

Things to have for your emergency kit that you may or may not use:

Lubricant for tent zipper* (candle wax makes a good lubricant and candles can double as emergency lighting)
Pliers* – good for emergency repair on your tent zipper
Extra rope*
Extra tarp* or two – together with rope you can make an emergency rain fly – good for when you have to erect your tent in the rain or if your tent leaks unexpectedly. If you need to rig up a shower curtain or changing room you can do that with a tarp and some rope also (or an emergency tent like I did the time I forgot mine!).
Pocketknife*
First aid kit*
Hatchet*
Hand and foot warmers*
Weather radio* and extra batteries*
Bungee cords*
Space blanket
Emergency rain poncho*

We hope you have a lot of fun outdoors this summer!

Categories
Gardening

Start Some of Your Spring Planting Right Now! Part 3

Start Some of Your Spring Planting Right Now! Part 3

by Carolyn Hasenfratz

*Indicates items available at Schnarr’s

Once you have enticed some seeds to sprout indoors, how should you care for them? In our Master Gardener lecture on Propagation we learned to start fertilizing 3-4 weeks after the seeds sprouted with a water soluble fertilizer at 1/2 strength.

Prevention of Damping Off

Keeping your containers* clean and using sterile potting mix*, recommended in our previous article Start Some of Your Spring Planting Right Now! Part 2 are practices intended to prevent damping off – a fungal disease that kills young seedlings by infecting them at the soil line.

If you want to add a further preventative or possibly kill fungus if it appears despite your precautions, you can spray your seedlings with chamomile tea. An article in Mother Earth News recommends putting a chamomile tea bag into 4 cups of boiling water and letting it sit for 24 hours. Then put the tea into a plant mister* and spray the seedlings at each watering. I’m also experimenting with spraying my edible sprouts* with the chamomile tea and am having success!

Other additional preventive practices against fungus on seedlings are maintaining good air circulation around the plants and watering them from the bottom.

Transplanting the Seedlings

You can transplant the seedlings after the first “true” leaves are present. “True” leaves look like the actual plant leaves and not like the Cotyledons, also known as “seed leaves” which are first to appear. If you have planted your seedling in a peat pot* or pellet*, you don’t have to transplant it, just move it to a larger container surrounded by more potting soil.

If you do need to transplant seedlings, the recommended procedure is to create a hole in the medium large enough for the root system. Gently loosen the medium around the root system, and if any medium clings to the roots leave it there. Pick up the seedling by the leaves, not the stem, and place into the hole. Gently fill in any gaps with medium but don’t pack down. Water well (you can water from the top this time so the water settles the soil around the roots) and put it in a growing environment appropriate for the plant. You will get the most healthy seedlings if you can place them in strong light and if you can get the nighttime temperature around 60-65 degrees and 10-15 degrees warmer during the day.

Hardening Off

Your seedlings should be hardened off for a couple of weeks before moving them outside permanently. On mild days you can start leaving them outdoors in a shady area that is sheltered from strong breezes. Wait awhile before moving them into the sun or leaving them out overnight. You can consult our Calendar for suggestions on when to move many popular plants outside!

Categories
Gardening Outdoor Fun Sustainability

Master Gardener Training Program Volunteer Activities

Master Gardener Training Program Volunteer Activities

by Carolyn Hasenfratz

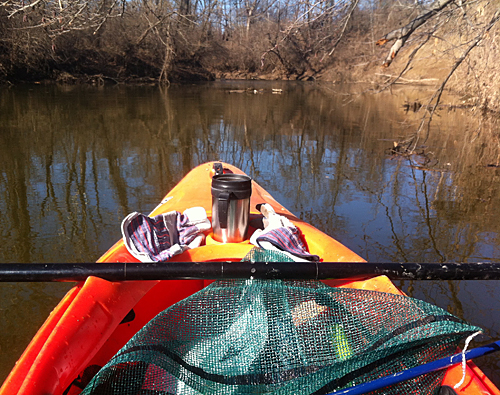
One of the requirements of the St. Louis Master Gardener Training Program is to perform at least 40 hours of volunteer work per year. We have until December to complete the hours but I thought it would be a good idea to get an early start (ok I admit it, I was dying to get my kayak out on the water). My first volunteer effort of the year was to participate in Operation Clean Stream at Simpson Lake in Valley Park on February 27, 2016.

Simpson Lake in Valley Park

Simpson Lake was a bit trashed due to the flooding in December but we made a really good dent in it. I was rewarded with sightings of a Bald Eagle and a beaver!

On St. Patrick’s Day I went on a tour of the Litzinger Road Ecology Center in Ladue with other Master Gardener trainees and made arrangements to volunteer there on a regular basis. The center is a private teaching facility owned by a foundation and managed by Missouri Botanical Garden. It is not open to the public so I thought you might enjoy seeing some photos of our tour if you have never been there.

Litzinger Road Ecology Center

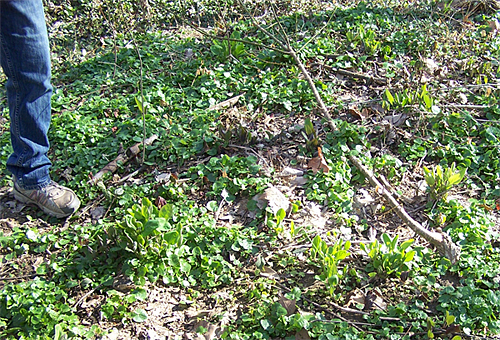
One of the major activities at the center is removing non-native plants so that native plants can flourish. This picture shows native Bluebells emerging among other plants that are slated for removal. When I start my volunteer work I have no doubt that I’ll be learning a lot more about invasive plants!

Litzinger Road Ecology Center

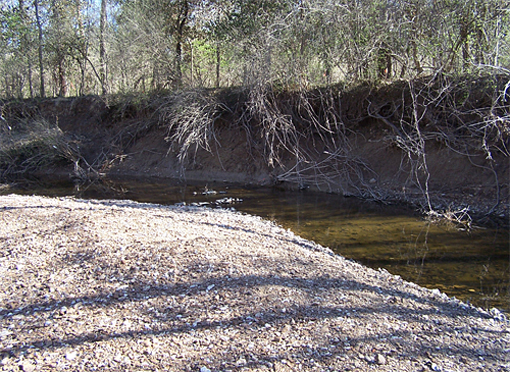
Here is a section of Deer Creek that runs through the center. At the top of the ridge there is an old railroad right-of-way that was formerly the Laclede and Creve Coeur Lake Railroad route. I knew nothing about this interesting historical tidbit until last year when I was riding my bike in the area and noticed the right-of-way and looked it up to see what it might be. As you can see from the photo, erosion is a big problem along the creek. If you own property within the watershed of Deer Creek and you would like to learn how to manage your property to reduce flooding and erosion and to improve the water quality, the Deer Creek Watershed Alliance can help you learn how to do that.

Litzinger Road Ecology Center

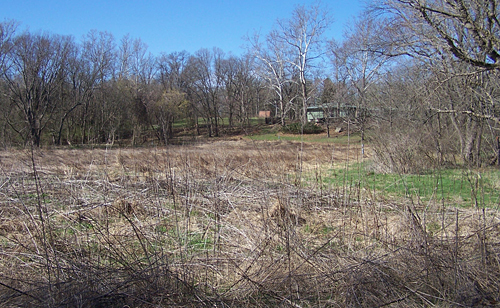
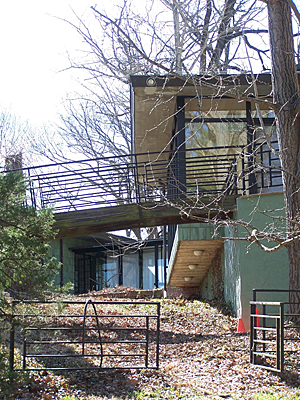
In the foreground is a prairie area and on the ridge is an exquisite Mid-Century Modern house that was formerly the home of the benefactors who donated the land for the center. It is now used as an office for the foundation.

Litzinger Road Ecology Center

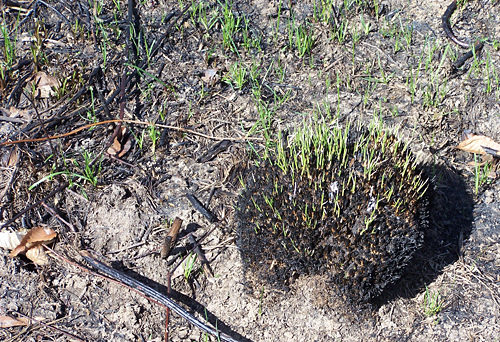
Fire is one of the tools sometimes used here for prairie management. Here is a clump of Prairie Dropseed coming back after a burn.

Litzinger Road Ecology Center

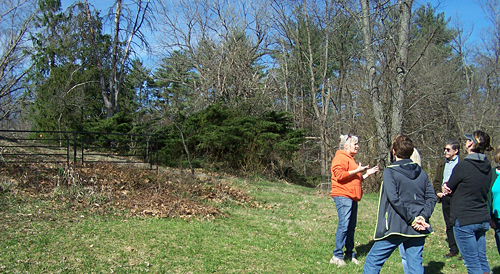
Our tour guide is pictured here explaining that a Monarch Waystation is planned for the area around the fence. The kids who come here for programs (and adults like me) should really love that when it’s done! I developed an interest in insects at a very young age and still haven’t lost it. Here and there on the grounds are “bug boards” that can be lifted up to see what’s taking shelter underneath. I loved doing that kind of thing when I was young and I still can’t resist it!

Litzinger Road Ecology Center

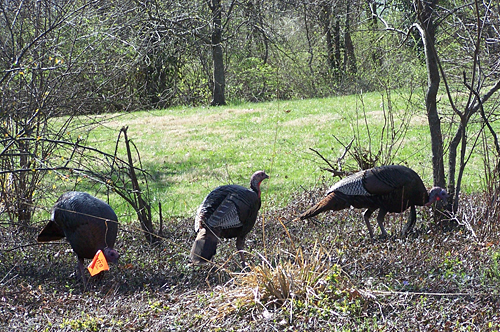
I’m also crazy about birds so seeing these gorgeous turkeys was a treat!

Litzinger Road Ecology Center

Here is a view of the circa 1964 house that shows some of the cool details.

Litzinger Road Ecology Center

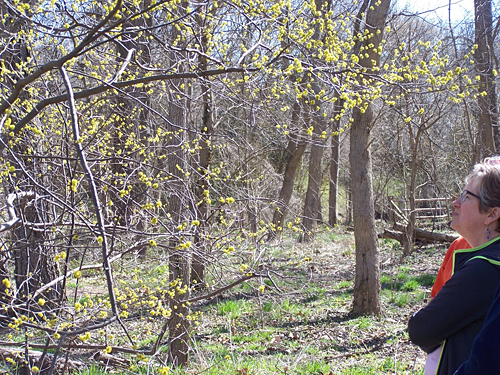
Here is a Spicebush in flower – a beautiful and desirable native plant for the St. Louis area. It’s worth considering if you are planting to help pollinators and birds because it is a host plant for the Spicebush Swallowtail butterfly.

I hope you enjoyed my virtual tour of the Litzinger Road Ecology Center! It is likely that I’ll mention some of my upcoming work here in future issues of this newsletter.

Categories
Gardening

How to Grow Potatoes

How to Grow Potatoes

by Carolyn Hasenfratz

Now is the right time for planting seed potatoes in the St. Louis area. My boyfriend is starting some in his yard and I’ve decided to try growing potatoes in containers on my deck since I’m not allowed to grow vegetables in the ground where I live. I’ve helped a client to do this before with good results but it’s been awhile so I did a little research to refresh my memory and worked out the following procedures.

First acquire some seed potatoes. These are whole potatoes with buds on them that will grow into new plants. If you are not going to plant right away store your seed potatoes in the refrigerator. Cut them into pieces with 2-3 eye buds on each. Let the pieces dry 2-3 days before planting. Small seed potatoes that are 1 to 1 1/2 inches in diameter can be planted whole.

Planting in the ground

The planting method I’m going to describe here mostly comes from an article called “Growing Potatoes in Mulch” and it sounds easy and fun. There are other methods you can try if this doesn’t appeal to you.

1. Pick a sunny spot. Some growers say that a 1/2 day of sun is ok. Choose a spot that has not been recently occupied by another member of the Nightshade family (Eggplant, Pepper or Tomato) within the last three years.

2. Scratch rows slightly into the earth with a hoe, 12-15 inches apart.

3. Place seed potato pieces in rows, cut side down, separated by about one foot.

4. Cover entire bed with 6-8 inches of mulch.

5. Add companion plants if using at the appropriate planting times. See the “Pest Prevention” section below for companion plant suggestions.

6. If any potato tubers look like they are going to break the mulch surface and be exposed to sun, pile more mulch around the plants.

7. Next year put the potato patch in a different area to deter pests.

Planting in a container

All the instructions I read online or in books about growing potatoes refer to really big containers, much larger than I have space for. I don’t know if I’ll have success with my smaller containers but I’m going to try it and see what happens.

1. Choose a large container with excellent drainage. Drill extra drainage holes if you need to. A barrel or trash can is not too large.

2. Set container in a sunny spot.

3. Fill container 1/2 full of potting soil.

4. As potato plants grow above the soil, periodically add more soil (or mulch if you want to try the mulch method) so that some of the leaves are left exposed but lower ones are covered. Don’t let any potatoes get exposed to sun. Eventually the soil may reach the top of the container as the plants grow.

Building a Potato Tower

I heard about this technique on a gardening podcast (I’m sorry, I can’t remember which one!) and it also sounds easy and fun!

1. Build a large cylinder in a sunny spot out of chicken wire or some other mesh product. Fasten together with zip ties.

2. Place about 6″ of straw in the bottom of the cylinder. Start to build layers by putting soil and compost in the middle with a layer of straw around the sides with your potato buds near the edge facing outward. They will grow out of the sides like a strawberry planter.

3. Continue to build layers until tower is full, with an extra few bud pieces on top.

4. When potatoes are ready to harvest, cut the zip ties and let the potatoes and soil fall out. A lot easier than digging! Add the used soil and straw to your compost pile.

Watering

If the weather is dry, give your potatoes 1 – 1/2″ of water per week. Increase to 2″ per week if it’s really hot.

Fertilizing

In the ground, when the sprouts are about 4″ high, apply a balanced fertilizer. If the soil under your potatoes is already fertile that is a big help.

In containers, if you use commercial potting mix there may be fertilizer in it already. If not, add compost and organic fertilizer each time you plant. Switch to a liquid fertilizer when roots have begun to fill the container.

I read a myriad of opinions on exactly what kind of fertilizers to use with potatoes or how often to apply. One thing everyone agrees on is that potatoes are heavy feeders.

Conventional Fertilizers

Apply 5-10-10 or 5-10-5 according to directions on the package.

Organic Fertilizers

Organic fertilizer is a little harder to figure out. I’ve been gardening organically for 12 years and feeding the soil is something I do all the time whenever I have organic matter available to add. I’ve mainly been growing herbs and wildflowers, many of which don’t even want fertilizer so until now it hasn’t been a major consideration for me. I rely a lot on “used” water from cleaning my aquariums and trench composting. Potatoes are something you will have to fertilize, however. Compost is valuable but probably will not be sufficient by itself. With organic fertilizers you won’t do harm by adding too much, but you could be wasting money if you add more than you really need. Cost is not a big consideration for the small containers I’m going to be using so I’m just going to make sure I add a quantity of organic fertilizer that is balanced and let the plants below my deck where the containers are take up the excess if they want it. You can always add Nitrogen because it doesn’t stay in the soil long. A soil test will tell you if you need Potassium and Phosphorus or other nutrients. There are a lot of factors to consider when choosing organic fertilizers, for example bulk, cost, transport and availability. It will be a more involved decision than just choosing a bag with the right numbers so I recommend that as a start you consult this article.

Pest Prevention

Colorado Potato Beetles and Flea Beetles are the most common pests on potatoes in Missouri. The former may be repelled by companion plantings of Catmint, Catnip, Cilantro, Horseradish, Marigold, Nasturtium, Onion, Sage and Tansy. The latter may be repelled by Catmint, Catnip, Mint, Southernwood and Tansy. Try planting some of these plants around your potatoes or make a tea out of the plant parts to spray on your plants.

Periodically inspect the underside of the leaves to see if there are any eggs – if you see some, stick some duct tape on the eggs and pull them off. Ground Beetles are predators on Colorado Potato Beetle larvae. They can be encouraged in your garden with shelter in the form of perennial plants, mulch, rocks and logs. Predatory wasps eat beetle larvae so if you can possibly co-exist with them in your garden they can be great helpers for you.

Harvesting

Feel in the dirt to see how big the potatoes are and take them whenever they are big enough for your needs, or wait until the tops have turned yellow. If you know what variety you have, you should be able to look up how long it takes to be ready for harvest. If you’re not sure, in the St. Louis area start checking for size around July 4.

If you want to do further reading here are the web sites and books I consulted for the information in this article:

Web sites:
Growing Potatoes in Mulch
When and How to Plant Potatoes
Beneficial Insects in the Garden – My own page

Books:
Container Gardening by Sunset.
Guide to Growing Your Own Food by Mother Earth News.

Categories
Gardening

Having plant problems? What to know before you shop for a cure

Having plant problems? What to know before you shop for a cure

by Carolyn Hasenfratz

If something is going wrong in your garden, there may or may not be a product available that treats it. A customer came in the other day and wanted to know what to do about a certain plant that is supposed to be evergreen turning brown in some areas. This could be a sign of a pest or disease, but it could also be a symptom of an environmental issue such as salt exposure, pollution, lack of water or sun scald, just to name a few examples. The cure may not be a product, it may be a different cultural practice. A little research before you go shopping might help you save some money or make better purchases.

If you don’t know exactly what the problem is, I suggest that you try an images search in your favorite search engine and try searches like “Diseases of Name of Plant”, “Name of Plant Pest Symptoms” or “Name of Plant Blight”. You may see an image that looks like the condition you are dealing with. Go to that web page and see if there is enough information to diagnose the issue.

Missouri Botanical Garden can help identify your problem in four ways.


    • Send them an email with an attached photo requesting identification.


    • Call the Horticulture Answer Service at (314) 577-5143.


    • Bring a sample to the Kemper Center Plant Doctors at Missouri Botanical Garden. On this web page are guidelines about what to bring and forms to print out to bring with you.


If you’re not sure what kind of plant you have, they can help with that too!

Categories
Gardening Sustainability

Seed Saving and Trading

Seed Saving and Trading

by Carolyn Hasenfratz

Do you find yourself with leftover seeds after doing your spring planting? When I have leftover seeds I usually put aside some for next year in case this year’s crop fails. Even if the germination rate won’t be as high next year it might be better than none at all. Some of my plants are so prolific that I have many more seeds than I can use in two seasons. I occasionally even have extras of commercial seeds because the packet I bought contains more than I need. When that happens I like to give the seeds away or trade them. Local gardening clubs and online groups sometimes host seed swaps.

A major advantage to acquiring seeds at a local swap is that you are trading with people who have grown the plants in similar conditions and soil as your own. The plants that survived well enough to produce seed are likely to grow well for you too. Whether the seeds are saved for your own use or for trading, keeping good records is important. I keep a three-ring binder with a page for each plant that I grow. I write on the page all the information I have for the source of that plant. If I grew it from commercial seed, I tape that packet on the page so I can refer back to it. If I acquired the seeds through a swap, I record as much information as possible. If the trader included the species name, you can look up the rest of what you need to know, but sometimes traders include growing tips also which is very handy.

The ideal way to package seeds for a swap is in a paper envelope with information about the plant written on it. Species name and cultivar name (if any) and date of harvest I would say is the bare minimum of information you should include. Plastic bags and empty film containers are sometimes used. These are not as good for storage as paper since they hold in moisture. If the seeds were not dried thoroughly before packaging, that could cause a mold problem. If you get seeds packaged in a plastic container and are not going to plant them right away, I recommend transferring them to a paper envelope as soon as possible.


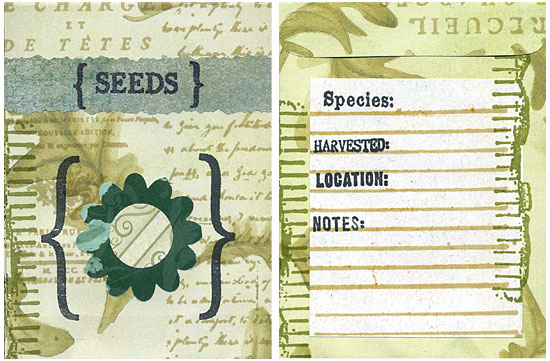
Decorated homemade seed packet'
You can purchase small paper envelopes to store your seeds or download and print out some free templates from the internet. I do a lot of paper crafts so I had some fun making my own more decorative versions. Here are instructions for these seed packets if you would like to make some like them. We also have a pre-printed PDF template you can download to make more utilitarian looking seed packets.

As this year’s growing season progresses, you may want to start saving and storing some seeds for the 2017 season. Every plant is not a good candidate for seed saving, for example hybrids will not breed true from seed. Some hybrids don’t produce seed at all. Some cultivars are stable and some are not.


Columbines'
I suspect that these Columbines, the parent plants having been acquired through a seed swap, are the descendants of hybrids. The swapper labeled these as blue and red but they and their descendants came out pink and purple. I would have rather had blue and red, but these are nice too so that’s ok. It’s hard to grow anything where I live so I’m not going to turn up my nose at something that is pretty and grows really well for me! You never know what is going to come out when you plant the seeds of a hybrid or of a plant that is likely to cross-pollinate with other plants in the vicinity. You might find this uncertainty part of the fun of gardening or an annoyance depending on what you are trying to do. This year I have a bunch of seedlings coming up that came from a Columbine plant that I know is a hybrid because I have the seed packet and it says so. I don’t know what the resulting plants are going to look like. If I don’t like them I just won’t save their progeny. Each year I grow petunias that are descended from seeds that my Mom and Dad got in a pack at Aldi in the 1980s. I don’t know from year to year if the flowers are going to be white, purple, magenta, or pink but that’s part of the fun for me! They’re all pretty so I don’t care. If you’re growing food or trying to breed plants for specific traits you need to know a lot more about where your seed stock comes from and what pollen it’s exposed to. For example if you’re growing one type of vegetable and your neighbor is growing one that is similar but not the same they could cross-pollinate. If that is a concern it’s good to know how your plant is pollinated and how to prevent cross-pollination. If you are not sure whether your plant is a good candidate for seed saving or how to do it, it’s best to look up the recommendations for that particular plant.

Aside from some of my Columbines, my garden has few hybrids. In my case one reason is so that I can reliably save seeds so I have some trading stock or when I want to grow more of a particular plant. Species plants are often more attractive to wildlife than hybrids, and wildlife is an important part of my garden. I also am not allowed to grow vegetables where I live (unless they are in containers on the deck) – I mostly concentrate on herbs and wildflowers. Wildflowers are good candidates for seed saving because they need to reproduce without human help and can be open pollinated. Many herbs if you get the species plant and not a hybrid will grow true from seed. I harvest when the seeds are brown and starting to get loose and the pod if there is one is starting to come open. When I cut the pods or seed heads to save them, I store them in paper bags that I have labeled with the species and date of harvest. I hang these bags from a chain in my closet for at least a month – then they are dry enough to separate the seeds from the chaff. I sometimes don’t bother to separate the seeds until I’m ready to plant them or put them in envelopes for trading. I collect the seeds from the healthiest plants and try to mingle the seeds of several parent plants together so the genetic diversity is greater. I’ve never noticed any strange mutations but if you get one you might be able to start a new variety!

If you’re a beginner to seed saving, here are some suggestions of plants I have had good results with:

Swamp Milkweed
Bronze Fennel
Dill
Blackberry Lily (flower color varies – can be red-purple, red-orange, or yellow)
Yucca filamentosa
Horehound
Hollyhock
Lemon Balm
Purple Coneflower
Moonflower
Agastache rugosa
Feverfew
German and Roman Chamomile
Calendula
Evening Primrose
Queen Anne’s Lace
Rue
Yarrow (white)
Cilantro
Blue Mistflower
Rose of Sharon (not cultivars)
Grape tomatoes

If you don’t have any of these plants take a look at what reseeds itself and breeds true in your own garden and try those first!

Categories
Gardening

Test your soil now to assess your fertilizer needs

Test your soil now to assess your fertilizer needs

by Carolyn Hasenfratz

During the upcoming growing season you may need to fertilize your lawn or garden. You will probably want to add Nitrogen in some form on a consistent basis since it does not stay in the soil long. If you add Nitrogen in an organic form it will be slow-release so you don’t need to worry about adding too much. If adding Nitrogen in chemical form it is important to get the timing and amount correct. For all the other soil nutrients you should get a soil test to make sure there really is need – there is no point in spending time and money to apply something you already have. A soil test is also important to find out the PH – it needs to be in the right range for what you are trying to grow. Even if the nutrients are present, if the PH is not right the plants won’t be able to make use of them.

Here is how to prepare a soil sample. Go to 10 to 15 places in your yard or garden and dig up consistently sized samples from the surface to six inches down. Collect the samples in a clean plastic bucket. Spread them out to air dry then mix together thoroughly. If you have distinct areas such as a lawn vs planting beds, prepare a separate sample for each area. You might want to do separate tests for the front or back yard, or sunny vs. shady areas also. Put one pint of each sample mixture into a clean plastic bag, label it with your name, address and sample location, and take it to a lab.

For information about the University of Missouri Extension testing service, see their web site. This web page on the Missouri Botanical Garden web site will tell you how to utilize your test results after you get them.

Categories
DIY Gardening Good Eating

Impatient for home-grown greens? Try some sprouts!

Impatient for home-grown greens? Try some sprouts!

by Carolyn Hasenfratz

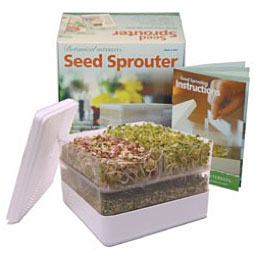
Seed Sprouter from Botanical Interests
There are a lot of health claims associated with eating sprouts. I know for sure that they taste great and can be ready to eat just a few days after starting so if you’re ready for something green and yummy to eat you won’t have long to wait. I purchased a Seed Sprouter from Schnarr’s and I’ll be giving it a try shortly. Schnarr’s carries some seeds from Botanical Interests that can be used for sprouting. We might not have everything listed on the Botanical Interests web site but we have some of them. You can also get seeds for sprouting from the Whole Foods bulk section.

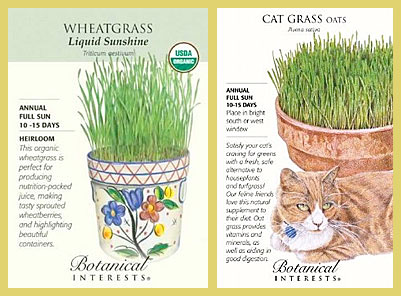
Did you know you can let some of your seeds grow two or three weeks past the sprout stage and cut the tops off to use them in juices or smoothies? Wheat Grass and Oat Grass work well for this because they are easy to grow indoors and they germinate pretty quickly. When they are long enough you can use them in your favorite recipe. I sowed my seeds in seed starting potting mix, harvested a first cutting and got a second smaller cutting off of them later before turning them over to my pet birds. Apparently European Starlings don’t need to be told that sprouts are good for you! They rapidly ate the stems, leaves, roots, and still-attached seeds with gusto! I think I remember reading somewhere that if you observe birds pulling up young seedlings in your garden, they are not just engaging in wanton vandalism, they want the extra nutrition from the sprouts. My own birds’ instinctive behavior around sprouts would seem to reinforce that idea.


Oat Grass and Wheat Grass


The Oat Grass is mainly marketed for cats while the Wheat Grass is marketed for human consumption. Both are nutritious for humans but the fibers are not digestible for us. You can get some of the nutrients from wheat and oat grass in a smoothie by thoroughly chopping the grass in a blender with the liquid that is going to go into your smoothie. Then strain the grass pieces out of the liquid and discard the fibrous parts. (I left some pieces in one of my smoothies as a test and I did not notice any digestive upsets but some people might not react well to the fibers). I don’t have a juicer and I’m not familiar with how they work but Wheat Grass is more commonly known for use with juicers.

According to the website WebMD, Wheat Grass contains vitamins A, C and E, iron, calcium, magnesium and amino acids. WebMD states that there is not enough evidence to support most health effects other than nutrition although people do attempt to treat some health conditions with it and rates it LIKELY SAFE consumed in food amounts. WebMD has no listing for Oat Grass but other web sites I looked at state that it is also nutritious for people though perhaps not as much as Wheat Grass.

Here is a delicious smoothie recipe to try.

1/2 cup milk (any kind)
Handful of cut wheat and/or oat grass
1 frozen banana
1 cup frozen cucumber pieces
1 scoop Vanilla Flavored Whey Protein powder*
1 heaping TBSP Matcha Green Tea Latte powder*
*available at Trader Joe’s

Directions:
Blend milk and grass pieces together in blender until well chopped. Strain grass pieces out of milk with a fine strainer. Return milk (now with a green tint) to blender and add all other ingredients. Mix well until smooth. Enjoy!

Categories
Gardening

Start Some of Your Spring Planting Right Now! Part 2

Start Some of Your Spring Planting Right Now! Part 2

by Carolyn Hasenfratz

The following seed starting tips come from my Master Gardener class and are general for a wide variety of seed starting. Some of the information you may need to germinate seeds is specific to the type of plant you are trying to grow. Check the seed packet or other resource to find out if there are any specific instructions for that particular seed.


Seed Starting Mix

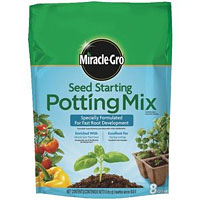
1. Choose a seed starting mix that is loose or lightweight, porous, fine-textured, holds water, and is free of pathogens or weeds. It can contain fertilizer but doesn’t necessarily have to. Pre-made mixes like the Miracle Gro Seed Starting Potting Mix* are easy to use. You could also make your own blend containing some or all of the following – peat moss*, perlite*, vermiculite*, compost and bark. Do not use field soil or sand. Peat pellets* can also be used in place of loose medium.


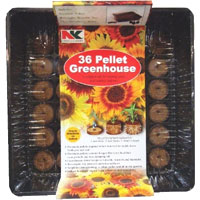
Seed Starting Kit

2. Next select a container. It can be a plastic container with drain holes* in the bottom or a plant able pot* made of biodegradable material. If you have used the container before it’s a good idea to soak it in a 10% bleach* plus water solution and scrub it to make sure it doesn’t harbor pathogens.


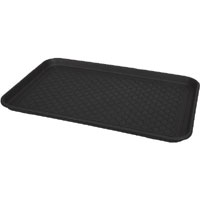
Boot Tray

3. Fill the container to the top with planting medium without packing it down. Set the container in a tray* of water and let the water soak through from the bottom up. The reason for watering from the bottom is to avoid packing down the planting medium. If you are using peat pellets soak them in water until they expand.


4. Dig little holes or trenches in the medium at the proper depth for that particular seed. If you are not sure plant it at about twice as deep as the diameter of the seed (3-5 times outdoors). Cover seeds with medium.

5. If the container comes with a clear plastic cover, put the cover on. If you don’t have a cover, use a clear plastic bag and seal the bag to keep in moisture. You shouldn’t need to water for at least a week or so, unless you see the medium looking light colored and dry around the edges. When you do water the seeds, do a thorough job.

6. Place the seeds in a warm spot or on a seedling heat mat* until they sprout. 75 to 80 degrees is a good temperature range unless your seeds have other requirements. After that you can remove them from the heat source and remove the plastic covering. Keep seedlings away from a draft or heat vent.

7. Some seeds need light to germinate but for other seeds you can wait until they sprout to put them under lights. Some light from a window is helpful but it won’t be enough by itself. Artificial light can be either fluorescent or incandescent but you might prefer the fluorescent because it does not give off as much heat. The lights need to be very close to the plants and there is less danger of overheating the plants if you use a light that doesn’t get too hot.

Warm and cool also can refer to light color and that is important to mention here. Plants use both red and blue light wavelengths for photosynthesis so you can use either warm or cool light or both together if you want. You don’t need special grow lights but if you see any that are meant to simulate a daylight spectrum those are a good choice. The brightness of the light, or lumens is more important than the color of the light, or kelvins. We have a wide selection of bulbs at Schnarr’s – talk to us about your lighting needs and we’ll help you select the right product.

8. 3-4 weeks after seeds have sprouted, you can start adding liquid fertilizer* at 1/2 strength.

* available at Schnarr’s.

Check the Schnarr’s Calendar for suggested St. Louis area planting times, we have many plants listed on there. Stay tuned for future tips for transplanting the seedlings!