Categories
Gardening Outdoor Fun

How I Use My Garden for Self Care

How I Use My Garden for Self Care

by Carolyn Hasenfratz

mygardenLife can be stressful at times. If we don’t take time for self care our health can suffer. I recently saw an advertisement for a workshop about gardening and holistic self care. I was not able to attend and learn some new things, but I can think of a lot of ways in which my garden already helps me with my own self care.

Exercise – That’s good for physical and mental health.

Time outdoors – Health benefits accrue from contact with nature and sunlight.

Hobby activity and learning – Observing what is going on in my garden and finding out the reasons why is great excercise for the brain. Studying for my Master Gardener tests earlier this year gave my memorization skills a big boost. If photography, sketching, painting or other visual arts are hobbies for you the garden can provide a lot of interesting subjects.

Mindfulness – I’m learning more about Mindfulness and how to practice it. The pleasant sensory experiences in a garden (taste, sight, smell, sound, touch) are a great incentive for Mindfulness exercises.

A sense of purpose – When I work on my garden, I have the satisfaction of knowing that I am learning things that I can teach to others. I’m making the vicinity healthier and more pleasant for my human neighbors. Because of the way I manage my garden I’m helping address environmental problems that affect all of us – soil erosion, soil health, flooding, overuse of pesticides, scarcity of pollinators for crops, air quality and water quality. The impact of my garden may be small but it’s more satisfying to do something than nothing. The number of beneficial non-human species that use my garden lets me know that I’m providing healthy habitat for them. I also donate some of the extra seeds I raise to non-profits.

Indoor environment improved – My gardens surround all three exterior walls of my condo so when I open the windows delicious fragrances waft in. I set vases of cut flowers and herbs around to freshen and beautify the interior. If you believe in aromatherapy, you can breathe in some herbal essential oils right from the plant! I also make potpourri from the dried herbs.

Nutrition – I harvest edible leaves and make tasty beverages from herbs in my garden. The freshness enhances both taste and nutritional value.

Personal care products – I use herbs from the garden dried or fresh in a number of personal care products such as facial masks, bath tea, soaps, face lotion, skin balm and more (some of my recipes are here). Luxury bath products do make you feel cared for and when you make your own they’re even more luxurious because they’re made to your specifications.

Spritual benefits – Many faith traditions can incorporate gardening and plants – for example mazes, grottoes, shrines, incense and more. Many people find that working in concert with nature makes them feel closer to the Creator they believe in.

According to a book I’m reading now, “The Expressive Arts Activity Book” by Suzanne Darley and Wende Heath, the arts are inherently therapeutic. Gardening is an art and many products of the garden can be used in art forms such as cooking and flower arranging. Although I don’t know much about it yet, there is a professional field called Horticultural Therapy. If you already have a garden, I encourage you to take time to enjoy it’s benefits. If you are thinking of starting one the fall is an excellent time – waiting until spring to start a garden from scratch can be a challenge!

Categories
DIY Gardening Home Decor Upcycling Ways With Wood

Build a Mosaic Plant Stand

Build a Mosaic Plant Stand

by Carolyn Hasenfratz

Make a Mosaic Plant Stand

In this article I’ll show you how to make a stand to show off a special container plant. Raising a planter off of its surface can really enhance the appearance of a single specimen or help you create an attractive container plant grouping by providing elevation to some containers. Such a stand may also help protect the surface underneath by allowing air circulation under the pot so the surface can dry out between waterings. This stand is designed for both indoor and outdoor use. It is designed to let water from the plants run off, rather than catching it. This stand can also be used as a sturdy trivet indoors or outdoors.

Tools and Supplies
* indicates items that are available at Schnarr’s
8 x 8″ x 1/2″ board*
Lattice wood strips 1 1/4″ wide*
Saw*
Miter saw*
Sandpaper*
Dust mask*
Pencil or pen
Ruler*
Hot glue gun*
Wood hot glue sticks
Drill*
Tiny drill bit*
Nails*
Hammer*
Wooden ball knobs or drawer pulls with 3/16″ holes to use as feet (Wood drawer pulls are available at Schnarr’s Webster Groves store)
Wood glue*
3/16″ drill bit*
3/16″ dowel rod*
An assortment of ceramic tiles and/or glass pieces that are about 1/4″ thick
Palette knife or putty knife*
Ceramic tile cement*
Old plastic lid
Tile grout*
Water container*
Mixing container for grout (can be an old food container)
Rags*
Disposable gloves*
Bucket* of water for cleanup
Tile and grout sealer*

Instructions

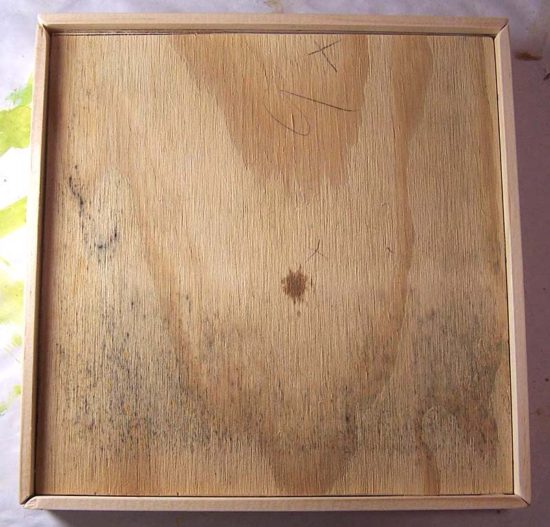
1. Cut an 8 x 8″ square out of 1/2″ thick plywood.

2. Cut four 8 1/4″ lengths out of a piece of 1 1/4″ wide lattice wood. Miter the corners at a 45 degree angle as you cut.

3. Put on dust mask and sand the rough edges off of your wood pieces.

4. On the inside edge of each mitered piece draw a line 1/4″ from the top.

Mitered wood strip with drawn line

5. Glue mitered pieces to the edges of the 8 x 8″ block using hot glue as the adhesive and your drawn line as a guide to help line them up. You should end up with a 1/4″ lip all the way around, creating a tray that will hold your tile pieces.

1/4 inch lip around edge

6. As a reinforcement to the glue, drill a couple of small pilot holes on each side of the tray and hammer nails in for a strong hold.

7. Choose four wooden ball knobs or wooden drawer pulls with 3/16″ holes. Place them in the corners of the bottom of your tray. Draw around the base of each with pencil to indicate where their footprint will be. Set knobs aside.

8. Switch to a 3/16″ drill bit and drill a hole in the center of each drawn circle. Try not to go all the way through the wood but if you accidentally do it’s no big problem.

9. Cut short segments (about 1″) from a 3/16″ in diameter piece of wooden dowel rod to make pegs. Insert pegs into holes in wood and thread knobs onto pegs to make sure they are not too long and that there is no gap between the knob and the bottom of the tray. When satisfied, remove, dab wood glue onto each end of each peg, and re-insert into holes. Place knobs over pegs and press in place. Let wood glue dry. I left the wood unpainted in my sample but if you want to you can paint or stain the wood and give a waterproof clear coating like spar varnish.

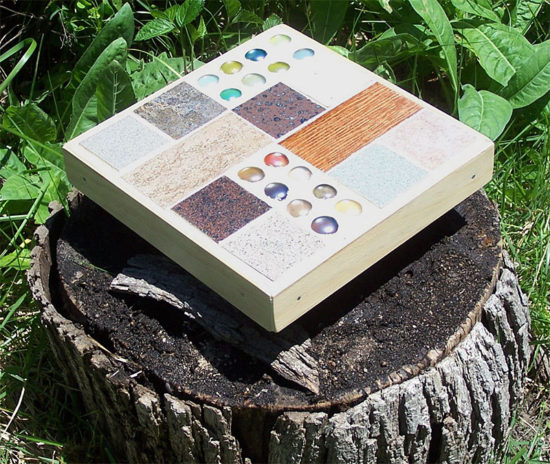
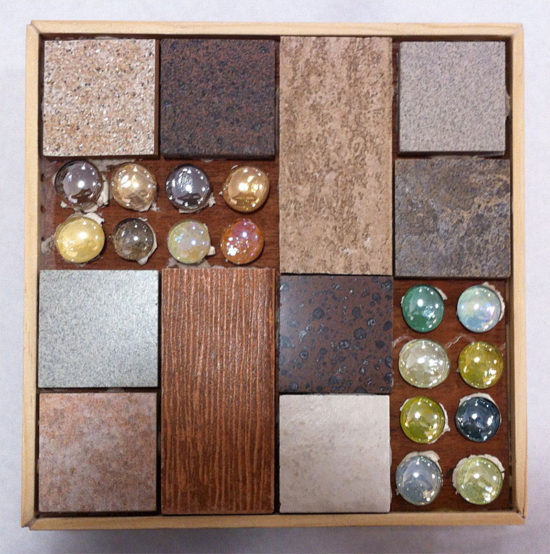
10. Get out your tiles and arrange in the tray to make an arrangement that is pleasing to you. For my sample I used tiles I salvaged from Leftovers, Etc. and some translucent glass blobs which were backed with colored paper. Try to leave a litte bit of space between each piece.

11. Once you have decided on an arrangement, scoop a small quantity of ceramic tile cement out of the container and place on an old plastic lid. Keep container closed so the rest of your cement doesn’t dry out. Use palette knife or putty knife to apply cement to the back of each pice and press in place. If any tile pieces are thinner than the others, you can put some extra cement on the back to build up the height. Let cement dry for the time period indicated on the container.

Tiles glued down and before grouting

12. When cement is dry you’re ready to apply grout. Grouting is very messy – I recommend you wear old clothes and protect your work surface and floor. Have plenty of clean rags on hand and a small bucket of water for cleanup. Don’t be surprised if you need a bath when you’re done!

13. Put some grout in a small plastic tray, such as one left over from a microwave dinner. Add water until it’s about the consistency of soft cream cheese – a little at a time to make sure you don’t add too much. Stir it with your putty knife as you add the water. Try to only mix up small amounts at a time so it does not start to set up before you’ve applied it.

14. Put on your disposable gloves, and use a rag to pick up a portion of tile cement. Smear it around to fill the cracks between tiles. The rags will help protect your hands from sharp pieces if there are any. The thin disposable gloves will protect your hands from being irritated, dried out or discolored by the grout, but alone they will not protect you from cuts.

After the tray is grouted, go back over it with a succession of fresh rags to remove the grout from the surface of the tiles. Dampen the rag with a little water toward the end to get them really cleaned off if needed. Be careful not to dispose of any grout in your sink – it could clog the drain. Dispose of any rags that are really soaked with grout – I put mine in the compost. If some are only slightly dirty, you may be able to re-use them by rinsing them in a bucket of water. If you do that, dump the dirty water out in the yard, don’t put it down the drain.

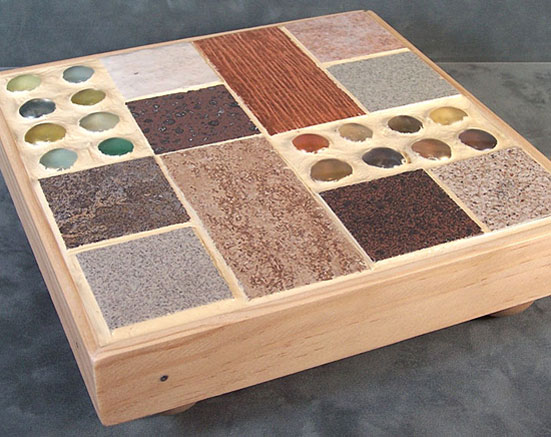
15. Let the grout dry, then apply tile and grout sealer. You’re done!

Finished mosaic plant stand

Categories
DIY Home Decor Sustainability Upcycling Ways With Wood

Stencil a Sofa Shelf Made From Distressed Wood

Stencil a Sofa Shelf Made From Distressed Wood

by Carolyn Hasenfratz

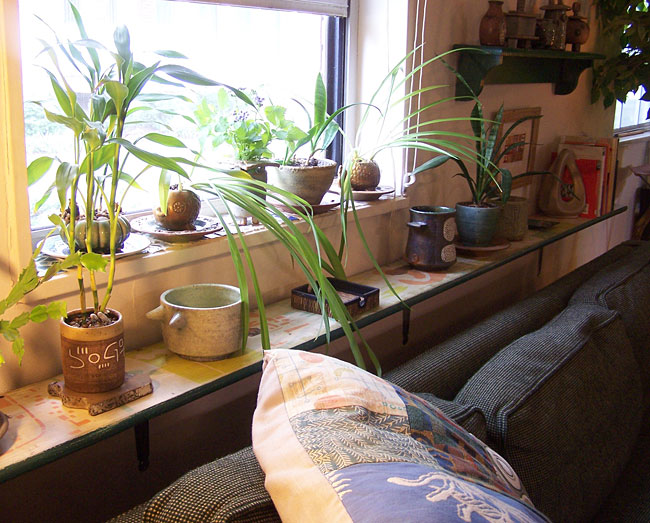
Sofa shelf made from distressed wood

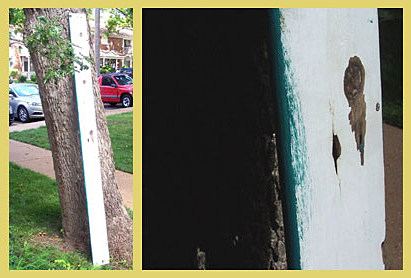
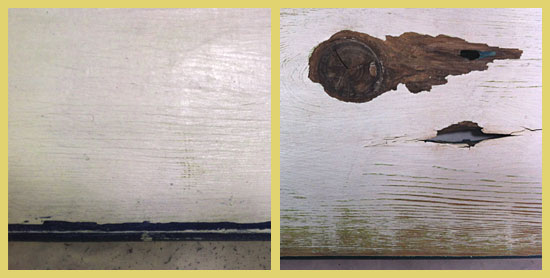
This project was made from the same stash of distressed wood that I used for the previous project Stencil a Wood Garden Sign. I kept aside a couple of intact large planks so I could make some interesting shelving. The wood was bare on one side and had partially peeling white paint over green on the other side. I decided to use the white side as a ground for some stencils I cut that were inspired by a mid-century modern building I saw on vacation last summer.

Tools and Supplies
* indicates items that are available at Schnarr’s
Distressed wood plank the length of your sofa
Sandpaper*
Dust mask*
Drop cloth for work surface*
Water based paint* for large areas
Acrylic craft paints for stenciling
Decorative stencils
Water based clear satin wood varnish*
Rags*
Paintbrush*
Assorted size old food containers for mixing paint and varnish
Sponges*
Old food container lids to use as palette while stenciling
Masking tape or painters tape*
Shelf brackets*
Screws*

Instructions

1. Put on a dust mask and sand your wood plank to remove rough edges and peeling paint. It’s always a good idea to wear a dust mask to keep from breathing small particles but I think it is even more important when working with old salvaged wood. You don’t know what that wood was treated with, what is in the old paint and it could be moldy as well. After sanding, wipe off the dust with a damp rag.

2. My wood plank already had a satisfactory ground color, white, on what would become the top surface. If your plank does not already have a ground color that you like, you can apply one. House or wall paint is a good choice. One technique that is really effective with the distressed look is to paint a contrasting color under the ground color. Some random sanding here and there later to expose the different layers of paint will simulate the effect of an old piece of wood that has been painted multiple times.

3. Apply a contrasting color to the sides and bottom of the board. As you can see, when you paint surfaces where two colors come together at a corner, it’s easy to slop a little paint over where you don’t want it. One reason that I love the distressed look so much is that when you sand off paint to conceal your mistakes, it looks like part of the design. If you are trying to paint precise corners or lines they don’t look good unless they are perfect, but with a distressed effect you can be a little sloppy!

My distressed board with closeup of paint job

4. Next put your dust mask on again and sand the corners and edges of your board to expose the wood in those places. Then check to see if any paint is beyond the corner where it is supposed to be, such my example below on the left.

Sanding in process

Sand away any paint that is in the wrong place, such as the excess paint that I removed from the top of the board. As I sanded the excess paint off, I exposed some of the wood grain on the front of the board and some of the green paint that is under the white paint. If you are using a really beat up piece of wood like I did in my sample, you can make some artistic decisions about sanding other areas. If there was a rough spot that I found pleasing, such as wood grain, I sanded such spots to enhance the texture. If there were spots that were not pleasing, such as dirty spots or flaking paint, I sanded to remove those unwanted areas of paint.

5. Decide what design you want to stencil on the top side of your shelf. I designed stencils specifically for this project but I have and will use them in lots of other projects as well. If you would like detailed information on how to cut your own stencils, see my article Fun With Stencils.

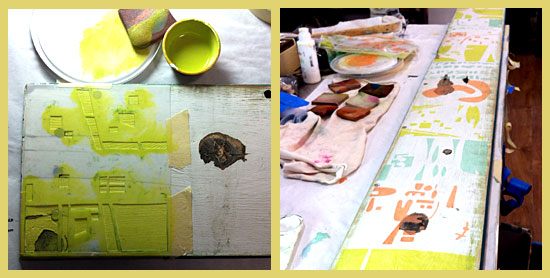
6. Apply craft paint through your chosen stencils in the colors of your choice. If you are new to stenciling on wood, please see my article Stencil a Wood Garden Sign for detailed instructions.

Stenciling in process

7. When stenciled paint is dry, to further enhance the distressed look mix up a paint/varnish/water mixture. Here is how – in a small container, mix some paint until you get a shade of dark brown that you like. In another larger container, mix a half and half solution of water and satin finish water based wood varnish. Gradually mix in some of the brown paint until you get a stain that you like – test by brushing on an inconspicuous spot. It should be dark enough to tone down your design a little bit and give it a weathered look, but not so dark that it obscures it. When the mix is right, stain/varnish your whole board and let dry.

8. Attach brackets of your choice to the wall behind your sofa, and set shelf in place. You’re done!

Categories
Gardening Good Eating

Recipe: Herbed Up Melon Salad

Recipe: Herbed Up Melon Salad

by Carolyn Hasenfratz

This will spice up your breakfast a bit!

Go the garden and pick a double handful mixed selection of whatever you have in your garden from this list:

Leaves:
Bee Balm (Monarda), Lemon Balm (Melissa), Peppermint (Mentha), Korean Hyssop (Agastache Rugosa), edible wild Violet (Viola), Basil, Borage (young leaves)

Flowers:
Edible Hibiscus, Dandelion (discard calyx), edible Roses, edible wild Violet (Viola), Borage

Chop a melon and put pieces in a bowl. Drizzle with lemon juice and agave nectar. Top with chopped herbs and flowers. If you have any discarded stems, use them to flavor your morning tea!

If you are interested you can read more of my recipes on my Fun With Food page.

Categories
Gardening Good Eating

Recipe: Carrot Soup With Herbs and Wild Greens

Recipe: Carrot Soup With Herbs and Wild Greens

by Carolyn Hasenfratz

I like carrots a lot but it gets kind of boring to eat them the same old way all the time. This recipe will liven up a bunch of carrots!

Ingredients:
1 bunch or bag of carrots
Vegetable broth
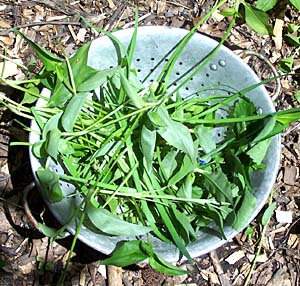
Colander full of fresh edible weed leaves and herbs from the garden – I used Dandelion, Violet, Asiatic Dayflower, Chives, Lemon Balm
4 garlic cloves
1 tsp dried basil
1/2 tsp salt
1/2 tsp ground ginger
1/4 tsp marjoram
1/4 tsp savory
1/4 tsp thyme
Cooking oil

Wash herbs and leaves and remove from stems. Discard stems. Heat a large pan or wok and stir fry herbs and leaves in cooking oil until wilted. Put greens in soup pot.

Chop carrots into discs or straws thin enough to cook easily. Add more oil to pan and stir fry carrots and garlic cloves until somewhat browned. You don’t have to cook them all the way, just brown some of the sides for caramelized flavor. Add to soup pot.

Add broth to cooking pan and heat long enough to mix in pan juices. Pour broth over vegetables in soup pot in a quantity enough to cover. Bring to a boil then turn down heat and simmer for 30 minutes. Add spices and salt while simmering.

Let soup cool enough to be safe to put in a blender. You may need to blend it in batches and add to a large bowl to mix batches together. Blend to a smooth consistency. Warm if needed and serve.

If you are interested you can read more of my recipes on my Fun With Food page.

Categories
Backyard Wildlife DIY Gardening Sustainability Upcycling Ways With Wood

Make a Pollinator House – Part 2

Make a Pollinator House – Part 2

by Carolyn Hasenfratz

In my previous article Making a Pollinator House – Part 1 I explained why you might want to build a home for native bees and other beneficial insects for your garden. I also provided an example of a quick way to build a shelter out of cinder blocks, wood scraps and dried plant material. I promised to write up plans for a more attractive pollinator house. Here are instructions for building two different designs to enhance your garden’s decor as well as it’s productivity and ecological health.

Tools and Supplies
* indicates items that are available at Schnarr’s
Tracing paper
Pencil
Ruler*
Hot glue gun*
Wood hot glue sticks
1″ x 6″ x 8′ multipurpose board*
2″ x 4″ x 8′ board*
Saw*
Sandpaper*
Dust mask*
Acrylic craft paint
Paint brushes*
Water container*
Heat tool for speeding up drying (optional)
Painters tape or masking tape*
Decorative stencils
Sponges*
Drill*
Tiny drill bit*
Nails*
Window screen*
Hammer*
Wood glue*
Clear matte finish varnish*
Hardware cloth or chicken wire (optional)*

For the additional second design with the pediment, you’ll also need:
Assorted sizes of distressed wood pieces
Decorative brass box corner*
Miter saw*
3/16″ drill bit*
3/16″ dowel rod*
Wooden ball knobs or drawer pulls* with 3/16″ holes to use as feet
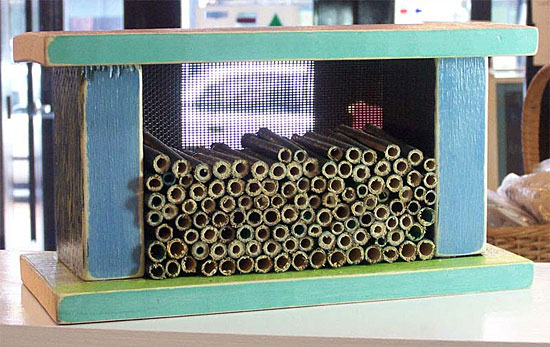
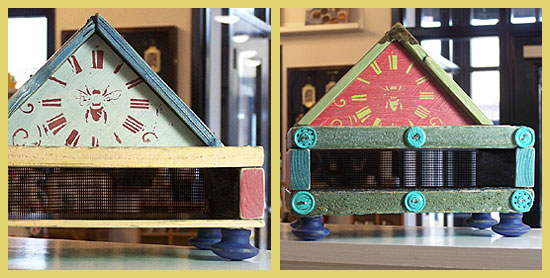
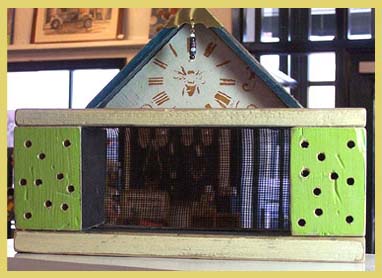
Mid-Century Modern style pollinator house

Instructions for Style #1 – “Mid-Century Modern” Pollinator House

1. Download the PDF document “Pollinator House Assembly Diagram”. It is sized to print out on a legal-sized piece of paper. Recreate the diagram in scale on a piece of tracing paper with pencil.

2. From the 1″ x 6″ x 8′ board, cut two 12″ x 5.5″ pieces(although the board is called 1″ x 6″ x 8′ it’s probably closer to 5.5″ so you might only have to cut the board into 12″ lengths).

3. From your 2″ x 4″ x 8′ (probably really 3.5″) board cut two 5″ segments.

4. Put on a dust mask and sand your wood pieces until smooth.
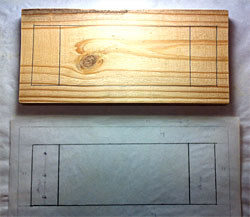
copy diagram onto wood
5. Mark each of your 12″ x 5.5″ pieces with the rectangles shown in the diagram. These will become the inner top and inner bottom of your house.
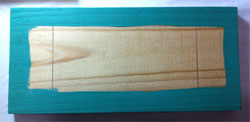

paint around edges
6. Paint a color of your choice in the border around the inner rectangle on each piece. For this step you don’t have to worry about painting precisely in the lines. Let paint dry.


7. Mark off around the middle rectangle with masking or painter’s tape on both pieces and paint black. When paint is dry, remove tape.

paint middle of boards black


8. Paint what will be the insides of your 5″ high supports black. Paint all other surfaces of your wood pieces assorted colors of your choice.
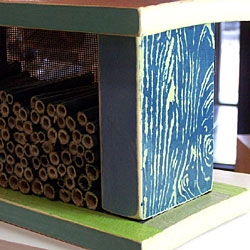
decorative stenciling
9. Decorate the top of your house and the sides of the supports with decorative stencils. I did not decorate the board edges with stenciling in my sample but you can if you want to. If you are new to stenciling on wood, see this article for tips –
Stencil a Wood Garden Sign.

10. Sand all the edges of your wood pieces so that the bare wood shows through on the corners. This gives the wood a distressed look. If you want to distress any other painted or stenciled surfaces further you can do so by roughing them up with sandpaper.

11. To assemble the house, stage the upright pieces by placing them in their footprints as indicated on the diagram on one of the 12 x 5.5″ pieces. Face the black painted sides inward and the stenciled sides facing out. If you’ve covered up your pencil lines with paint, you can use your diagram to redraw them as needed.

12. Load up your hot glue gun with wood project glue sticks and plug it in to heat up. Apply hot glue to the bottoms of the support pieces and press in place. Let glue harden.

13. Glue the other ends of the supports in place on the other 12 x 5.5″ piece. Let glue harden.

14. Place the tracing paper diagram on top of your house. Mark where the nail holes will go in pencil. Drill small pilot holes then hammer nails in. Repeat for the bottom.

15. Mix some dark brown paint with water to make a thin wash and paint over the whole house. Test first on the bottom to make sure it’s not too heavy or light. Alternately, you could use a wash of off-white paint if you’d rather have a pale wash. The purpose of the wash is to give an aged appearance to the wood – this is particularly effective when the paint clings to the corners that have been bared by sanding. Let paint dry.

16. Paint whole house with clear matte varnish.

17. Cut out a 10 x 5″ piece out of scrap window screen and nail it to the back side. This is to keep whatever materials you fill the house with from falling out the back side.

18. Fill the house from the front with materials that contain holes for pollinating insects such as native bees to live in.

Some suggestions of materials you could use to fill the house:

  • Bamboo or reed segments
  • Rocks
  • Rolled up corrugated cardboard
  • Chunks of scrap wood with holes drilled in it
  • Bundles of twigs or straw
  • Unfired ceramic clay with holes poked in it
  • Natural dried stems and reeds from the garden cut into segments
  • Dried seed pods

If necessary, cut out a piece of hardware cloth or chicken wire and nail it over the front to hold materials in.

19. Read this article for ideas on where to place the house in your garden or yard –
Making a Pollinator House – Part 1.

Depending on where you want to put your house, you may want to attach hanging hardware to it or mount it on a post. The wood pieces we used are thick enough to give you flexibility in attachment options.
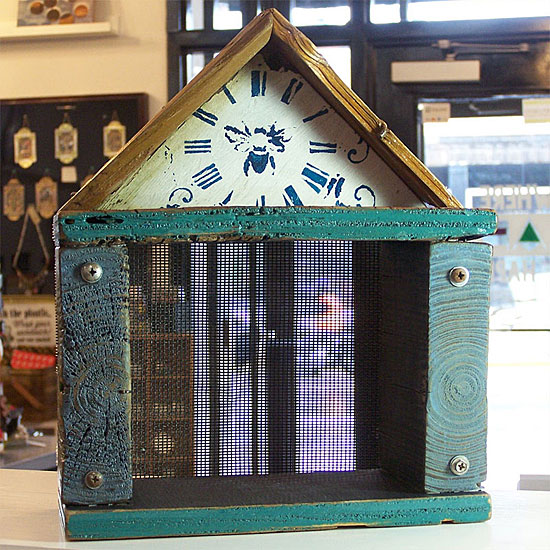
Pollinator House with Pediment

Instructions for Style #2 – Pollinator House with Pediment

The prototypes I made for the second design vary somewhat in size and proportions because I used distressed wood that I had lying around. I designed the houses around what wood I had available and embellished some with found objects or hardware. If you want to build similar houses and don’t have access to distressed wood, you can use new wood.

1. Cut out two chunky pieces of wood to use as uprights and two thin pieces to use as the top and bottom.
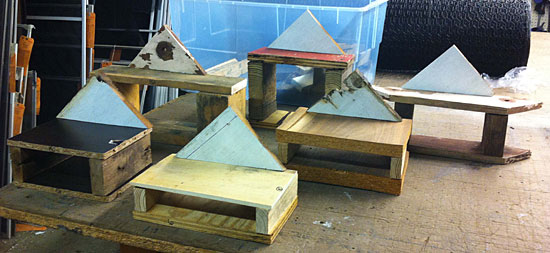
Different pollinator house designs

2. Cut a right triangle out of wood that is 3/4 to 1″ thick for the pediment piece. A pediment is like a roof gable that is decorative rather than functional. My samples vary slightly in size but the triangles are mostly around 7 1/2″ inches on the long side and 3 3/4″ on the short sides.

3. Choose some thin, narrow wood pieces for the roof overhang. Lattice wood strips are about the right size – if you don’t have any distressed wood in that size range you can purchase some lattice strips to use. Cut these strips into approximately 6″ pieces and miter the corners.

4. Sand all wood pieces.

5. Paint the sides of your wood pieces that will become the interior with black paint.

6. Paint the other sides and parts in assorted colors of your choice.

7. Stencil a bee design or other stencil of your choice on the front of the triangle.

8. If you think any of the other wood surfaces need to be enhanced with stencil designs, decorate those also. Since many of my wood pieces were distressed and had a pronounced wood grain, knots, old nails and other irregularities I let those provide the visual interest in many areas. Antique look, vintage look, grunge or botanical stencils would be especially effective for this design.

9. Sand the edges of your wood pieces to expose the bare wood on the corners and distress any other areas that you think are in need of it.

10. Hot glue the vertical support pieces to the top and bottom of your house then nail in place.

11. To assemble the pediment section, put your two roof pieces in a miter clamp with the mitered ends butted together to make the roof point. Put a little wood glue on the ends as you do this. Position the clamped-together pieces on a block of scrap wood to brace them. Drill small pilot holes in one end and hammer in small nails. Slip a couple of nails in between from the other direction.

Creating roof peak with miter clamp and nails

12. Take your triangle pediment and apply hot glue to the top edge. On your work surface, lay the pediment down, slide the triangle part in and press in place. When the glue has hardened, hammer small nails through the roof pieces into the pediment for extra hold.

Attach roof overhang to pediment

13. Apply hot glue to the bottom of the triangle section. Place in place on top of house and let the glue harden. Drill two pilot holes at each end and drive long thin nails down into the supports below.

14. If you would like to attach wood feet to the bottom of your house, drill 3/16″ holes into the bottom of the house. Cut short pieces of 3/16″ wood dowel rod and put wood glue on both ends. Insert one end of each dowel rod piece into a hole in the house and the other end into the hole in a wooden ball knob or drawer pull.

15. Mix some dark brown paint with water to make a thin wash and paint over the whole house. Test first on the bottom to make sure it’s not too heavy or light. Alternately, you could use a wash of off-white paint if you’d rather have a pale wash. The purpose of the wash is to give an aged appearance to the wood – this is particularly effective when the paint clings to the corners that have been bared by sanding. Let paint dry.

16. Paint whole house with clear matte varnish.

17. Attach a decorative brass box corner to the roof peak.

18. Cut out a piece out of scrap window screen and nail it to the back side.

19. Fill house with nesting materials and place in a suitable location.

Here are some pictures showing how some of the other houses turned out.
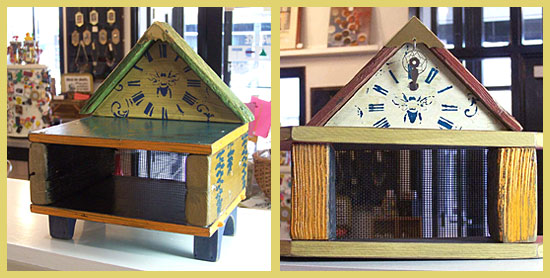
Pollinator houses made with distressed wood

Pollinator houses made with distressed wood

Pollinator house made with distressed wood

Categories
Gardening Good Eating

A Couple of Quick and Easy Recipes

A Couple of Quick and Easy Recipes

by Carolyn Hasenfratz

fresh edibles from my garden
As a follow-up to my recent article on foraging for wild edibles, here are a couple more simple and easy ideas for getting interesting nutritious treats into your diet. It’s a lot of fun to go out in the garden and yard and decide “What looks good to eat today?” I also grow some things in my garden that could be fatal if I accidentally eat them so it’s critical to be able to identify what is in your foraging area.

Tuna Sandwiches With Wild Leaves

Ingredients:
Wild edible leaves
Fresh garden herbs
2 cans tuna
Chopped crunchy vegetables
Mayonnaise
Bread

Go out to the garden and pick some large edible leaves. Rinse and dry them. I used wild Violet, Dandelion and Asiatic Dayflower for my test. Set aside.

In addition pick some more conventional herbs if you have them that would taste good in tuna salad such as Sage, Garlic Chives and Lemon Balm. Wash and chop herbs, and put in mixing bowl. Add two cans of tuna and some chopped crunchy vegetables. I used the Healthy 8 mixture from Trader Joe’s. No I’m not on the Trader Joe’s payroll but I buy this mixture a lot because it’s really convenient to add to all kinds of recipes, both raw and cooked.

Mix mayonnaise into your tuna salad and toast your favorite bread. Put tuna mixture on bread and top with your foraged edible leaves in place of lettuce. Yummy!


Quick Weed Soup

Ingredients:
Wild edible leaves
Fresh garden herbs or greens
Broth or instant Miso soup packets
Kombu seaweed
Quick cooking vegetables such as edamame, mushrooms or sprouts
Optional – quick cooking proteins such as tofu cubes or small shrimp
Optional – wild Violet, Dandelion, Asiatic Dayflower or other edible flowers for garnish

Collect from your garden wild greens that taste good cooked such as Asiatic Dayflower, Dandelion and wild Violet. Be sure you are certain about identification, if not get help from an expert to avoid making mistakes with toxic plants. If you have other more conventional herbs from the garden that would taste good in an Asian-flavored soup, collect those too.

Wash herbs and leaves. Chop any herbs that need chopping.

Place herbs and leaves in a soup pot on the stove. Add your favorite broth or add water plus packets of instant Miso soup mix until the flavor is to your liking.

Cut sheets of Kombu seaweed into strips with a scissors and add to broth. Add quick cooking veggies and proteins if you are using any. Bring soup to a boil and check if the proteins are cooked through. Simmer for a few minutes more if needed, but if you used pre-cooked shrimp you probably won’t have to. If you have any edible flowers, sprinkle on top for garnish. If using Dandelion flowers, you should pull the petals out and discard the calyx to avoid bitterness. Enjoy!

In my opinion of the three wild leaves I used in my test, the Asiatic Dayflower was the most flavorful – it does taste like green beans as they say. The wild Violet and Dandelion are so nutritious I would not want to omit them but I would use them in smaller proportions for better overall flavor.

If you are interested you can read more of my recipes on my Fun With Food page.

Categories
Backyard Wildlife Gardening Sustainability

What To Do If You Find a Bird That Needs Help

What To Do If You Find a Bird That Needs Help

by Carolyn Hasenfratz

I can tell by the amount of food and feeders that we sell that Schnarr’s customers love their backyard birds! Many of us will encounter at some point a bird that is sick or injured or a baby that appears to be abandoned. Right now some birds are starting their second brood of the summer so baby bird season is not over yet!

Baby birds are very vulnerable if they fall or are pushed out of the nest. If you feel compelled to intervene, I totally understand why – that’s how I came to be living with two European Starlings – it’s a long story! Having been through the situation of finding a baby bird more than once, I’ve done a lot of reading and learning from experience and here is what I recommend.

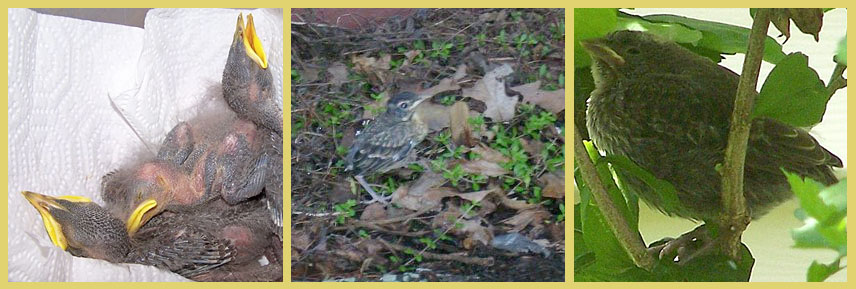
First determine if the bird is a nestling or a fledgling. A nestling will not be fully feathered and will not be able to run away. It needs to be back in a nest ASAP. Try to put the bird back in the original nest if you can and if you know the parents are alive. It’s a myth that the smell of humans will cause the parent birds to abandon it – most birds can’t smell.

Sometimes it’s not possible to put the bird back in the original nest – you can’t find it, you can’t reach it, or it’s been destroyed. If that’s the case you have the following options.

One plan is to make a makeshift nest and put it in a place where the parents can find it and it is safe from predators. If the bird is a species that nests in a cavity, you can look up nest box plans online specifically for that species and build one. I’ve been successful in getting a Starling family to move to a homemade nest box after the babies fell out of a dryer vent. Observe the nest to see if the parents find the baby and start feeding it. If they don’t, take the bird to a wild bird rehab center. It’s hard to say how long you should wait before giving up on the effort to re-involve the parents. The necessary feeding intervals of baby birds can vary depending on how old they are – if in doubt you could call a wild bird rehab center for advice. It’s easy for baby birds to get dehydrated if they go too long without food because most of them don’t drink liquids but get their moisture from their squishy bug diet. Don’t attempt to give the baby bird water or liquids unless you know the right way – it’s very easy to accidentally kill a baby bird by giving it water without knowledge of the correct procedure.

It’s time-consuming to make and observe a makeshift nest – if you have the time, you might find it worthwhile to put in the effort. You’ll learn a lot while doing it and it’s very rewarding! If you don’t have the time or the interest, just take the bird to the nearest wild bird rehab center right away. If it’s one of the three species not protected by federal laws (Pigeons, House Sparrows or European Starlings) the rehabber might either euthanize it or refuse to accept it. In that case you will have a difficult choice to make and having been in that position, I wouldn’t envy you! I chose to raise the five-day-old Starling I found in 2009 rather than let it be killed but everyone does not have the means or desire to take on the job of raising a baby bird. It can be done with the correct knowledge but it’s a big commitment. Raising a baby bird and releasing it to the wild later sounds like a good idea but is not an option if the bird has been raised alone and if you want the bird to survive – it will not have learned survival skills from the parents. It may not know how to act around other wild birds and could fail to be accepted by a wild flock. A protected species (not one of the three mentioned) is not legal to keep without a permit and you must take it to a licensed rehabber to help it.

Nestlings and Fledglings
The baby birds on the left are nestlings and the other two examples are fledglings.

If the bird is fully feathered and can run away and perch, it’s a fledgling. Most fledglings do not need any help. It’s not uncommon for baby birds to leave the nest before they can fly well. The fledgling will be somewhat vulnerable until it can fully fly but the parents should be feeding it and trying to keep it away from danger. The best way to help it is to put it on a perch off the ground (if you can catch it). If you have cats or dogs keep them indoors for a week or so. It’s not good for the health of pet cats to let them outside in any circumstances, but if you must let yours out try not to do so until the fledglings are flying.

If you find a bird that is sick or injured, it will need care no matter what age it is, so in that case try to get it to a rehabber as soon as possible. If a bird does not look sick but has been caught by a dog or cat, it needs antibiotics within a day or so or it is probably doomed. When birds are to the point of showing signs of illness or injury they are in bad shape – their instinct is to hide their infirmity as long as possible so they are not caught by predators or rejected by their flocks. Speaking of sick birds, it is my understanding is that a thorough hand-washing after handling is sufficient precaution in case the bird does have something a human can catch, like Salmonella. I am not a vet or a scientist so get more information on diseases if you are concerned. Many bird-borne diseases are species-specific and can’t be caught by humans. However, if you have disposable gloves on hand it’s smart to wear them for extra protection.

The best way to transport a bird to a rehabber is to put it in a box with soft nest-like materials and cover the box. Make sure it can breathe if it’s boxed or wrapped. The bird will likely be terrified and if it’s confined it will be less likely to injure itself. Handle it as little as possible and try not to expose it to loud noises.

If the bird is really large, like a hawk, heron, goose or pea fowl (which I once rescued believe it or not!), get advice from the Humane Society or other knowledgeable group before attempting to transport. My handling of the peahen I found went very smoothly but without good instructions and remembering to remain calm I might have had trouble! Some large birds can cause serious injuries with talons or beaks if not handled carefully. The peahen I transported had some mean-looking spurs but fortunately did not attempt to use them on me!

For more advice from the experts, please see these links:
I Found A Baby Bird. What Do I Do?
Songbirds
Ducklings or goslings
Birds of prey, vultures, herons, pelicans or swans

Information on raising House Sparrows and Starlings:
Sparrows and Starlings
www.starlingtalk.com – Everything you need to know about raising Starlings and if you want to, living with them permanently

Categories
Gardening Good Eating Outdoor Fun

You’d Be Happy Too If You Could Eat What Bugs You!

You’d Be Happy Too If You Could Eat What Bugs You!

by Carolyn Hasenfratz

You'd Be Happy Too If You Could Eat What Bugs You!

“You’d be happy too if you could eat what bugs you!” That’s what it says on a coffee cup that I bought for my Dad when I was a little kid. I chose the cup for Dad because the design was in his favorite colors, green and orange. I have to admit I liked that
it had a frog and a bug on it, two of my favorite things then and now!

I’m not yet at the point where I’m willing to experiment with eating bugs, but I’m intrigued by garden weeds that are edible. There is no doubt that gardeners are “bugged” by weeds but your attitude toward some of them might improve if you can harvest and eat them.

For example Dandelions, Wild Violets and Asiatic Dayflowers are common weeds in my garden and also delicious in a salad when young and tender. When I regularly pull the baby leaves, rinse and eat them I’m harvesting and enjoying a fresh and nutritious crop rather than dealing with something annoying. You should be very careful when foraging to make sure you’ve researched the wild plant you want to eat to make sure you have identified it correctly, are not confusing it with a poisonous look-alike and are picking it from an area that is free of toxins such as pesticides, herbicides or auto exhaust.

Unless you are extremely confident in your identification skills, my recommendation is to get some foraging instruction from an expert in person so you can actually see and taste the plants as you learn about them. To improve my skills in identifying edible wild plants, I attended a recent workshop at Litzinger Road Ecology Center given by Jan Phillips, author of Wild Edibles of Missouri. There must be a lot of interest in this topic because there were about 40 people there.

First we watched a slide presentation where we learned about some of the wild edibles available in Missouri. Did you know that you can eat Daylily buds, Plantain, Redbud flowers and Henbit? We learned about these and many more. When I was a kid my neighborhood friends and I used to eat the seed pods of the weed Yellow Wood Sorrel – we called them “pickles” because they have a tart taste. I thought we were just lucky not to be poisoned while experimenting, but it turns out that’s a well-known edible weed though some people can’t eat it because they are allergic to the oxalic acid it contains.

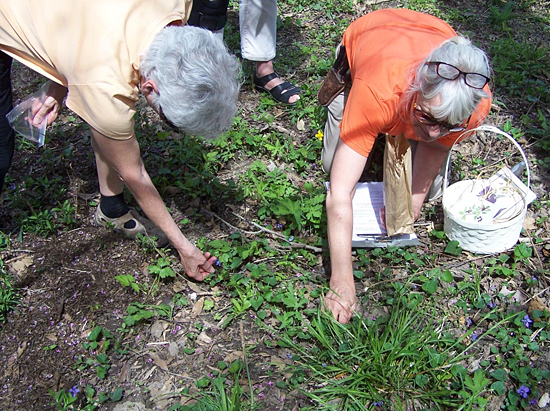
Foraging at Litzinger Road Ecology Center

After the slide show we split into groups and foraged over different areas of the property. My group picked a lot of Redbud flowers, Violets, Dandelions, Spring Beauty, Henbit and Plantain.

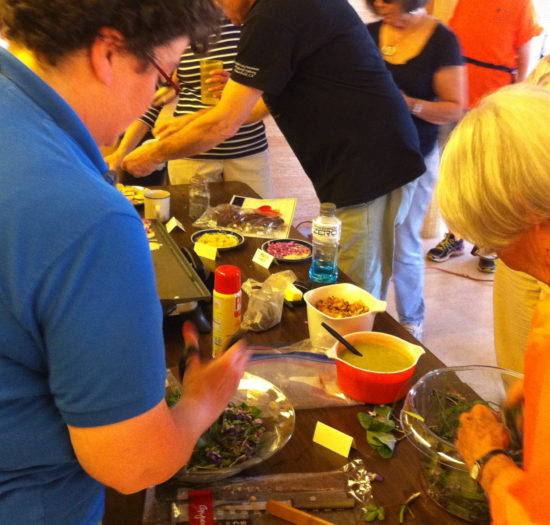
Eating the results

After foraging we brought our produce to the kitchen to wash and spin it. We then enjoyed some of it in salad. Chef Ryan Maher provided us with some delicious mushroom dressing to accompany the greens and flowers. Redbud and Dandelion flowers were cooked into pancakes for us to try. We enjoyed an array of other unusual treats that had been prepared ahead of time – teas brewed from things like Spicebush (that was my favorite), candied Peppermint leaves, Reindeer Lichen biscuits with Gooseberry jelly, wild nuts and more. Wild foraging is definitely a way to introduce some interesting new ingredients into your cooking!

Here is a salad recipe of mine that I like to mix with my “weed” greens.

Your favorite fresh greens from the garden
1 bulb fennel
1 cup mung bean sprouts
1 cup chopped kale (optional, if you need to boost the amount of greens)
1 cup broccoli slaw
Your favorite dressing (I mainly use vinegar and oil with a sprinkle of salt – edible weeds can be used to make flavored vinegars and tasty dressings also!)
Sprinkle dried cranberries and roasted pumpkin seeds on top

What chore sounds like more fun? Weeding, or picking some interesting food? Depending on what is growing in your garden, which task is awaiting might just depend on how you look at it!

Resources for more information on edible weeds and wild plants:
Link: Common Edible Weed Plants
Book: “Peterson Field Guide to Edible Wild Plants” by Lee Allen Peterson
Book: “Stalking the Wild Asparagus” by Euell Gibbons

Categories
DIY Gardening Home Decor Upcycling

Decorate a Terra Cotta Plant Pot with Acrylic Paint and Stencils

Decorate a Terra Cotta Plant Pot with Acrylic Paint and Stencils

by Carolyn Hasenfratz

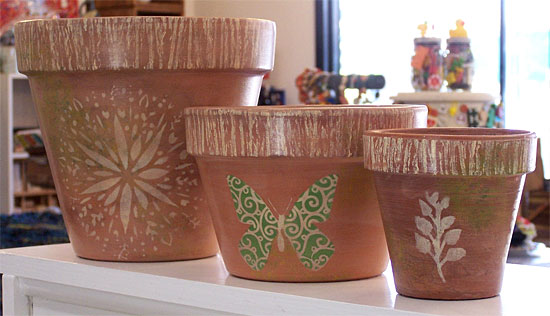
Terra cotta pots decorated with paint and stencils

Supplies and Materials
*Indicates items available at Schnarr’s

Terra cotta pot*
Acrylic paint*
Water-based varnish or sealer*
Small containers for mixing paint (can be disposable cleaned food containers)
Rags for cleanup*
Paintbrushes*
Water container*
Sponges*
Decorative stencils
Letter and number stencils*
Palette knife for paint mixing
Palette (could be a proper artists palette or a temporary one made from freezer paper*)
Sandpaper* (optional)
Memory Essentials Get Rollin’ tool
Memory Essentials Bits and Pieces
Optional – heat tool for speeding up drying between steps if you need to
Masking tape*
Optional – disposable plastic gloves* if you want to keep paint off your hands
Drop cloth* for work surface

Painting and stenciling terra-cotta pots is a fun and inexpensive way to enhance your patio or garden decor. Younger and older crafters alike can join in. Small decorated pots can be used as party favors. Medium-sized pots might provide the base for a table centerpiece. A large pot could function as a gift basket that you can fill with items for a loved one who likes gardening. Gardeners can always use extra small items such as gloves* (they tend to wear out with regularity), seeds*, bulbs*, bug repellent*, gardener’s soap, hand lotion*, sunscreen*, lip balm* and plant tags*. You can also throw in a gift card* so they can get exactly what they want!

You can use either a brand-new terra cotta pot or a used one. I kind of like a used one for this project because I’m going for an artificially aged or distressed look and and that’s easier to achieve if the pot already features some stains from being used. A brand new pot will work also.

Directions

1. Clean and dry your pot.

2.Using your acrylic paints, mix a terra cotta color that is lighter than your pot. Good colors to use in the mix are white, brown, orange and maybe red.

3. Put some water-based varnish in a small container and mix in some of the light terra cotta color. Brush some inside your pot to see how translucent it is. I used a stiff brush that was about 1″ wide. You should be adding a light, translucent haze of color in which you can see some brush strokes. Paint the whole inside of the pot and let dry. This step achieves two objectives – it seals the inside of the pot and tests your mixture to make sure it’s right – not too opaque and not too transparent. Normally one of the benefits of a terra cotta plant pot is the porosity, but since we’re applying paint to ours we don’t want water seeping through and wearing off the design over time. Set aside the remainder of the paint/varnish mixture to use later.

4. On your palette, squeeze out some green, yellow and white paint. Use a sponge to blend these colors in random ways and lightly sponge paint onto your pot in random areas. This is to simulate lime scaling and moss or algae that would normally appear on a terra cotta pot over time as it’s in use. After this paint is dry, if you need to tone it down any you can sand it lightly or sponge a litte of your translucent light terra cotta color over it.

5. The next step is to apply a loose vertical texture to the rim of the pot to accentuate it. I used a Memory Essentials Get Rollin’ tool with rubber bands on it from the set Memory Essentials Bits and Pieces. This is one of my favorite textures of all time and I’ve used it in paper crafts, fabric surface design and all kinds of random projects over the years. If you don’t have these tools you can create a similar texture tool by wrapping rubber bands or string around a wood block. Spread some cream-colored paint on your palette and run or press your tool in it then apply to the rim to make the texture. Let dry.

6. Select a stencil or stencils for applying a design to the side of your pot. You might want to use letter or number stencils to create names, initials, words or house numbers. In my examples I used decorative stencils in garden-related designs. Temporarily tape the stencils to the side of the pot with masking tape. Put some cream-colored paint on your palete (do not thin with water) and apply paint through the stencil with a dry sponge. When you’re done, pull off stencil and either wash paint from stencil immediately or put in a container of water to wash later. If your design requires more than one color, use a clean dry sponge for each color – a moist sponge will make your paint run under the stencil and mar the design. While you’re working, if you don’t want to pause and go to the sink to wash paint from your stencils, brushes and sponges at each step, throw them in the container of water until you’re ready to do cleanup at the end. Let stenciled paint dry on pot.

7. Take a look at your pot and see if you like the appearance the way it is or if you want to make it a little more distressed. Randomly hit some areas with sandpaper if you want to “age” it a bit more. Wipe off dust with a slightly damp rag.

8. Paint outside of pot with your translucent light terra cotta / varnish mixture. Let some brush marks show, but smooth them out a bit if you think they are too prominent. Turn pot over and paint the bottom to seal it. Let dry. You’re done!

For more information on stenciling, here are some of my other articles:


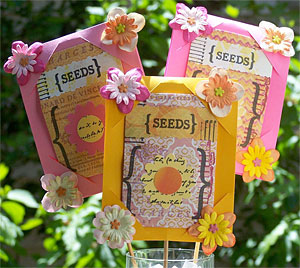
Seed packet bouquet

If you want to take the idea of using a decorated pot as table decor or a party favor a little further, here is an idea you might like from my personal blog. Make a bouquet out of seed packets with free templates that I provided for download and display it in one of your decorated pots.
Make a Seed Packet Bouquet