How to Harvest and Dry Herbs

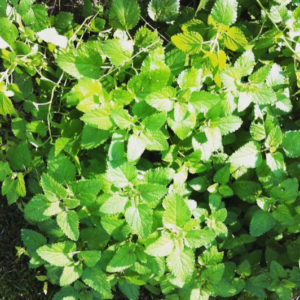
Lemon Balm – Melissa officinalis
Here are the methods I use for drying and storing herbs. These procedures come partly from the book “Growing and Using Herbs Successfully” by Betty E.M. Jacobs plus years of trial and error. In order to get the optimal flavor and fragrance from herbs, the best time to harvest them is between the time the first flower buds appear and before the flowers open. If possible, lightly spray the herbs with water the day before you plan to harvest, that way you can save a step by not having to wash them after cutting. It’s ideal to harvest on a sunny day after the dew has dried on the leaves but before the day has reached its hottest point. As you harvest, you can remove all but 4 inches of the stem on annual herbs. On perennial herbs, you can take 1/3 of the plant. Proper identification of your plants before harvesting for consumption is critical because some plants are toxic.
Different herbs will be at their best time for harvesting at varying points during the season. You may be able to get two or three cuts from some plants. If you miss the optimum time, you will still get some benefit from the herbs but you may have to use more. Some of my herbs (like most members of the mint family) need to be trimmed and thinned regularly anyway to keep them from taking over the garden.

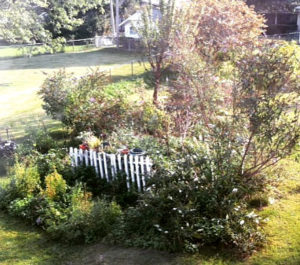
Dad’s garden in early October – lots of Lemon Balm and Peppermint around the fence
There are some exceptions, but most herbs can be stored and used in the dry form. It’s most common to dry herb leaves, though with some herbs you might use different parts of the plant such as the flowers or roots. I’ll demonstrate an easy way to dry leafy herbs with some Lemon Balm (Melissa officinalis) from my Dad’s garden. These plants (and all the Lemon Balm plants in my own garden) are descendants from a specimen I purchased a the Webster Groves Herb Society Sale in 2003 when I first started herb gardening.
If your herbs are already clean from spraying with water the previous day, you can put them right in the drying bag. Take a paper grocery bag and write on it the species you are harvesting and the date. Cut the herbs and loosely let them fall into the bag as you cut (cut the parts you want rather than pull off as pulling may damage the roots). Put the bag in a dry, dark area for one month. To save space, I hang my bags with clothespins from a chain in a closet. The herbs should be dry after a month has passed. The next step is to strip and store the herb leaves.
Stripping the leaves from the stems is very easy but a little messy. You might want to do this task outdoors if possible but if the weather is not favorable you’ll have to do this inside. Spread a towel over your work area to catch plant bits. Place a container to one side to catch stems. Take each herb stem from the bag and hold it over a large bowl. Starting from the top of the stem and working down, pull off the leaves with your hand. If the herbs are fully dried the leaves should come right off with no effort. There are a few herbs that cause some irritation to my nose during this step so if you are concerned about allergies you could try wearing a dust mask.
Store the stripped leaves in a labeled glass jar or in a paper bag, away from moisture or sunlight. Keep the leaves intact if possible before using, in case crumbling them ahead of time releases some of the potency. If you later notice any condensation in the jar, the herbs were not dry enough, so take them out and let them dry some more in a paper bag so they don’t get moldy. You can discard the stems in the compost or try to find a creative way to use them – depending on the herb the stems may have some fragrance or flavor in them. I’ve been known to put them in sachet bags, grind them up to make fragrance pastilles, burn them in a grilling fire or campfire, heat them in water in potpourri crock pot or use them to make flavored vinegar. When it’s time to use the herb leaves, they will probably crumble just fine with your fingers but you could use a grinder or mortar and pestle to help get a finer grind if needed.
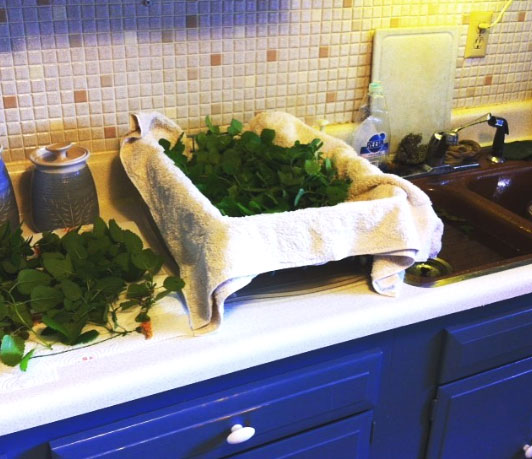
If you need to wash the herbs after picking, here is an easy way to do it. Clean your kitchen sink and fill it with cool water. Take a handful of herb stems with leaves and shake – this helps dislodge any bugs or dirt. If any leaves fall off on their own accord, discard those. Quickly dunk the herbs in the water, shake again and let drip dry on a towel. Inspect each stem for chewed up or discolored leaves and remove those. Place herbs on another dry towel and let dry. If you need to speed up the drying, you can run a fan over them. Turn the herbs while drying and place them on a fresh dry towel. Usually after about a day the herbs are dry to the touch and ready to put in a labeled bag and left for a month in a dark dry place to dry completely. If you have larger quantities of herbs to handle and you have space you can set up special drying areas with racks but if you want to keep it simple just harvest as much as you have room to process at one time.

Herb washing and drying station in Dad’s kitchen
The preceding instructions will work for most herbs but if you need guidance with things like fruits, seeds, fleshy roots or other special cases just do a search for “how to harvest + name of herb”.
Ideas for herbal tea blends:
Make Your Own Herbal Teas
Directory of useful herbs
Directory of Culinary and Medicinal Herbs
Some ways I’ve experimented with my harvested herbs:
Fun With Food
Melt and Pour Soap Recipes and Other Personal Care Products – making soap is what inspired me to start growing herbs in the first place!
One reply on “How to Harvest and Dry Herbs”
[…] Read more on the Schnarr’s Hardware Blog: How to Harvest and Dry Herbs […]