Disguise Problem Spots with Containers
Let’s face it, our area is inherently challenging to gardeners. We have continentality which causes extreme variations in temperature and moisture, and we are in an area of the continent that is a transition zone for East, West, North and South. It’s difficult to keep all parts of our gardens looking good at the same time. With the recent dry spell we just had, many of us have spots in our gardens that look a little burned out. I have a lot of native plants which love our conditions, but even some of those look ragged and dried up in late summer.
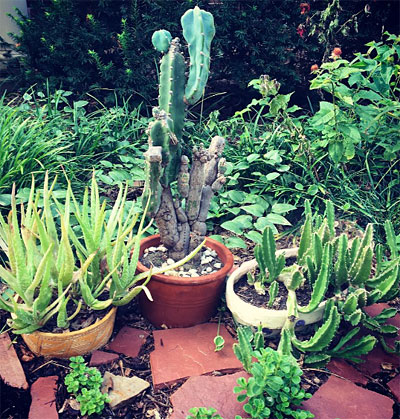
The cactus in the middle is my oldest one – I’ve had it since I was five years old!
When choosing containers, first keep in mind what style of garden you have. You can break design “rules” but you will have more predictable success if you try to match the style of pots to the style of home and garden you have.
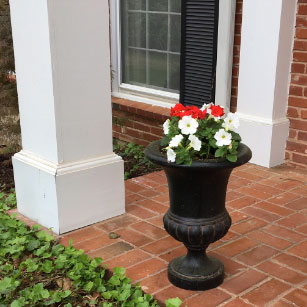 We have a client with a large Colonial Revival house and a lot of iron fencing and furniture in the backyard. When adding some container plantings we chose symmetrical numbers of faux cast iron urn style planters that harmonized with the existing architecture and garden. We filled them with traditional flowers in a limited color palette that went well with what was already planted in the yard and garden. The look we chose for that client would not be appropriate in my garden.
My own informal garden contains a lot of wildflowers and herbs mixed with ornamentals that grow in shade. Mixing and matching pots and using odd numbers of containers are design techniques that work well with an informal garden.
To prepare a place to set the pots, I gathered up an assortment of flat decorative sandstone pieces and made little stands for the pots. You can set pots right on the ground, but I think they look better raised a little bit. I used some extra thin pieces of rock as shims for any pots that did not look level.
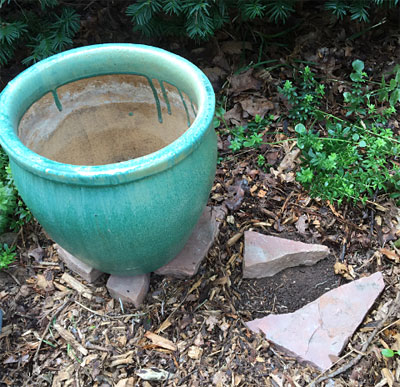
Starting a new container grouping in a bare spot.
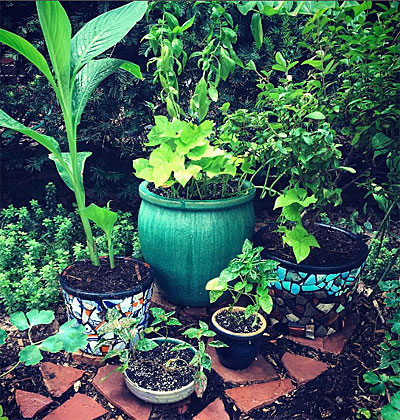
Finished container group with foliage plants.
Two of the pots you see here already had plants in them. Keeping in mind the colors, shapes and sizes of the other three pots I wanted to add to the grouping, I went plant shopping for part shade annuals. I chose Sweet Potato Vine, Ornamental Pepper ‘Black Pearl’, and Hypoestes. I couldn’t resist adding a Basil plant that was on sale. In large pots a good design formula is to mix tall, shorter, and trailing plants. In the largest pot I made the Basil the tall plant. I just love the smell of Basil and I’ll harvest it just before frost and cook with it. I know it’s a little late in the season to be planting annuals but these should last into October. If we’re lucky and we get an extra long growing season, maybe I’ll get more out of them. Containers small enough to move can be brought inside to avoid frosty nights and extend the life of the plants. I love the colors of the garden with bright fall leaves nestled among the plants so to me the extra effort of adding some more colorful foliage is worth it. I chose all foliage plants instead of flowering plants because two of my containers featured a mosaic design that I did and they were already very colorful on their own.
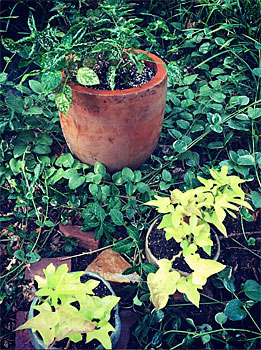 I made a design mistake in this second grouping. The Hypoestes in the tall pot does not contrast enough with the color of the ground cover that was already there. How would I fix this? One way would be to add some brightly colored trailing plants around the edge of the pot. Or if I had any faux flowers or foliage around I could stick some in. Or I could sink an empty narrow container that holds water like a test tube into the soil and put a colorful cutting in there for a temporary display that would still look natural. Or for a nighttime display I could add a tall narrow water container to the pot, fill it with acrylic or glass gems and put a battery powered water light in it and say “I meant to do that!”
As you can see, container gardening is a great addition to your existing garden. It provides a fun outlet for creativity and some instant gratification too!
One reply on “Disguise Problem Spots with Containers”
[…] Read more about container gardening on the Schnarr’s Hardware Blog. […]