Make Old Wax Candles Into New Candles
Supplies
Candle scraps and stubs – such as taper candles, partially filled votive candles, old pillar candles
Gulf Wax*
Candle holders – empty glass candle holders, Mason jars*
Votive candle wicks
Roll of wicking string
Metal washers* – if using wicking string
Essential oils – optional
Candle coloring dyes – optional
Tools
Hot plate* or stove top
Shallow pan that can take heat from burner
Cutting board*
Thin non-serrated sturdy knife – best if somewhat sharp but not extremely so for safety
Assorted sizes of foil pie plates
Pot holders and oven mitts
Pyrex glass measuring cups*
Jar lifter*
Pliers*
Clothes pins*
Metal spoons
Fire extinguisher*
Metal lid that fits over your melting setup
Trivets and hot pot pads
Thermometer*
* indicates available at Schnarr’s
Before beginning, please read and heed these wax melting safety precautions:
1. Do not allow pets or young children around the wax melting area. If you choose to allow older children to participate, supervise them closely.
2. Keep a fire extinguisher and a metal lid that will fit over your melting setup nearby. In the unlikely event that a wax fire occurs, you can try to smother the fire with the lid and if that doesn’t work, use the fire extinguisher. Make sure you have read the instructions for an oil or grease fire beforehand because a wax fire is similar. You should not use water on a wax fire.
3. Do not leave the melting wax unattended. Do not allow the water pan to go dry.
4. Replace the water in the boiling pan when it gets lower. Pyrex glass measuring cups will withstand the infusion of cooler water without cracking but empty glass holders of unknown origin may not be able to take rapid temperature changes. To prevent cracking, remove non-heat resistant glass containers from the boiling pan when adding new cooler water.
5. A jar lifter is a good tool for lifting jars from the boiling pan safely, but some containers may be too small for the jar lifter tool. I’ve made do with pliers in a pinch. If you choose to pick up a glass container by the edge with pliers, be aware that thin glass containers may crack under the stress. This has not happened to me, but be ready just in case by holding the container away from you so you don’t get splashed with hot wax.
6. Observe normal cooking precautions. Keep long hair tied up and avoid loose clothing that could catch fire or things that may catch on pot handles and the like. If using an extension cord for a hot plate, tape it down and deal with any other tripping hazards you might find. Wax cools off rapidly but until it does it clings and can cause serious burns.
7. Protect your work surface from hot containers with trivets and hot pot pads.
8. Monitor the wax temperature with a thermometer and make sure the wax does not exceed 250 degrees F.
9. Wear old clothes because wax is difficult to get out of fabrics.
10. Do not leave burning candles unattended.
Ok, now that I’ve scared the heck out of you, it’s time to have some fun!
First I’ll demonstrate a couple of ways to refill votive candle holders.
A really easy way to refill a votive candle holder is to take an old taper candle or long tall candle and cut it into a section short enough to fit the candle holder. If there are any gaps between the candle and the sides of the container, melt some wax and pour it in between to fill it in. I don’t know what will happen if you attempt to mix soy wax with paraffin wax – the experiments in this article were all done with paraffin wax.
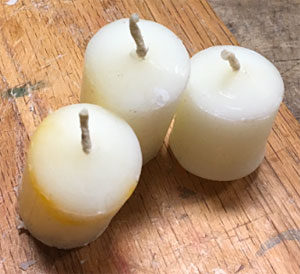
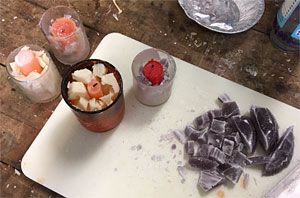
This picture shows three tops of long tall pillar candles that have been cut down to votive candle height. After trimming these stubs, I cut up some chunks of Gulf Wax for melting. I was making these votives for a support group I belong to that has a member with allergies, so I chose unscented stubs and avoided adding fragrances or color to the melted portion.
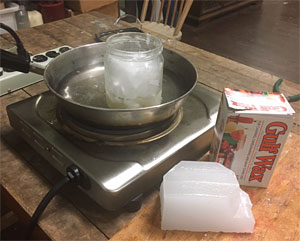
Here is one example of a double boiler setup at Perennial, a community studio where I do some of my work. Placing your melting container in water rather than directly on a burner decreases the risk of fire, produces more even heat and prevents scorching of the wax. I brought a pan of water to the simmering point with the glass jar of wax pieces in it. As you know from reading the safety precautions above, there is some risk in using a random jar and not a Pyrex measuring cup for this, but most of the time it will work if you don’t shock the glass with sudden temperature changes. I forgot to bring my Pyrex with me on this occasion so I made do with what was there.
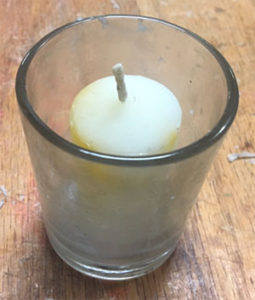 When my wax was melted, I dipped the bottom end of the candle stub in wax and pressed it into the empty votive candle holder. This held the stub in place long enough to pour wax around it. To pour, I picked up the glass jar with a jar lifter tool, being careful to hold it away from me in case I dropped it or the glass broke.
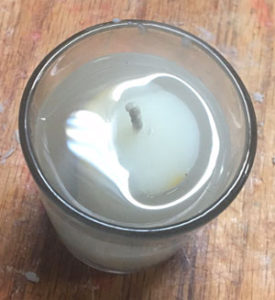 Here is a candle with some fresh new Gulf wax poured around it. I poured just up to where the wick emerges from the candle stub.
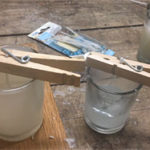 If you don’t have candle stubs available, you can refill votive candles with melted wax poured around purchased votive candle wicks, available at craft stores. Melt the wax as before and hold the wicks in place with clothespins as shown in the picture. Leave the clothespins in place until the wax is solid so that your wicks don’t migrate from the center. Your candles will burn better and more safely if the wick is centered.
I came back to Perennial later to make more candles, this time intending to experiment with fragrances and colors. I brought my Dad with me – he’s the one who had turned me on to candle burning when I was very young. We used to sit around the dinner table and watch pillar candles burn after eating. Dad used to let me put metallic crayons in them so I could watch the little mica flakes swirl around the base of the flame. Now I know that crayons are not good for candles because they clog the wick, but wow that was fun!
Dad and I brought to the workshop all the candle stubs and partially filled glass candle holders that we had lying around from our homes. Combined with a new package of Gulf Wax that I bought and the donated old candles and wax chunks available at Perennial, we had enough for hours of fun.
Dad had some tall glass candle holders he wanted to refill. To fill each candle, he tied a piece of wick to a washer to weigh it down and suspended the top of the wick over the mouth of the candle holder with a clothespin. He filled his candles with many layers of different colors in a sort of ombre effect. While he worked on that I experimented with colored chunks around taper candle pieces.
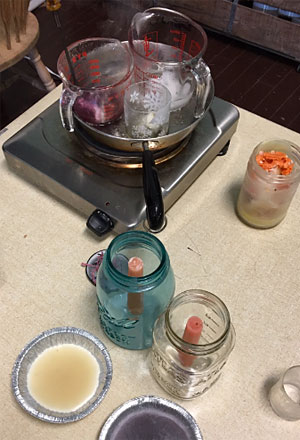 As you can see from the photo, I remembered to bring my Pyrex glass measuring cups this time. If you set the cups so that the handles are toward the outside edge of your pan, they may be cool enough to pick up with your bare hand but if they are not use a pot holder or oven mitt.
My first step was to get the wax out of a bunch of half melted container candles in glass. I set the partly filled containers in the double boiler before turning up the heat to avoid shocking the glass. When the wax was melted, I pulled out the old candle wick and metal pieces with pliers and then poured the wax into small pie plates. I kept the wax sorted by color and fragrance so that the colors and fragrances in my new candles could be coordinated and not clash too much. Perennial has a refrigerator so I put the wax into the freezer to speed up hardening so I could cut it later.
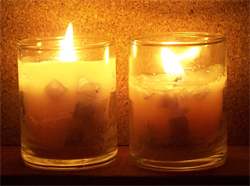
I had a few small glass container candles to fill so I repeated my technique of using sections of tapers cut down to the container height. Then I filled in around them with cut up wax chunks in preparation for filling in the spaces with a matrix of a contrasting wax color. The creamy white chunks shown had a fragrance already in them that was tobacco and vanilla. To my freshly poured wax portion I added Sweetgrass and Woodsmoke fragrances that I thought would blend well.
The purple chunks are from lavender scented candles, so to the matrix wax I added my own blend of relaxing essential oils that already includes lavender. For some of my favorite essential oil blends, see this web page of mine that contains a lot of information about my experiments with essential and fragrance oils.
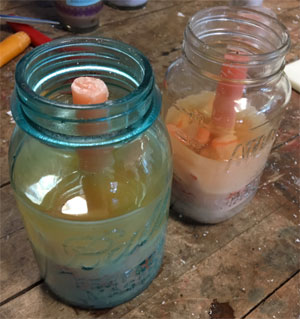
I decided to also make a couple of large candles out of old Mason jars to use as insect repelling candles outdoors. I dipped two taper candles cut to the right length in melted wax then pressed them into the bottoms of the Mason jars. I poured a little melted wax around the tapers for extra hold.
I un-molded more of my colored melted wax pieces and cut them into chunks. Then I distributed them between the two Mason jar candles around the central taper. I melted more wax and poured it to fill in between the chunks. Right before pouring, I added an insect-repelling essential oil blend to the off white wax to make these into insect repelling candles for the patio or the summer camp site. As these candles burn down, the colored chunks will create a pleasing decorative effect. I didn’t add any additional dyes to the wax for the projects shown, I just used what colors of scrap wax were on hand, but if you want to add colors use candle wax dye colors purchased from a craft store.
To clean out your containers, pour the extra wax out into one of your pie plates, then wipe out with a rag or paper towel. Discard rag or paper towel. Clean containers with alcohol if a more thorough cleaning is needed.
