In this tutorial I’ll show you how to make your own stencils from recycled food container lids and use them to decorate personalized gift packages. Many of the stencil designs I used in my demo were traced from nostalgic Christmas cookie cutters that were passed down to me from parents and grandparents. They bring back a lot of happy memories of doing holiday crafts and baking with my Mom. Most of the time making things in preparation for the Holiday was more fun for me than the actual event!
I designed this project to be something you can do with kids, but I think anyone who enjoys being a little bit playful and making eco-friendly packaging would enjoy this – I know that I had a great time!
Part 1 – Making the Stencils
Tools and Materials – *indicates available at Schnarr’s
Self-healing cutting mat
*X-acto knife or craft knife and blades
*Sharpie marker
Cookie cutters
*Pencil
Cleaned plastic food container lids
*Scissors
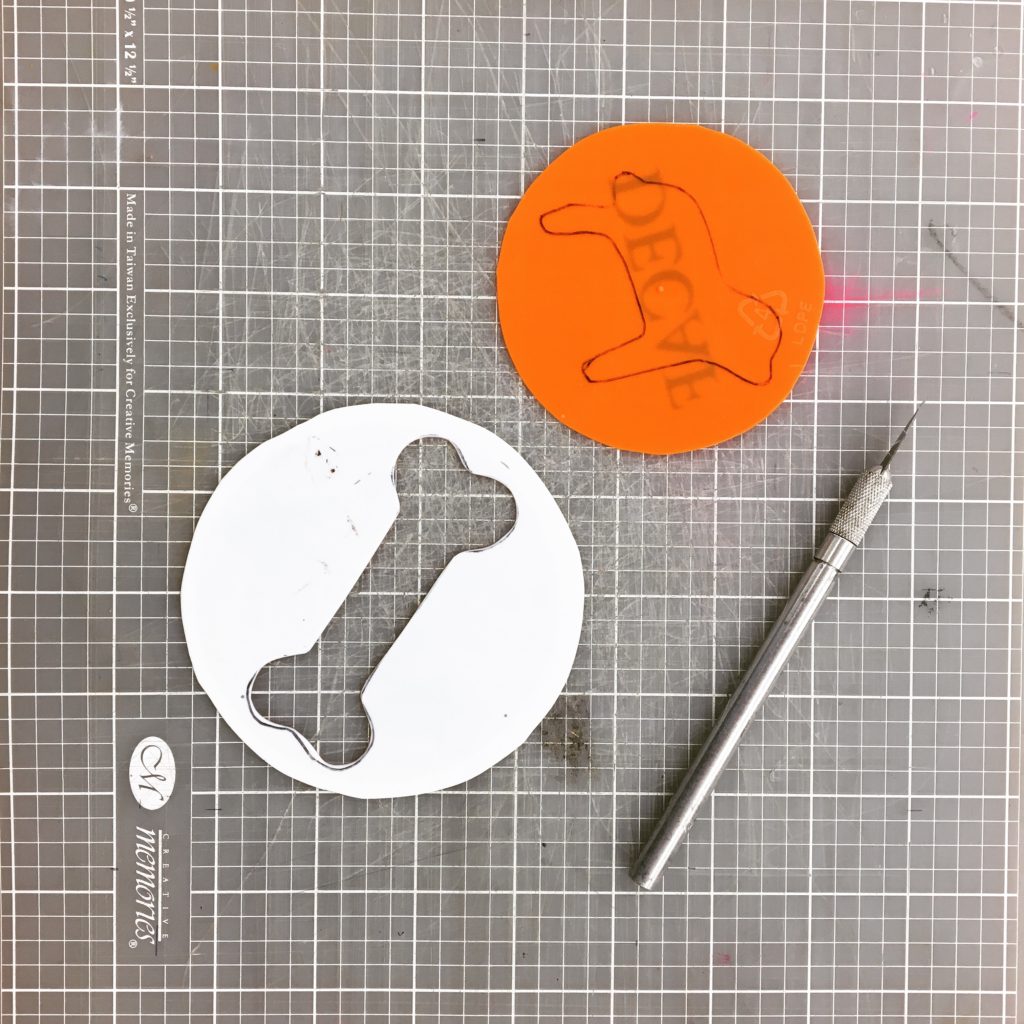
1. Take an old plastic food container lid and cut off the rim.
2. Choose a cookie cuttter or some other object to use as a template and trace around it with pencil on a piece of paper. Or if you have no such object, draw a simple shape of your choice.
3. Place the food lid piece over the drawing and trace the outline with a permanent marker. Cut out the shape with a craft knife, scissors, or some combination of the two.
Part 2 – Applying Chalkboard Paint to the Paper
Tools and Materials – *indicates available at Schnarr’s
*Kraft paper or the backs of recycled grocery bags
*Chalkboard paint
*Small sponges
*Painter’s tape or *masking tape
Cleaned plastic food container lids
1. If you are using the backs of recycled grocery bags, you can get a lot of the folds and wrinkles out of them first by ironing them between pieces of clean scrap paper. Spread paper down on your work surface and tape edges to hold in place.
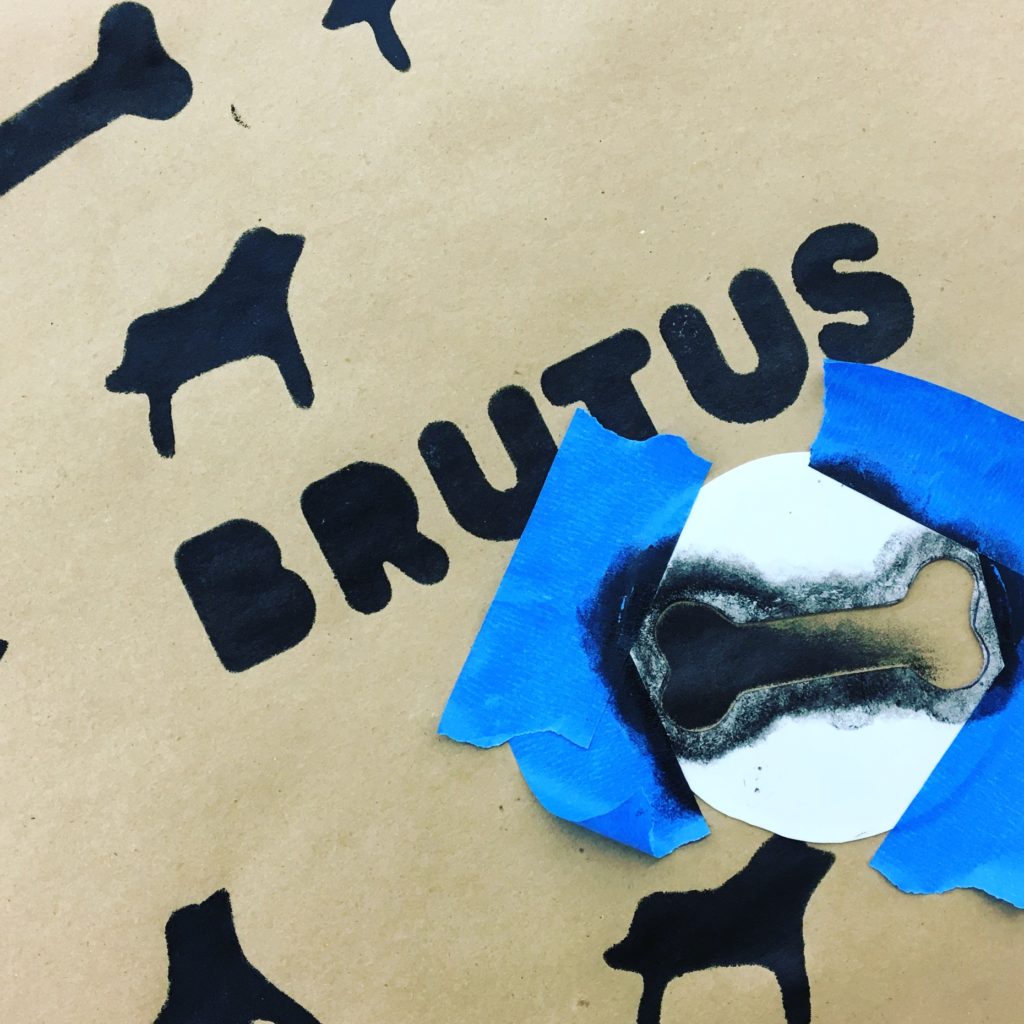
2. Dab some chalkboard paint onto an old food lid and dip a small sponge into it. Place your stencil on the paper and tape down if necessary to hold it steady. Dab the sponge gently inside the cutout area and slowly apply the paint. Increase the amount of pressure and paint if necessary to get full coverage. If you apply the paint gently and gradually, you can avoid applying too much and having it bleed under the stencil.
Here I am stencling chalkboard paint onto the kraft paper. I recommend that you apply the chalk after wrapping the package, but in this demo I drew with chalk on some of the shapes while I was still stenciling so that people would see the possibilities of the chalkboard paint.
3. Lift stencil straight up to avoid smearing and repeat until the whole piece of paper is covered to your satisfaction. Let the paper dry.
4. Wrap the package after the paint is dry.
Part 3 – Adding More Decoration
Tools and Materials – *indicates available at Schnarr’s
Colored chalk
Stickers
*Markers
*Ribbon
*Baker’s twine or decorative string
*Bows
*Gift tags
Spray fixative (optional)
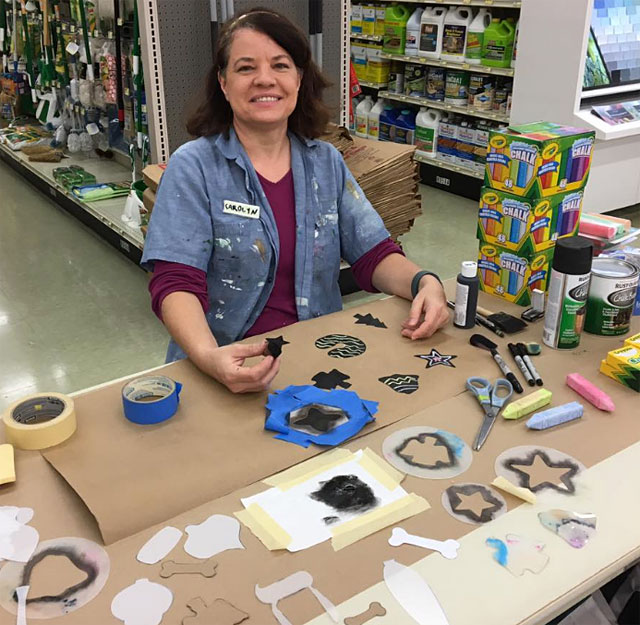
Here is a selection of wrapped boxes and decorating materials to give you an idea of how you can combine markers, stickers, ribbon, twine and tags with your chalked designs.
Tip: If your package is going to get handled a lot before presenting, you can spray your chalk work with spray fixative to protect it. Spray fixative is a product artists sometimes use to protect pencil, chalk, pastel and other media that might smear, and it is available at art supply stores.
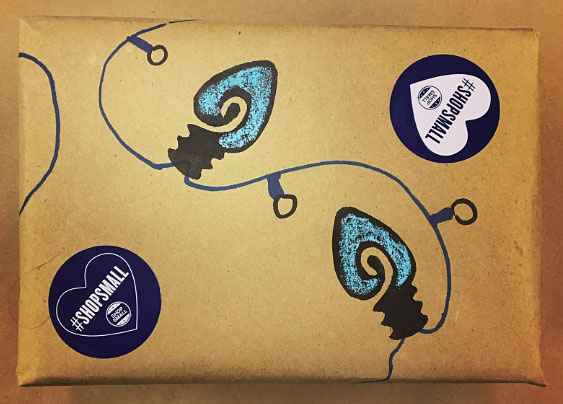
Drawing with both markers and chalk is great fun!
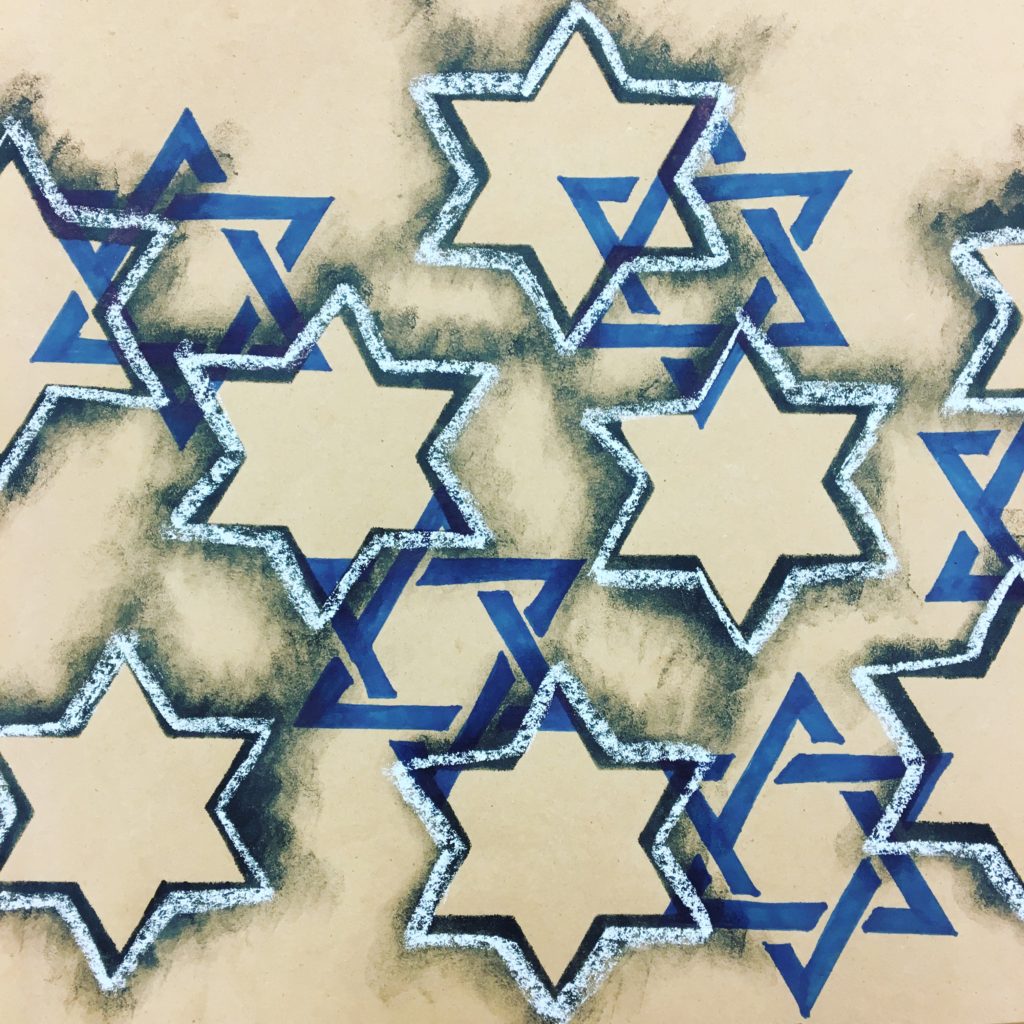
On this sample, I sponged the chalkboard paint around a cutout star that was left over when I made a six-pointed star stencil. Combined with royal blue marker drawn through another stencil and light blue chalk I made a Hanukkah design.
Part 4 – Making Gift Tags
Tools and Materials – *indicates available at Schnarr’s
Scrap chipboard or cardstock
*Chalkboard paint
*Paintbrush
Stencils
*Scissors
*Pencil
*Ribbon
*Baker’s twine or decorative string
Hole punch
Spray fixative (optional)
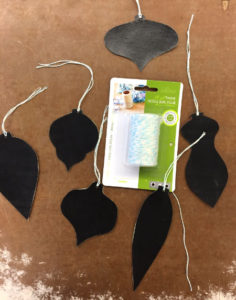
It’s easy to make chalkboard gift tags to go along with your chalk-enhanced gift packages.
1. Paint some chalkboard paint onto one side of some scrap chipboard or card stock and let dry.
2. Use your stencils to trace shapes onto the unpainted side with pencil and cut out. You can make your tags tag-shaped or any other shape you like that fits your theme.
3. Punch a hole at the top of your tag and attach a piece of ribbon or twine using a lark’s head knot.
4. Use chalk to write on the tag and protect with spray fixative if necessary.
Learn techniques for making interesting backgrounds for paper projects with some items that can be found in a hardware store. Make a Happy Thanksgiving card by embellishing your card further with rubber stamps and paper tape!
Tools and Materials *indicates items available at Schnarr’s
*Foam paint roller
*String
Water-based block printing ink or rubber stamping ink
Rubber brayer – a brayer is a rubber roller that is used to spread printmaking ink
Palette knife
Fall leaf, foliage and flower rubber stamps
Stamps with sayings, greetings or sentiments (optional)
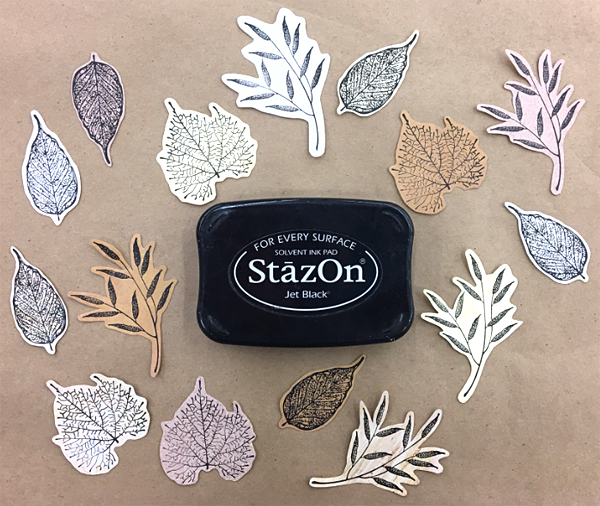
StazOn Jet Black and Timber Brown stamping ink
*Freezer paper
*Masking tape
*Glue stick
8.5 x 11 cardstock in a light color and a second color
Assorted 12″ x 12″ decorative papers in both light and dark colors
Bone folder
*Scrap piece of thick wood dowel
*Two long nails
*Hammer
Optional – craft stencil with leaf designs
Paper cutter or paper cutting system
Envelope template (download here – http://www.carolynsstampstore.com/catalog/members/envelope_template_rectangular.pdf)
*Double-sided tape
Pencil
*Scissors
*Rags or paper towels for cleanup
Flat metal ruler
*Gold acrylic paint
Rectangular eraser with flat surfaces
Old cleaned food container lid
Matte medium
*Paintbrush
Decorative paper edging scissors
Decorative paper tape (also known as washi tape)
Clean scrap paper
Directions
Some of these pictures will show parts being made for more than one greeting card. Normally when I’m making cards I make several at a time and I make more parts than I think I’ll need so that I can mix and match to get the best color combinations.
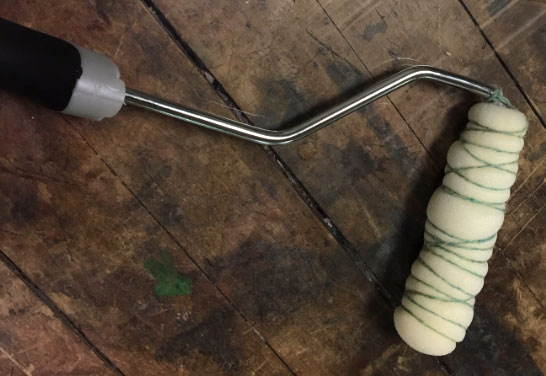
1. First take a foam roller and wrap some string around it in a random fashion. Tie off string to hold it in place.
Foam paint roller wrapped with string to make textures.
2. Tape some freezer paper down to your work surface shiny side up. This is to protect the table and also so you can use part of the paper covered work surface as a disposable palette. In some of my sample photos I used a large piece of scrap plexiglass as a work surface and palette instead of the freezer paper – that’s why the ceiling lights are reflected in a couple of the pictures.
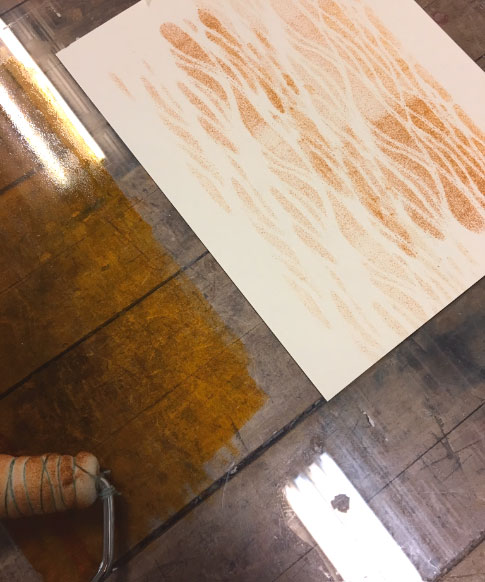
3. Choose a light earth tone color of ink and spread some on a portion of the freezer paper. Tape a piece of cardstock to the work surface to keep it from moving around. Roll the string covered foam roller in the ink and test on a piece of scrap paper to see if the color is what you want. When satisfied, re-ink and roll the pattern on the cardstock. Let ink dry on cardstock. Rinse out and clean the foam roller.
An example of a rolled out pattern. To make the color darker, press harder or add more ink.
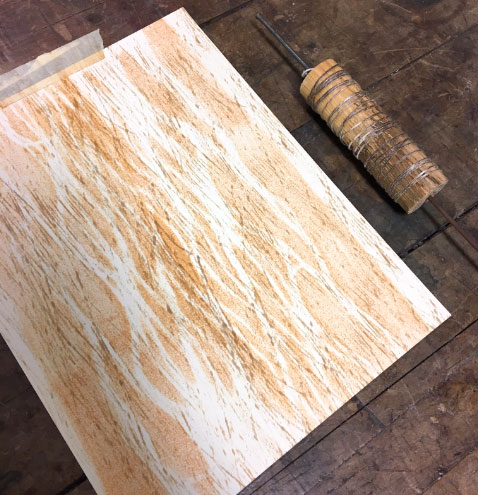
4. Take a segment of thick wood dowel and hammer a nail in each end of the dowel to use as handles. Wrap string around the wood randomly. Select an earth tone ink color that is darker than the first color. Roll some ink out on your palette with the the rubber brayer. Roll the string covered dowel onto the ink palette then onto your cardstock multiple times in different directions until you are satisfied with the results. Let dry.
5. These next few steps (5-7) are optional. If you want to tone down the texture on the cardstock to make it fade more into the background, a very effective way to do that is to roll some semi-translucent stamping ink in a light color over your background. Chalk inks and pigment inks in white and soft pastel colors are very effective for this.
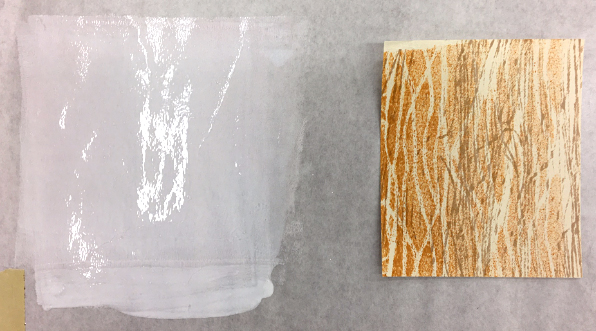
White chalk ink rolled out on the left. On the right is a piece of textured cardstock that I want to tone down to make more subtle.
What a similar piece of cardstock looks like after rolling with off-white chalk ink.
6. Allow the chalk or pigment ink to dry thoroughly. Chalk and pigment inks take longer to dry than dye-based inks. To speed up the drying, you can use a heat tool or iron the sheets of cardstock between two sheets of clean scrap paper.
7. Chalk ink can cause interesting effects when used in conjunction with other inks. Often it causes a blurring effect if you stamp over it, especially if the chalk ink is not completely dry. Sometimes this blurring effect can be exploited in a design to good effect but in this case I don’t want my next layer to be blurred. To prevent this, paint the inked cardstock with a layer of matte medium and allow to dry.
8. Take a piece of 11″ x 8.5″ piece of cardstock that is a different color and cut it in half lengthwise. Fold one of these pieces in half and make the fold crisp with a bone folder. You’ll end up with a card that is 4.25″ x 5.5″ when folded to use as a base.
9. Cut out a piece of 4″ x 5.25″ paper to use as border around your center piece. Center it on the card base and glue down with a glue stick.
10. Cut out a 3.75″ x 5″ section out of your printed cardstock to use as the center front of your greeting card.
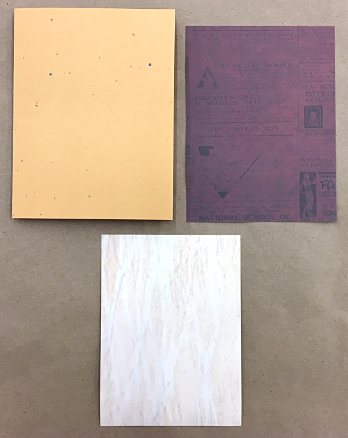
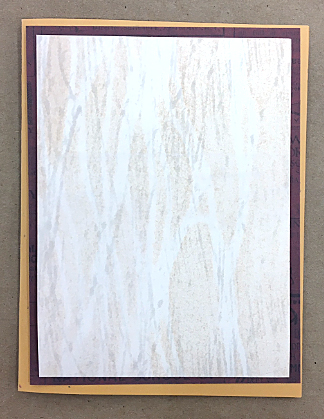
Three parts for each card – a folded base piece which is the body of the card, a border piece and a center piece.
These pieces are stacked but not glued yet to see how they look and check if the colors work well together.
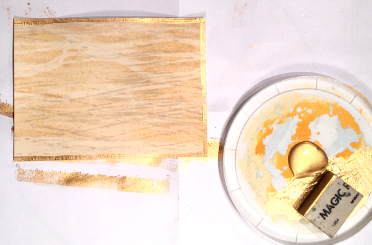
11. Squirt some gold paint onto an old food container lid and dip the side of the rectangular eraser in the paint. Use the side of the eraser to stamp a border on three sides of the center 3.75″ x 5″ section. The gold edges will become the top and side edges of the center part of the card.
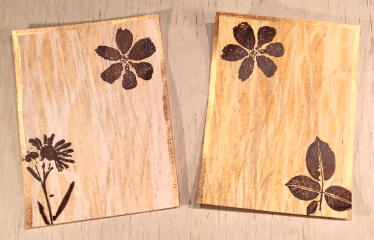
12. Using StazOn Timber Brown ink, stamp two flower or foliage stamps in the corners of your front piece. Bold stamps without fine detail will be especially effective here because a little bit of the brushed-on texture from the matte medium will find it’s way into the design and enhance the rich textures of the card.
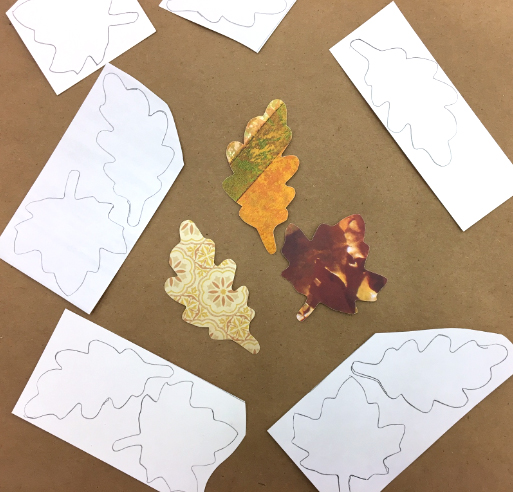
13. Draw some leaf shapes on the backs of different pieces of decorative paper. You can use a stencil to trace the leaf shapes as I did or draw them from your own design. Cut out leaves.
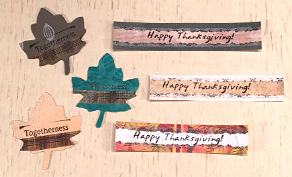
14. Using black ink and rubber stamps with sayings on them, stamp some of the leaves with a word that goes well with “Happy Thanksgiving”. In my samples I stamped “Togetherness”, “Treasure” and “Celebrate”. Underline your stamped word with a piece of plaid patterned paper tape in fall colors or other tape design of your choice. Trim the tape.
15. Stamp “Happy Thanksgiving” or other greeting of your choice onto a strip of light colored paper. Trim the strip with decorative paper edging scissors. Take a piece of 3.75″ x .75″ decorative paper and tape a piece of decorative paper tape down the center lengthwise. I chose a black and white floral design for my samples. With a glue stick, glue the strip that says “Happy Thanksgiving” over the paper tape.
16. Stamp some leaf rubber stamps in black on various pieces of light colored paper. Cut out the stamped leaves.
17. Place a variety of leaf parts on the center of your card and move them around until you get an arrangement that you like. Glue down the leaves with the glue stick. Glue the “Happy Thanksgiving” strip to the bottom center of the card. Center and glue the center section to the front of the card.
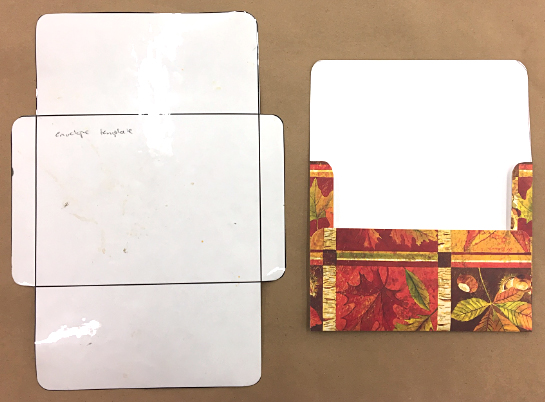
18. To make an envelope for your card, print out the envelope template and cut it out. I laminated my template for durability because I use it a lot. Place the template on the back side of a piece of decorative paper. Trace around it with a pencil. Cut out envelope. Fold in tabs, using the ruler and bone folder as aids. Assemble envelope by putting double-sided tape about halfway up the side flaps and pressing tabs together.
Create a piece of original artwork while learning how to print with found objects. You’ll also learn some basic monoprinting techniques while creating a background for your composition.
Materials and Supplies
Masa printmaking paper
*Scrap plexiglass
*Scrap wood blocks
Scrap chipboard
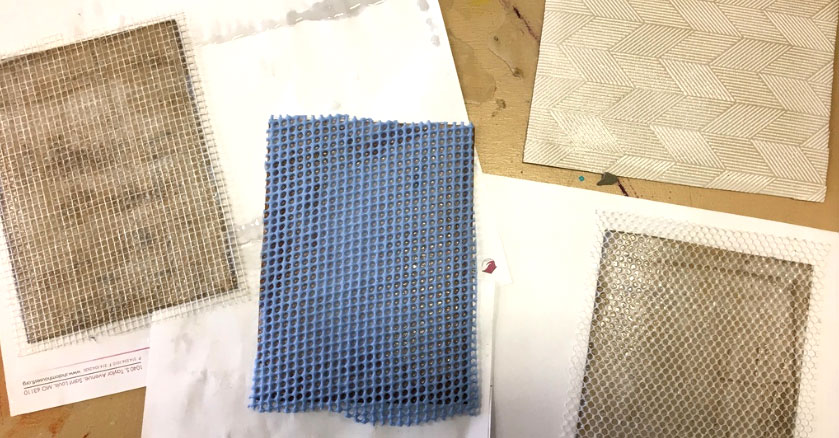
Scrap mesh
Scrap textured wallpaper
*Acrylic varnish
Used mailing envelopes lined with bubble wrap
*Thumbtacks
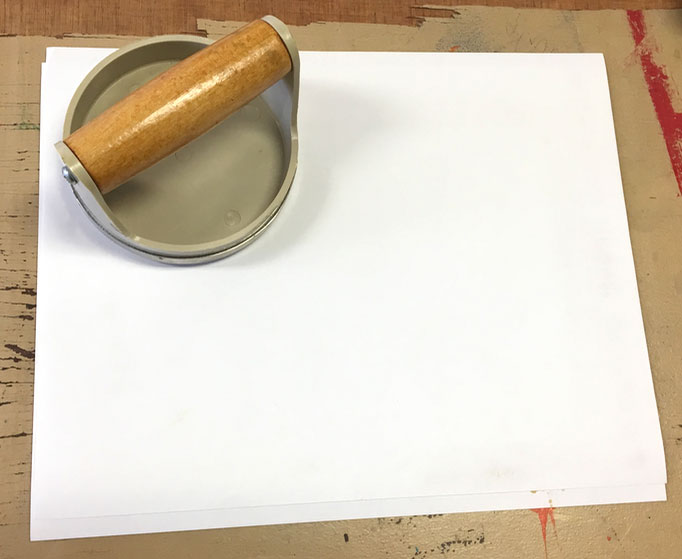
Baren (printmaking tool sold at art supply stores)
Printing registration frame (can be built from instructions online)
Small tabletop printing press (sold at art supply stores)
Brayers – hard and soft (sold at art supply stores)
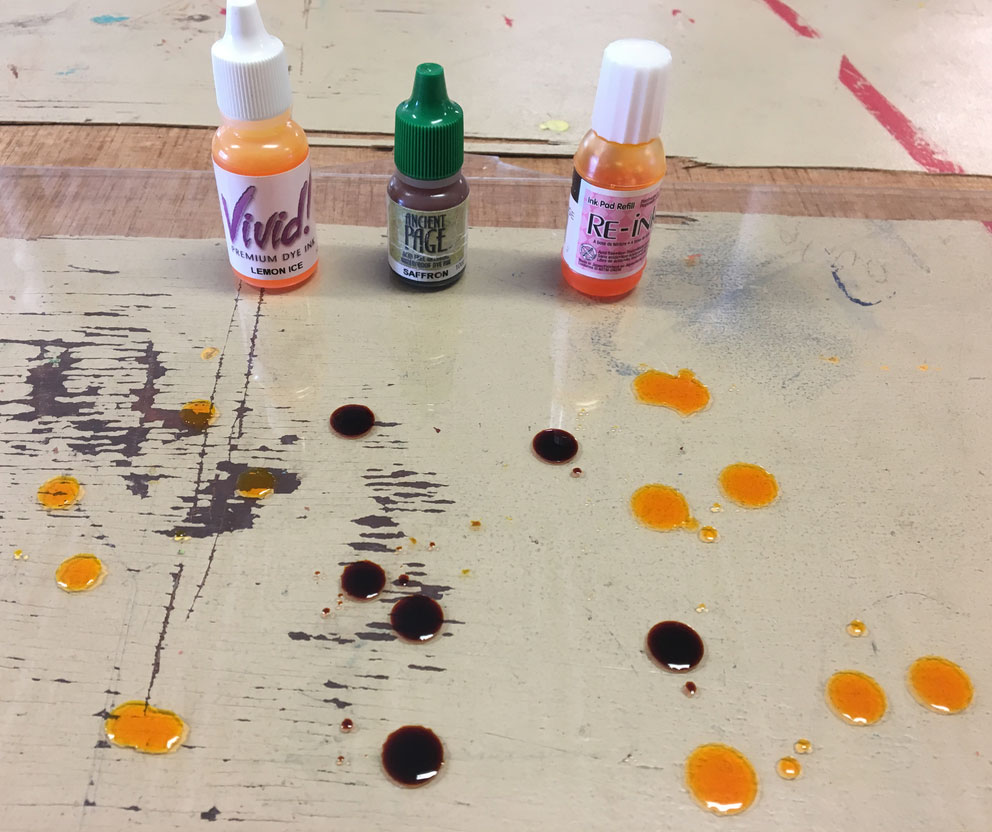
Dye-based rubber stamping ink
*Acrylic paint
Palette knife
Pie plate or other cleaned shallow food container
*Small sponge pieces
*Water container
*Ball point pens
*Rags for cleanup
*Double sided tape
*Painters tape
*Craft/X-acto knife and blades
*Cork pieces
Scrap paper
*Scissors
Recycled plastic file folders
Heat tool (optional)
5 x 7 inch wood blocks
foam from cleaned food containers
Cut out a piece of scrap paper 8 x 10 inches. In this middle of this page, draw a 5 x 7 inch rectangle. This will be a guide to use while designing and printing.
Cut out a few pieces of scrap chipboard the size of the inner rectangle in your schematic, 5 x 7 inches. Using a white glue or wood glue, glue some scrap materials to the front such as mesh placemats, mesh from food packaging or textured wallpaper scraps. After glue is dry, coat the textured surface with acrylic varnish and let dry. This is for durability and so the ink washes off after printing. Trim around the chipboard if needed.
From Masa printmaking paper or some other printmaking paper of your choice, Cut some 8 x 10 inch sheets and some 5 x 7 inch sheets.
Squirt some light-colored dye-based ink onto a piece of plexiglass. You can use one color or a blend of multiple colors. Roll out an area of color with a brayer that is at least as big as the smaller of your two pieces of paper. If you use plexiglass as a temporary palette and work surface as I did in part of my demo, you can put your schematic drawing under the plexiglass to use as a guide.
Tip: if you use waterproof dye-based ink, you can apply water based media to your design later without smearing or blending the ink.
If you color the image in some way after printing, it is called a hand-colored print. If you have interest, experiment with painting and drawing media, stamping, stenciling or collage to turn your print into a mixed media piece.
Cut out a shape of your choice from a piece of bubble-wrap lined envelope. Place this shape down on your area of color. Roll over the back of it with a brayer. Lift bubble wrap and set aside with ink still on it. Do not clean the bubble wrap yet.
Take one of your 5 x 7 inch pieces of paper and place it face down on the inked area. The rougher side of Masa paper is considered the face but you can try both sides if you want to see which effect you like better.
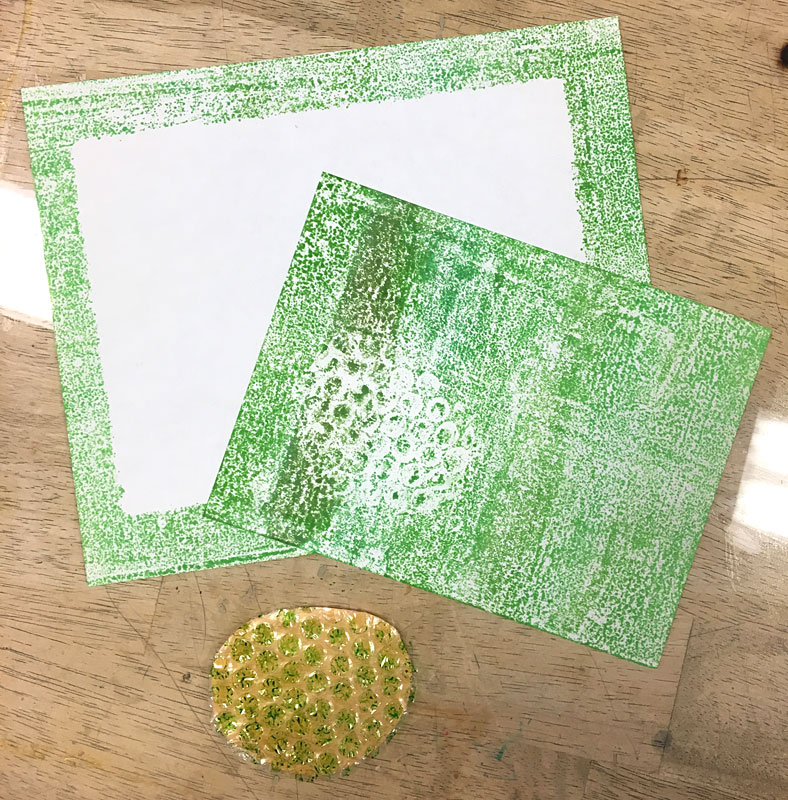
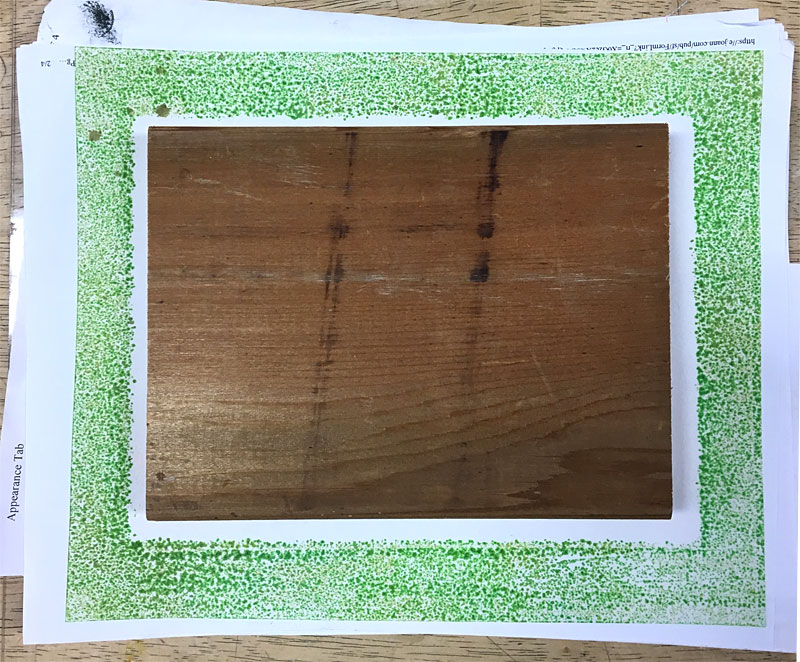
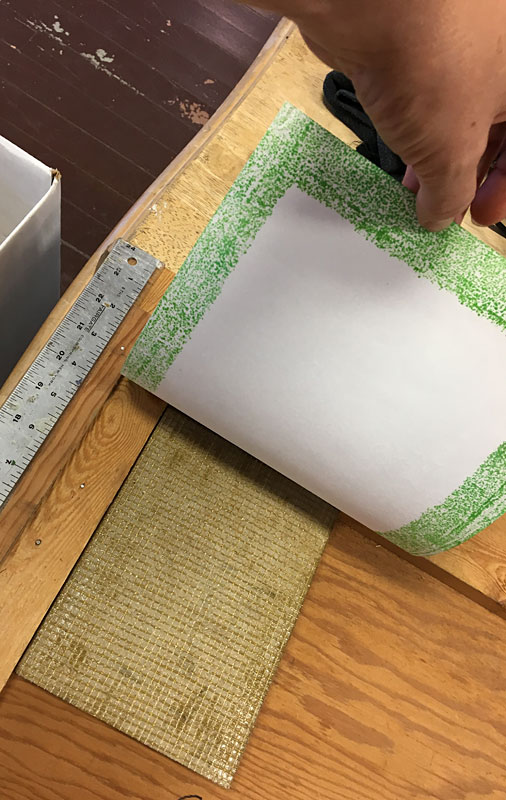
Take one of the 8 x 10 inch pieces of paper and place it face down over the back of the first piece of paper. Put a piece of scrap paper over all and rub with the baren. Lift up your paper pieces. You should now have one small piece with a monoprinted background design on it and a larger piece with a white space in the middle of a monoprinted frame.
This picture shows a printmaking tool called a baren. It’s used to rub the back of the paper to help the ink transfer to the front of the paper evenly.
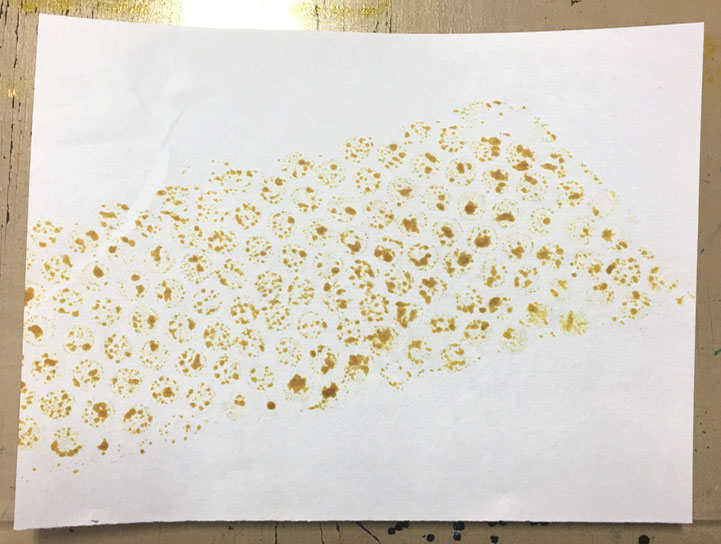
The texture of the bubble wrap has been transferred onto the background piece. This is just one way you can make marks in ink that’s been rolled out on a plate. You can draw into it with a rubber stylus, press rubber stamps into it and experiment with a myriad of found objects to see what kinds of marks they make in the ink. A monoprint is a one-off – you don’t have to worry about trying to duplicate it to make an edition.
Tip – you can also use pigment rubber stamping ink or block printing ink for printing. You can get finer details and markings with pigment stamping ink than with dye-based ink. Pigment ink will take longer to dry, however, perhaps several days unless you speed up the drying with a heat tool.
Take another blank piece of paper and place your inked up bubble wrap on it ink side down to the paper. Roll over the back of the bubble wrap piece with a brayer and lift up.
At this stage we have three pieces of paper with different areas printed. Add additional layers of colors and designs. Use increasingly darker colors for subsequent layers to add depth to your piece. To make your design more lively I recommend letting a little bit of white show through in one or more spots as you add layers.
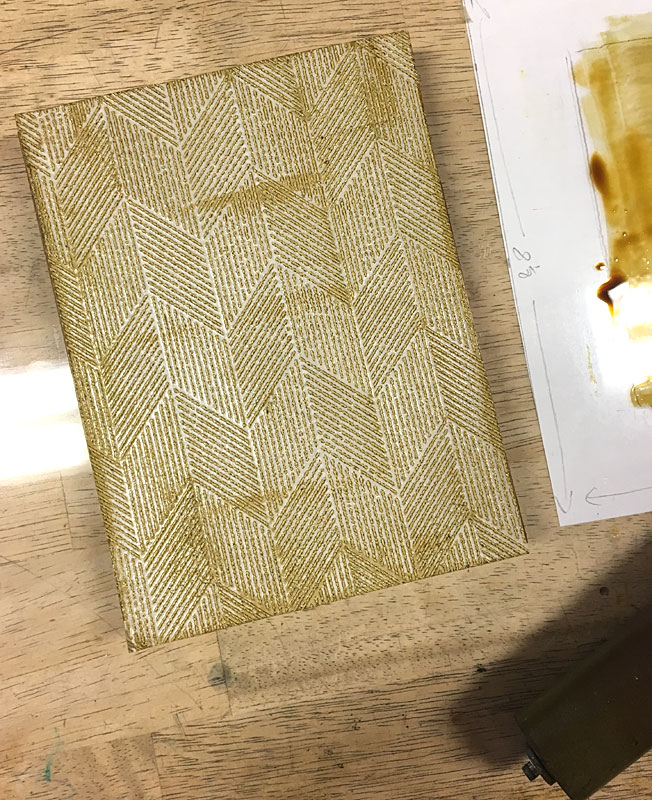
Use a brayer to roll out a slightly darker color of your choice. Choose one of the four blocks of wood with a texture plate taped to the front. Roll some color onto one of the texture plates. To lift ink up, roll fast – to lay ink down, roll slow. Roll in different directions to help get an even application of ink over the whole design.
Tip – do test prints on scrap paper to get a feel for how much ink you need before doing a “good” print.
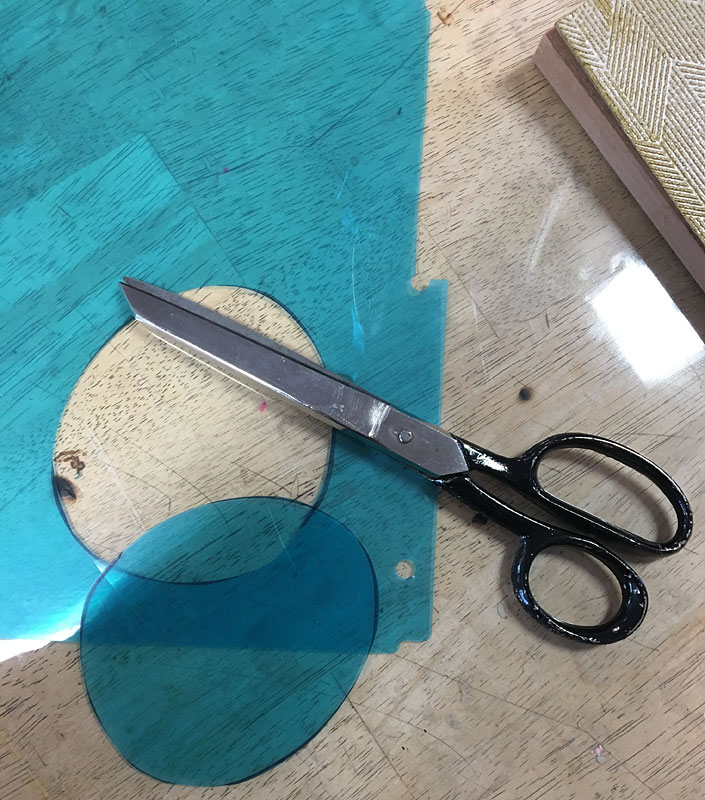
Cut out a shape of your choice from a piece of recycled plastic folder. Use this piece of plastic as a mask if you want to leave any areas unprinted. Slip the mask between printing block and paper when it’s time to print.
How can you print with an inked design mounted on a wood block? Here are some methods to try.
A. By “stamping” with the block – put a stack of old newspaper or scrap paper on your work surface so it has a little “give” – you’ll get a better print that way. Press your block straight down on the paper and apply as much pressure as you can without moving the block. Take care to apply pressure to the edges and center of the block. Lift straight up.
B. With a tabletop printing press – the model shown was purchased from an art supply company.
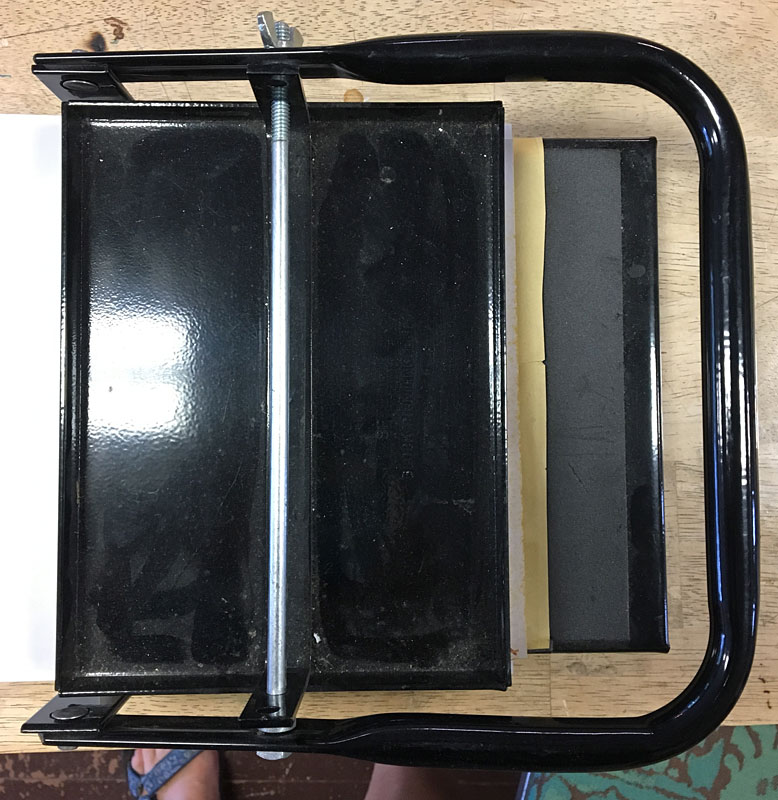
C. With a block printing frame – you can made one for yourself with wood and a big clipboard clip – the ruler built into my sample is optional. These frames are terrific for block print registration and keeping your print from moving while rubbing. Look online for plans if you want to build one. Rub the back of your print with a large spoon or a baren to transfer the ink to the paper. Take care to rub all parts and pay special attention to the middle or edges since those areas tend to get missed.
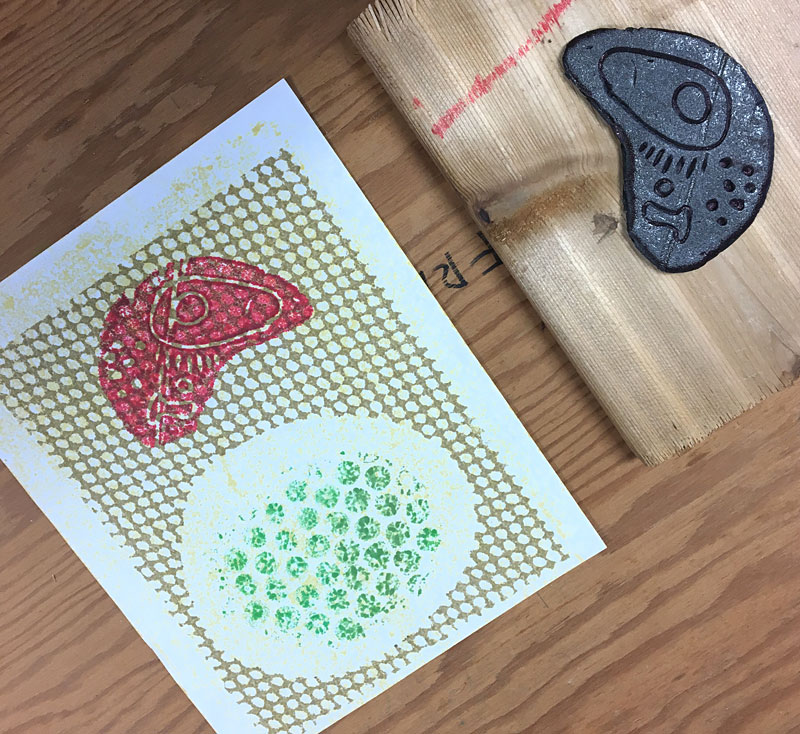
Another way of making a design from a recycled item is to take a piece of scrap foam from a cleaned food tray and cut it to a shape of your choice. Draw into the foam with a ball point pen, keeping in mind that whatever lines you draw will be a negative space that won’t print. Tape this shape to a wood block with double sided tape. Ink the shape and print with the method of your choice.
A very simple way of printing is to take a piece of cork and draw a simple design on it. Cut around it with a craft knife to make a stamp.
Stamp cutting safety tips:
Aim knife blade away from yourself while cutting
Use sharp blades to decrease chance of blade slipping
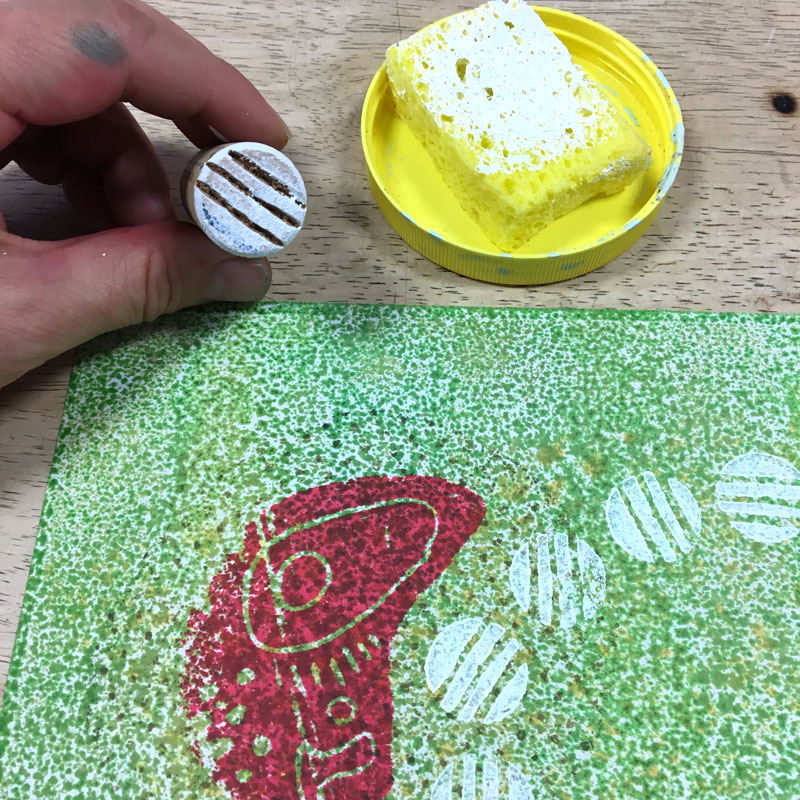
To print with a cork stamp, place a small, slightly damp sponge on a pie plate or in an old lid. Mix up a little acrylic paint of your choice and dab some on the sponge with a palette knife. Acrylic paint is usually fairly opaque unless it is diluted. Small stamps applied with opaque paint are a great way to add a finishing touch to a print made with translucent inks. Press your cork stamp into the sponge and to some test prints on scrap paper. Stamp your cork stamp on your prints.
Tip – Rubber erasers and rubber carving material are also good for making your own stamps. Read my tutorial for instructions – http://www.limegreennews.com/howcarv.html

 Tools and Materials – *indicates available at Schnarr’s
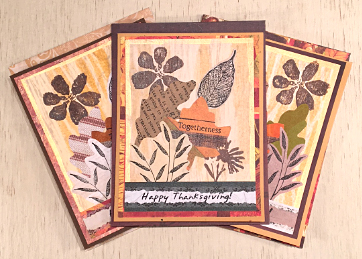
 Create a piece of original artwork while learning how to print with found objects. You’ll also learn some basic monoprinting techniques while creating a background for your composition.