Terra-Cotta Mosaic Planter
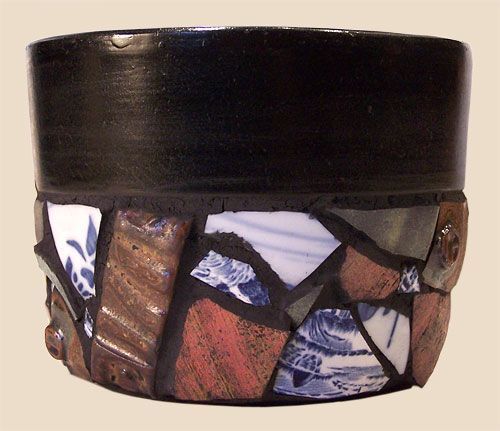
You can make a plain terra cotta planter more interesting with ceramic tile pieces!
What You’ll Need
| Terra Cotta planter Disposable latex or vinyl gloves Paintbrush Black oil-based waterproof enamel paint or color of your choice Paint thinner Liquid soap in a pump-top dispenser Rags (you’ll need several) Tile cement Small putty knife Old plastic lid Small plastic tray |
Eye goggles Broken up ceramic pieces or tiles Tile grout Heavy leather gloves Hammer Optional – tile nippers Optional – abrasive sponge Optional – dust mask Optional – cement pigment Tile and grout sealer Small bucket of water |
1. Whether your terra cotta planter is new or you’re upcycling an old one, be sure it is thoroughly clean and dry.
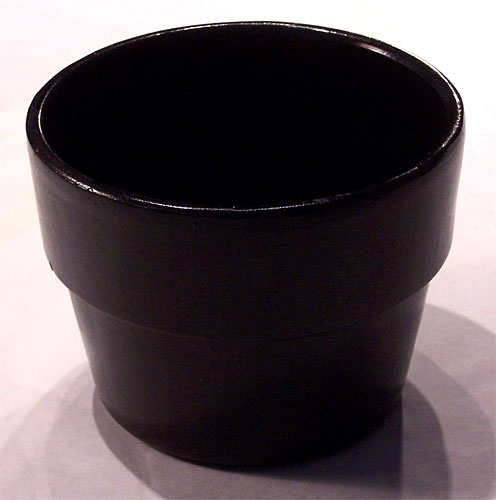
2. Put on disposable gloves and paint the planter inside and out. You will probably need two coats to cover completely. The reason for painting the planter is to keep water from seeping through the wall of the planter and weakening the applied tile pieces. Normally the porous nature of terra cotta is desirable but in this case it would harm the durability of the tile work so we’re sealing the surface. If you need a refresher on how to clean up oil-based paint and care for your brushes, here are some tips:
How to Clean Oil Paint from Paint Brushes
If you want to avoid having to clean up oil-based paint, you can substitute water-based paint. Your finished project might be less durable but if you choose a good quality high-gloss water-based enamel paint that should help. I used black paint in my samples because I wanted it to match the black tile grout that I used in my demo. You can choose different paint and grout colors if you want. Painting the pot in sections and letting it dry while resting on the unpainted portion helps you do a neater job. You’ll need to let the paint dry between coats.
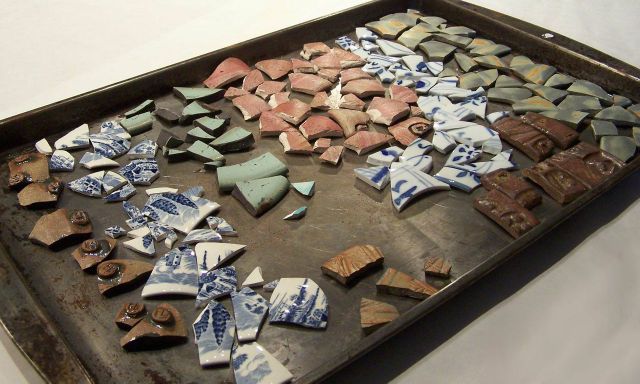
3. While you are waiting for the paint to dry, you can start getting your tiles ready. What are some good sources of tiles?
- Break up old broken ceramic items into smaller pieces. One way is to wrap pieces in an old towel and smash them with a hammer. Wear leather gloves and goggles when you do this to protect yourself from sharp pieces. For more refined shaping of small pieces, you can cut them with tile nippers. The broken edges can and will cut you if mishandled so be careful! If any pieces are unacceptably sharp, you can try filing them or smoothing them on a grinding wheel.
- A teacher/artist resource recycling center – a lot of the tiles I’ve accumulated for my projects came from Leftover’s, Etc. (http://www.leftoversetc.com/)
- If you have access to a ceramics studio, you can make your own tile pieces – see this tutorial of mine to learn how to get started – http://carolynsstampstore.com/catalog/mosaic_table_top_with_textured_clay_tiles.php.
- Commission a local ceramic artist to make some tiles for you.
- By far the most convenient and quick way to get tiles is to purchase them from a craft or tile dealer. Craft dealers also sometimes have glass tiles and faux seaglass which is well worth some experimentation.
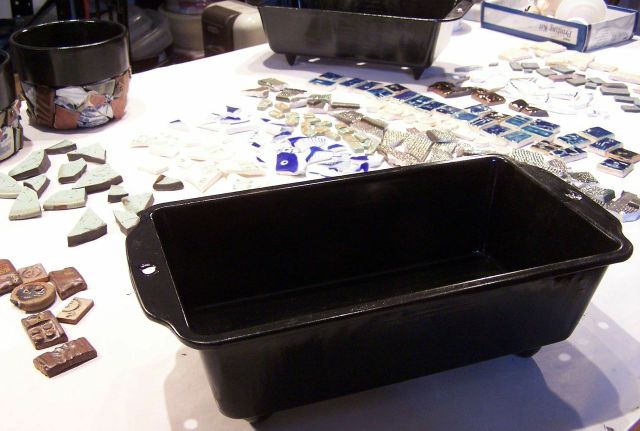
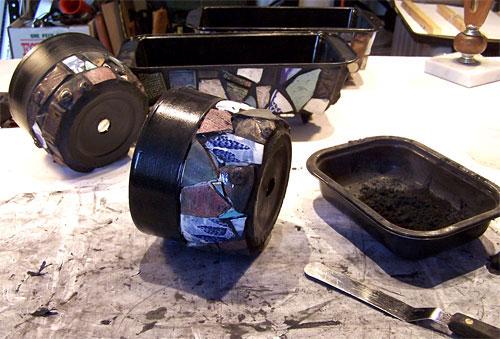
This photo shows more prepared tile pieces along with some metal bread pans painted and ready for tile application. The bread pans were rusty and/or afflicted with peeling non-stick coating so I decided to upcycle them. I sanded and cleaned them thoroughly before applying paint to make sure the paint would stick. You can try this with a variety of old metal containers – I’ve made a mosaic tile planter out of an old metal roasting pan as well.
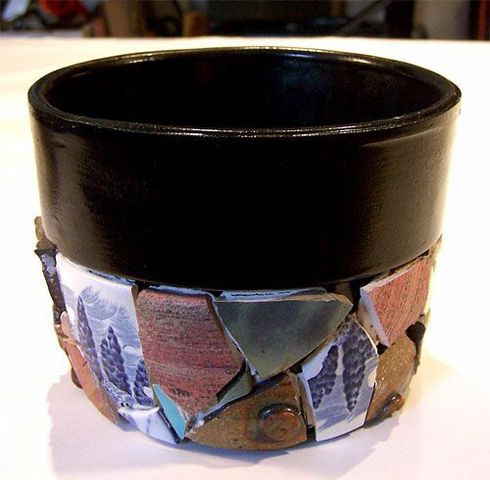
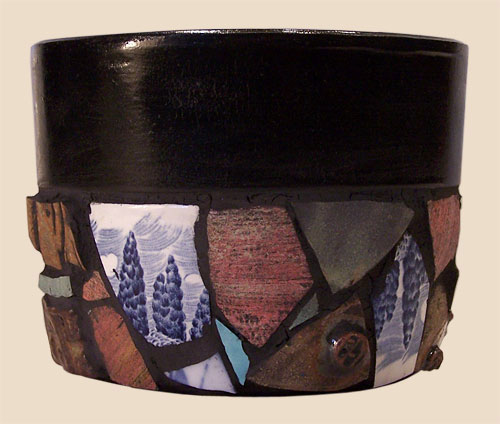
4. Cover the lower portion of the planter with tile pieces. You can attempt to follow a planned design or use a random arrangement like I did in my samples. On an old lid, put out a small portion of tile cement, about as much as you can use in 15 minutes. Put a small dab on the back of each tile and press in place. If you are using pieces of varying thicknesses as I am, it will be easier to grout later if you try to even up the tile height by putting more cement on the thinner pieces.
5. Let the tile cement dry thoroughly – see instructions on the package for how much time this is.
6. When it’s dry you’re ready to apply grout. I chose to use black grout to match the black paint on the pot. You can use any color of grout that you want, but it will probably look better if the grout and paint colors match. If you don’t find grout in your preferred color, it’s possible to tint grout with cement pigments. If you decide to do this wear a dust mask while mixing. Be sure to mix up a large enough batch to complete the whole project because it might be difficult to mix the exact same color twice unless you measure the materials very carefully. Grouting is very messy, especially with dark colors. I recommend you wear old clothes and protect your work surface and floor. Have plenty of clean rags on hand and a small bucket of water for cleanup. Don’t be surprised if you need a bath when you’re done!
7. Put some grout in a small plastic tray, such as one left over from a microwave dinner. Add water until it’s about the consistency of soft cream cheese – a little at a time to make sure you don’t add too much. Stir it with your putty knife as you add the water. Try to only mix up small amounts at a time so it does not start to set up before you’ve applied it.
Put on your disposable gloves, and use a rag to pick up a portion of tile cement. Smear it around to fill the cracks between tiles. The rags will help protect your hands from sharp pieces so always make sure there is a rag between your hand and the pot. The thin disposable gloves will protect your hands from being irritated, dried out or discolored by the grout, but alone they will not protect you from cuts.
After one section of the pot is grouted, go back over it with a succession of fresh rags to remove the grout from the surface of the tiles. Dampen the rag with a little water toward the end to get them really cleaned off if needed. If you can’t get them all the way clean with rags only, try an abrasive sponge. This step takes a lot of patience, you will probably have to wipe each section several times, especially when using a dark grout color like I did in my sample. It’s also a rewarding step, because you can start to see how your design will turn out!
Repeat this process until the whole pot is grouted and cleaned.
Be careful not to dispose of any grout in your sink – it could clog the drain. Dispose of any rags that are really soaked with grout – I put mine in the compost. If some are only slightly dirty, you may be able to re-use them by rinsing them in a bucket of water. If you do that, dump the dirty water out in the yard, don’t put it down the drain.
7. Let the grout dry, then apply tile and grout sealer. You’re done!
I recommend bringing this type of planter inside for the winter if you use it outdoors, subjecting it to the freeze-thaw cycle is probably not good for durability.
| Available at Schnarr’s: | ||
 Leather Work Gloves |
 Dust Mask |
 Protective Goggles |
 Hammer |
 Mrs. Meyers Hand Soap |
 Disposable Latex Gloves |
 Tile Nippers |
 Odorless Paint Thinner |
 Paint Brush |
 Putty Knife |
 Cloth Rags |
 Rust Control Enamel |
 Terra Cotta Plant Pot |
 Tile and Grout Sealer |
 SimpleSet Pre-Mixed Ceramic Tile Thin-Set Mortar |
 Polyblend Sanded Tile Grout |
||