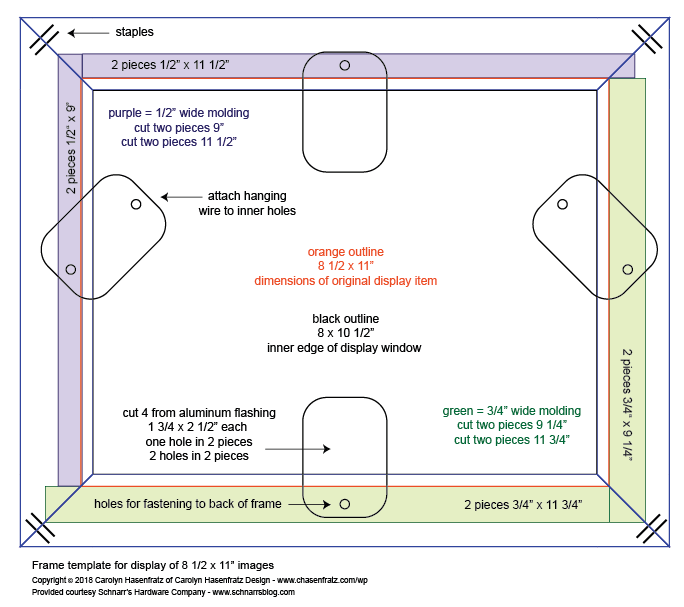
Tutorial – Image Transfers on Wood Jewelry
by Carolyn Hasenfratz Winkelmann
Materials
Thin wood scraps (about 1/8 – 1/4 inch thick)*
Gold acrylic paint*
White acrylic paint*
Large thin jump rings
Necklace chain with clasp
Cutout images from magazines or laser jet prints
Clear heavy-duty packing tape*
Scotch Magic Tape*
Clear-drying gel medium (several brands will work, including Modge Podge sold at the Schnarr’s Ladue store)
Paper towels*
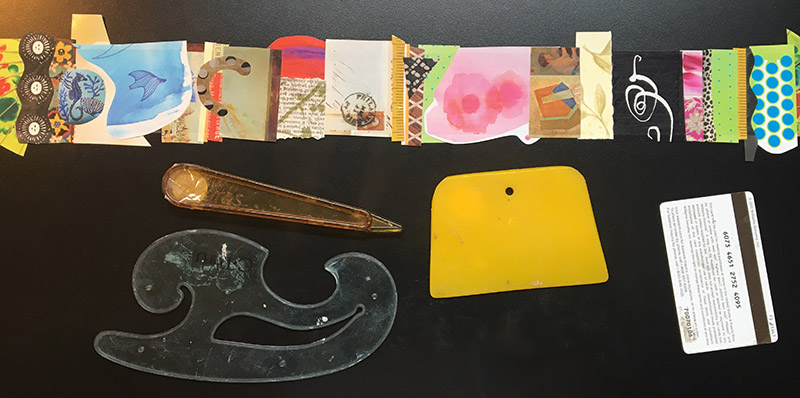
Tools
Saw*
Drill with small drill bit*
Paint brushes*
Water container*
Sandpaper*
Clear plastic tote lid (or some other piece of rigid clear plastic like a piece of plexiglass)
Scissors*
Bone folder or burnisher
Basin for water*
Needle tool
* – indicates items sold at Schnarr’s
Instructions
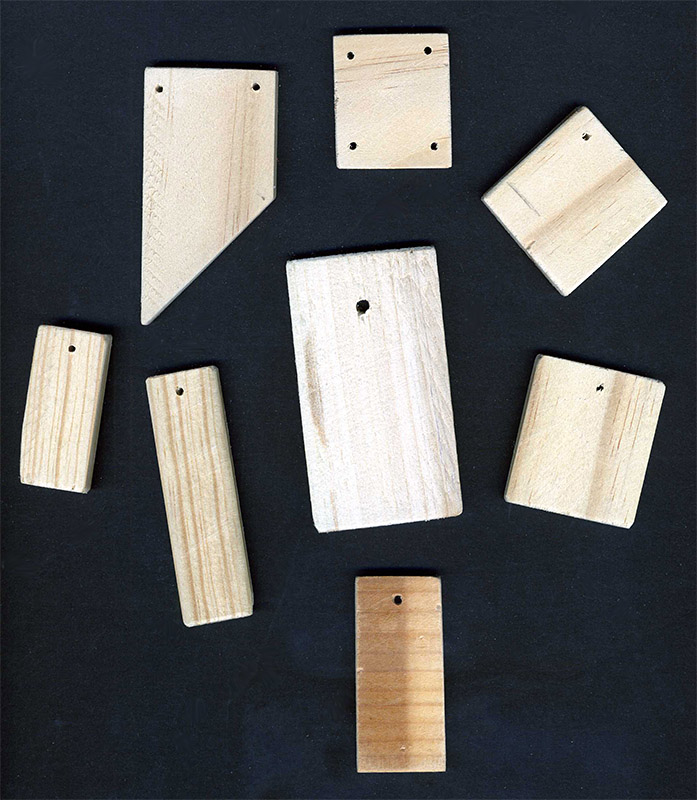
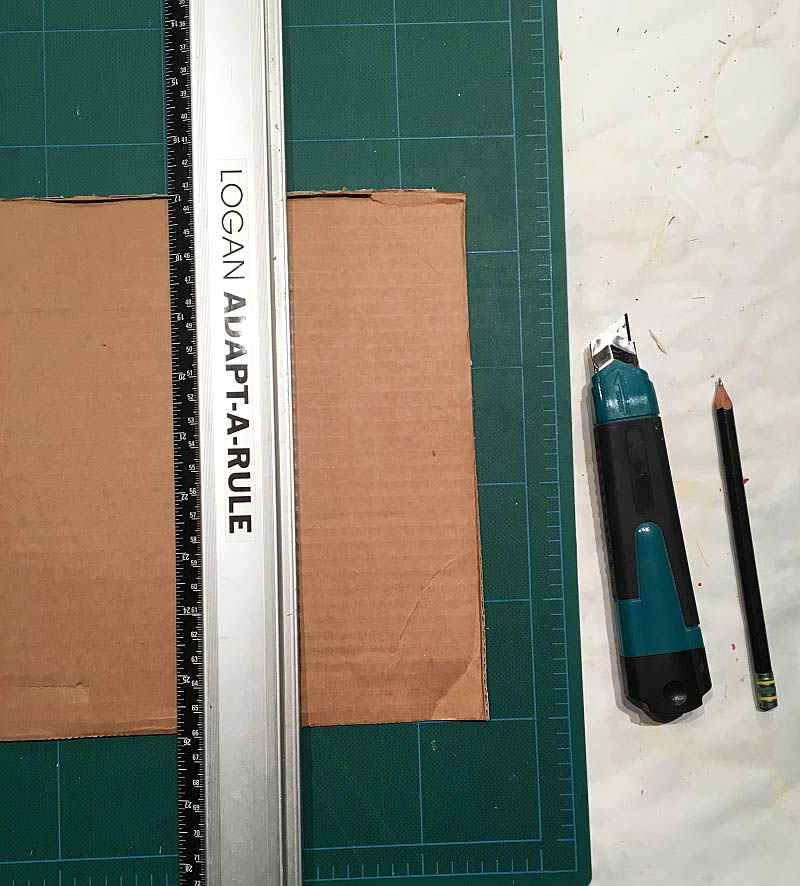
1. Gather some thin wood scraps and cut them into pieces in the 3/4 inch to 2 3/4 inch range to make bases for wood pendants. Try different proportions and shapes so you can try out different design options.
2. Drill holes so the pendants can be strung onto a necklace later. You can also add extra holes for dangles if you want to. Sand the wood pieces smooth and wipe off with a damp rag.
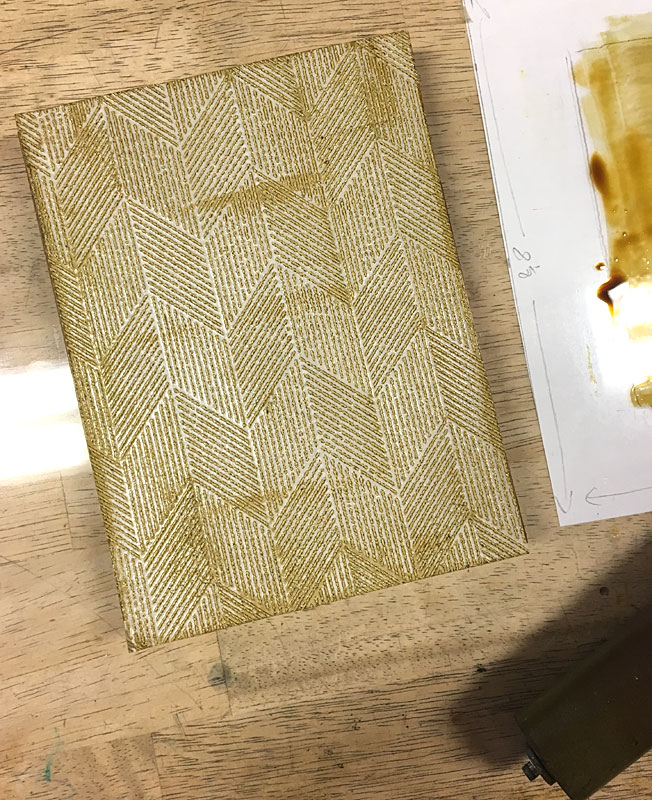
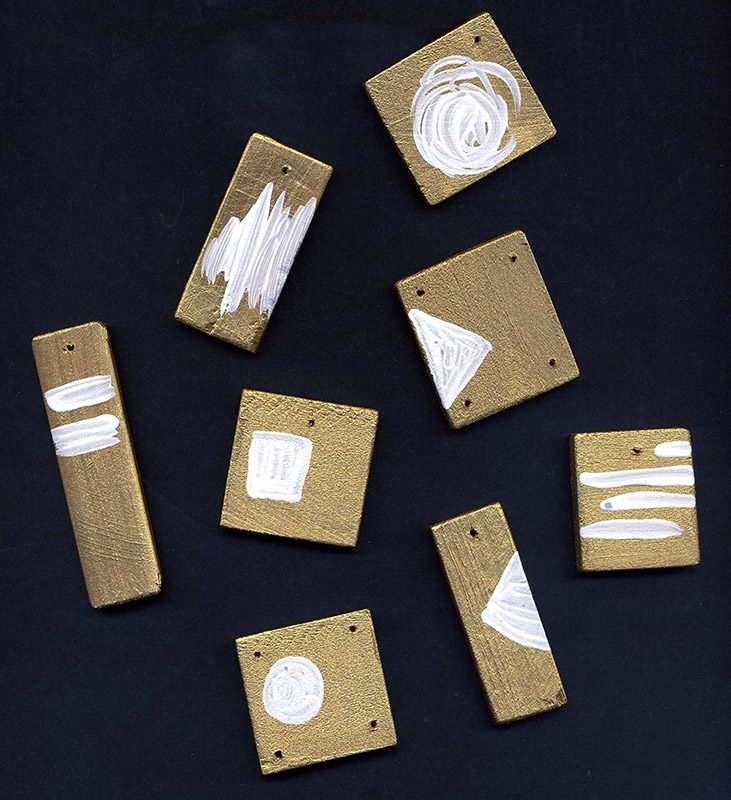
3. Paint the wood pieces all over with gold acrylic paint. When the gold paint is dry, choose a spot on the front of your pendant and paint a white mark, such a stripe or a circle and let dry. When you start layering translucent images onto your pendant, the white spots will show through and help provide a focal point for your design. You can paint in a loose manner or make precise shapes or preferably experiment with both to see the effects.
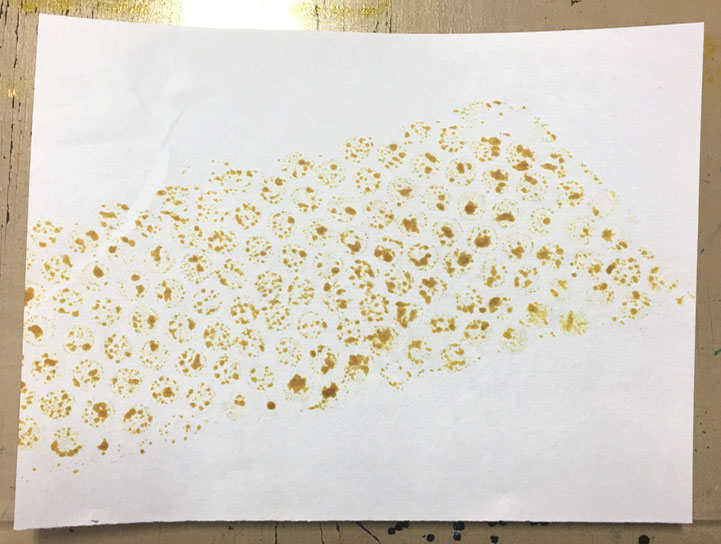
4. Take some of your found images from magazines or laser prints and paint them with a layer of clear gel medium. Let dry, and apply a second coat with the brush strokes in the other direction. Let second layer dry, and apply a third coat in a diagonal direction. Let all layers dry for several hours.
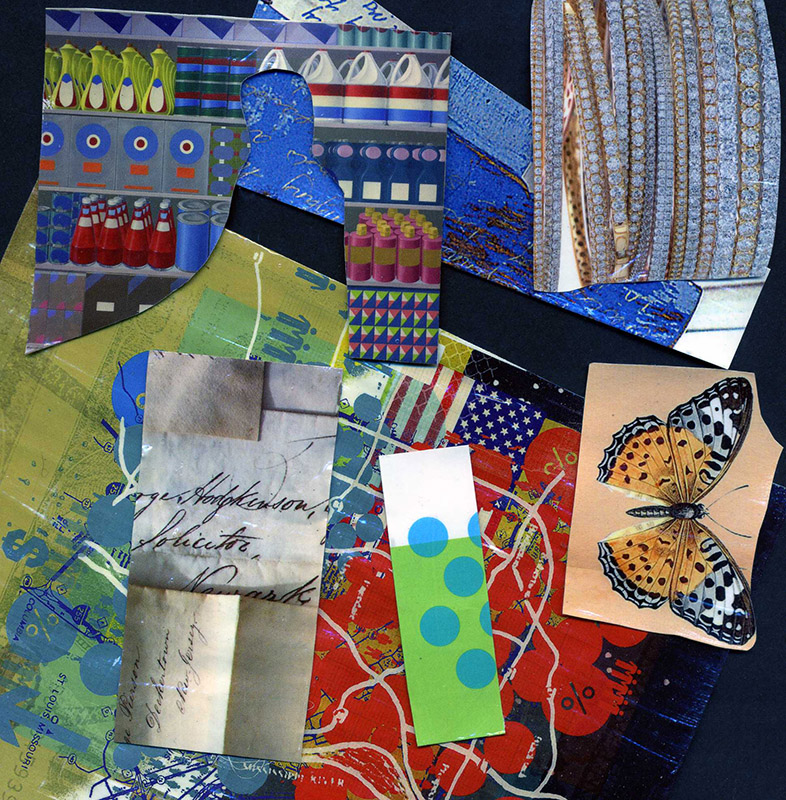
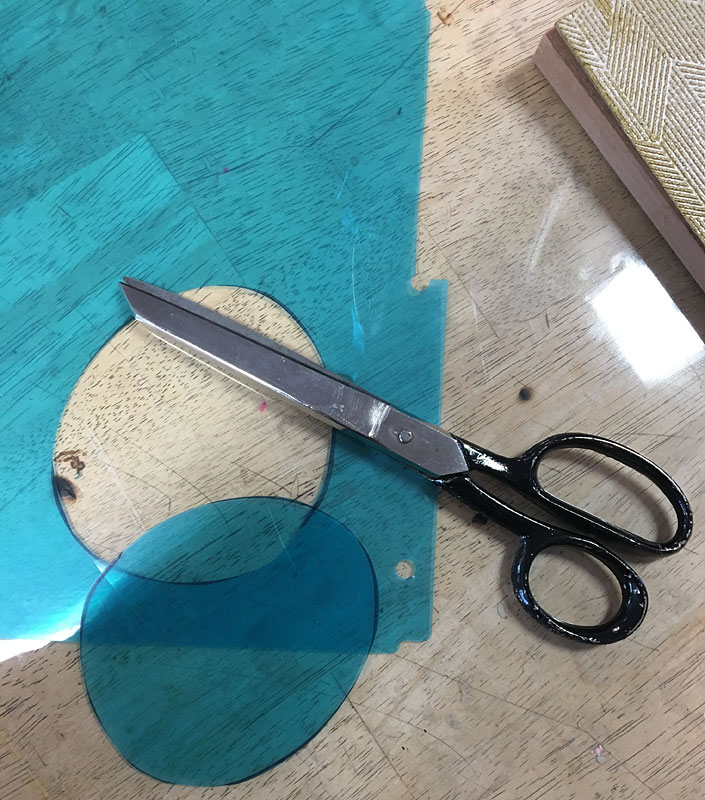
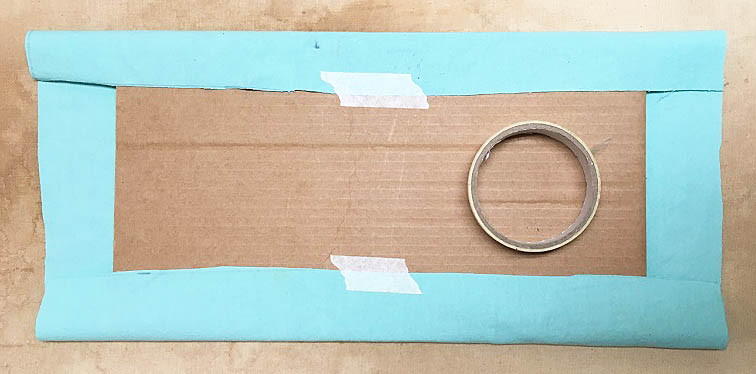
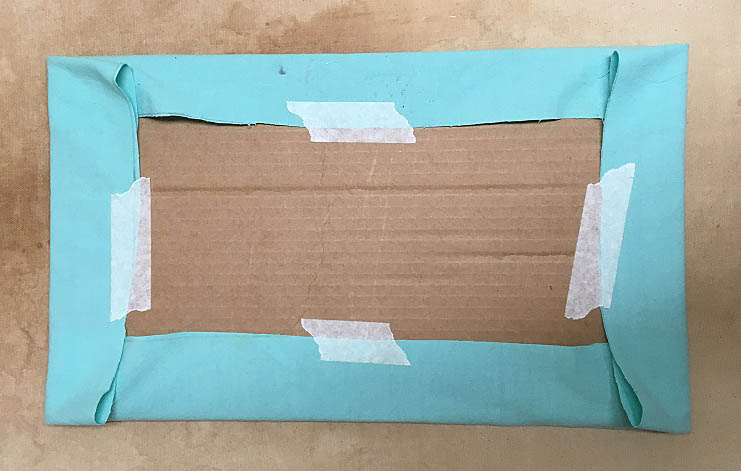
5. Take strips of clear packing tape and use the Scotch Magic Tape to hold them down at the ends, sticky side up, on a rigid clear tote lid or piece of plexiglass. Cut or tear found images and press onto the tape pieces with the sides you want to show facing downward. As you layer on images, you can check your work by picking up the clear tote lid and peering from underneath to see what your work looks like.

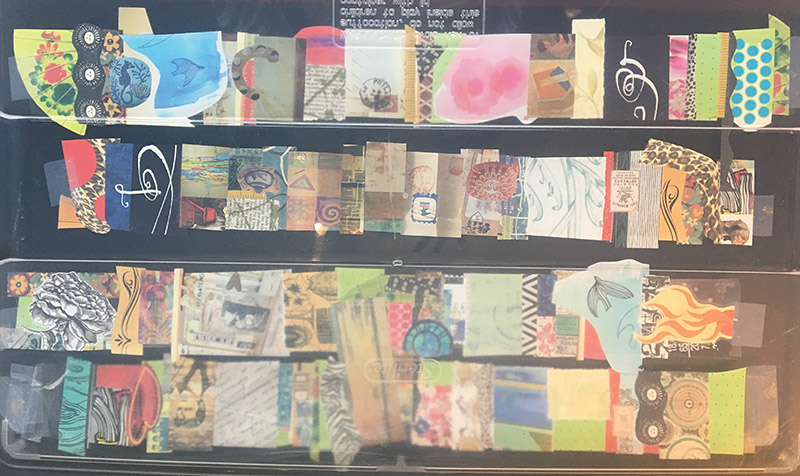
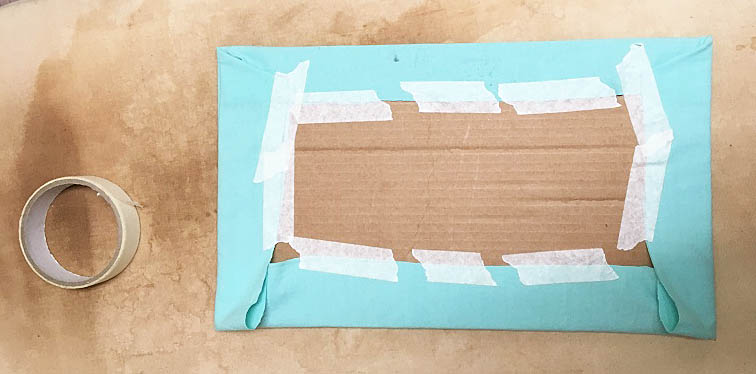
6. After the tape is completely filled, remove from the lid and tape face down on a clean rigid surface like a desk top or table top. Rub well in several directions with a burnisher or bone folder.
7. After the tape strips are thoroughly burnished, soak them in water. Add the images that you coated with gel medium also. When the paper on the back gets soft, gently rub it until it peels away. You will probably have to change the water and rub multiple times to get all the paper off. When you are done, only the ink will be left on the tape. Dry the tape and gel pieces back/sticky side up on paper towels.
Tip – to avoid clogging your drain, dump the water with paper pulp in it outside instead of putting it down the drain.
8. Take one of your images on tape and hold it over your pendant piece until you find a composition you like. Loosely trim the tape piece and coat the front of the pendant with gel medium. Press the tape onto the front of your pendant and push any extra glue out and wipe off. Let dry, then trim around with a scissors. Use a crafting heat tool to speed the drying if necessary.
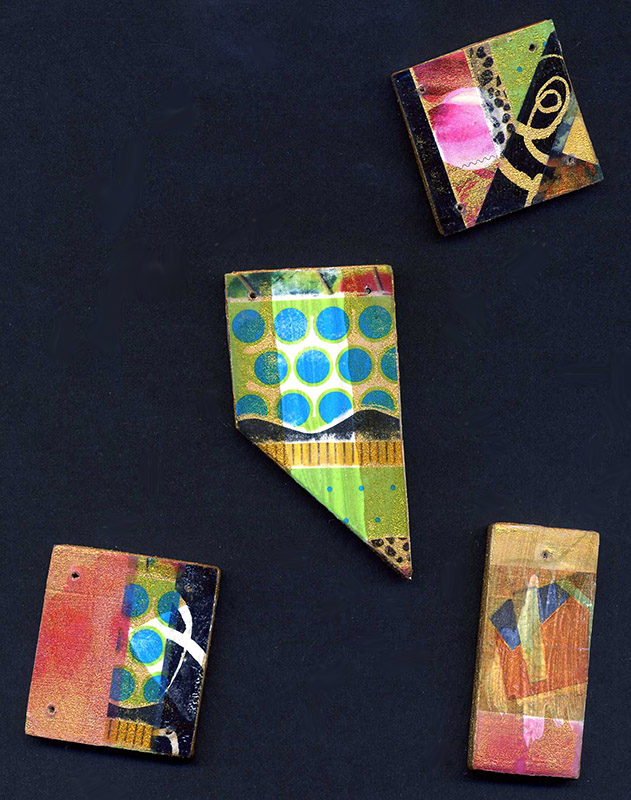
9. If your first image layer does not quite look finished as is, cut sections out of some of your gel-coated pieces and use the gel medium to glue them on top of your tape layer for extra interest. Top off with a final coat of gel medium and let dry.
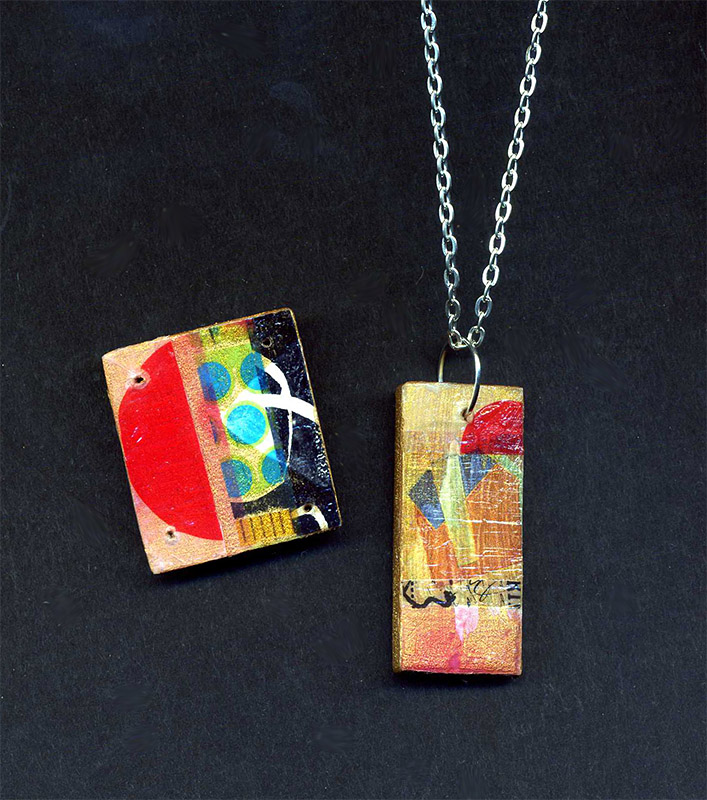
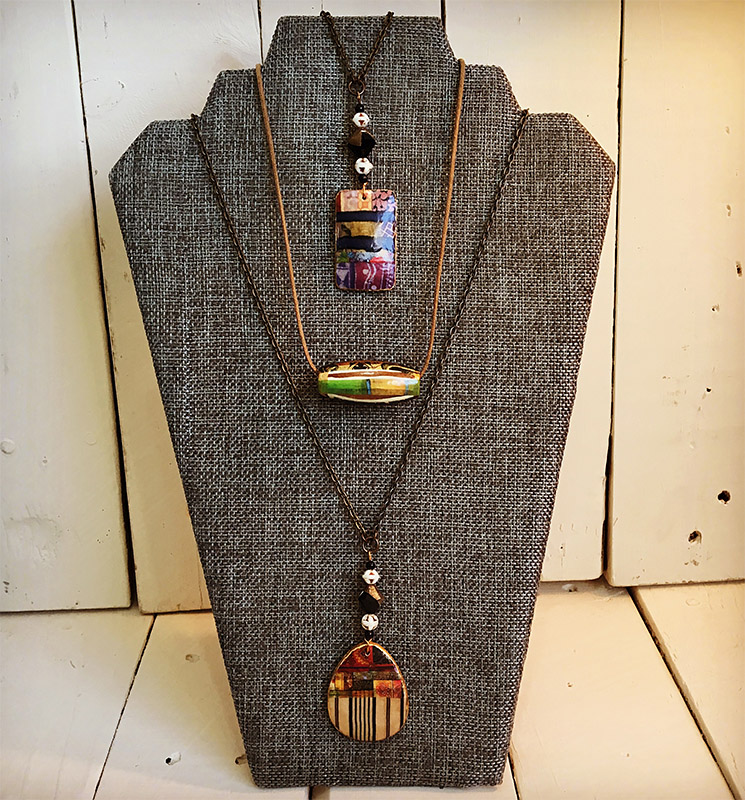
10. Re-pierce your hole or holes with a needle tool, and put a jump ring in your hanging hole. If your pendant has multiple holes for dangles, put a jump ring in each hole and attach dangles to the jump rings. Run a jewelry chain with a clasp through the hanging jump ring. You are done!
More information
Here is another tutorial I wrote that makes use of image transfers:
Art Journaling With Stencils and Image Transfers
I have a Pinterest board for Image Transfer ideas and inspiration to help you explore further:
https://www.pinterest.com/chasenfratz/image-transfers/
If you would like to see what other classes and events I have coming up, please see this page on my blog:
http://www.chasenfratz.com/wp/about/classes-and-events/


 Create a piece of original artwork while learning how to print with found objects. You’ll also learn some basic monoprinting techniques while creating a background for your composition.