Textured Backgrounds For Fall Leaf Greeting Cards
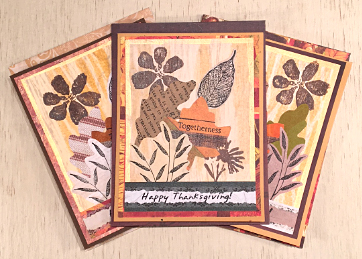 Learn techniques for making interesting backgrounds for paper projects with some items that can be found in a hardware store. Make a Happy Thanksgiving card by embellishing your card further with rubber stamps and paper tape!
Tools and Materials
*indicates items available at Schnarr’s
*Foam paint roller
*String
Water-based block printing ink or rubber stamping ink
Rubber brayer – a brayer is a rubber roller that is used to spread printmaking ink
Palette knife
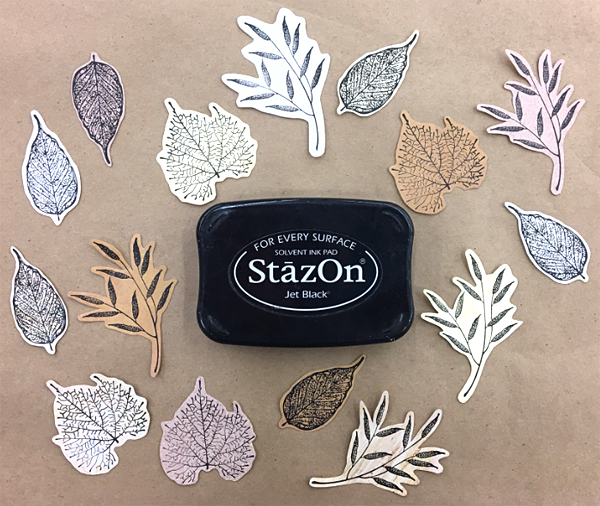
Fall leaf, foliage and flower rubber stamps
Stamps with sayings, greetings or sentiments (optional)
StazOn Jet Black and Timber Brown stamping ink
*Freezer paper
*Masking tape
*Glue stick
8.5 x 11 cardstock in a light color and a second color
Assorted 12″ x 12″ decorative papers in both light and dark colors
Bone folder
*Scrap piece of thick wood dowel
*Two long nails
*Hammer
Optional – craft stencil with leaf designs
Paper cutter or paper cutting system
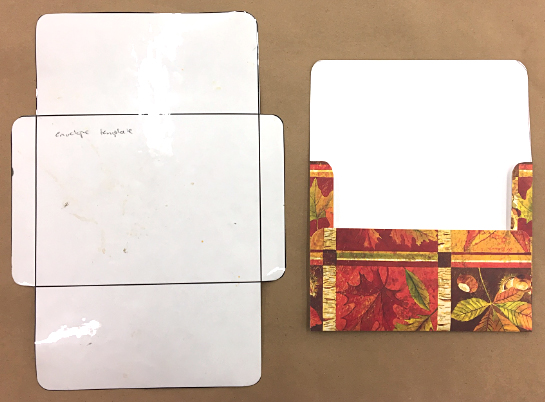
Envelope template (download here – http://www.carolynsstampstore.com/catalog/members/envelope_template_rectangular.pdf)
*Double-sided tape
Pencil
*Scissors
*Rags or paper towels for cleanup
Flat metal ruler
*Gold acrylic paint
Rectangular eraser with flat surfaces
Old cleaned food container lid
Matte medium
*Paintbrush
Decorative paper edging scissors
Decorative paper tape (also known as washi tape)
Clean scrap paper
Directions
Some of these pictures will show parts being made for more than one greeting card. Normally when I’m making cards I make several at a time and I make more parts than I think I’ll need so that I can mix and match to get the best color combinations.
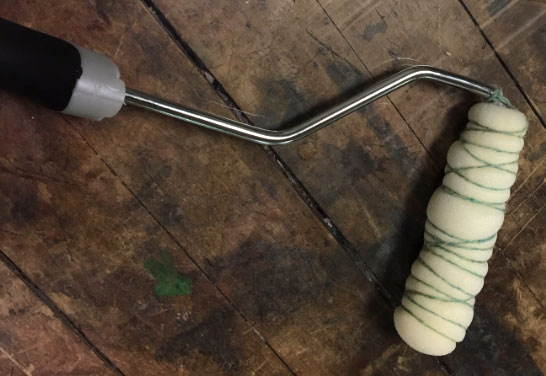
1. First take a foam roller and wrap some string around it in a random fashion. Tie off string to hold it in place.
2. Tape some freezer paper down to your work surface shiny side up. This is to protect the table and also so you can use part of the paper covered work surface as a disposable palette. In some of my sample photos I used a large piece of scrap plexiglass as a work surface and palette instead of the freezer paper – that’s why the ceiling lights are reflected in a couple of the pictures.
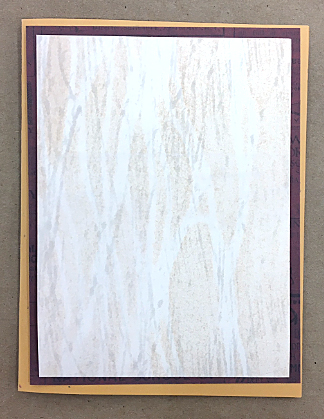
3. Choose a light earth tone color of ink and spread some on a portion of the freezer paper. Tape a piece of cardstock to the work surface to keep it from moving around. Roll the string covered foam roller in the ink and test on a piece of scrap paper to see if the color is what you want. When satisfied, re-ink and roll the pattern on the cardstock. Let ink dry on cardstock. Rinse out and clean the foam roller.
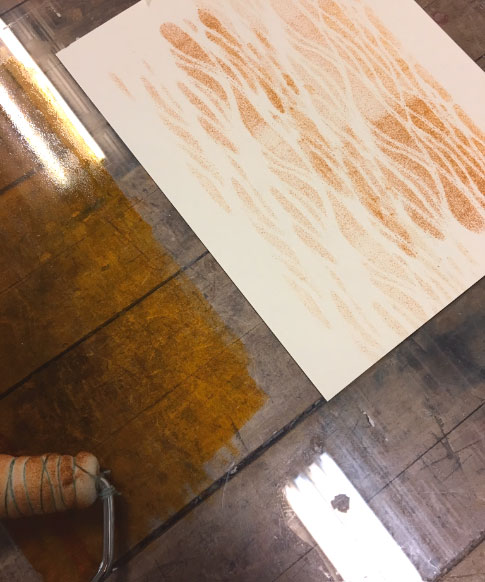
4. Take a segment of thick wood dowel and hammer a nail in each end of the dowel to use as handles. Wrap string around the wood randomly. Select an earth tone ink color that is darker than the first color. Roll some ink out on your palette with the the rubber brayer. Roll the string covered dowel onto the ink palette then onto your cardstock multiple times in different directions until you are satisfied with the results. Let dry.
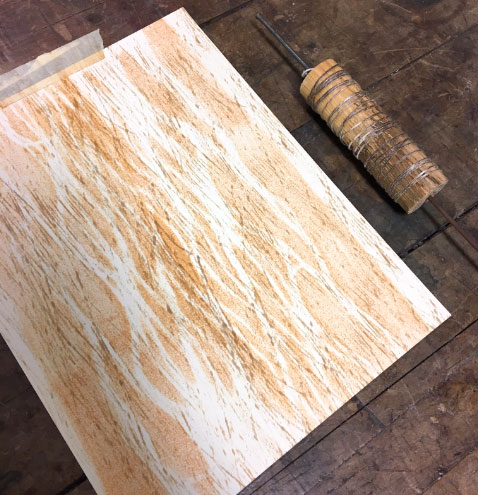
5. These next few steps (5-7) are optional. If you want to tone down the texture on the cardstock to make it fade more into the background, a very effective way to do that is to roll some semi-translucent stamping ink in a light color over your background. Chalk inks and pigment inks in white and soft pastel colors are very effective for this.
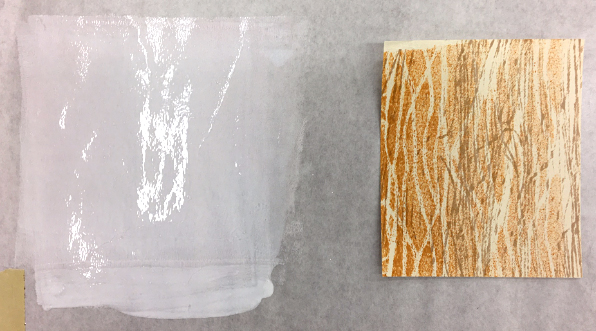
6. Allow the chalk or pigment ink to dry thoroughly. Chalk and pigment inks take longer to dry than dye-based inks. To speed up the drying, you can use a heat tool or iron the sheets of cardstock between two sheets of clean scrap paper.
7. Chalk ink can cause interesting effects when used in conjunction with other inks. Often it causes a blurring effect if you stamp over it, especially if the chalk ink is not completely dry. Sometimes this blurring effect can be exploited in a design to good effect but in this case I don’t want my next layer to be blurred. To prevent this, paint the inked cardstock with a layer of matte medium and allow to dry.
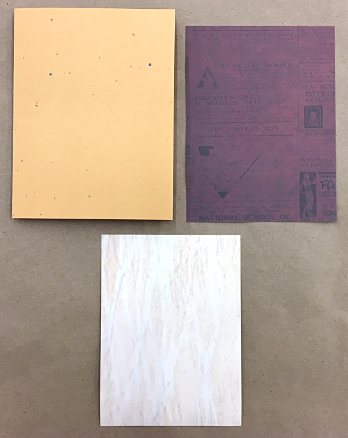
8. Take a piece of 11″ x 8.5″ piece of cardstock that is a different color and cut it in half lengthwise. Fold one of these pieces in half and make the fold crisp with a bone folder. You’ll end up with a card that is 4.25″ x 5.5″ when folded to use as a base.
9. Cut out a piece of 4″ x 5.25″ paper to use as border around your center piece. Center it on the card base and glue down with a glue stick.
10. Cut out a 3.75″ x 5″ section out of your printed cardstock to use as the center front of your greeting card.
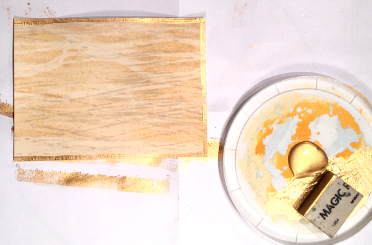
11. Squirt some gold paint onto an old food container lid and dip the side of the rectangular eraser in the paint. Use the side of the eraser to stamp a border on three sides of the center 3.75″ x 5″ section. The gold edges will become the top and side edges of the center part of the card.
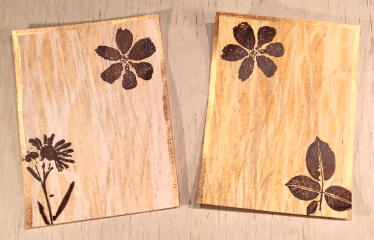
12. Using StazOn Timber Brown ink, stamp two flower or foliage stamps in the corners of your front piece. Bold stamps without fine detail will be especially effective here because a little bit of the brushed-on texture from the matte medium will find it’s way into the design and enhance the rich textures of the card.
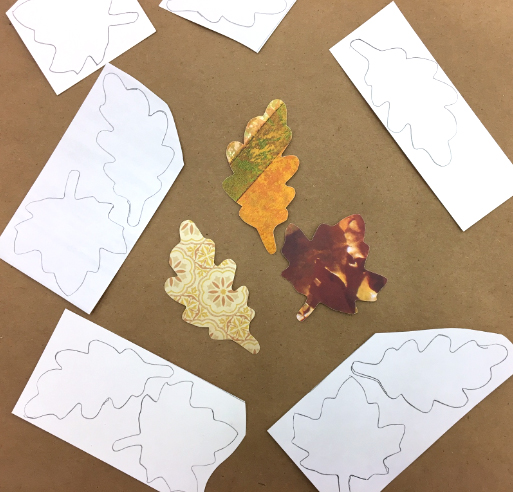
13. Draw some leaf shapes on the backs of different pieces of decorative paper. You can use a stencil to trace the leaf shapes as I did or draw them from your own design. Cut out leaves.
14. Using black ink and rubber stamps with sayings on them, stamp some of the leaves with a word that goes well with “Happy Thanksgiving”. In my samples I stamped “Togetherness”, “Treasure” and “Celebrate”. Underline your stamped word with a piece of plaid patterned paper tape in fall colors or other tape design of your choice. Trim the tape.
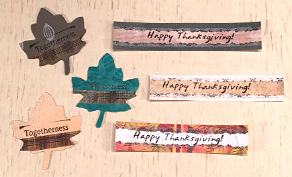
15. Stamp “Happy Thanksgiving” or other greeting of your choice onto a strip of light colored paper. Trim the strip with decorative paper edging scissors. Take a piece of 3.75″ x .75″ decorative paper and tape a piece of decorative paper tape down the center lengthwise. I chose a black and white floral design for my samples. With a glue stick, glue the strip that says “Happy Thanksgiving” over the paper tape.
16. Stamp some leaf rubber stamps in black on various pieces of light colored paper. Cut out the stamped leaves.
17. Place a variety of leaf parts on the center of your card and move them around until you get an arrangement that you like. Glue down the leaves with the glue stick. Glue the “Happy Thanksgiving” strip to the bottom center of the card. Center and glue the center section to the front of the card.
18. To make an envelope for your card, print out the envelope template and cut it out. I laminated my template for durability because I use it a lot. Place the template on the back side of a piece of decorative paper. Trace around it with a pencil. Cut out envelope. Fold in tabs, using the ruler and bone folder as aids. Assemble envelope by putting double-sided tape about halfway up the side flaps and pressing tabs together.
You’re done!