Categories
DIY Gardening Home Decor

Making Holiday Centerpieces From Natural Materials

Making Holiday Centerpieces From Natural Materials

by Carolyn Hasenfratz

I enjoy walking around outside at any time of year. It takes more motivation to go outdoors in cold weather but I’m always glad at such times that I made the effort. A landscape that is mostly dry and brown may seem unappealing at first, but if you look closely at plants and their remains in winter you will see more textures, shapes and colors than you may have thought possible.

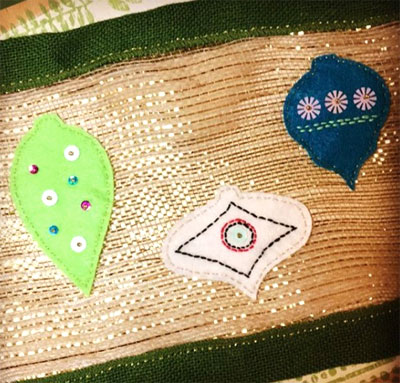
One way to enrich the way you see the winter landscape is to collect natural materials and use them to make centerpieces for your Holiday celebrations, or any occasion. I had the opportunity recently to join other volunteers at the Litzinger Road Ecology Center in making centerpieces for the annual Holiday party. We were provided with a variety of recycled and donated containers along with embellishments such as ribbon and floral accents. Our goal was to create arrangements of mostly natural materials from the prairie at Litzinger Road Ecology Center to make attractive centerpieces.


collecting natural materials from the prairie

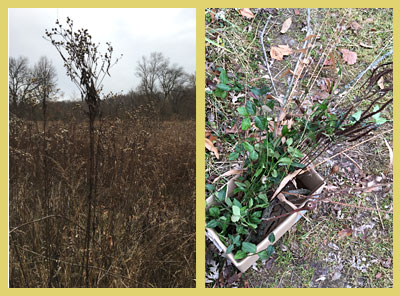
After taking a quick look at the available floral supplies, we spread out around the property to look for plant materials that we wanted to use. We collected reeds, grasses, seed heads, dried flowers, branches, feathers, vines, berries, pods, snake-skin, pine cones, nuts, bark, evergreen branches and more. A few plants were still green. Others provided many variations on dried plant colors – red-brown, silvery grey, dark brown, straw yellow hues and more. Often when we are working in the field we are mindful of the identification of plants. This time we were free to concentrate mainly on what the plant materials look like and what would make attractive combinations. Tall or short, delicate or bold, feathery or solid, rough or smooth – how can one enhance the other?

It’s enjoyable to go into a craft store and buy materials that fit a preconceived idea of what you want to make – it’s also a fun creative challenge to see what you can make out of the limited materials on hand with little to no pre-planning. I decided to be a little irreverent with my arrangement and use some green invasive creeping euonymus (Euonymus fortunei) which is a plant that may not quite be as hated as invasive honeysuckle here at LREC but could be a close second! To keep the vine green until the time of the party, I placed the cut ends of the vines into small bottles of water in the bottom of the glass container I was using. This also helped provide structural support since we did not have any florist foam in our supply stash to help hold tall stems erect.


Making a holiday arrangement with invasive euonymus vines


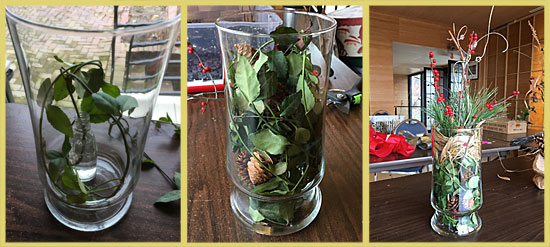
I added a few small pine cones among the green to break up the color a little bit, then I made a small donut shape of grasses and placed it in the vase on its side to provide extra structural support at the top. Then I added some branches with red berries, a few pine needles and some tall thin strips of wood with plastic crystals on them. A few red berries fell into the vase and down into the greenery so I added a few more here and there to make it look like I put them there on purpose.


finished arrangements made from natural materials and a few embellishments

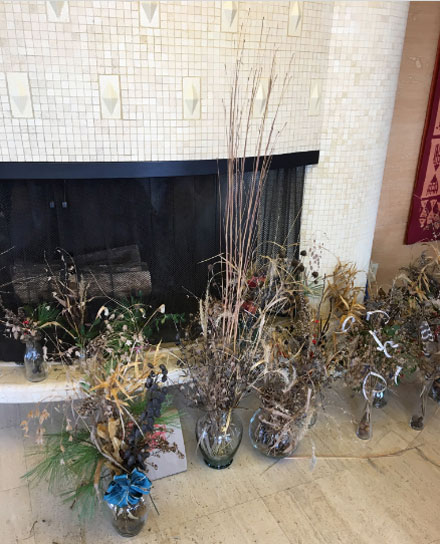
Finished arrangements made by other volunteers


Is there anything in your backyard that would look good in a Holiday arrangement? Explore with fresh eyes and you might find a new way to appreciate your garden in what we normally think of as the off-season. I recommend you take care to identify your finds if you have children or pets in the house who might eat things that they shouldn’t. Some common garden plants (and houseplants) are toxic. Have fun and see where your creativity takes you!

Categories
DIY Home Decor

Holiday Table Runner With Wired Burlap Ribbon

Holiday Table Runner With Wired Burlap Ribbon

by Carolyn Hasenfratz

To celebrate the Holiday season, here are instructions for making a table runner that uses some of the wired burlap ribbon that we sell in the gift wrap and decoration aisle at Schnarr’s Hardware in Ladue.

Tools and Materials
*indicates items available at Schnarr’s
Wired burlap ribbon*
Several different colors of felt
Ball-point pen*
Several different colors of embroidery floss
Embroidery sewing needle
Fabric Scissors
Masking tape*
Pins
Sequins
Seed beads
Sewing needle small enough to go through seed beads while threaded
Sewing thread
Scrap chipboard
Fabric
Washable fabric marker (optional)

Rolls of wired burlap ribbon that are available at Schnarr's Hardware in Ladue.
Rolls of wired burlap ribbon that are available at Schnarr’s Hardware in Ladue.

Cut a piece of wide burlap ribbon the length that you want for your table runner, plus about 4 extra inches for hemming. Before cutting, tape a piece of masking tape just inside where you plan to cut. The tape will help keep the ends of the ribbon from unraveling while you work.

Pin down the hems on the ends but don’t sew yet.

Fold wired burlap ribbon lengthwise and pin along the long sides of the wide ribbon.

Use a large needle and full thickness of one of your colors of embroidery thread to sew the ribbon in place with a running stitch just inside the wired edge.

Draw simple ornament designs or other holiday designs of your choice onto scrap chipboard. Cookie cutters are a great source for simple holiday shapes. Depending on how long your table runner is, you could possibly need a lot of felt shapes, so that’s why I suggest preparing chipboard shape templates to trace around. It’s quicker and easier than tracing around a cookie cutter. If you have stencils with designs you like, you could also use those or cut your own custom stencils.

Using the ball-point pen, trace shapes onto the back of your felt pieces. Cut out shapes.

Place felt shapes on your runner in an arrangement that you like. Pin in place.

Sew a running stitch along the edges of the felt shapes, attaching them to the wide burlap ribbon.

Stitch details to your shapes using a running stitch or other embroidery techniques of your choice with the various embroidery thread colors. If it helps to figure out where to sew details, you can draw the lines on the felt with a washable fabric marker. After you’re done sewing on the details, dab any washable marker marks that show with a damp cloth to get rid of them.

Accent the shapes with a few sequins. Hold the sequins on by bringing a thread from the back through a bead, around the side of the bead then back down through the sequin. Go back through each bead at least twice for durability. Sew a few beads by themselves among the sequins if you want to.

Pin and fold strips of fabric in a complementary color to the ends to cover up the raw edge of the ribbon. Sew in place with embroidery thread.

When the Holiday season is over, store your table runner rolled up so that the wire in the ribbon does not kink.

I have made a similar table runner using a fall leaf design. Here is a link to instructions on my blog:
Fall Table Runner with Wired Burlap Ribbon