Categories
DIY Home Decor Storage and Organizing Ways With Wood

Make a Rustic Message Center

Make a Rustic Message Center

by Carolyn Hasenfratz Winkelmann

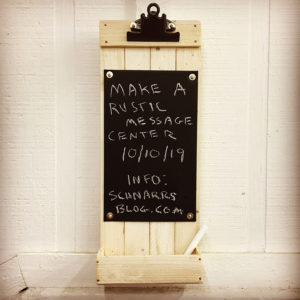
Make a Rustic Message Center from lath wood

For this message center to hang on a wall I deliberately used rough lath wood instead of smoother wood stock. I wanted to simulate the look of a utilitarian crate that is getting re-used for another purpose. I bought a bundle of new lath wood so that I would have enough for teaching and samples. You can use scrap wood that you have salvaged if you prefer. Salvaged lath wood often has bits of plaster clinging to it which is very interesting if you like the distressed look. A good source for salvaged lath wood is Perennial, a creative re-use studio where I occasionally teach. On the TV show “American Pickers”, they often pick up items for re-use that have “just the right amount of Stank on it” as they say. I know what they are talking about – it’s one of the reasons I love to work with salvaged materials mixed with new. I use a dust mask when sanding any wood, especially salvaged wood because you don’t know what’s in it or where it’s been!

Materials
Lath wood
*Small wire nails and tacks – some of them can be decorative if you choose. Recommended sizes – 19 x 1/2″ and 19 x 3/4″ (Quantity approx. eighteen 1/2″ and six 3/4″)
*Small wood screws – 4 x 1/2″ (Quantity six)
*Small washers – #6 (Quantity six)
*Chalkboard Paint
*Chalkboard Contact Paper
*Clipboard Clip (available at Schnarr’s Webster)
*Wood glue
Scrap cardboard
*Optional – White acrylic paint

Tools
*Sandpaper
*Saw
*Ruler
*Pencil
*Drill
*Tiny Drill Bit
*File
*Rags
*Paint water container
*Paint brushes
*Small clamps
Block of old wood for bracing wood while drilling and nailing
*Dust mask
*Squeegee or bone folder
*Utility knife, self healing cutting mat and *metal ruler, or paper cutter for cutting cardboard
*Phillips screwdriver
*Optional – small container for mixing paint wash
*indicates products available at Schnarr’s

Instructions

1. Cut 1 1/2 inch lath wood into the following lengths:

Four pieces – 15″
Five pieces – 6″
Two pieces – 1.5″

Use the pencil and ruler to measure and mark wood pieces, then cut.

Optional: Paint all the wood pieces on all sides with a wash of white acrylic paint and allow to dry.
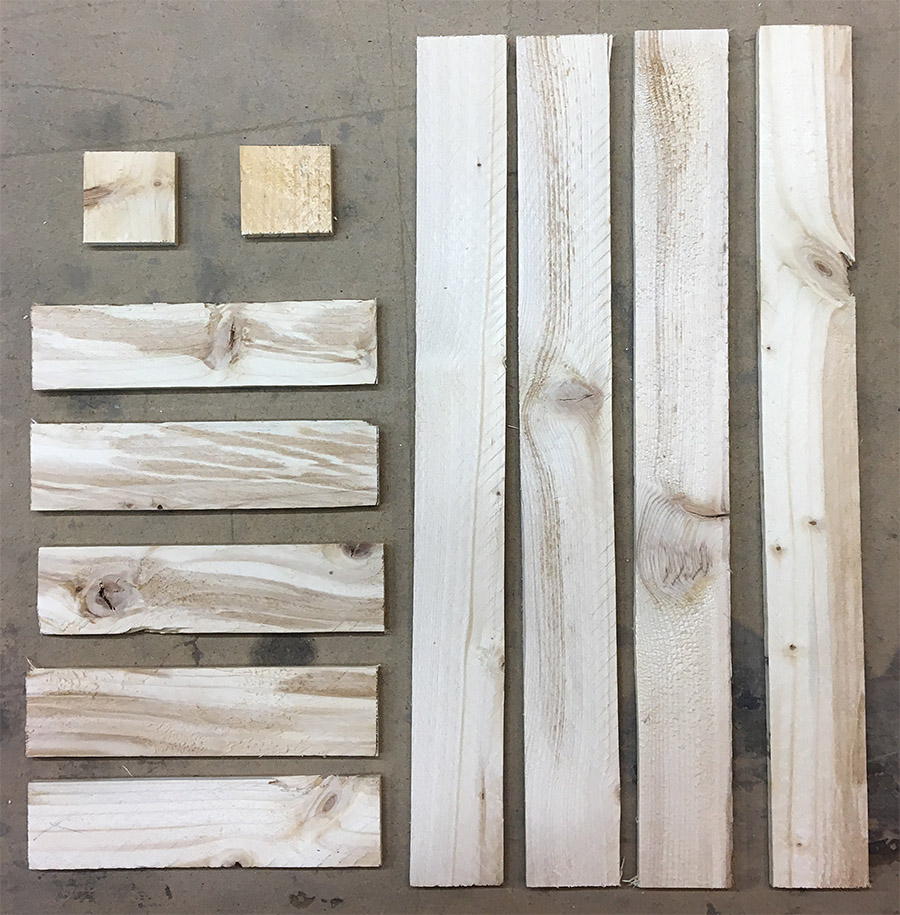
Pieces cut from lath wood
You will need to cut eleven pieces of wood for this project.

2. Sand the rough edges off of your wood pieces. You are probably wondering why I placed the step of sanding the wood pieces after painting instead of the other way around. The reason is it brings out the rustic look more because you’ll be removing some paint as you remove the rough spots on the wood.

3. Lay the four 15″ long pieces down on your work surface. Place one of the 6 inch strips about an inch and a half from the top. Add another right at the bottom of what will become the back of the message center. If it is helpful, draw a pencil line lengthwise on the wood to help you line up your nail holes. Draw little dots to show where the nail holes will go.

4. Squeeze a little wood glue on the backs of the wood cross pieces and clamp in place if you have trouble with the wood sliding around while you’re trying to work on it. If any wood glue squeezes out just wipe the excess off with a rag. Drill a little pilot hole for each nail. You don’t want the drill hole to go through all the way, it only needs to go in far enough to help the nail stay in place and to keep the wood from splitting at the surface as the nail goes in.

Hardware I used in this project - wire nails, wood screws washers and Clipboard Clips
Hardware I used in this project – wire nails, wood screws washers and Clipboard Clips

5. Hammer in your 1/2″ nails. If any poke through the front, file off the sharp parts.
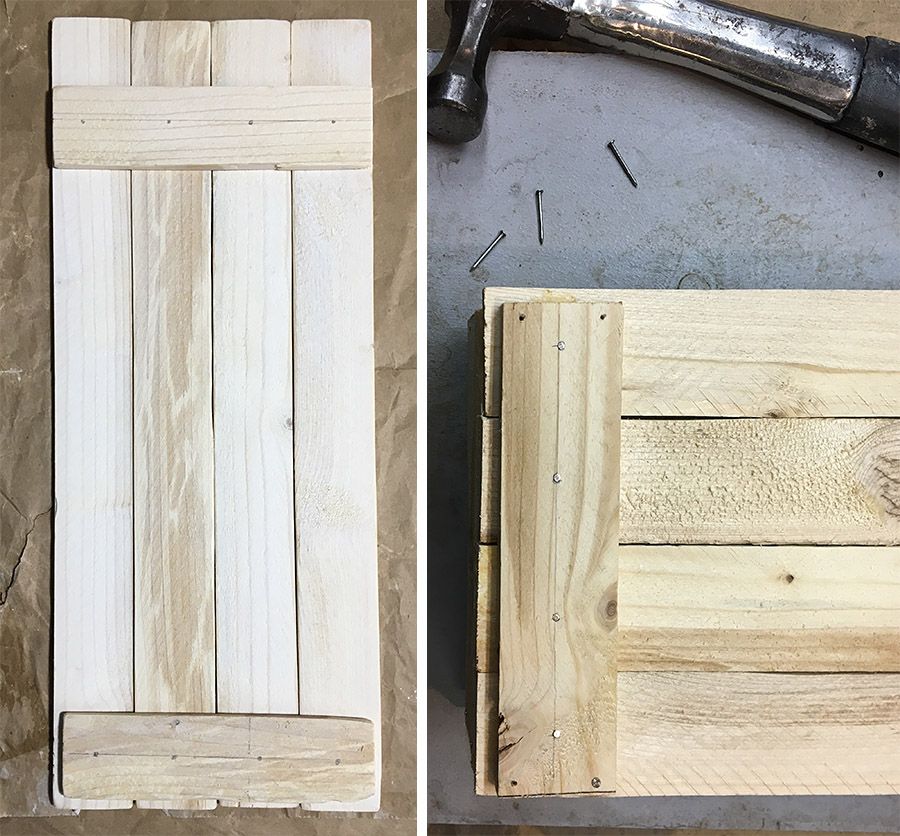
Nailing wood slats to back to hold vertical wood pieces together

6. Now start to assemble the tray that will be attached to the bottom front of the message center. Prop up one of the two small one and a half inch pieces of wood up against a piece of scrap wood. A small section of a 2 x 4 is the perfect size (2 x 4s are not really 2″ x 4″ as you can see.) Add a dab of wood glue and place a 6 inch cross piece on top, butting up the edges together. Drill a couple of pilot holes and nail in place. Repeat for the other end.

7. Add another 6″ piece to the bottom of the box and nail in place after dabbing with wood glue, then nail the whole assembly to the bottom front of the message center with 3/4″ inch long nails. It helps to prop up the other end with the 2 x 4 piece while you are nailing through the back.
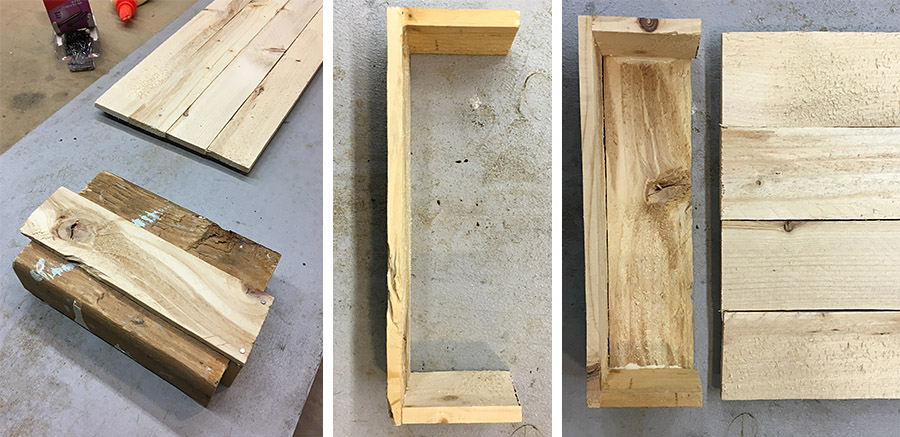
Making tray for the bottom of the message center.

8. Next make a small chalkboard for the middle front. Cut out a 5 1/2″ x 9″ piece of scrap cardboard and cover with chalkboard Contact paper. Cut the Contact paper slightly larger than the cardboard so that you can fold the edges over for a neat look. Burnish the paper with a squeegee tool to make a nice tight seal. Paint the front of the chalkboard over with chalkboard paint. (Unfortunately the Contact paper does not really take the chalk well enough by itself, but it makes an excellent base for the paint.) Let paint dry.
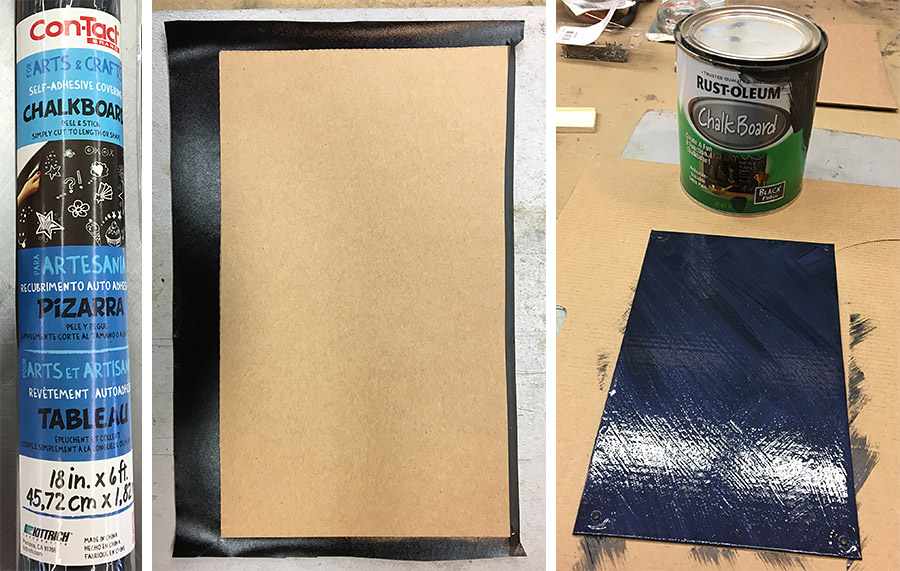
Cover a piece of scrap cardboard with contact paper, then paint over with chalkboard paint

9. Nail the last 6″ wood strip across the top front of the message center and glue and nail in place. Place the clipboard clip where you want it and make little pencil marks to indicate where to drill two holes for the screws to hold the clip on.

10. Drill the pilot holes then thread a washer on two screws and drive the screws in place.

11. Use a screw and washer on each corner of the chalkboard to attach in the middle front of the message center. You are done!
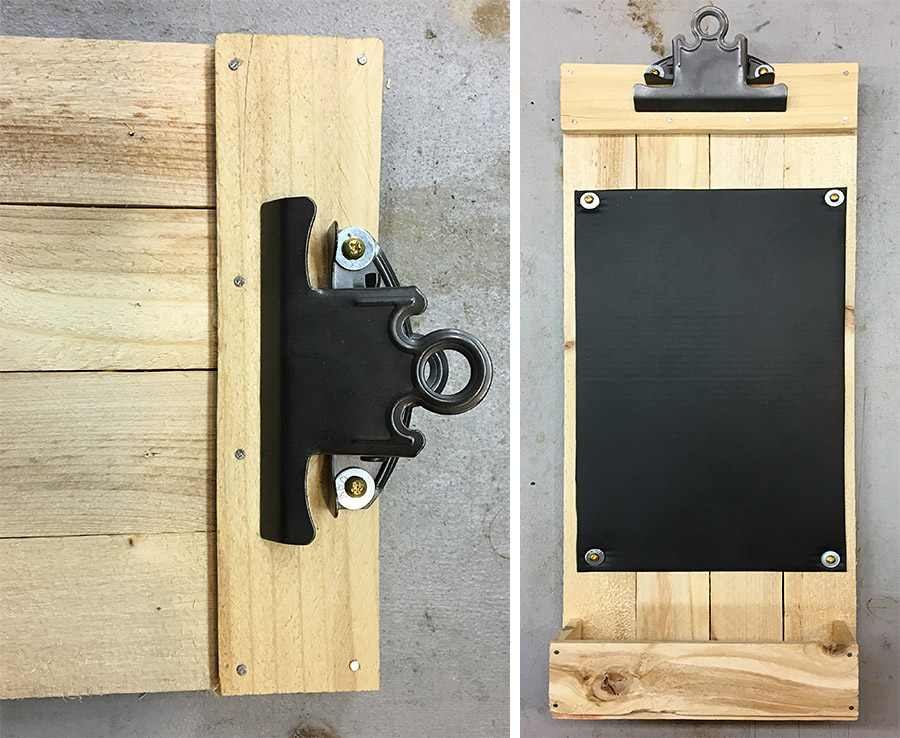
Attach the clipboard clip and you are done!
Attach the clipboard clip and chalkboard and you are done!

Do you want some more ideas for for things to make out of wood? Here is the Pinterest Board I made awhile ago that was the inspiration for this article:
Rustic Spring Ideas – this project isn’t only for spring of course, but I started working on it in February.

There are also some ideas for fun wood projects here on the Schnarr’s Pinterest site:
Ways With Wood
Categories
DIY Home Decor Upcycling Ways With Wood
Make a picture frame from scrap wood

Make a picture frame from scrap wood

by Carolyn Hasenfratz

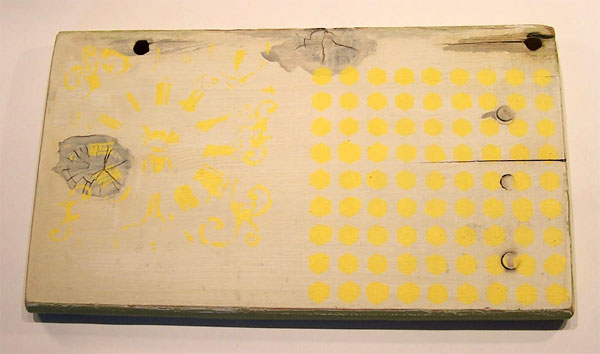
Have you taken down an old fence or pulled up an old wood floor? Are you getting some remodeling done or have access to scrap wood? It’s fun to make reclaimed wood pieces into unique picture frames. For my sample I purposefully chose scrap wood with a rustic and weathered appearance, welcoming flaws that don’t compromise the wood’s structural integrity such as saw marks, knots, plaster stains and nail holes. This project is designed to exploit the unique qualities of scrap wood – the flaws in the wood are part of the “decoration”. If you like you can choose new wood and give the surface whatever treatment that fits your decor. You can even buy wood made specifically for picture framing if you want a more conventional style of frame. I made this frame the size of an 8 1/2 by 11″ award certificate because this is a common size that a lot of people need.

Watch Video of Carolyn Teaching this Class at Schnarr’s Hardware in Webster Groves:
Part 1
Part 2

Materials needed:
Scrap wood approximately the size of lattice strips – 1 1/2″ wide by 2/8″ thick. For my sample I used wood lath salvaged from a demolished building. You can purchase new lattice strips if you don’t have access to the right size scrap wood.
Scrap wood strips – 2/8 – 3/8″ thick by 1/2 – 3/4″ wide. I obtained my strips from the scrap stashes available to me. You can buy such wood new if you need to where molding is sold.
Small washers
Staples for staple gun
Sandpaper
Aluminum flashing
Small nails – long enough to go through both layers of wood but not long enough to penetrate to the front of the frame
8 1/2″ piece of plexiglass, clear acetate or glass
8 1/2″ piece of chipboard, cardboard or mat board
Wire
Wood glue

Tools needed:
Mitre saw
Eye protection
Staple gun
Dust mask
Drill with tiny drill bit
Ruler
Pencil
Permanent marker
Sturdy scissors
Wire cutter
Large nail
Scrap block of wood
Hammer
Staple gun

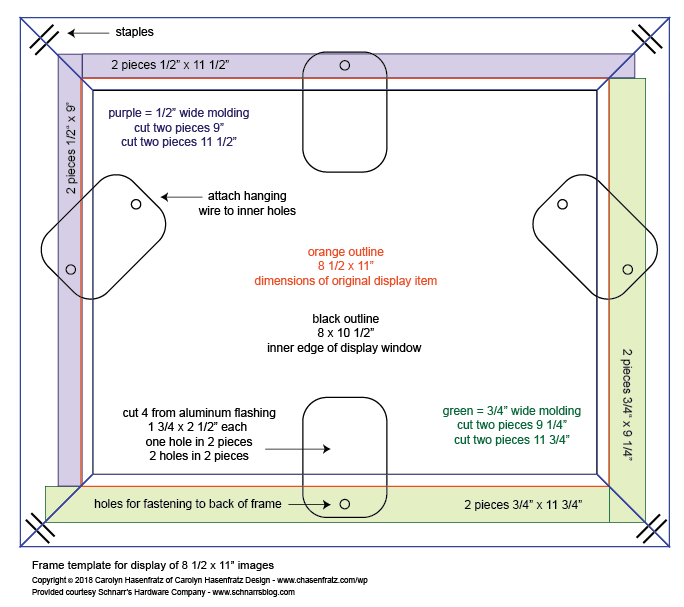
Click the diagram above to download a PDF copy to print out

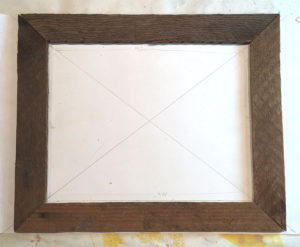
1. The inside edge of the opening for your framed picture will be 8″ x 10 1/2″. When finished the frame will overlap the framed image about 1/4″ all the way around. Mark with a ruler and pencil on the wood where the cuts will be. You might find it helpful to draw a rough diagram on paper to help visualize the cuts. Using a miter saw, cut four wood pieces with 45 degree angles at the ends. Wear eye protection when sawing and drilling.

2. Sand the cut ends of the wood. I did not give my wood any other treatment or finish. This is partly because I like the way it looks as it is. Another reason is that this wood was salvaged from a historic building that has great personal significance to me. I did not want to alter the historic integrity of the wood beyond cutting it to size. There are saw marks on the wood from the 1920s which I think are cool! Salvaged lath wood that has been separated from its original historic context is often available for purchase at Perennial, an art studio that promotes the reuse of materials. If you want you can give your scrap or new wood further treatments such as sanding, painting or staining for a variety of decorative effects. Wear a dust mask while sanding – it’s never good to breathe dust and old wood may have mold spores or contaminants.

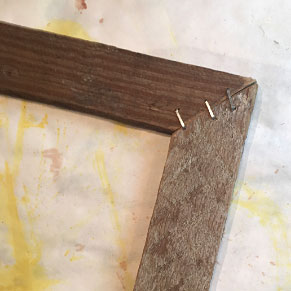
3. With a staple gun, shoot two or three staples into the back of the frame across each mitered corner. The staples will help tack your work in place until you can get some bracing installed on the back of the frame to make it more sturdy. Tap the staples with a hammer if they need a little extra help going all the way into the wood.

4. On the back of the frame, center an 8.5 x 11 piece of chipboard, cardboard or matt board and trace around it as a guide for placing narrow wood strips on the back for holding your protective layer (plexiglass, clear acetate or glass) and artwork.

5. To make the bracing, cut four pieces from the wood strips that are approximately 2/8 x 3/8 inches thick and 3/4 to 1/2 inches wide. The lengths you cut from with wood will be slightly different depending on how wide the strips are. Cut them so that the inside edge opening is 8 1/2 by 11. Make the lengths 9 inches for the short side and 11 1/2 inches for the long sides if using 1/2″ wide wood. If using 3/4 inch wide wood use 2 9 1/4″ pieces and 2 11 3/4″ pieces. If you are using wood in different dimensions just cut them so that the opening id 8 1/2 x 11″. Since you’ll be attaching these pieces to the back of the frame, if the pieces don’t all match or don’t line up perfectly it doesn’t matter, they won’t be visible. Sand pieces smooth.

6. Apply a line of wood glue on the back of each wood strip then press in place on the back of the frame. Drill small pilot holes, about three per strip, then nail the strips to the frame.

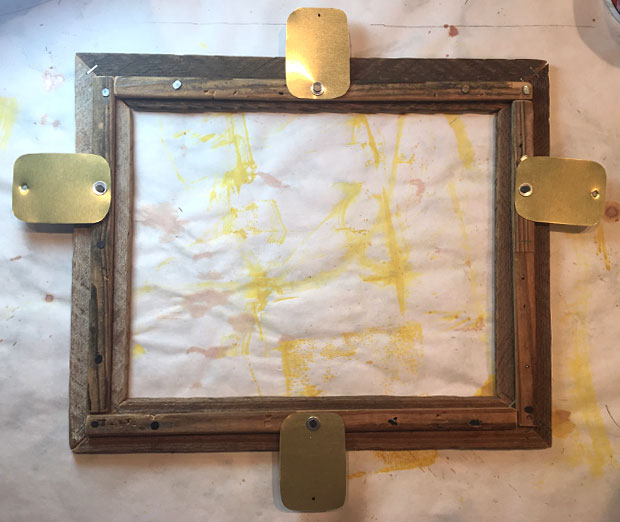
7. Next make some metal tabs to hold the artwork into the frame. These tabs are designed to swivel in and out so that you can easily take out or put in artwork. Draw four rectangles with permanent marker, 1 3/4 by 2 1/2 inches each, onto aluminum flashing. The flashing we sell has both a silver colored side and a brass colored side. These tabs won’t be visible when the frame is on the wall but if you have a preference for one side or the other keep that in mind. Using a sturdy pair of scissors cut out four pieces and round the corners to avoid sharp points. Sand or file the metal peices to get sharp edges off if necessary. On two of the pieces drill or punch one hole toward one end, on the two other pieces drill or punch a hole in each end. An easy way to punch a hole is to place the flashing on a scrap wood block and hammer in a large nail where you want the hole.

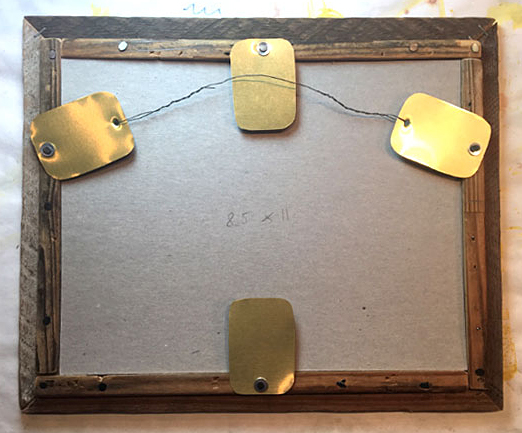
8. Attach the four flashing pieces to the back of your frame as shown on the diagram. Place a small washer under each nail head.

9. You are now ready to add artwork to the frame. First put in your clear protective layer (the glass, acetate or plexiglass), the display item, then a stiff layer of chipboard, cardboard or mat board to protect the artwork from the back and keep it from falling out. Rotate the tabs inward.

10. String a piece of wire from inner holes on the two-hole tabs from one side to the other for hanging. You’re done!

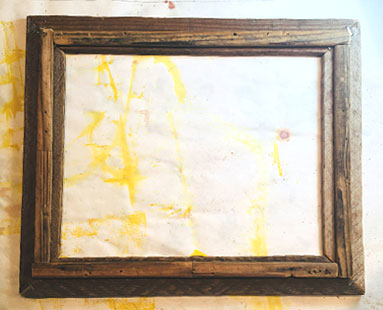
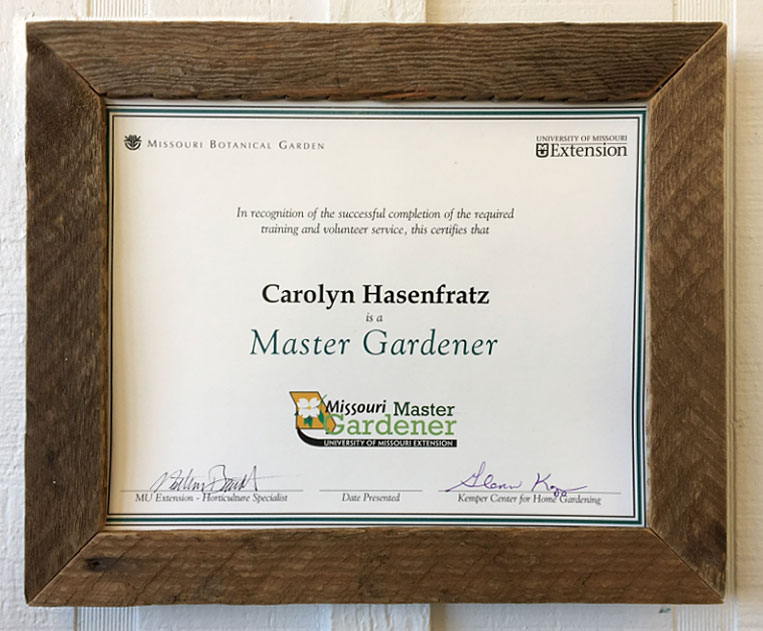
Here is how my frame looks with a certificate displayed in it:

Suggestions For Sources of Scrap Wood
Ask home improvement stores for scraps.
Volunteer to clean out someone’s garage or workshop in exchange for keeping some interesting wood pieces.
Make inquiries of people you know who are doing home improvements.
Look in thrift stores for picture frames or cheap pictures in frames that you can get parts from.
Make a request for wood pieces from the Freecycle community – freecycle.org
Walk your neighborhood on trash day – I’ve found so much usable wood that way.
Purchase salvaged supplies from a non-profit studio that specializes in reclaimed materials such as Perennial or Leftovers, Etc..

Categories
Backyard Wildlife DIY Gardening Sustainability Upcycling Ways With Wood
Make a Pollinator House – Part 2

Make a Pollinator House – Part 2

by Carolyn Hasenfratz

In my previous article Making a Pollinator House – Part 1 I explained why you might want to build a home for native bees and other beneficial insects for your garden. I also provided an example of a quick way to build a shelter out of cinder blocks, wood scraps and dried plant material. I promised to write up plans for a more attractive pollinator house. Here are instructions for building two different designs to enhance your garden’s decor as well as it’s productivity and ecological health.

Tools and Supplies
* indicates items that are available at Schnarr’s
Tracing paper
Pencil
Ruler*
Hot glue gun*
Wood hot glue sticks
1″ x 6″ x 8′ multipurpose board*
2″ x 4″ x 8′ board*
Saw*
Sandpaper*
Dust mask*
Acrylic craft paint
Paint brushes*
Water container*
Heat tool for speeding up drying (optional)
Painters tape or masking tape*
Decorative stencils
Sponges*
Drill*
Tiny drill bit*
Nails*
Window screen*
Hammer*
Wood glue*
Clear matte finish varnish*
Hardware cloth or chicken wire (optional)*

For the additional second design with the pediment, you’ll also need:
Assorted sizes of distressed wood pieces
Decorative brass box corner*
Miter saw*
3/16″ drill bit*
3/16″ dowel rod*
Wooden ball knobs or drawer pulls* with 3/16″ holes to use as feet

Mid-Century Modern style pollinator house

Instructions for Style #1 – “Mid-Century Modern” Pollinator House

1. Download the PDF document “Pollinator House Assembly Diagram”. It is sized to print out on a legal-sized piece of paper. Recreate the diagram in scale on a piece of tracing paper with pencil.

2. From the 1″ x 6″ x 8′ board, cut two 12″ x 5.5″ pieces(although the board is called 1″ x 6″ x 8′ it’s probably closer to 5.5″ so you might only have to cut the board into 12″ lengths).

3. From your 2″ x 4″ x 8′ (probably really 3.5″) board cut two 5″ segments.

4. Put on a dust mask and sand your wood pieces until smooth.

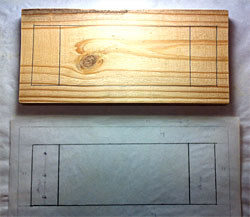
copy diagram onto wood
5. Mark each of your 12″ x 5.5″ pieces with the rectangles shown in the diagram. These will become the inner top and inner bottom of your house.


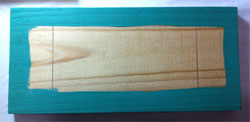
paint around edges
6. Paint a color of your choice in the border around the inner rectangle on each piece. For this step you don’t have to worry about painting precisely in the lines. Let paint dry.


7. Mark off around the middle rectangle with masking or painter’s tape on both pieces and paint black. When paint is dry, remove tape.

paint middle of boards black


8. Paint what will be the insides of your 5″ high supports black. Paint all other surfaces of your wood pieces assorted colors of your choice.

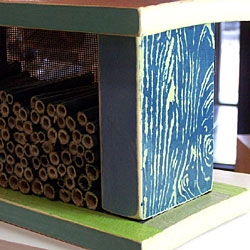
decorative stenciling
9. Decorate the top of your house and the sides of the supports with decorative stencils. I did not decorate the board edges with stenciling in my sample but you can if you want to. If you are new to stenciling on wood, see this article for tips –
Stencil a Wood Garden Sign.

10. Sand all the edges of your wood pieces so that the bare wood shows through on the corners. This gives the wood a distressed look. If you want to distress any other painted or stenciled surfaces further you can do so by roughing them up with sandpaper.

11. To assemble the house, stage the upright pieces by placing them in their footprints as indicated on the diagram on one of the 12 x 5.5″ pieces. Face the black painted sides inward and the stenciled sides facing out. If you’ve covered up your pencil lines with paint, you can use your diagram to redraw them as needed.

12. Load up your hot glue gun with wood project glue sticks and plug it in to heat up. Apply hot glue to the bottoms of the support pieces and press in place. Let glue harden.

13. Glue the other ends of the supports in place on the other 12 x 5.5″ piece. Let glue harden.

14. Place the tracing paper diagram on top of your house. Mark where the nail holes will go in pencil. Drill small pilot holes then hammer nails in. Repeat for the bottom.

15. Mix some dark brown paint with water to make a thin wash and paint over the whole house. Test first on the bottom to make sure it’s not too heavy or light. Alternately, you could use a wash of off-white paint if you’d rather have a pale wash. The purpose of the wash is to give an aged appearance to the wood – this is particularly effective when the paint clings to the corners that have been bared by sanding. Let paint dry.

16. Paint whole house with clear matte varnish.

17. Cut out a 10 x 5″ piece out of scrap window screen and nail it to the back side. This is to keep whatever materials you fill the house with from falling out the back side.

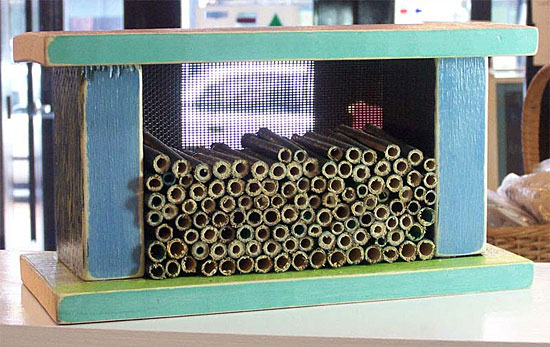
18. Fill the house from the front with materials that contain holes for pollinating insects such as native bees to live in.

Some suggestions of materials you could use to fill the house:

  • Bamboo or reed segments
  • Rocks
  • Rolled up corrugated cardboard
  • Chunks of scrap wood with holes drilled in it
  • Bundles of twigs or straw
  • Unfired ceramic clay with holes poked in it
  • Natural dried stems and reeds from the garden cut into segments
  • Dried seed pods

If necessary, cut out a piece of hardware cloth or chicken wire and nail it over the front to hold materials in.

19. Read this article for ideas on where to place the house in your garden or yard –
Making a Pollinator House – Part 1.

Depending on where you want to put your house, you may want to attach hanging hardware to it or mount it on a post. The wood pieces we used are thick enough to give you flexibility in attachment options.

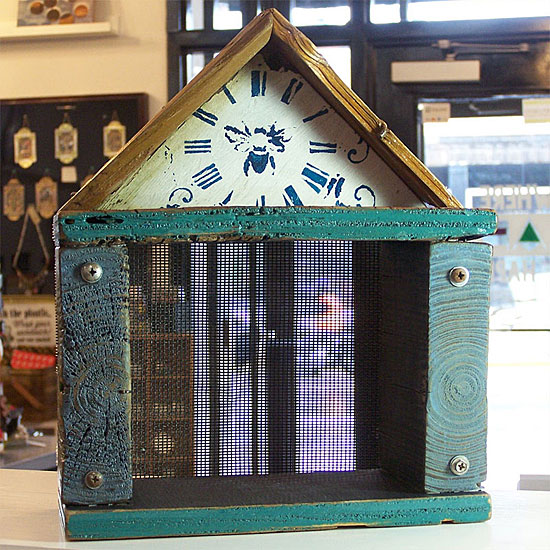
Pollinator House with Pediment

Instructions for Style #2 – Pollinator House with Pediment

The prototypes I made for the second design vary somewhat in size and proportions because I used distressed wood that I had lying around. I designed the houses around what wood I had available and embellished some with found objects or hardware. If you want to build similar houses and don’t have access to distressed wood, you can use new wood.

1. Cut out two chunky pieces of wood to use as uprights and two thin pieces to use as the top and bottom.

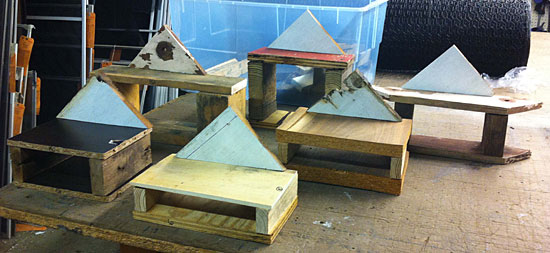
Different pollinator house designs

2. Cut a right triangle out of wood that is 3/4 to 1″ thick for the pediment piece. A pediment is like a roof gable that is decorative rather than functional. My samples vary slightly in size but the triangles are mostly around 7 1/2″ inches on the long side and 3 3/4″ on the short sides.

3. Choose some thin, narrow wood pieces for the roof overhang. Lattice wood strips are about the right size – if you don’t have any distressed wood in that size range you can purchase some lattice strips to use. Cut these strips into approximately 6″ pieces and miter the corners.

4. Sand all wood pieces.

5. Paint the sides of your wood pieces that will become the interior with black paint.

6. Paint the other sides and parts in assorted colors of your choice.

7. Stencil a bee design or other stencil of your choice on the front of the triangle.

8. If you think any of the other wood surfaces need to be enhanced with stencil designs, decorate those also. Since many of my wood pieces were distressed and had a pronounced wood grain, knots, old nails and other irregularities I let those provide the visual interest in many areas. Antique look, vintage look, grunge or botanical stencils would be especially effective for this design.

9. Sand the edges of your wood pieces to expose the bare wood on the corners and distress any other areas that you think are in need of it.

10. Hot glue the vertical support pieces to the top and bottom of your house then nail in place.

11. To assemble the pediment section, put your two roof pieces in a miter clamp with the mitered ends butted together to make the roof point. Put a little wood glue on the ends as you do this. Position the clamped-together pieces on a block of scrap wood to brace them. Drill small pilot holes in one end and hammer in small nails. Slip a couple of nails in between from the other direction.

Creating roof peak with miter clamp and nails

12. Take your triangle pediment and apply hot glue to the top edge. On your work surface, lay the pediment down, slide the triangle part in and press in place. When the glue has hardened, hammer small nails through the roof pieces into the pediment for extra hold.

Attach roof overhang to pediment

13. Apply hot glue to the bottom of the triangle section. Place in place on top of house and let the glue harden. Drill two pilot holes at each end and drive long thin nails down into the supports below.

14. If you would like to attach wood feet to the bottom of your house, drill 3/16″ holes into the bottom of the house. Cut short pieces of 3/16″ wood dowel rod and put wood glue on both ends. Insert one end of each dowel rod piece into a hole in the house and the other end into the hole in a wooden ball knob or drawer pull.

15. Mix some dark brown paint with water to make a thin wash and paint over the whole house. Test first on the bottom to make sure it’s not too heavy or light. Alternately, you could use a wash of off-white paint if you’d rather have a pale wash. The purpose of the wash is to give an aged appearance to the wood – this is particularly effective when the paint clings to the corners that have been bared by sanding. Let paint dry.

16. Paint whole house with clear matte varnish.

17. Attach a decorative brass box corner to the roof peak.

18. Cut out a piece out of scrap window screen and nail it to the back side.

19. Fill house with nesting materials and place in a suitable location.

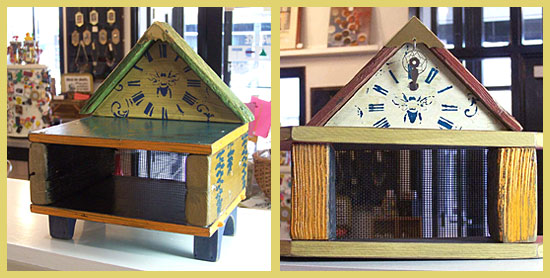
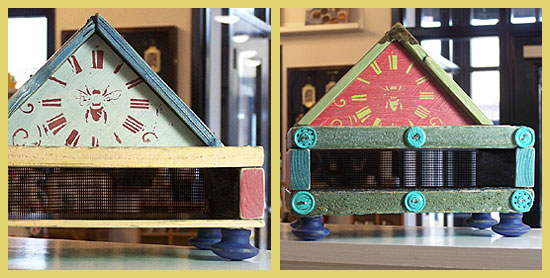
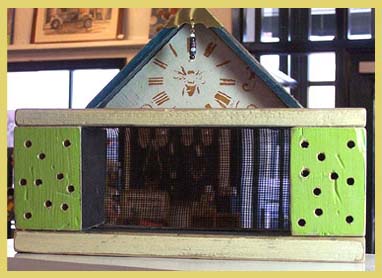
Here are some pictures showing how some of the other houses turned out.

Pollinator houses made with distressed wood

Pollinator houses made with distressed wood

Pollinator house made with distressed wood

Categories
DIY Ladies' Night Upcycling Ways With Wood
Stencil a Wood Garden Sign
Stencil a Wood Garden Sign
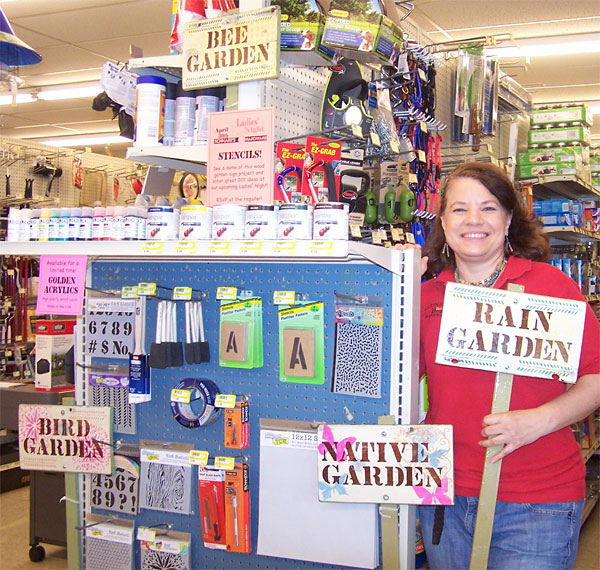
Schnarr's employee Carolyn with several finished signs and a selection of supplies you can use to make one. Carolyn will be demonstrating stenciling at our Ladies' Night on April 30, 2015.
Schnarr’s employee Carolyn with several finished wood garden signs and a selection of supplies you can use to make one. Carolyn will be demonstrating stenciling at our Ladies’ Night on April 30, 2015.
How would you like a practical and decorative wood garden sign? Stencils are handy for such a project because they are available in letters, numbers and lots of fun decorative designs.
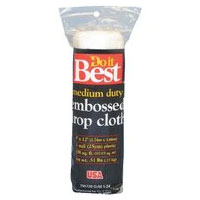
Here are the tools and materials you will need:

Pencil
Paper
Ruler
Tracing paper
Letter or number stencils
Decorative stencils
Wood
Acrylic or latex paint
Bristle paintbrush(es)
Water container for paint brushes
Rags
Sandpaper
Dust mask
Freezer paper
Drop cloth
Wide painter’s tape or low-tack masking tape
Small disposable plastic cups
Wooden stake
Sponge brushes or sponge pieces (at least one for each color)
Plastic lids from food containers
Large water container (preferably shallow and flat)
Optional – hair dryer or heat tool
Old toothbrush
Outdoor wood varnish with sun protection
Paint thinner for cleaning brushes if using brush-on varnish
Drill
Drill bit
2 bolts
2 nuts
2 washers (optional)

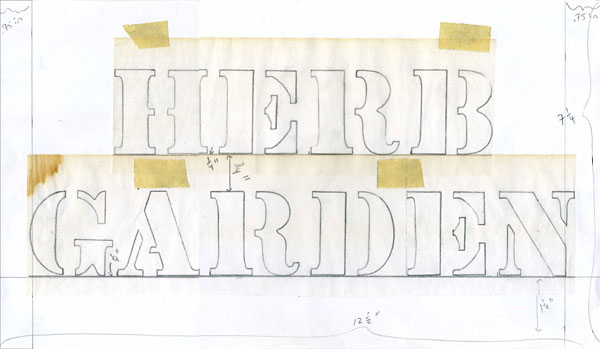
The first step in making such a sign is to decide how big it should be. If you have some scrap wood available, you could let the size of the wood pieces you have on hand determine your design. In my case, I had some used, distressed long boards that were 7 1/4 inches wide. I got out some stencil letters and decided how long my wood piece should be to fit the lettering I wanted on the sign. I worked out some lettering samples on tracing paper and taped these to a piece of paper to determine my final sign size – 7 1/4 x 16 1/2 inches.

Working out my stencil design on paper for my wood garden sign.
Working out my stencil design on paper.

If you don’t have scrap wood to start out with, you can just make your design any size you want and get your wood cut to order. Work out your design ahead of time using pencil, paper and tracing paper, then go get your wood cut or cut it to size yourself. I recommend using wood of a 3/4 to 1/2 inch thickness. If you buy a board at Schnarr’s we will cut it to length.

After the wood is cut, sand it smooth. I recommend you wear a dust mask while sanding. Wipe off the dust with a damp rag.

The next step is to decide on a base or ground color for your sign. For this project I am using all acrylic or latex water-based paints (except for the varnish layer). You can use a dark color as base and stencil on it later with light colors, or make your ground color light with darker colors stenciled on later. If you like the distressed look that I am so fond of, you can put an additional color under the ground color and let some of it show through by sanding on the corners and other strategic places on the sign. You can make the back and sides a different color like I did in my sample or make it all one color. Freezer paper or drop cloths are handy for protecting your work surface while you paint.

Since I was starting with distressed wood with some paint already on it, I let the existing color influence my other color choices. My scrap wood had previously been painted white over a light green. Some of the green showed through the white as I was sanding. There were a few spots where the paint had peeled away entirely showing dark wood underneath. I wanted to tone down these areas but not cover them up entirely so I decided to paint the front of my sign with an off-white wash to preserve some of the distressed look and create a more even ground for the subsequent design. After the off-white wash was dry I painted the back and sides of my sign green.

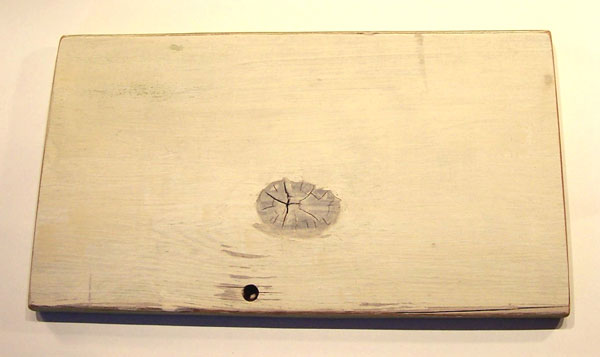
Distressed wood cut to size, painted, sanded and read for stenciling on wood garden sign..
Distressed wood cut to size, painted, sanded and read for stenciling.

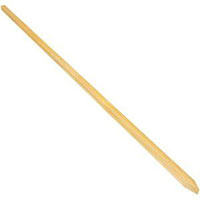
For a vertical post to use for mounting my sign, I chose a wood stake available at Schnarr’s. I sanded it smooth then painted it green.

After the paint is dry, sand the edges on the sign and post to make them look distressed and wipe both with a damp cloth to get all of the dust off.

Now it’s time to actually start stenciling. Get your work area ready by placing your paints, stencils, tape, small brushes for mixing, water container, rags, small plastic cup, sponge brushes or sponges, and plastic lid where you can reach them. At your feet or on the table if there is enough room, place a large flat container filled with water. This is for placing your stencils and other tools in to soak when you are done using them. This can be a messy process so wear old clothes.

The next step is to apply some background design in a light color. I wanted to add a little interest to the background and edges without detracting too much from the lettering that would be applied later, so I chose a light yellow paint for my sample.

Choose a stencil and tape it in place on your wood sign.

Mix some light yellow paint in a little plastic cup. Do not mix any water into the paint. Dab some paint onto a plastic lid. If you don’t have a plastic lid, a little square of freezer paper taped to your work surface will serve as a disposable palette. Press your sponge or sponge brush into the paint and dab it onto the lid a few times to distribute the paint. You want a light application of paint to start out. If you are new to stenciling, you most likely will overestimate the amount of paint you need and use too much, so start with less than you think you need – you can always add more but if your paint application is too heavy it could bleed under the stencil.

Start pressing the sponge lightly into the stencil openings. Dab very gently at first and increase pressure gradually until all the open areas are filled with paint. When you are satisfied, lift the stencil.

Starting to develop the stencil design with some yellow in the background for wood garden sign..
Starting to develop the stencil design with some yellow in the background.

If you are finished with that particular stencil, put it in the large container of water to soak. If you are going to use the stencil again on another part of the sign, move it and continue stenciling until you are finished, then soak it.

When you are finished with a color, put the sponge and plastic lid in the water container for cleaning later. Do not attempt to clean the sponge or sponge brush and use it immediately for a new color – you will have to start with a clean dry sponge for the next color because water makes the paint too runny and it will bleed under the stencil.

Acrylic paint dries quickly. It won’t take long for your first layer of paint to be dry enough to work on the next layer, but if you need to speed up the drying you can hit it with a hair dryer or heat tool. Repeat the above steps with each new color until your sign is complete.

If you are using letters or numbers on your sign, you can draw a line with pencil or ruler to help you apply them in a straight line, then erase the pencil line later after the paint is dry.

Wood garden sign in progress with two colors

Wood garden sign in progress with two paint colors in place.
Finished wood garden sign with stencils.
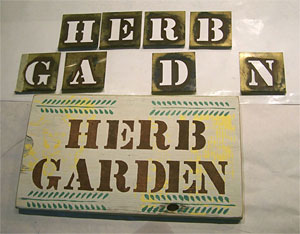
Antique brass stencils with the lettering they made on my sign.

To clean your stencils and tools, swirl them around in the water to get out as much paint as possible. Squeeze all the paint you can out of the sponges and brushes. If needed clean with soap. Rinse and let them dry on a rag. Dump out the paint water and replace with fresh. Scrub your paint lids and stencils with a toothbrush to get the remaining paint off. Acrylic paint doesn’t have much of an affinity for sticking on plastic especially if soaked, but if allowed to dry prior to soaking some spots might be stubborn. If all the paint doesn’t come off it won’t affect future use so don’t worry about it. Remove as much paint as you can, rinse off stencils and lids and let dry.

When your sign is completely dry, if you are going for the distressed look rough up the design in a few spots with sandpaper. Wipe off dust.

Coat both sign and post with outdoor weatherproof wood varnish, preferably one with sunlight protection to help keep your paint colors from fading. Follow the safety directions on the container for both varnish and paint thinner as they can be dangerous if not handled properly. Do not use a sponge brush for the varnish, it will dissolve. You can avoid the hassle of dealing with brushes and rags and paint thinner by using a spray varnish instead of a brush-on product. I used a brush-on varnish because it’s more economical and I think I get a thicker coat by using a brush. Ultimately, you can make your varnish choice based on your personal application preference.

When varnish is dry, drill two holes in both sign and post to accommodate the bolts that will hold the sign together.

Connect sign to post with nuts and bolts. Place a washer behind the bolt head for a more finished look. Bolts are preferred over nails for this project so you can easily replace the post if it rots over time.

Install your sign where you want it by hammering it into the ground.

If you would like to read about how to cut your own stencils, see my article Fun with Stencils.

If you are interested in attending our Ladies’ Night on April 30, 2015 remember to RSVP (on Facebook and via email [[email protected]]).

Available at Schnarr’s:

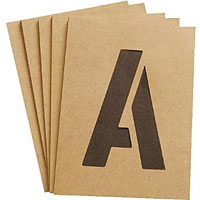
Letter and Number Stencils

Letter and Number Stencils

Masking Tape

Masking Tape

Indoor Outdoor Varnish
Indoor / Outdoor Varnish

Sandpaper

Sandpaper
Sponge Brushes
Sponge Brushes

Valspar Indoor Outdoor Latex Enamel

Freezer Paper

Freezer Paper

Wood Stake

Wood Stake

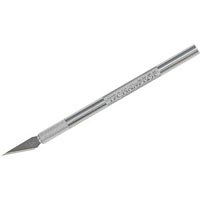
Hobby Knife
Hobby Knife

Hobby Knife Blades

Hobby Knife Blades

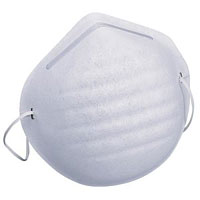
Dust Mask
Dust Mask

Drop Cloth
Drop Cloth