Kitchen Backsplash Project Part III – Filling in the Tile “Murals”
It’s a good thing I make detailed notes as I work, because this kitchen backsplash project underwent a two and a half year hiatus! I didn’t really plan to neglect the project for that long, but in 2013 and 2014 I did a lot of art and craft shows and my studio space and time was necessarily diverted to that pursuit rather than home improvement projects. In 2015 I’m doing fewer shows and determined to finish some of what I started earlier!
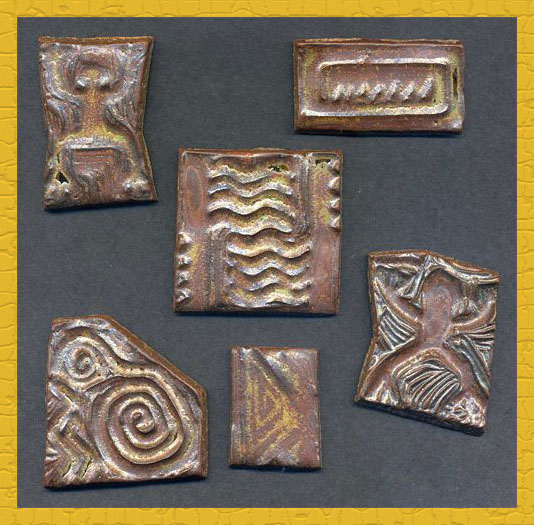 The next step in finishing my kitchen backsplash is to complete the tile work in four frames spaced at intervals above the strip. These are inspired by Spanish and Mexican tile murals in their shape and placement though they don’t attempt to depict any kind of representational scene. In the interim I had carved some new rubber stamps of ancient petroglyph designs and made some small stoneware tiles from them which I decided to include.
Using paper templates, I laid out my designs on trays in the studio, then transported them to the kitchen.
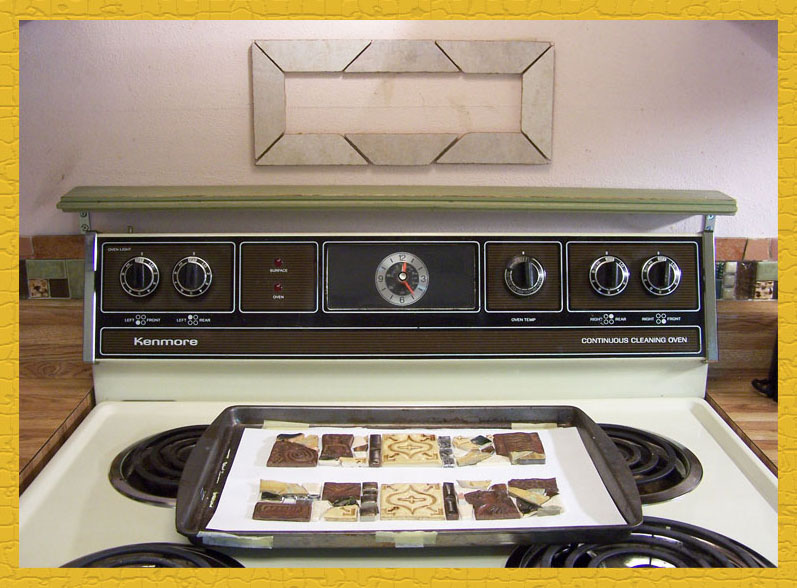
As you can see in this picture, since I last worked on the tile strip, I installed a narrow shelf above the back of the stove. This is made from a piece of recycled flooring. I painted it in a color harmonious with my intended future paint scheme and sanded the edges for a slightly distressed look. I used corner brackets to mount it to the wall, attached with screws so I can remove it when it’s time to paint the wall. It is meant for holding some of the small Southwestern-themed collectibles that I keep in the kitchen. Later on I’m going to install another shelf above this frame with hooks on the underside for displaying a favorite set of collectible coffee cups.

Here is the frame partially filled with tile. Using a pencil and ruler, I marked where the large tile in the middle would go then worked out from the middle and the edges. I dabbed a bit of tile cement on the back of each piece and pressed it in place. Normally with tile work a quantity of cement is spread out on the surface first before the tiles are placed, but my way of working is slow so I wanted to make sure the cement didn’t dry before I could finish an area.
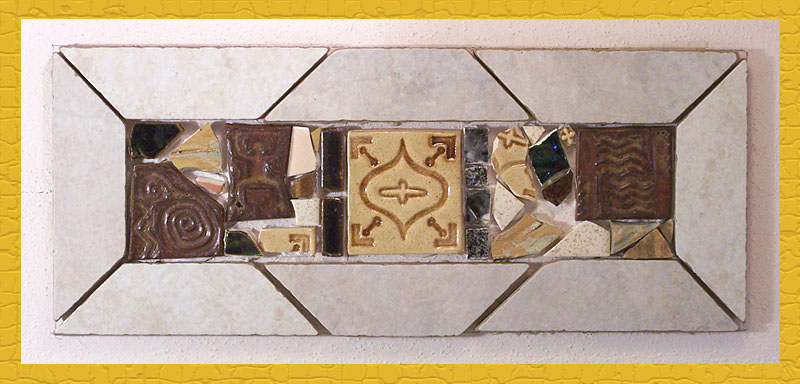
After the tiles are allowed a sufficient time to dry according to the directions on the tile cement bucket, the next step is to grout the tiles!