Introduction to Letterboxing – Part I – Carving a Personal Stamp
What is Letterboxing? It’s a fun outdoor hobby that is kind of like a lower-tech version of Geocaching. Letterboxers hide small, weatherproof boxes in publicly accessible places (like parks) and distribute clues to finding the box in printed catalogs, on one of several web sites, or by word of mouth. Individual letterboxes contain a notebook and a rubber stamp, preferably hand carved or custom made. Finders make an imprint of the letterbox’s stamp in their personal notebook, and leave an impression of their personal signature stamp on the letterbox’s “visitors’ book” or “logbook” — as proof of having found the box and letting other letterboxers know who has visited. Many letterboxers keep careful track of their “find count”.
To begin looking for letterboxes, you need a simple toolkit – a personal signature stamp, a stamping ink pad to carry with you, a personal logbook to carry with you and some hunting clues. In this class I will show you how to make the signature stamp and in the next segment you’ll learn how to make the logbook. You can buy the stamping ink pad from a craft supplier. Clues are available on web sites and at least one mobile app.
Materials
*indicates items that are available at Schnarr’s
*Tape
Tracing paper
Rubber carving material
Rubber stamping ink pad
*Ziploc bags
Tools
Pencil
Ball point pen
*X-Acto knife and blades
Carving tool with interchangeable tips with v-gouges and u-gouges in different sizes
*Scissors
Squeegee or bone folder
Scrap paper
*Metal ruler
Part 1: Making the stamp
Letterboxers choose a trail name and typically carve a personal rubber stamp that incorporates their trail name or relates to their trail name. Here is what my personal stamp looks like.
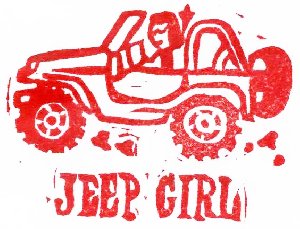
I intended to use the trail name “Jeep Girl” because that was my CB handle in my Route 66 club. I carved my stamp before I checked one of the letterboxing web sites and discovered that “Jeep Girl” was already taken, so I changed my letterboxing trail name to “Jeep Girl 66”. I recommend that when you are considering trail names to check to see if the one you want is already taken. Here are the web sites to perform those searches:
Atlasquest – https://www.atlasquest.com
Letterboxing North America – http://letterboxing.org
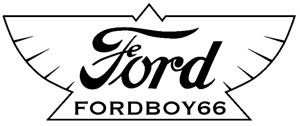
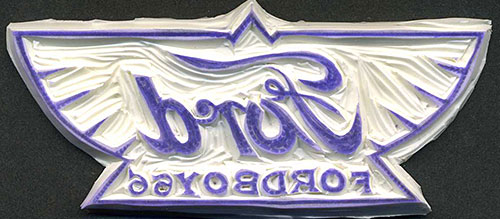
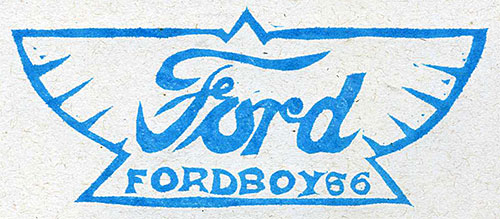
1. Once you know what your trail name is going to be, create a stamp design to complement it. You can draw your design by hand or on a computer if you have access to computer graphics software. My fiance Tom needed a stamp to go along with his trail name “fordboy66” so here is a design I came up with using computer graphics tools inspired by the Ford logo from 1912.
While you are designing your stamp, keep in mind what size your carving is going to be. My stamp is pretty big so that the details were easy to carve. Draw or print out your design at the actual size that you want your stamp to be.
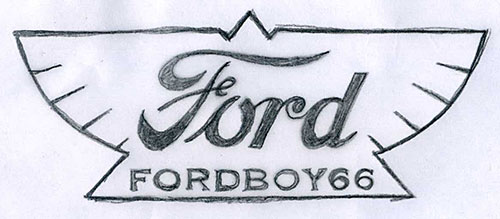
2. Next tape a piece of tracing paper over your design and trace using a relatively soft pencil that’s been sharpened really well. You want to be able to capture detail but use soft graphite if you can so that the design will be easy to transfer to the rubber.
3. Lay your tracing graphite side down onto your rubber carving material and tape in place. Draw over your lines again from the other side with the pencil to transfer your drawing to the rubber. Lift a portion of the tracing paper to see how well the design has transferred before you move it. You can also rub all over the paper with a squeegee or bone folder to make sure you went over all the lines.
![]()
4. Remove your tracing and set aside. Go over the pencil lines on the rubber one more time with a ball point pen so that when you are working your design won’t be rubbed off. If possible, choose an ink color that is close to the color you’ll be stamping because for the first few printings a little ball point pen ink is probably going to get into your stamp print. The pen ink will wear off in time.

With so many redrawings needed to get your design transferred, some imperfections will creep in. Part of the charm of Letterboxing is the hand-carved quality of the stamps, so please don’t see this as a defect. Fun and adventure are what is important – high quality carvings are appreciated but not a requirement. People of all skill levels can make a carving that is good enough for the job.
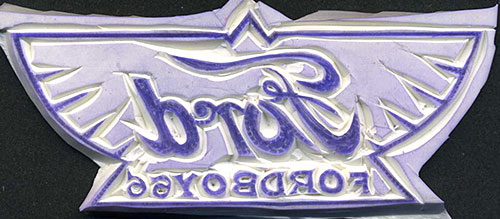
If you have any text in your stamp design, the words should look backwards on the rubber before you start cutting. Double check before you start to make sure your text will print the right way when you use the stamp.
5. Cut away the negative portions of your design (the “white” space) and leave the positive areas, the parts you want to print (or the “black” lines). I find the easiest way to carve is to outline by cutting around the design elements with an X-acto knife, then making another cut a little further out with the knife forming a channel that is shaped like a “V”.
Then I cut away large areas with a v-gouge, one of the tips included in a linoleum cutter tool set.
I’ve written a very detailed tutorial on rubber stamp carving if you need more information. http://www.limegreennews.com/howcarv.html
If your carving material is thin, you might need to mount it on a piece of clear acrylic block to stiffen it and get a good print. You can temporarily attach the rubber to the acrylic block with double-sided tape.
6. Wash and dry your stamp. Test your stamp by pressing it on your ink pad and then onto paper. Once you are satisfied with your carving, you can store it in a Ziploc bag along with your ink pad to keep ink from getting on you when you carry it around.
Stay tuned for Part II – Making a Personal Logbook!
2 replies on “Introduction to Letterboxing – Part I – Carving a Personal Stamp”
I hope to personalize a stamp for my business. Thank you for sharing!
[…] /Introduction to Letterboxing – Part I – Carving a Personal Stamp […]