How to Transplant Herbaceous Plants
In the spring it’s fun to see how many of your herbaceous perennials from last year are coming back. Maybe you need to thin or divide some and trade your extras with friends and neighbors, or move some of them to a better spot, or buy some new plants. It’s likely transplanting will be part of your spring gardening activities. Here is how to successfully transplant herbaceous plants.
1. First test the soil drainage in the new planting spot. Dig a hole 10-12 inches deep and fill with water. If the water does not drain away in several hours, consider adding organic matter to the soil or building a raised bed, unless you are planting bog plants which won’t mind sitting in water.
2. Test your soil if you want precise information about what fertilizer to add. Here is an article on how to get your soil tested. In some cases, excess fertilizer can do more harm than good so it’s best to know if you really need it.
3. If you have purchased plants or grown them indoors, harden them off gradually for a few days before planting in the ground.
4. Select a cloudy day for transplanting. If plants are in containers, water well.
5. If you’re transplanting a group of plants, if you haven’t worked out the positions of the plants in advance on paper, it’s helpful to set the pots on the ground where they will go to help you visualize the arrangement.
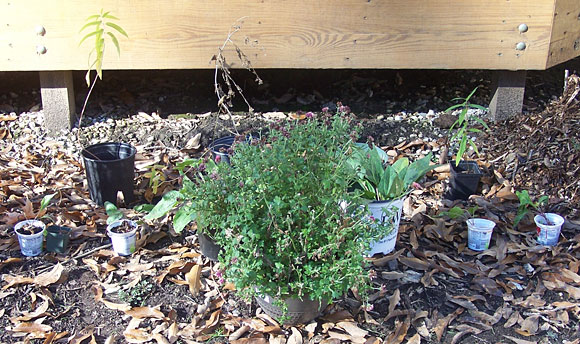
My arrangement might look a little strange because the front plant looks bigger, but I was taking into account the mature sizes of the plants and not the current size.

6. Turn the pot over and slide the plant out, catching it around the crown with your other hand. Tap or push the bottom of the container to help the root ball out if needed. Inspect the roots to make sure they are not circling around the pot. If they are, untangle and spread out the roots so that they don’t continue to grow in a circle.
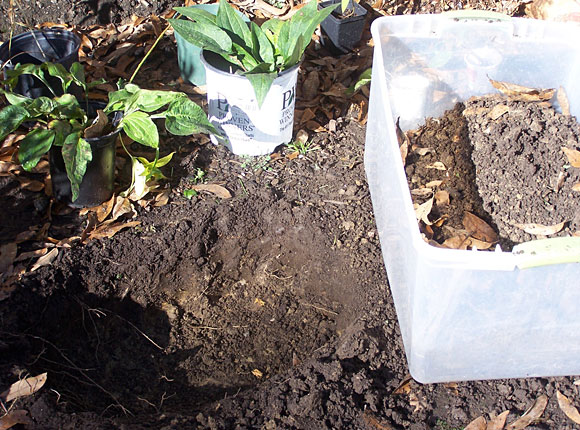
7. Dig a hole that is as deep as the root ball, but several times wider if possible. If the roots are loose, make a mound in the middle of the hole and drape roots around it to raise the crown of the plant to be even with the soil surface around your hole and to encourage the roots to grow outward. For an extra good start you can dust the plant roots with a Mycorrhizal Fungi inoculant. Mycorrhizal Fungi work with the plant’s roots to help them better absorb water and nutrients. Some soil mixes such as Pro Mix already include the fungi. Learn more about this symbiosis here – Mycorrhizal Fungi: The Amazing Underground Secret to a Better Garden.
8. Fill hole in with dirt and water well. Add more dirt if the water makes it settle too much. The crown of the plant should end up level with the soil line.
10. Check and water plants more frequently when newly transplanted.
Transplants of seedlings need to be handled slightly differently – see this article for tips – Start Some of Your Spring Planting Right Now! Part 3.
Happy planting!
One reply on “How to Transplant Herbaceous Plants”
[…] Read more – How to Transplant Herbaceous Plants. […]