Categories
DIY Home Decor Upcycling Ways With Wood

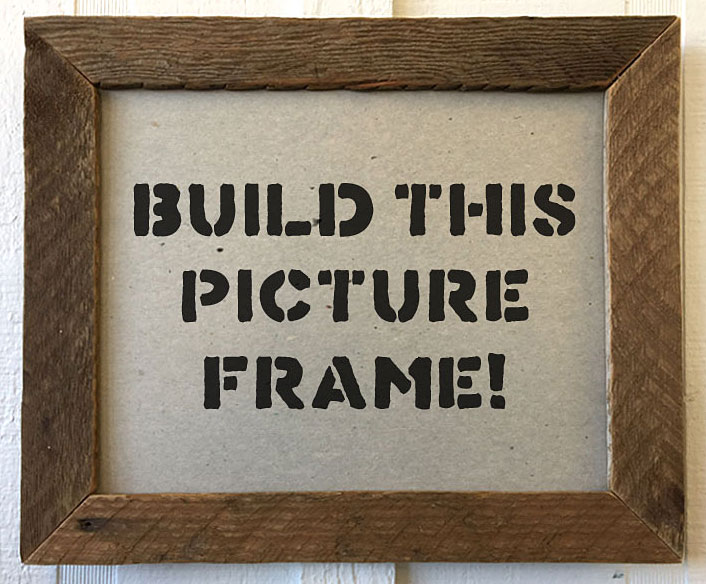
Make a picture frame from scrap wood

Make a picture frame from scrap wood

by Carolyn Hasenfratz

Have you taken down an old fence or pulled up an old wood floor? Are you getting some remodeling done or have access to scrap wood? It’s fun to make reclaimed wood pieces into unique picture frames. For my sample I purposefully chose scrap wood with a rustic and weathered appearance, welcoming flaws that don’t compromise the wood’s structural integrity such as saw marks, knots, plaster stains and nail holes. This project is designed to exploit the unique qualities of scrap wood – the flaws in the wood are part of the “decoration”. If you like you can choose new wood and give the surface whatever treatment that fits your decor. You can even buy wood made specifically for picture framing if you want a more conventional style of frame. I made this frame the size of an 8 1/2 by 11″ award certificate because this is a common size that a lot of people need.

Watch Video of Carolyn Teaching this Class at Schnarr’s Hardware in Webster Groves:
Part 1
Part 2

Materials needed:
Scrap wood approximately the size of lattice strips – 1 1/2″ wide by 2/8″ thick. For my sample I used wood lath salvaged from a demolished building. You can purchase new lattice strips if you don’t have access to the right size scrap wood.
Scrap wood strips – 2/8 – 3/8″ thick by 1/2 – 3/4″ wide. I obtained my strips from the scrap stashes available to me. You can buy such wood new if you need to where molding is sold.
Small washers
Staples for staple gun
Sandpaper
Aluminum flashing
Small nails – long enough to go through both layers of wood but not long enough to penetrate to the front of the frame
8 1/2″ piece of plexiglass, clear acetate or glass
8 1/2″ piece of chipboard, cardboard or mat board
Wire
Wood glue

Tools needed:
Mitre saw
Eye protection
Staple gun
Dust mask
Drill with tiny drill bit
Ruler
Pencil
Permanent marker
Sturdy scissors
Wire cutter
Large nail
Scrap block of wood
Hammer
Staple gun
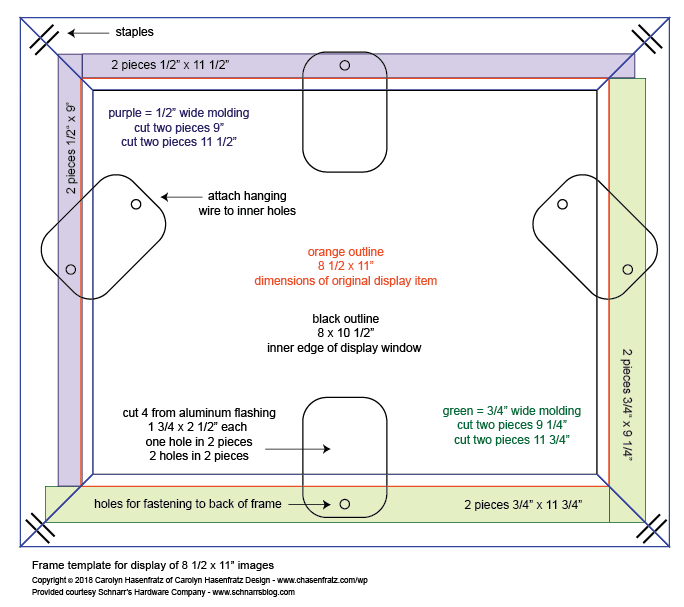
Click the diagram above to download a PDF copy to print out

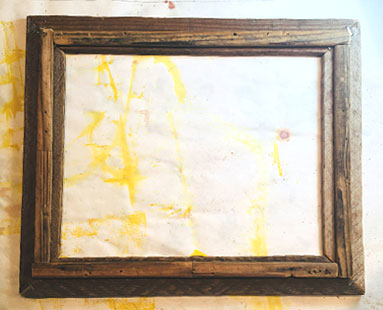
1. The inside edge of the opening for your framed picture will be 8″ x 10 1/2″. When finished the frame will overlap the framed image about 1/4″ all the way around. Mark with a ruler and pencil on the wood where the cuts will be. You might find it helpful to draw a rough diagram on paper to help visualize the cuts. Using a miter saw, cut four wood pieces with 45 degree angles at the ends. Wear eye protection when sawing and drilling.

2. Sand the cut ends of the wood. I did not give my wood any other treatment or finish. This is partly because I like the way it looks as it is. Another reason is that this wood was salvaged from a historic building that has great personal significance to me. I did not want to alter the historic integrity of the wood beyond cutting it to size. There are saw marks on the wood from the 1920s which I think are cool! Salvaged lath wood that has been separated from its original historic context is often available for purchase at Perennial, an art studio that promotes the reuse of materials. If you want you can give your scrap or new wood further treatments such as sanding, painting or staining for a variety of decorative effects. Wear a dust mask while sanding – it’s never good to breathe dust and old wood may have mold spores or contaminants.

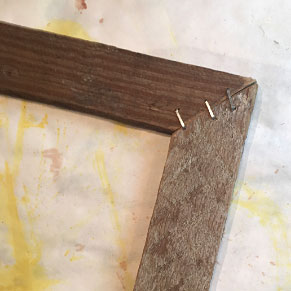
3. With a staple gun, shoot two or three staples into the back of the frame across each mitered corner. The staples will help tack your work in place until you can get some bracing installed on the back of the frame to make it more sturdy. Tap the staples with a hammer if they need a little extra help going all the way into the wood.

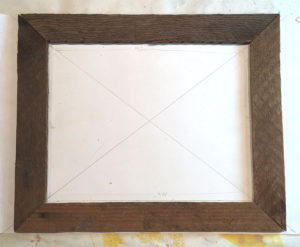
4. On the back of the frame, center an 8.5 x 11 piece of chipboard, cardboard or matt board and trace around it as a guide for placing narrow wood strips on the back for holding your protective layer (plexiglass, clear acetate or glass) and artwork.

5. To make the bracing, cut four pieces from the wood strips that are approximately 2/8 x 3/8 inches thick and 3/4 to 1/2 inches wide. The lengths you cut from with wood will be slightly different depending on how wide the strips are. Cut them so that the inside edge opening is 8 1/2 by 11. Make the lengths 9 inches for the short side and 11 1/2 inches for the long sides if using 1/2″ wide wood. If using 3/4 inch wide wood use 2 9 1/4″ pieces and 2 11 3/4″ pieces. If you are using wood in different dimensions just cut them so that the opening id 8 1/2 x 11″. Since you’ll be attaching these pieces to the back of the frame, if the pieces don’t all match or don’t line up perfectly it doesn’t matter, they won’t be visible. Sand pieces smooth.

6. Apply a line of wood glue on the back of each wood strip then press in place on the back of the frame. Drill small pilot holes, about three per strip, then nail the strips to the frame.

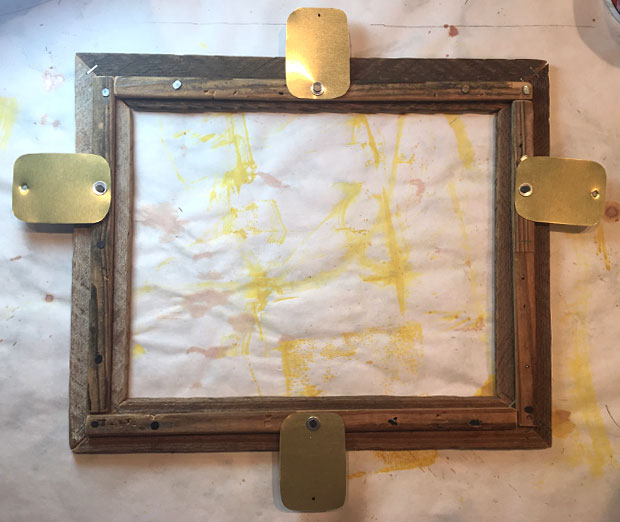
7. Next make some metal tabs to hold the artwork into the frame. These tabs are designed to swivel in and out so that you can easily take out or put in artwork. Draw four rectangles with permanent marker, 1 3/4 by 2 1/2 inches each, onto aluminum flashing. The flashing we sell has both a silver colored side and a brass colored side. These tabs won’t be visible when the frame is on the wall but if you have a preference for one side or the other keep that in mind. Using a sturdy pair of scissors cut out four pieces and round the corners to avoid sharp points. Sand or file the metal peices to get sharp edges off if necessary. On two of the pieces drill or punch one hole toward one end, on the two other pieces drill or punch a hole in each end. An easy way to punch a hole is to place the flashing on a scrap wood block and hammer in a large nail where you want the hole.

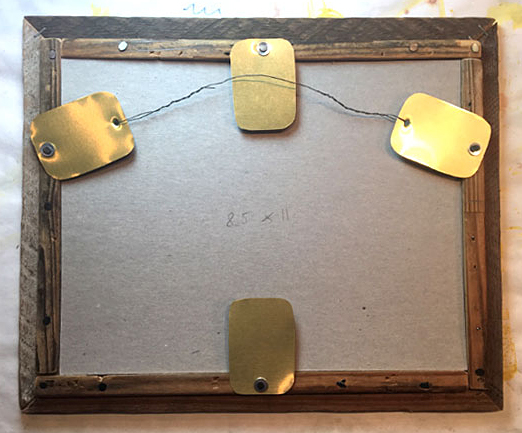
8. Attach the four flashing pieces to the back of your frame as shown on the diagram. Place a small washer under each nail head.

9. You are now ready to add artwork to the frame. First put in your clear protective layer (the glass, acetate or plexiglass), the display item, then a stiff layer of chipboard, cardboard or mat board to protect the artwork from the back and keep it from falling out. Rotate the tabs inward.

10. String a piece of wire from inner holes on the two-hole tabs from one side to the other for hanging. You’re done!

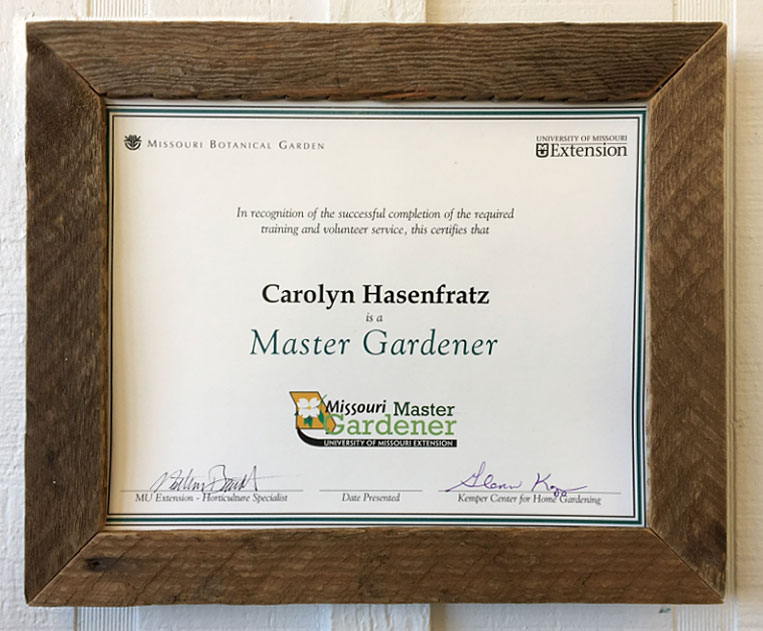
Here is how my frame looks with a certificate displayed in it:

Suggestions For Sources of Scrap Wood
Ask home improvement stores for scraps.
Volunteer to clean out someone’s garage or workshop in exchange for keeping some interesting wood pieces.
Make inquiries of people you know who are doing home improvements.
Look in thrift stores for picture frames or cheap pictures in frames that you can get parts from.
Make a request for wood pieces from the Freecycle community – freecycle.org
Walk your neighborhood on trash day – I’ve found so much usable wood that way.
Purchase salvaged supplies from a non-profit studio that specializes in reclaimed materials such as Perennial or Leftovers, Etc..
Categories
DIY Home Decor Ways With Wood

Schnarr’s Hardware is now offering DIY Classes!

Schnarr’s Hardware is now offering DIY Classes!

by Carolyn Hasenfratz

I hope you can join us for our first class at Schnarr’s Hardware in Webster Groves – Make a Picture Frame from Scrap Wood!

make a picture frame from scrap wood

Schnarr’s employee Carolyn Hasenfratz will show you how to use reclaimed wood pieces to make a frame that fits an 8 1/2 x 11-inch picture. This size frame is a good size for award certificates and other common documents that you might want to display. Tools and materials will be provided. You will learn techniques that you can use to design and build your own frames from your choice of wood scraps. Save a ton of money by gaining skills you can use by making your own unique frames for your home decor while gaining the satisfaction of saving materials from the landfill.

Class with Carolyn Hasenfratz – Make a Picture Frame from Scrap Wood
Date: February 22, 2018
Time: 5:30 pm – 7:30 pm
Location: Schnarr’s Hardware in Webster Groves, 40 East Lockwood, St. Louis MO, 63144

The cost of the class is $20. To register please go to this url: https://dabble.co/rc/carolynhasenfratz10

What’s Provided
Wood, tools, metal, chipboard, hardware

What You Can Expect
Learn to build simple picture frames
Learn to design frames from reclaimed wood
Learn to fabricate hardware for the back of the frame using simple tools
Learn how to recycle wood pieces
Learn about sources of low cost reclaimed materials for your DIY projects

For Carolyn’s complete teaching schedule, please go to:
http://www.chasenfratz.com/wp/about/classes-and-events/

Categories
DIY Gardening Home Decor Upcycling Ways With Wood

Build a Mosaic Plant Stand

Build a Mosaic Plant Stand

by Carolyn Hasenfratz

Make a Mosaic Plant Stand

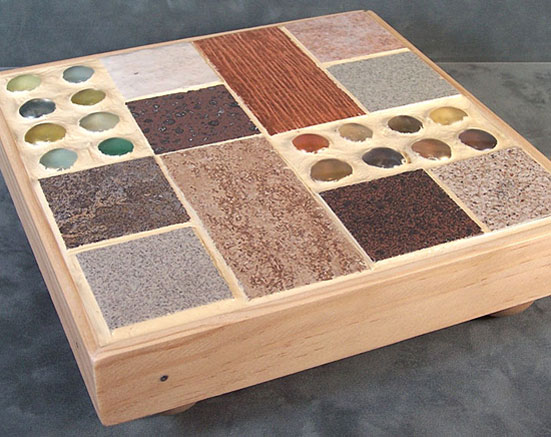
In this article I’ll show you how to make a stand to show off a special container plant. Raising a planter off of its surface can really enhance the appearance of a single specimen or help you create an attractive container plant grouping by providing elevation to some containers. Such a stand may also help protect the surface underneath by allowing air circulation under the pot so the surface can dry out between waterings. This stand is designed for both indoor and outdoor use. It is designed to let water from the plants run off, rather than catching it. This stand can also be used as a sturdy trivet indoors or outdoors.

Tools and Supplies
* indicates items that are available at Schnarr’s
8 x 8″ x 1/2″ board*
Lattice wood strips 1 1/4″ wide*
Saw*
Miter saw*
Sandpaper*
Dust mask*
Pencil or pen
Ruler*
Hot glue gun*
Wood hot glue sticks
Drill*
Tiny drill bit*
Nails*
Hammer*
Wooden ball knobs or drawer pulls with 3/16″ holes to use as feet (Wood drawer pulls are available at Schnarr’s Webster Groves store)
Wood glue*
3/16″ drill bit*
3/16″ dowel rod*
An assortment of ceramic tiles and/or glass pieces that are about 1/4″ thick
Palette knife or putty knife*
Ceramic tile cement*
Old plastic lid
Tile grout*
Water container*
Mixing container for grout (can be an old food container)
Rags*
Disposable gloves*
Bucket* of water for cleanup
Tile and grout sealer*

Instructions

1. Cut an 8 x 8″ square out of 1/2″ thick plywood.

2. Cut four 8 1/4″ lengths out of a piece of 1 1/4″ wide lattice wood. Miter the corners at a 45 degree angle as you cut.

3. Put on dust mask and sand the rough edges off of your wood pieces.

4. On the inside edge of each mitered piece draw a line 1/4″ from the top.

Mitered wood strip with drawn line

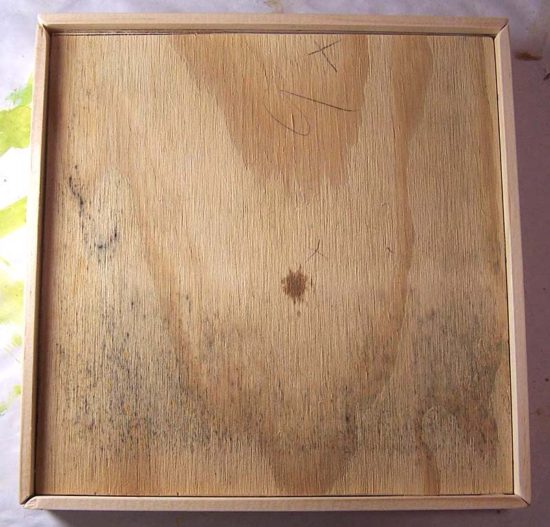
5. Glue mitered pieces to the edges of the 8 x 8″ block using hot glue as the adhesive and your drawn line as a guide to help line them up. You should end up with a 1/4″ lip all the way around, creating a tray that will hold your tile pieces.

1/4 inch lip around edge

6. As a reinforcement to the glue, drill a couple of small pilot holes on each side of the tray and hammer nails in for a strong hold.

7. Choose four wooden ball knobs or wooden drawer pulls with 3/16″ holes. Place them in the corners of the bottom of your tray. Draw around the base of each with pencil to indicate where their footprint will be. Set knobs aside.

8. Switch to a 3/16″ drill bit and drill a hole in the center of each drawn circle. Try not to go all the way through the wood but if you accidentally do it’s no big problem.

9. Cut short segments (about 1″) from a 3/16″ in diameter piece of wooden dowel rod to make pegs. Insert pegs into holes in wood and thread knobs onto pegs to make sure they are not too long and that there is no gap between the knob and the bottom of the tray. When satisfied, remove, dab wood glue onto each end of each peg, and re-insert into holes. Place knobs over pegs and press in place. Let wood glue dry. I left the wood unpainted in my sample but if you want to you can paint or stain the wood and give a waterproof clear coating like spar varnish.

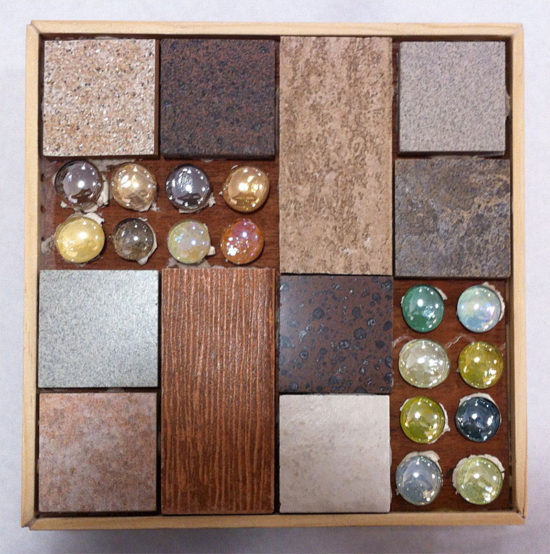
10. Get out your tiles and arrange in the tray to make an arrangement that is pleasing to you. For my sample I used tiles I salvaged from Leftovers, Etc. and some translucent glass blobs which were backed with colored paper. Try to leave a litte bit of space between each piece.

11. Once you have decided on an arrangement, scoop a small quantity of ceramic tile cement out of the container and place on an old plastic lid. Keep container closed so the rest of your cement doesn’t dry out. Use palette knife or putty knife to apply cement to the back of each pice and press in place. If any tile pieces are thinner than the others, you can put some extra cement on the back to build up the height. Let cement dry for the time period indicated on the container.

Tiles glued down and before grouting

12. When cement is dry you’re ready to apply grout. Grouting is very messy – I recommend you wear old clothes and protect your work surface and floor. Have plenty of clean rags on hand and a small bucket of water for cleanup. Don’t be surprised if you need a bath when you’re done!

13. Put some grout in a small plastic tray, such as one left over from a microwave dinner. Add water until it’s about the consistency of soft cream cheese – a little at a time to make sure you don’t add too much. Stir it with your putty knife as you add the water. Try to only mix up small amounts at a time so it does not start to set up before you’ve applied it.

14. Put on your disposable gloves, and use a rag to pick up a portion of tile cement. Smear it around to fill the cracks between tiles. The rags will help protect your hands from sharp pieces if there are any. The thin disposable gloves will protect your hands from being irritated, dried out or discolored by the grout, but alone they will not protect you from cuts.

After the tray is grouted, go back over it with a succession of fresh rags to remove the grout from the surface of the tiles. Dampen the rag with a little water toward the end to get them really cleaned off if needed. Be careful not to dispose of any grout in your sink – it could clog the drain. Dispose of any rags that are really soaked with grout – I put mine in the compost. If some are only slightly dirty, you may be able to re-use them by rinsing them in a bucket of water. If you do that, dump the dirty water out in the yard, don’t put it down the drain.

15. Let the grout dry, then apply tile and grout sealer. You’re done!

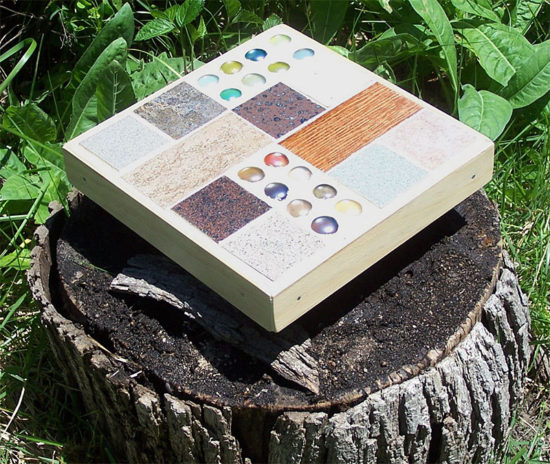
Finished mosaic plant stand

Categories
DIY Home Decor Sustainability Upcycling Ways With Wood

Stencil a Sofa Shelf Made From Distressed Wood

Stencil a Sofa Shelf Made From Distressed Wood

by Carolyn Hasenfratz

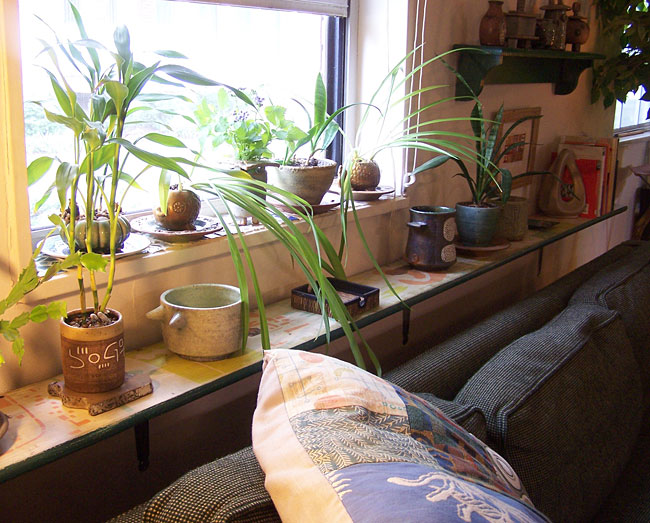
Sofa shelf made from distressed wood

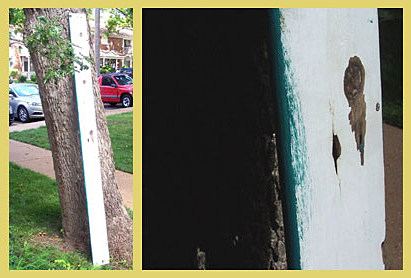
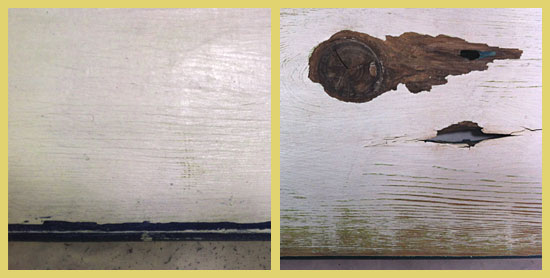
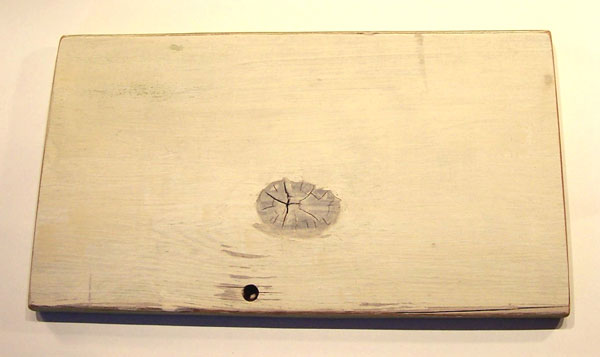
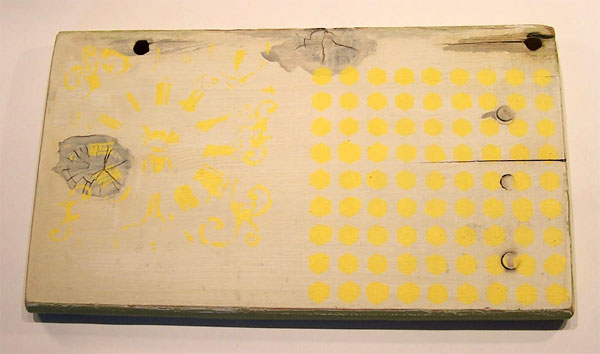
This project was made from the same stash of distressed wood that I used for the previous project Stencil a Wood Garden Sign. I kept aside a couple of intact large planks so I could make some interesting shelving. The wood was bare on one side and had partially peeling white paint over green on the other side. I decided to use the white side as a ground for some stencils I cut that were inspired by a mid-century modern building I saw on vacation last summer.

Tools and Supplies
* indicates items that are available at Schnarr’s
Distressed wood plank the length of your sofa
Sandpaper*
Dust mask*
Drop cloth for work surface*
Water based paint* for large areas
Acrylic craft paints for stenciling
Decorative stencils
Water based clear satin wood varnish*
Rags*
Paintbrush*
Assorted size old food containers for mixing paint and varnish
Sponges*
Old food container lids to use as palette while stenciling
Masking tape or painters tape*
Shelf brackets*
Screws*

Instructions

1. Put on a dust mask and sand your wood plank to remove rough edges and peeling paint. It’s always a good idea to wear a dust mask to keep from breathing small particles but I think it is even more important when working with old salvaged wood. You don’t know what that wood was treated with, what is in the old paint and it could be moldy as well. After sanding, wipe off the dust with a damp rag.

2. My wood plank already had a satisfactory ground color, white, on what would become the top surface. If your plank does not already have a ground color that you like, you can apply one. House or wall paint is a good choice. One technique that is really effective with the distressed look is to paint a contrasting color under the ground color. Some random sanding here and there later to expose the different layers of paint will simulate the effect of an old piece of wood that has been painted multiple times.

3. Apply a contrasting color to the sides and bottom of the board. As you can see, when you paint surfaces where two colors come together at a corner, it’s easy to slop a little paint over where you don’t want it. One reason that I love the distressed look so much is that when you sand off paint to conceal your mistakes, it looks like part of the design. If you are trying to paint precise corners or lines they don’t look good unless they are perfect, but with a distressed effect you can be a little sloppy!

My distressed board with closeup of paint job

4. Next put your dust mask on again and sand the corners and edges of your board to expose the wood in those places. Then check to see if any paint is beyond the corner where it is supposed to be, such my example below on the left.

Sanding in process

Sand away any paint that is in the wrong place, such as the excess paint that I removed from the top of the board. As I sanded the excess paint off, I exposed some of the wood grain on the front of the board and some of the green paint that is under the white paint. If you are using a really beat up piece of wood like I did in my sample, you can make some artistic decisions about sanding other areas. If there was a rough spot that I found pleasing, such as wood grain, I sanded such spots to enhance the texture. If there were spots that were not pleasing, such as dirty spots or flaking paint, I sanded to remove those unwanted areas of paint.

5. Decide what design you want to stencil on the top side of your shelf. I designed stencils specifically for this project but I have and will use them in lots of other projects as well. If you would like detailed information on how to cut your own stencils, see my article Fun With Stencils.

6. Apply craft paint through your chosen stencils in the colors of your choice. If you are new to stenciling on wood, please see my article Stencil a Wood Garden Sign for detailed instructions.

Stenciling in process

7. When stenciled paint is dry, to further enhance the distressed look mix up a paint/varnish/water mixture. Here is how – in a small container, mix some paint until you get a shade of dark brown that you like. In another larger container, mix a half and half solution of water and satin finish water based wood varnish. Gradually mix in some of the brown paint until you get a stain that you like – test by brushing on an inconspicuous spot. It should be dark enough to tone down your design a little bit and give it a weathered look, but not so dark that it obscures it. When the mix is right, stain/varnish your whole board and let dry.

8. Attach brackets of your choice to the wall behind your sofa, and set shelf in place. You’re done!

Categories
Backyard Wildlife DIY Gardening Sustainability Upcycling Ways With Wood

Make a Pollinator House – Part 2

Make a Pollinator House – Part 2

by Carolyn Hasenfratz

In my previous article Making a Pollinator House – Part 1 I explained why you might want to build a home for native bees and other beneficial insects for your garden. I also provided an example of a quick way to build a shelter out of cinder blocks, wood scraps and dried plant material. I promised to write up plans for a more attractive pollinator house. Here are instructions for building two different designs to enhance your garden’s decor as well as it’s productivity and ecological health.

Tools and Supplies
* indicates items that are available at Schnarr’s
Tracing paper
Pencil
Ruler*
Hot glue gun*
Wood hot glue sticks
1″ x 6″ x 8′ multipurpose board*
2″ x 4″ x 8′ board*
Saw*
Sandpaper*
Dust mask*
Acrylic craft paint
Paint brushes*
Water container*
Heat tool for speeding up drying (optional)
Painters tape or masking tape*
Decorative stencils
Sponges*
Drill*
Tiny drill bit*
Nails*
Window screen*
Hammer*
Wood glue*
Clear matte finish varnish*
Hardware cloth or chicken wire (optional)*

For the additional second design with the pediment, you’ll also need:
Assorted sizes of distressed wood pieces
Decorative brass box corner*
Miter saw*
3/16″ drill bit*
3/16″ dowel rod*
Wooden ball knobs or drawer pulls* with 3/16″ holes to use as feet

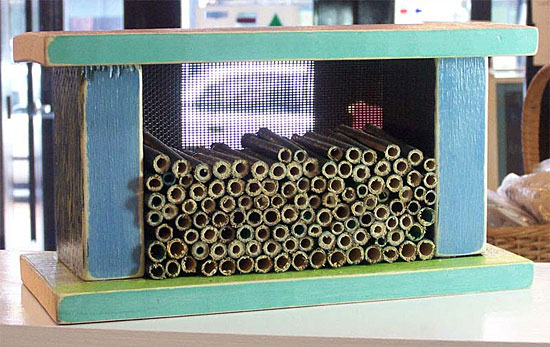
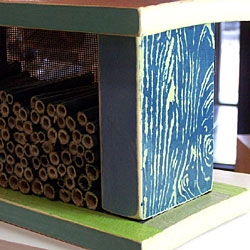
Mid-Century Modern style pollinator house

Instructions for Style #1 – “Mid-Century Modern” Pollinator House

1. Download the PDF document “Pollinator House Assembly Diagram”. It is sized to print out on a legal-sized piece of paper. Recreate the diagram in scale on a piece of tracing paper with pencil.

2. From the 1″ x 6″ x 8′ board, cut two 12″ x 5.5″ pieces(although the board is called 1″ x 6″ x 8′ it’s probably closer to 5.5″ so you might only have to cut the board into 12″ lengths).

3. From your 2″ x 4″ x 8′ (probably really 3.5″) board cut two 5″ segments.

4. Put on a dust mask and sand your wood pieces until smooth.

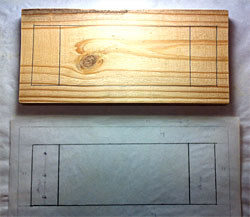
copy diagram onto wood
5. Mark each of your 12″ x 5.5″ pieces with the rectangles shown in the diagram. These will become the inner top and inner bottom of your house.


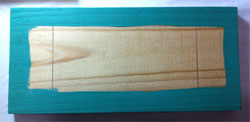
paint around edges
6. Paint a color of your choice in the border around the inner rectangle on each piece. For this step you don’t have to worry about painting precisely in the lines. Let paint dry.


7. Mark off around the middle rectangle with masking or painter’s tape on both pieces and paint black. When paint is dry, remove tape.

paint middle of boards black


8. Paint what will be the insides of your 5″ high supports black. Paint all other surfaces of your wood pieces assorted colors of your choice.

decorative stenciling
9. Decorate the top of your house and the sides of the supports with decorative stencils. I did not decorate the board edges with stenciling in my sample but you can if you want to. If you are new to stenciling on wood, see this article for tips –
Stencil a Wood Garden Sign.

10. Sand all the edges of your wood pieces so that the bare wood shows through on the corners. This gives the wood a distressed look. If you want to distress any other painted or stenciled surfaces further you can do so by roughing them up with sandpaper.

11. To assemble the house, stage the upright pieces by placing them in their footprints as indicated on the diagram on one of the 12 x 5.5″ pieces. Face the black painted sides inward and the stenciled sides facing out. If you’ve covered up your pencil lines with paint, you can use your diagram to redraw them as needed.

12. Load up your hot glue gun with wood project glue sticks and plug it in to heat up. Apply hot glue to the bottoms of the support pieces and press in place. Let glue harden.

13. Glue the other ends of the supports in place on the other 12 x 5.5″ piece. Let glue harden.

14. Place the tracing paper diagram on top of your house. Mark where the nail holes will go in pencil. Drill small pilot holes then hammer nails in. Repeat for the bottom.

15. Mix some dark brown paint with water to make a thin wash and paint over the whole house. Test first on the bottom to make sure it’s not too heavy or light. Alternately, you could use a wash of off-white paint if you’d rather have a pale wash. The purpose of the wash is to give an aged appearance to the wood – this is particularly effective when the paint clings to the corners that have been bared by sanding. Let paint dry.

16. Paint whole house with clear matte varnish.

17. Cut out a 10 x 5″ piece out of scrap window screen and nail it to the back side. This is to keep whatever materials you fill the house with from falling out the back side.

18. Fill the house from the front with materials that contain holes for pollinating insects such as native bees to live in.

Some suggestions of materials you could use to fill the house:

  • Bamboo or reed segments
  • Rocks
  • Rolled up corrugated cardboard
  • Chunks of scrap wood with holes drilled in it
  • Bundles of twigs or straw
  • Unfired ceramic clay with holes poked in it
  • Natural dried stems and reeds from the garden cut into segments
  • Dried seed pods

If necessary, cut out a piece of hardware cloth or chicken wire and nail it over the front to hold materials in.

19. Read this article for ideas on where to place the house in your garden or yard –
Making a Pollinator House – Part 1.

Depending on where you want to put your house, you may want to attach hanging hardware to it or mount it on a post. The wood pieces we used are thick enough to give you flexibility in attachment options.

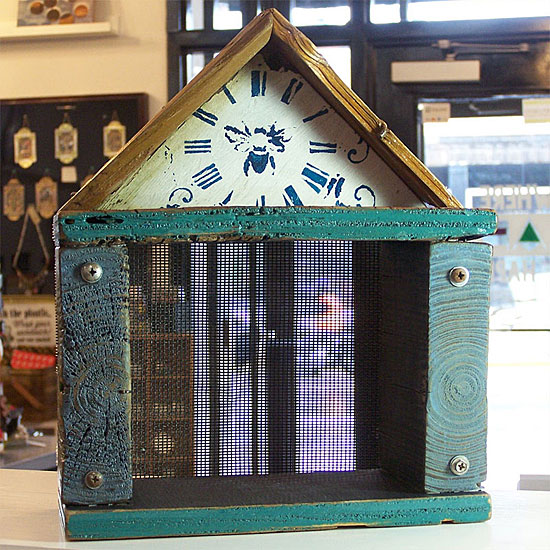
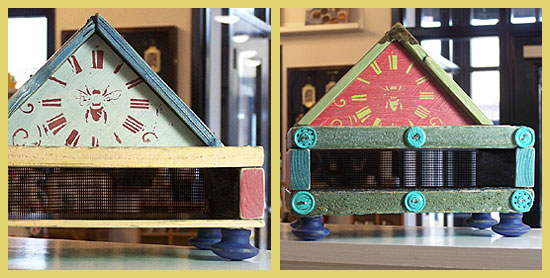
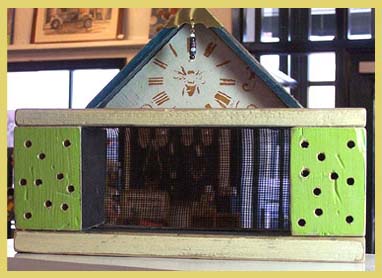
Pollinator House with Pediment

Instructions for Style #2 – Pollinator House with Pediment

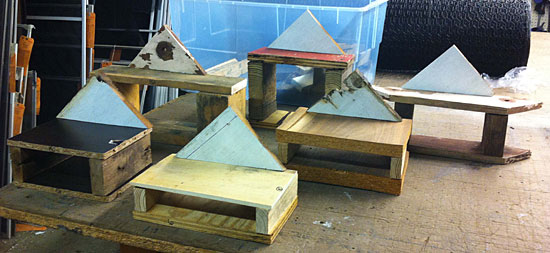
The prototypes I made for the second design vary somewhat in size and proportions because I used distressed wood that I had lying around. I designed the houses around what wood I had available and embellished some with found objects or hardware. If you want to build similar houses and don’t have access to distressed wood, you can use new wood.

1. Cut out two chunky pieces of wood to use as uprights and two thin pieces to use as the top and bottom.

Different pollinator house designs

2. Cut a right triangle out of wood that is 3/4 to 1″ thick for the pediment piece. A pediment is like a roof gable that is decorative rather than functional. My samples vary slightly in size but the triangles are mostly around 7 1/2″ inches on the long side and 3 3/4″ on the short sides.

3. Choose some thin, narrow wood pieces for the roof overhang. Lattice wood strips are about the right size – if you don’t have any distressed wood in that size range you can purchase some lattice strips to use. Cut these strips into approximately 6″ pieces and miter the corners.

4. Sand all wood pieces.

5. Paint the sides of your wood pieces that will become the interior with black paint.

6. Paint the other sides and parts in assorted colors of your choice.

7. Stencil a bee design or other stencil of your choice on the front of the triangle.

8. If you think any of the other wood surfaces need to be enhanced with stencil designs, decorate those also. Since many of my wood pieces were distressed and had a pronounced wood grain, knots, old nails and other irregularities I let those provide the visual interest in many areas. Antique look, vintage look, grunge or botanical stencils would be especially effective for this design.

9. Sand the edges of your wood pieces to expose the bare wood on the corners and distress any other areas that you think are in need of it.

10. Hot glue the vertical support pieces to the top and bottom of your house then nail in place.

11. To assemble the pediment section, put your two roof pieces in a miter clamp with the mitered ends butted together to make the roof point. Put a little wood glue on the ends as you do this. Position the clamped-together pieces on a block of scrap wood to brace them. Drill small pilot holes in one end and hammer in small nails. Slip a couple of nails in between from the other direction.

Creating roof peak with miter clamp and nails

12. Take your triangle pediment and apply hot glue to the top edge. On your work surface, lay the pediment down, slide the triangle part in and press in place. When the glue has hardened, hammer small nails through the roof pieces into the pediment for extra hold.

Attach roof overhang to pediment

13. Apply hot glue to the bottom of the triangle section. Place in place on top of house and let the glue harden. Drill two pilot holes at each end and drive long thin nails down into the supports below.

14. If you would like to attach wood feet to the bottom of your house, drill 3/16″ holes into the bottom of the house. Cut short pieces of 3/16″ wood dowel rod and put wood glue on both ends. Insert one end of each dowel rod piece into a hole in the house and the other end into the hole in a wooden ball knob or drawer pull.

15. Mix some dark brown paint with water to make a thin wash and paint over the whole house. Test first on the bottom to make sure it’s not too heavy or light. Alternately, you could use a wash of off-white paint if you’d rather have a pale wash. The purpose of the wash is to give an aged appearance to the wood – this is particularly effective when the paint clings to the corners that have been bared by sanding. Let paint dry.

16. Paint whole house with clear matte varnish.

17. Attach a decorative brass box corner to the roof peak.

18. Cut out a piece out of scrap window screen and nail it to the back side.

19. Fill house with nesting materials and place in a suitable location.

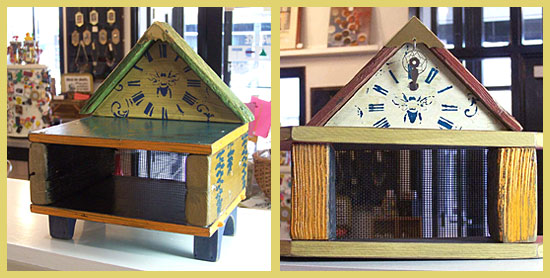
Here are some pictures showing how some of the other houses turned out.

Pollinator houses made with distressed wood

Pollinator houses made with distressed wood

Pollinator house made with distressed wood

Categories
DIY Gardening Sustainability Upcycling Ways With Wood

Make a Garden Sign Out of a Recycled Produce Crate

Make a Garden Sign Out of a Recycled Produce Crate

What you’ll need:

Thin wood produce crate
Sturdy screwdriver or pry tool*
Saw*
Wide masking tape*
Paint*
Paintbrush*
Decorative stencils
Optional: Letter and number stencils*
Sponge or sponge brushes*
Temporary palette (freezer paper* or old plastic lid)
Drill*
Hammer*
Outdoor varnish*
Nails*
Brads*

*Available at Schnarr’s

In a previous article I described stenciling with paint on a wood garden sign. That works great if you don’t want a lot of small words but I found myself in need of some new garden signs that would require a lot of text on them. I decided to find a way to computer generate the text and put it on a weatherproof sign. In the past I had purchased produce from a co-op and had saved a couple of the thin wood crates thinking they would be useful for garden markers of some kind. I decided to make small signs from this wood and print out my text on clear acetate and attach that to the signs with brads.

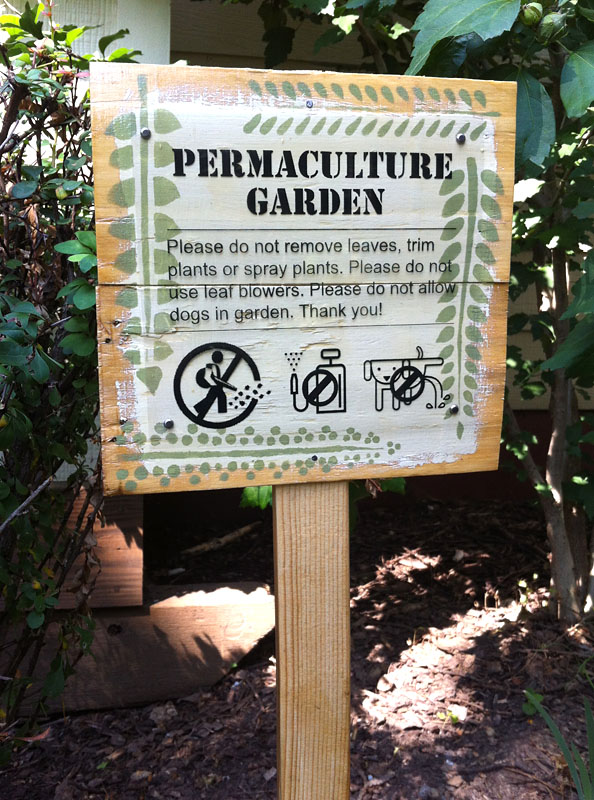
I have some special gardening challenges where I live. I want to have a Permaculture garden. Different people will define Permaculture slightly different ways but the easiest way I can explain it is that I want to manage my garden in a way that works with nature instead of fighting it in order to save both labor and money. Surrounding my condo are large Oak trees which deposit mass quantities of leaves each season. The types of plants that thrive under trees are adapted to grow in the conditions created by a yearly deposit of leaf litter which is not removed but left to decay in place. However since I live in a condo, the leaves are removed by the groundskeepers which causes a lot of problems. I have mostly perennial plants which are not intended to be replaced each year. The leaf blowers make the plants look bent and bedraggled, as if they’d just been power-washed. The plants need the winter protection provided by leaves, so I have more die-off than I should. Leaf litter helps soil retain moisture and most shade-adapted plants like moist soil. When the naturally provided soil protection is stripped off, the soil dries out too much. I can see why a plant seller would be happy about this, but I’m a plant consumer and I’d rather keep the ones I have rather than keep buying new ones! To keep plants alive I have to water more which costs the condo complex money. I can and do put down mulch, but the leaf blowers blow a lot of it into the lawn which doesn’t help either my garden or the lawn to look it’s best.

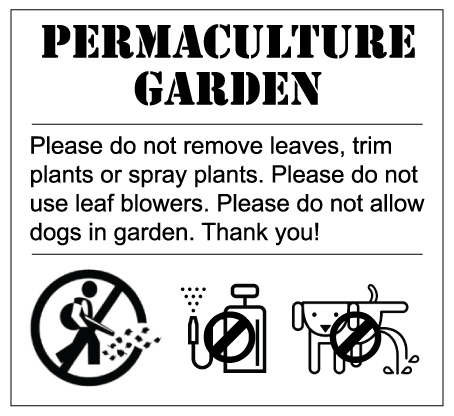
I think my garden would look a lot better and be healthier and require less maintenance if the groundskeepers would leave it alone. I have explained the situation to the condo management and they have agreed to let me deal with the leaves myself this season and keep the leaf blowers away as an experiment. Getting the agreement is one major step forward, getting the groundskeepers to comply will be another challenge. I don’t expect the groundskeepers to remember which is my garden, there are around 1,500 units where I live. So I obtained permission to install six signs to place around my garden which would read: “PERMACULTURE GARDEN. Please do not remove leaves, trim plants, or spray plants. Please do not use leaf blowers. Please do not allow dogs in garden. Thank you!” I worked this text out in computer graphics software and for good measure added icons to represent no leaf blowers, no spray and no peeing dogs. I looked online for the graphics and was amused by how many choices of “No leaf blowers” icons there are! I must not be the only person who finds they interfere with my gardening techniques.

Computer generated content for signs.

These signs will have to be somewhat prominent to be seen, so I tried to make them as attractive as possible and harmonious with my gardening style. First I pried apart the salvaged wood produce crates to get the wood pieces, then I cut them into 8 inch long sections. For each sign I placed two pieces together and held them together in the back with a piece of wide masking tape. This created a roughly square sign (8 x 7.5 inches).

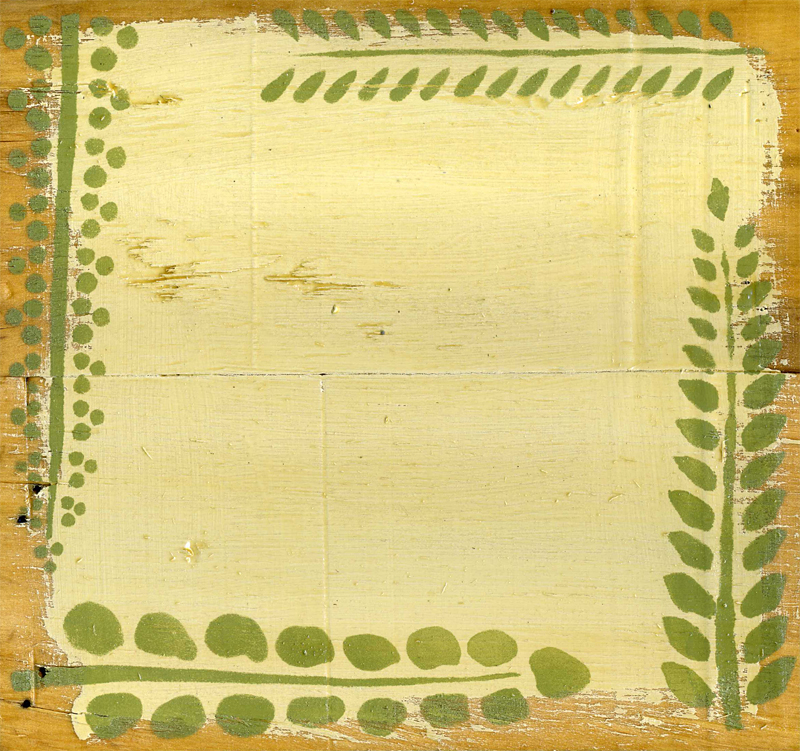
I painted a rough square of off-white paint in the middle of each sign, treating the edges very loosely for a rustic look. Then I used some medium avocado-green paint to stencil botanical designs around the edges. See my previous article Stencil a Wood Garden Sign for detailed information on how to stencil on wood. Then I painted the backs and fronts with several coats of weatherproof varnish.

Sign ground after painting, stenciling and varnishing.

Then I took my computer generated text to a copy shop and got six copies printed in reverse on clear tranparencies. The reason for printing in reverse is that I think the ink will hold up better to the weather if it’s on the back of the clear film.

Next I punched four holes in the corners of the pieces of film and drilled four corresponding holes in each sign. Then I attached the film to the wood with brads.

I purchased six wooden stakes from Schnarr’s, sanded them and varnished those as well. Then I nailed the signs to the stakes and installed them.

Finished garden sign.

Here is one of the six finished signs! If all goes well and I actually get the opportunity, I will write about how I chose to deal with the fall leaves and what the results were.

Categories
DIY Home Decor Ladies' Night Ways With Wood

DIY Zodiac Constellation Artwork

Zodiac Constellation

I’m going to be completely honest, I find astrology to be very interesting.  So when City in a Jar combined DIY and zodiac constellations to create this awesome decor piece I was stoked.  I think it turned out pretty stellar, check out her blog for other cool ideas.

Join us for Ladies’ Night April 30th from 7:00 pm – 8:30 pm to see this and other cool DIY projects. RSVP on facebook, or email [email protected].

Categories
DIY Home Decor Ladies' Night Storage and Organizing Uncategorized Upcycling Ways With Wood

DIY Mason Jar Organizer

DIY Mason Jar Organizer

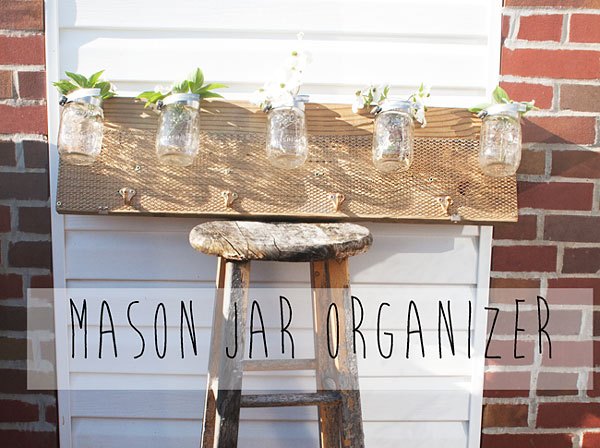
See the blog Fox and Gypsy for a DIY project mason jar orgainzer diy. See  this project at our Ladies’ Night on April 30th, 2015!

If you want to come you can RSVP for Ladies’ Night (on Facebook and via email [[email protected]]).

Categories
DIY Ladies' Night Upcycling Ways With Wood

Stencil a Wood Garden Sign

Stencil a Wood Garden Sign

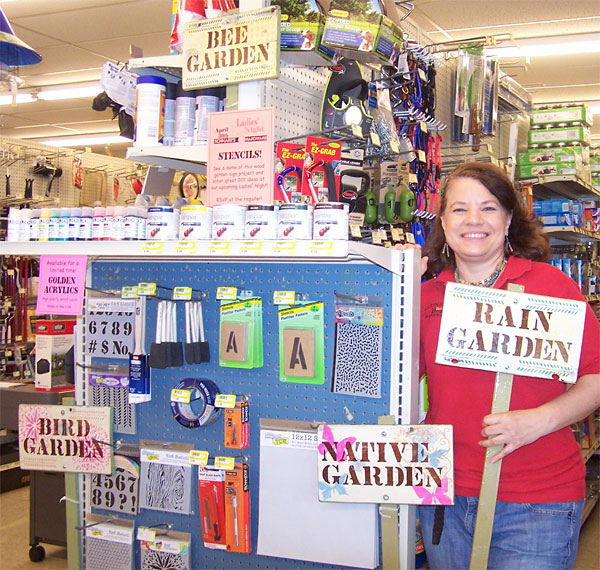
Schnarr's employee Carolyn with several finished signs and a selection of supplies you can use to make one. Carolyn will be demonstrating stenciling at our Ladies' Night on April 30, 2015.
Schnarr’s employee Carolyn with several finished wood garden signs and a selection of supplies you can use to make one. Carolyn will be demonstrating stenciling at our Ladies’ Night on April 30, 2015.

How would you like a practical and decorative wood garden sign? Stencils are handy for such a project because they are available in letters, numbers and lots of fun decorative designs.

Here are the tools and materials you will need:

Pencil
Paper
Ruler
Tracing paper
Letter or number stencils
Decorative stencils
Wood
Acrylic or latex paint
Bristle paintbrush(es)
Water container for paint brushes
Rags
Sandpaper
Dust mask
Freezer paper
Drop cloth
Wide painter’s tape or low-tack masking tape
Small disposable plastic cups
Wooden stake
Sponge brushes or sponge pieces (at least one for each color)
Plastic lids from food containers
Large water container (preferably shallow and flat)
Optional – hair dryer or heat tool
Old toothbrush
Outdoor wood varnish with sun protection
Paint thinner for cleaning brushes if using brush-on varnish
Drill
Drill bit
2 bolts
2 nuts
2 washers (optional)

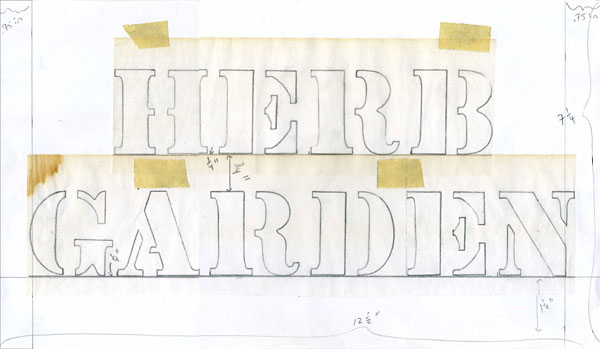
The first step in making such a sign is to decide how big it should be. If you have some scrap wood available, you could let the size of the wood pieces you have on hand determine your design. In my case, I had some used, distressed long boards that were 7 1/4 inches wide. I got out some stencil letters and decided how long my wood piece should be to fit the lettering I wanted on the sign. I worked out some lettering samples on tracing paper and taped these to a piece of paper to determine my final sign size – 7 1/4 x 16 1/2 inches.

Working out my stencil design on paper for my wood garden sign.
Working out my stencil design on paper.

If you don’t have scrap wood to start out with, you can just make your design any size you want and get your wood cut to order. Work out your design ahead of time using pencil, paper and tracing paper, then go get your wood cut or cut it to size yourself. I recommend using wood of a 3/4 to 1/2 inch thickness. If you buy a board at Schnarr’s we will cut it to length.

After the wood is cut, sand it smooth. I recommend you wear a dust mask while sanding. Wipe off the dust with a damp rag.

The next step is to decide on a base or ground color for your sign. For this project I am using all acrylic or latex water-based paints (except for the varnish layer). You can use a dark color as base and stencil on it later with light colors, or make your ground color light with darker colors stenciled on later. If you like the distressed look that I am so fond of, you can put an additional color under the ground color and let some of it show through by sanding on the corners and other strategic places on the sign. You can make the back and sides a different color like I did in my sample or make it all one color. Freezer paper or drop cloths are handy for protecting your work surface while you paint.

Since I was starting with distressed wood with some paint already on it, I let the existing color influence my other color choices. My scrap wood had previously been painted white over a light green. Some of the green showed through the white as I was sanding. There were a few spots where the paint had peeled away entirely showing dark wood underneath. I wanted to tone down these areas but not cover them up entirely so I decided to paint the front of my sign with an off-white wash to preserve some of the distressed look and create a more even ground for the subsequent design. After the off-white wash was dry I painted the back and sides of my sign green.

Distressed wood cut to size, painted, sanded and read for stenciling on wood garden sign..
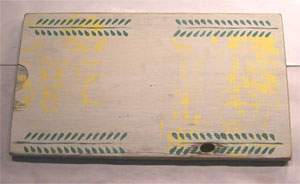
Distressed wood cut to size, painted, sanded and read for stenciling.
For a vertical post to use for mounting my sign, I chose a wood stake available at Schnarr’s. I sanded it smooth then painted it green.

After the paint is dry, sand the edges on the sign and post to make them look distressed and wipe both with a damp cloth to get all of the dust off.

Now it’s time to actually start stenciling. Get your work area ready by placing your paints, stencils, tape, small brushes for mixing, water container, rags, small plastic cup, sponge brushes or sponges, and plastic lid where you can reach them. At your feet or on the table if there is enough room, place a large flat container filled with water. This is for placing your stencils and other tools in to soak when you are done using them. This can be a messy process so wear old clothes.

The next step is to apply some background design in a light color. I wanted to add a little interest to the background and edges without detracting too much from the lettering that would be applied later, so I chose a light yellow paint for my sample.

Choose a stencil and tape it in place on your wood sign.

Mix some light yellow paint in a little plastic cup. Do not mix any water into the paint. Dab some paint onto a plastic lid. If you don’t have a plastic lid, a little square of freezer paper taped to your work surface will serve as a disposable palette. Press your sponge or sponge brush into the paint and dab it onto the lid a few times to distribute the paint. You want a light application of paint to start out. If you are new to stenciling, you most likely will overestimate the amount of paint you need and use too much, so start with less than you think you need – you can always add more but if your paint application is too heavy it could bleed under the stencil.

Start pressing the sponge lightly into the stencil openings. Dab very gently at first and increase pressure gradually until all the open areas are filled with paint. When you are satisfied, lift the stencil.

Starting to develop the stencil design with some yellow in the background for wood garden sign..
Starting to develop the stencil design with some yellow in the background.

If you are finished with that particular stencil, put it in the large container of water to soak. If you are going to use the stencil again on another part of the sign, move it and continue stenciling until you are finished, then soak it.

When you are finished with a color, put the sponge and plastic lid in the water container for cleaning later. Do not attempt to clean the sponge or sponge brush and use it immediately for a new color – you will have to start with a clean dry sponge for the next color because water makes the paint too runny and it will bleed under the stencil.

Acrylic paint dries quickly. It won’t take long for your first layer of paint to be dry enough to work on the next layer, but if you need to speed up the drying you can hit it with a hair dryer or heat tool. Repeat the above steps with each new color until your sign is complete.

If you are using letters or numbers on your sign, you can draw a line with pencil or ruler to help you apply them in a straight line, then erase the pencil line later after the paint is dry.

Wood garden sign in progress with two colors

Wood garden sign in progress with two paint colors in place.
Finished wood garden sign with stencils.
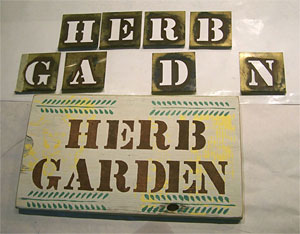
Antique brass stencils with the lettering they made on my sign.

To clean your stencils and tools, swirl them around in the water to get out as much paint as possible. Squeeze all the paint you can out of the sponges and brushes. If needed clean with soap. Rinse and let them dry on a rag. Dump out the paint water and replace with fresh. Scrub your paint lids and stencils with a toothbrush to get the remaining paint off. Acrylic paint doesn’t have much of an affinity for sticking on plastic especially if soaked, but if allowed to dry prior to soaking some spots might be stubborn. If all the paint doesn’t come off it won’t affect future use so don’t worry about it. Remove as much paint as you can, rinse off stencils and lids and let dry.

When your sign is completely dry, if you are going for the distressed look rough up the design in a few spots with sandpaper. Wipe off dust.

Coat both sign and post with outdoor weatherproof wood varnish, preferably one with sunlight protection to help keep your paint colors from fading. Follow the safety directions on the container for both varnish and paint thinner as they can be dangerous if not handled properly. Do not use a sponge brush for the varnish, it will dissolve. You can avoid the hassle of dealing with brushes and rags and paint thinner by using a spray varnish instead of a brush-on product. I used a brush-on varnish because it’s more economical and I think I get a thicker coat by using a brush. Ultimately, you can make your varnish choice based on your personal application preference.

When varnish is dry, drill two holes in both sign and post to accommodate the bolts that will hold the sign together.

Connect sign to post with nuts and bolts. Place a washer behind the bolt head for a more finished look. Bolts are preferred over nails for this project so you can easily replace the post if it rots over time.

Install your sign where you want it by hammering it into the ground.

If you would like to read about how to cut your own stencils, see my article Fun with Stencils.

If you are interested in attending our Ladies’ Night on April 30, 2015 remember to RSVP (on Facebook and via email [[email protected]]).

Available at Schnarr’s:

Letter and Number Stencils

Letter and Number Stencils

Masking Tape

Masking Tape

Indoor Outdoor Varnish
Indoor / Outdoor Varnish

Sandpaper

Sandpaper
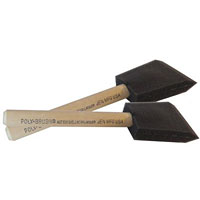
Sponge Brushes
Sponge Brushes

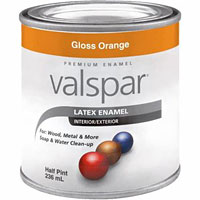
Valspar Indoor Outdoor Latex Enamel

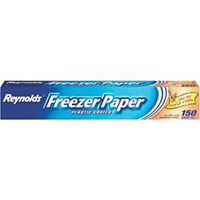
Freezer Paper

Freezer Paper

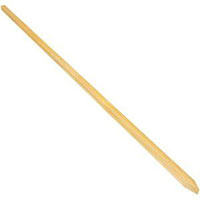
Wood Stake

Wood Stake

Hobby Knife
Hobby Knife

Hobby Knife Blades

Hobby Knife Blades

Dust Mask
Dust Mask

Drop Cloth
Drop Cloth