Kitchen Backsplash Project Part III – Filling in the Tile “Murals”
It’s a good thing I make detailed notes as I work, because this kitchen backsplash project underwent a two and a half year hiatus! I didn’t really plan to neglect the project for that long, but in 2013 and 2014 I did a lot of art and craft shows and my studio space and time was necessarily diverted to that pursuit rather than home improvement projects. In 2015 I’m doing fewer shows and determined to finish some of what I started earlier!
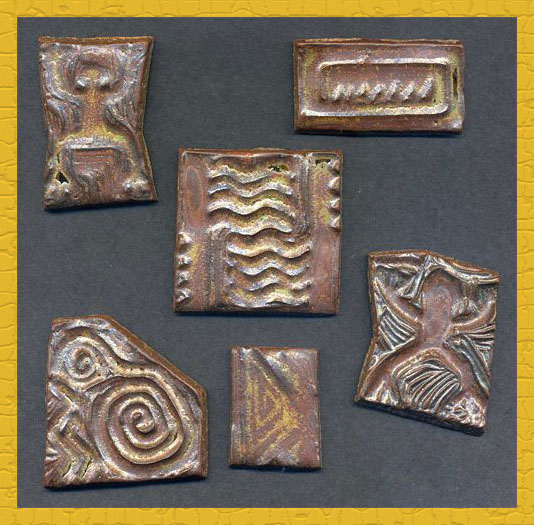
The next step in finishing my kitchen backsplash is to complete the tile work in four frames spaced at intervals above the strip. These are inspired by Spanish and Mexican tile murals in their shape and placement though they don’t attempt to depict any kind of representational scene. In the interim I had carved some new rubber stamps of ancient petroglyph designs and made some small stoneware tiles from them which I decided to include.
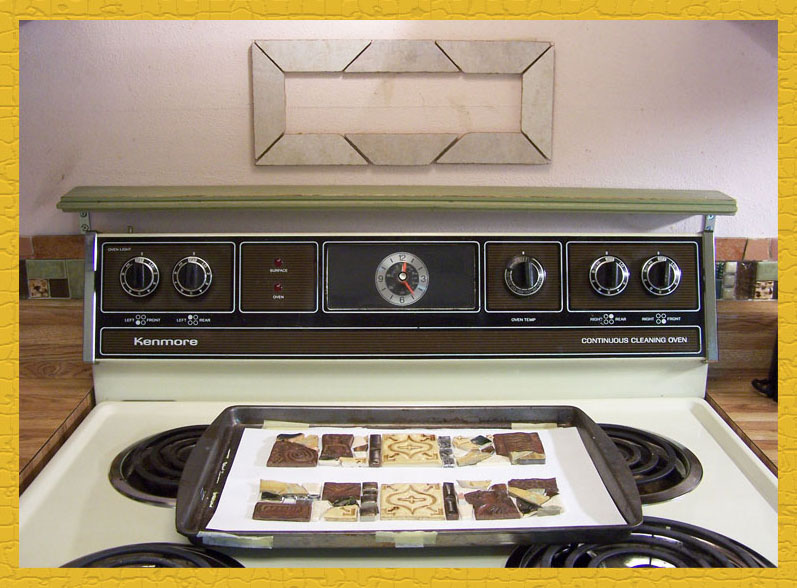
Using paper templates, I laid out my designs on trays in the studio, then transported them to the kitchen.
As you can see in this picture, since I last worked on the tile strip, I installed a narrow shelf above the back of the stove. This is made from a piece of recycled flooring. I painted it in a color harmonious with my intended future paint scheme and sanded the edges for a slightly distressed look. I used corner brackets to mount it to the wall, attached with screws so I can remove it when it’s time to paint the wall. It is meant for holding some of the small Southwestern-themed collectibles that I keep in the kitchen. Later on I’m going to install another shelf above this frame with hooks on the underside for displaying a favorite set of collectible coffee cups.
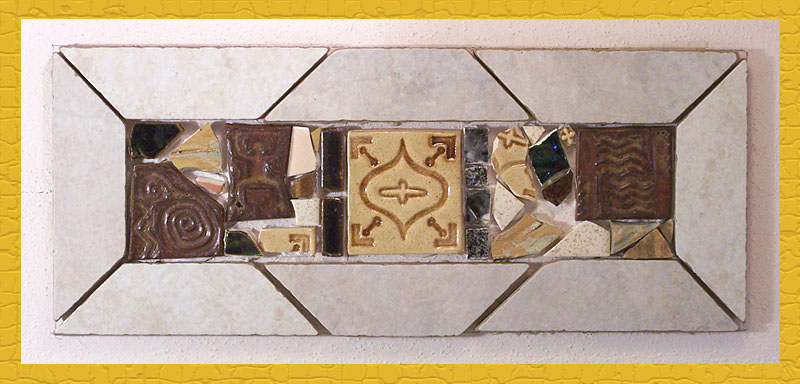
Here is the frame partially filled with tile. Using a pencil and ruler, I marked where the large tile in the middle would go then worked out from the middle and the edges. I dabbed a bit of tile cement on the back of each piece and pressed it in place. Normally with tile work a quantity of cement is spread out on the surface first before the tiles are placed, but my way of working is slow so I wanted to make sure the cement didn’t dry before I could finish an area.
After the tiles are allowed a sufficient time to dry according to the directions on the tile cement bucket, the next step is to grout the tiles!
Kitchen Backsplash Project Part II – Tile Design and Beginning Work on the Walls
After absorbing inspiration and stockpiling tiles for my kitchen for three years, how did I begin the process of actually getting some tiles on the wall?
I’ve been intending since I moved in to my condo in 2004 to eventually repaint the kitchen. The paint in this room is rough, and even worse, it’s pink! So it has to go and until it’s repainted it doesn’t matter to me if I mark it up with pencil or tape.
To begin my designs I cleared everything off of the counter top and used a ruler and pencil to mark where I wanted strips of tile. This work would be too much to be completed in one work session. It being necessary to use the kitchen in between work sessions, I had to devise a way to design and install the strips in sections.
I decided on a repeating pattern that would appear at intervals, with more free-form arrangements in between. I measured where the repeating elements would go and decided how many I would need, then I went into my studio and designed one of the repeating sections. Then I made sure I had enough of those tiles to repeat the pattern the required number of times. Choosing the tiles from which to create the repeating patterns could have been an overwhelming task, given the number of tiles I had accumulated – I had been collecting them for multiple projects, not just the back splash. For help I referred to the swatch page I had made for my kitchen to help me keep in mind what look and feel I wanted for the room. I hung up the swatch page nearby and sorted out tiles that seemed to fit. That narrowed down the selection and from those I was able to come up with the repeating pattern. I laid each section out on a tray in my studio and carried it into the kitchen to install each section, then repeated until all the recurring sections were in place.
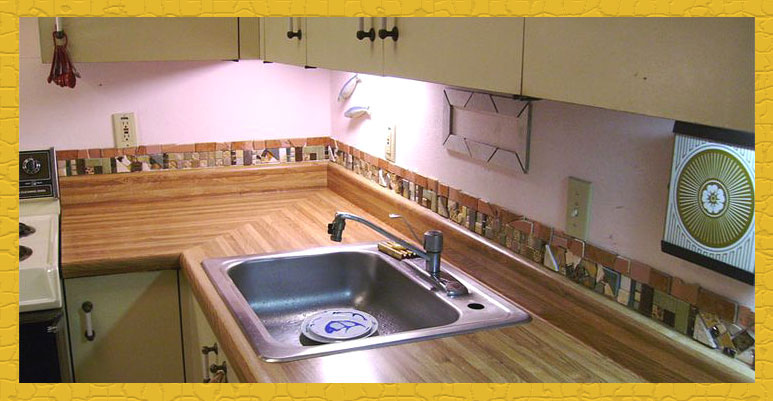
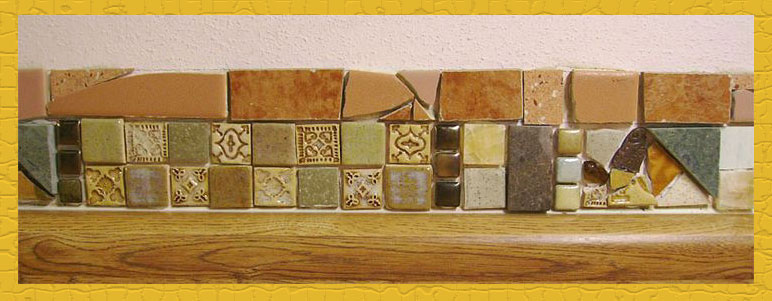
After that was done, I filled in the spaces between the repeating segments, then added a strip in a terra cotta color above it.
A strip similar to this would be very easy to do with purchased or made to order tiles of a uniform size. Since I was including a lot of salvaged tiles however, I had to do a lot of piecing, cutting and nipping. I’m very pleased with the result and I think it was worth the extra effort – it would not be to everyone’s taste but is exactly the kind of look I wanted. There is no way anyone would be able to replicate this design exactly even if they wanted to!
While I had the tiles out, I decided to do a strip by the pantry as well.
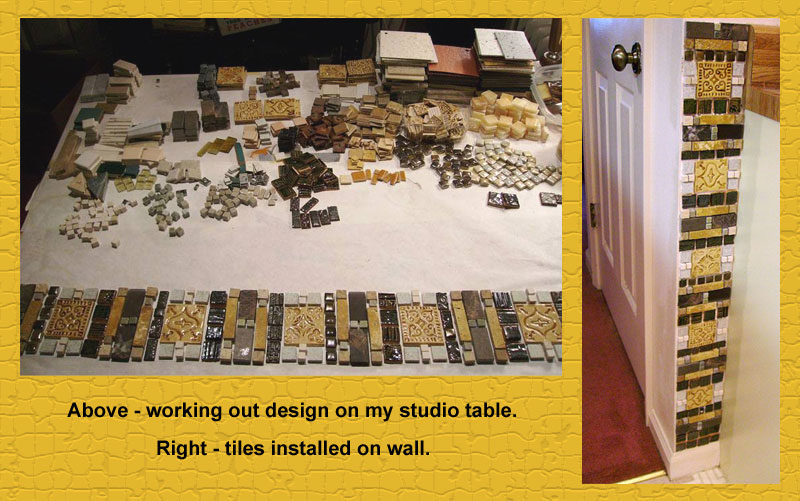
I drew an outline of the area to be tiled on the paper that covers my studio table, then filled that in while working out my design. When I was satisfied, I placed some of the tiles on a tray, carried it to the kitchen, and installed the tiles one section at a time. I marked the wall with pencil lines before beginning so that I didn’t go out of the allotted spaces while installing.
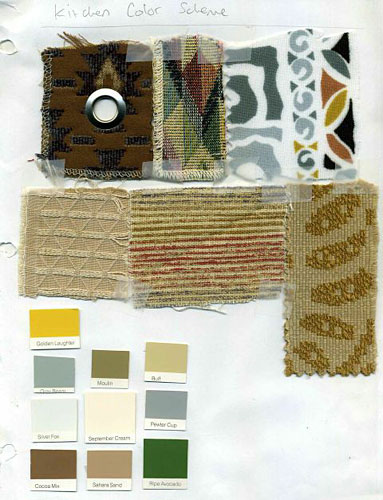
While working on the tiles, I gave some thought to the future paint scheme of my kitchen and picked out color swatches. I put the swatches and some notes in my idea book and also marked in pencil what color goes where on the kitchen walls.
When I wrote in my previous article Decor Idea Book that my home decor would take years to complete, I was not exaggerating. I’ve been interested in tiles and mosaics since I was a teenager, but the real impetus for beginning to decorate my condominium home with tile was a visit in 2009 to Henry Chapman Mercer’s Fonthill Castle in Pennsylvania. Among other things, Mercer was a tilemaker in the Arts and Crafts era and his historic home is decorated with outstanding examples of the tilemaker’s art, both from his own designs and tiles he collected on his travels.
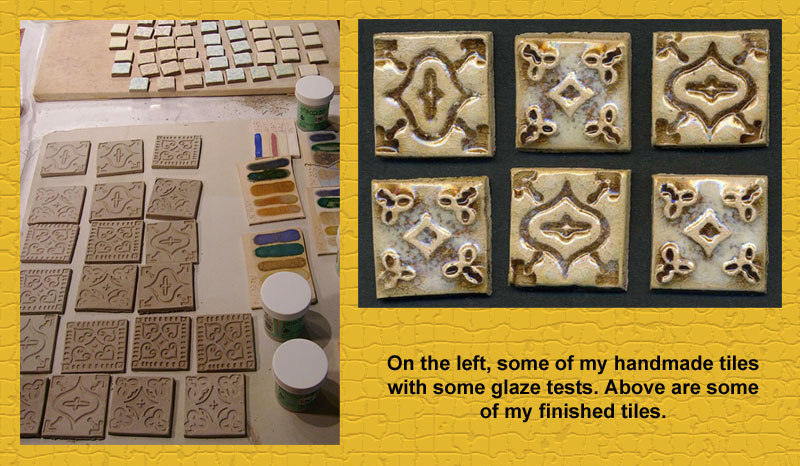
What brought me to the vicinity of Fonthill was a buisness trip to Philadelphia. I arranged with my employer to arrive a day early so I could visit Fonthill Castle. The morning after my visit, I sketched tile design ideas in the hotel restaurant while waiting to meet my boss for breakfast. Later on I gave some thought to how I would turn these designs into tiles. Mercer favored plaster press molds, but since I had a small company on the side for which I designed rubber stamps, I decided to turn my designs into stamps and use them to impress the clay tiles. See my tutorial Mosaic Table Table Top With Textured Clay Tiles to learn my technique for making tiles from rubber stamps. In 2015 while on the way back from a trip to the Northeast I was in the vicinity of Fonthill again, so I stopped in the tileworks shop to buy some tiles made from Mercer’s original molds.
One of my favorite places to vacation is the Southwest, and for awhile I was taking so many trips to that area on Route 66 that I was in Santa Fe for at least a day or two almost every summer. Although I’ve been interested in art and crafts ever since I can remember, my first visit to Santa Fe while on a family vacation at the age of 16 was a life-changing experience. It was so different, so exotic and so saturated with the arts that I decided then and there that art was to be my area of study in college and I did eventually graduate with a Fine Art degree.
Over the years I’ve been to Santa Fe enough times to have a favorite restaurant – Cafe Pasqual’s – and a favorite motel – El Rey Inn. In September of 2009 I was on a trip with my family on the way to Arizona and we stayed at El Rey. It was Mom’s first time there and she was enthralled with the grounds. Since tile work and plans for my own home were on my mind, we wandered the exquisite grounds together and took lots of photos, with tiles prominent in my photos for future inspiration. On this trip my brother and I also introduced my parents to our favorite suite at El Rancho Hotel in Gallup, NM, the Ronald Reagan suite, with extensive tile work in the bathroom. Everyone should experience these historic properties at least once in a lifetime – you won’t be sorry!
Since Southwest decor and good food seem to go together, I decided the proper place in my home for Santa Fe inspired tile work is in my kitchen. Over the next 2-3 years I made a lot of tiles for this project.
I’ve been augmenting my growing store of tiles with recycled tiles that I picked up at Leftover’s Etc., a teacher’s resource recycling center where you can get donated leftover art and craft supplies for a very reasonable price. Since the stock varies depending on what is donated, collecting tiles suitable for a specific project can take quite a while, so it suited me to acquire these periodically while I slowly accumulated a stock of handmade tiles. You might ask, why not just buy the tiles you need and get it over with? There are beautiful tiles available commercially – one could make a lovely kitchen with these. However, while I’m sure I could design a very nice backsplash out of commercial tiles, my preference for my own home is to express my love of ceramics by putting more of myself into the project. Another thing that makes this project more personal and special is that in addition to my collection of salvaged tiles purchased from Leftover’s Etc., over the years I had accumulated tiles from sources significant to me – I added in some that I recycled from an old farmhouse down the street from where I grew up that was demolished when I was in college, and some that I dug up from the construction debris-filled soil while working on my current garden. Whenever I work in my kitchen I’ll get pleasure from thinking about how I made or acquired the tiles in front of me.
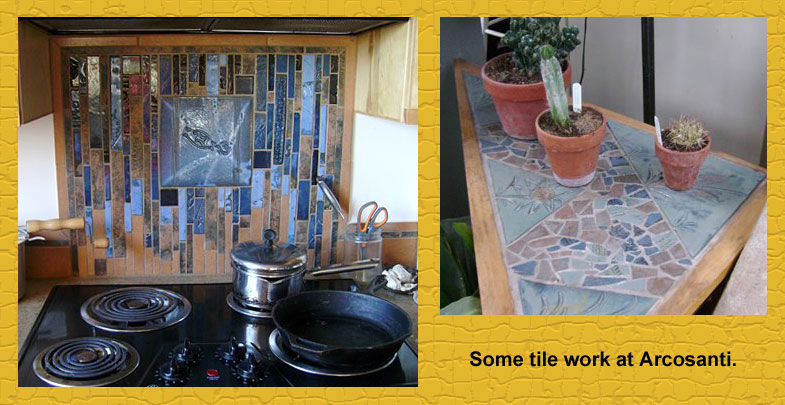
The next major step forward in my kitchen backsplash project occurred in the fall of 2012. I had just returned from a vacation/sabbatical which included a one-week workshop at Arcosanti, an experimental community in Arizona that teaches concepts in architecture, sustainability, re-use of materials and many other topics of interest to me. Visitors to Missouri Botanical Garden will have seen some bronze bells made at Arcosanti. There is a ceramics studio on the site and many areas of the community are decorated with wonderful tile work.
To see more of my Arcosanti Photos, check out my online albums:
I went to Arcosanti to be inspired, and wow was I ever! Upon my return I was fired up to work on the backsplash due to what I had seen and I was satisfied that I finally had enough tiles to begin. Look for Part II of this series to see how I incorporated all these creative influences!
It’s going to take years to complete the decor in my condominium – if I ever complete it. My timetable won’t work for everybody but it’s ok for me – decorating is a satisfying hobby activity and I enjoy doing as much as I can myself, for example even to the point of designing rubber stamps that I use to make ceramic tiles to incorporate into tile work.
It’s not easy to focus on my original vision when working on such a long-term project. To help out, I have made a book to help me organize my ideas and color schemes. If you would like to make a similar book, here is what you’ll need.
3-ring binder that holds 8.5 x 11 paper
8.5 x 11 paper or cardstock
8.5 x 11 chipboard or cardboard
Tab divider inserts
3-hole punch
3-hole folder inserts
Scissors
Clear tape
Glue
1. Get some blank 8.5 x 11 paper and/or card stock and punch holes in one edge with the three hole punch. You may choose to use lined or unlined paper – the unlined is easier to draw on if you want to sketch out ideas. Open the rings and place the paper in your binder.
2. If you want to work on ideas for more than one room, make sections by placing one tab divider insert and one folder insert at the beginning of each room section. Label the section according to the room. The pockets are handy for collecting things in to mount on a page later if you’re pressed for time.
Fabric and paint swatches for my kitchen
3. In each section, start collecting ideas and swatches that pertain to the corresponding room. Examples of things you can include are fabric swatches, paint swatches and magazine clippings with ideas or products you like. Lightweight items can be taped down to paper. You could staple fabric swatches to cardstock and glue tile samples to chipboard or cardboard. Take notes or make sketches as you develop your ideas. You can continually add new pages as needed.
4. Eventually you may find yourself creating or purchasing things like plans, templates, instructions and stencils. If size allows these can be stored in binder folders so they are always handy or have holes punched in them to store in the binder.
5. If you’re a Pinterest user, you can create corresponding Pinterest boards to supplement your pool of ideas. From time to time it might be helpful to print out some of the pictures and instructions you find online and display them in your book. Be sure to check out Schnarr’s Pinterest offerings!
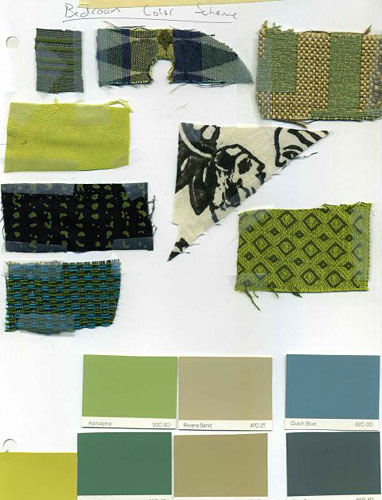
Fabric and paint swatches for my bedroom
If I’m designing something for a particular room, typically I’ll put the paint and fabric swatch pages up on a wall in my creative space to keep my overall scheme and feel for the room in mind as I work. I rarely require things to “match”, but I do like them to “fit”. For example my office and bedroom are heavily Mid-Century Modern, the living room is Mid-Century Modern plus Beachy, while I’m trying to give my kitchen a Santa Fe look. I don’t know what to call my in-progress bathroom – “Venice Cafe Modern” maybe, since the look I’m going for is Boho meets 1970s? Whatever you call it, putting the samples up on the wall helps remind me of what my vision is for the space.
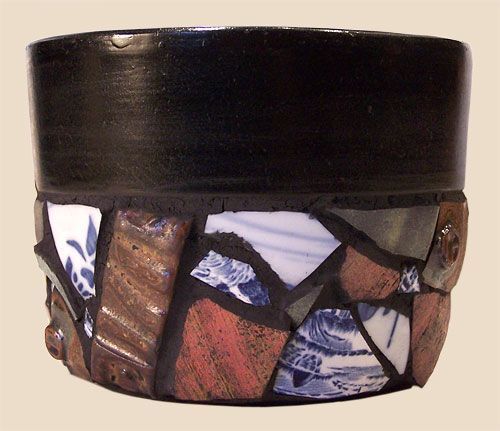
You can make a plain terra cotta planter more interesting with ceramic tile pieces!
What You’ll Need
Terra Cotta planter
Disposable latex or vinyl gloves
Paintbrush
Black oil-based waterproof enamel paint or color of your choice
Paint thinner
Liquid soap in a pump-top dispenser
Rags (you’ll need several)
Tile cement
Small putty knife
Old plastic lid
Small plastic tray
Eye goggles
Broken up ceramic pieces or tiles
Tile grout
Heavy leather gloves
Hammer
Optional – tile nippers
Optional – abrasive sponge
Optional – dust mask
Optional – cement pigment
Tile and grout sealer
Small bucket of water
1. Whether your terra cotta planter is new or you’re upcycling an old one, be sure it is thoroughly clean and dry.
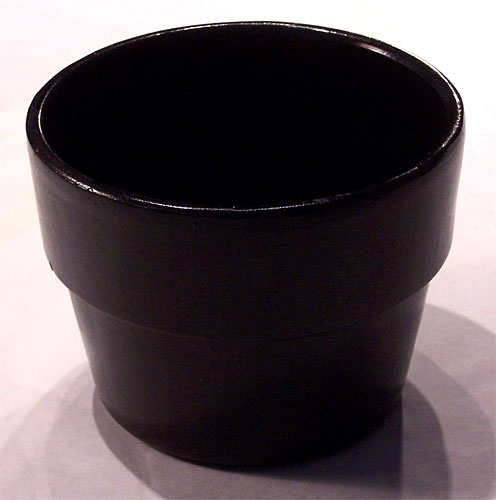
2. Put on disposable gloves and paint the planter inside and out. You will probably need two coats to cover completely. The reason for painting the planter is to keep water from seeping through the wall of the planter and weakening the applied tile pieces. Normally the porous nature of terra cotta is desirable but in this case it would harm the durability of the tile work so we’re sealing the surface. If you need a refresher on how to clean up oil-based paint and care for your brushes, here are some tips:
If you want to avoid having to clean up oil-based paint, you can substitute water-based paint. Your finished project might be less durable but if you choose a good quality high-gloss water-based enamel paint that should help. I used black paint in my samples because I wanted it to match the black tile grout that I used in my demo. You can choose different paint and grout colors if you want. Painting the pot in sections and letting it dry while resting on the unpainted portion helps you do a neater job. You’ll need to let the paint dry between coats.
Terra cotta pot painted with black enamel
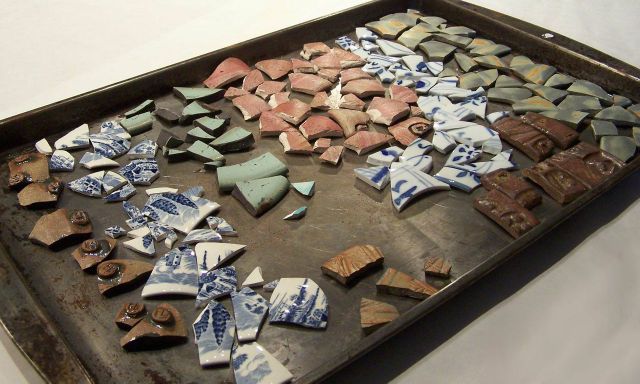
3. While you are waiting for the paint to dry, you can start getting your tiles ready. What are some good sources of tiles?
Break up old broken ceramic items into smaller pieces. One way is to wrap pieces in an old towel and smash them with a hammer. Wear leather gloves and goggles when you do this to protect yourself from sharp pieces. For more refined shaping of small pieces, you can cut them with tile nippers. The broken edges can and will cut you if mishandled so be careful! If any pieces are unacceptably sharp, you can try filing them or smoothing them on a grinding wheel.
A teacher/artist resource recycling center – a lot of the tiles I’ve accumulated for my projects came from Leftover’s, Etc. (http://www.leftoversetc.com/)
Commission a local ceramic artist to make some tiles for you.
By far the most convenient and quick way to get tiles is to purchase them from a craft or tile dealer. Craft dealers also sometimes have glass tiles and faux seaglass which is well worth some experimentation.
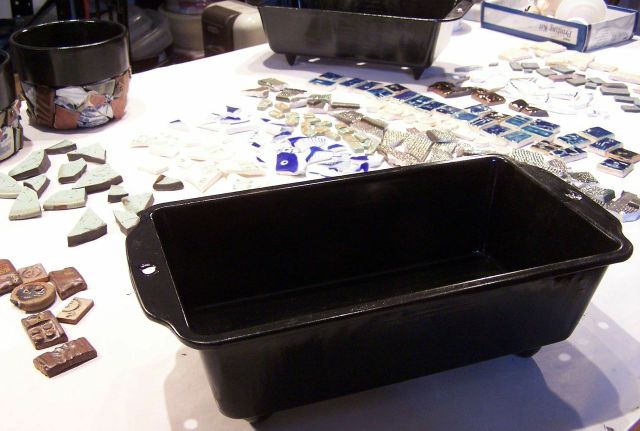
Broken ceramic pieces ready to install on plant potPainted bread pan with tiles ready to install
This photo shows more prepared tile pieces along with some metal bread pans painted and ready for tile application. The bread pans were rusty and/or afflicted with peeling non-stick coating so I decided to upcycle them. I sanded and cleaned them thoroughly before applying paint to make sure the paint would stick. You can try this with a variety of old metal containers – I’ve made a mosaic tile planter out of an old metal roasting pan as well.
4. Cover the lower portion of the planter with tile pieces. You can attempt to follow a planned design or use a random arrangement like I did in my samples. On an old lid, put out a small portion of tile cement, about as much as you can use in 15 minutes. Put a small dab on the back of each tile and press in place. If you are using pieces of varying thicknesses as I am, it will be easier to grout later if you try to even up the tile height by putting more cement on the thinner pieces.
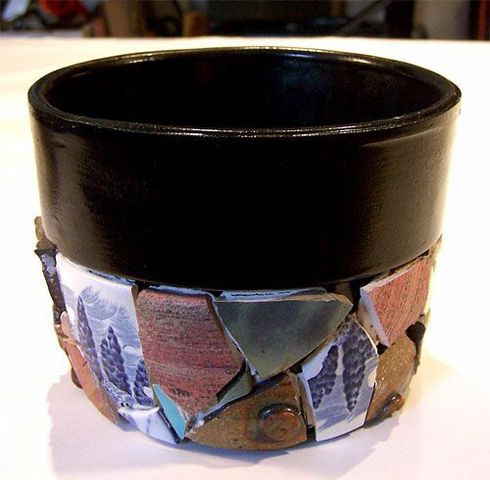
Plant pot before applying grout
5. Let the tile cement dry thoroughly – see instructions on the package for how much time this is.
6. When it’s dry you’re ready to apply grout. I chose to use black grout to match the black paint on the pot. You can use any color of grout that you want, but it will probably look better if the grout and paint colors match. If you don’t find grout in your preferred color, it’s possible to tint grout with cement pigments. If you decide to do this wear a dust mask while mixing. Be sure to mix up a large enough batch to complete the whole project because it might be difficult to mix the exact same color twice unless you measure the materials very carefully. Grouting is very messy, especially with dark colors. I recommend you wear old clothes and protect your work surface and floor. Have plenty of clean rags on hand and a small bucket of water for cleanup. Don’t be surprised if you need a bath when you’re done!
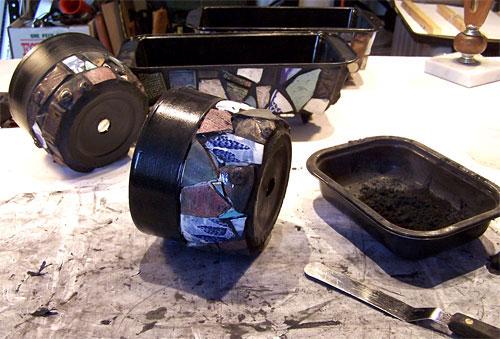
7. Put some grout in a small plastic tray, such as one left over from a microwave dinner. Add water until it’s about the consistency of soft cream cheese – a little at a time to make sure you don’t add too much. Stir it with your putty knife as you add the water. Try to only mix up small amounts at a time so it does not start to set up before you’ve applied it.
Put on your disposable gloves, and use a rag to pick up a portion of tile cement. Smear it around to fill the cracks between tiles. The rags will help protect your hands from sharp pieces so always make sure there is a rag between your hand and the pot. The thin disposable gloves will protect your hands from being irritated, dried out or discolored by the grout, but alone they will not protect you from cuts.
Applying tile grout.
After one section of the pot is grouted, go back over it with a succession of fresh rags to remove the grout from the surface of the tiles. Dampen the rag with a little water toward the end to get them really cleaned off if needed. If you can’t get them all the way clean with rags only, try an abrasive sponge. This step takes a lot of patience, you will probably have to wipe each section several times, especially when using a dark grout color like I did in my sample. It’s also a rewarding step, because you can start to see how your design will turn out!
Repeat this process until the whole pot is grouted and cleaned.
Be careful not to dispose of any grout in your sink – it could clog the drain. Dispose of any rags that are really soaked with grout – I put mine in the compost. If some are only slightly dirty, you may be able to re-use them by rinsing them in a bucket of water. If you do that, dump the dirty water out in the yard, don’t put it down the drain.
7. Let the grout dry, then apply tile and grout sealer. You’re done!
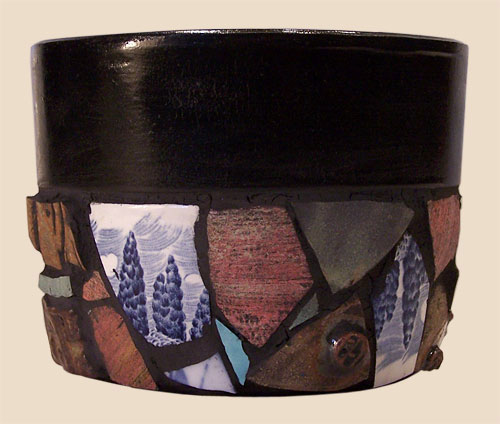
Finished mosaic terra cotta planter
I recommend bringing this type of planter inside for the winter if you use it outdoors, subjecting it to the freeze-thaw cycle is probably not good for durability.
I’m going to be completely honest, I find astrology to be very interesting. So when City in a Jar combined DIY and zodiac constellations to create this awesome decor piece I was stoked. I think it turned out pretty stellar, check out her blog for other cool ideas.
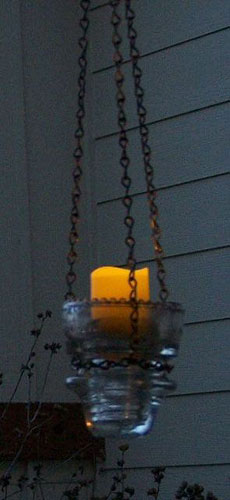
Do you collect glass insulators? I often see them for sale in antique shops and there are several web sites with information for insulator collectors. I’ve always found them attractive looking and I thought they’d be even more interesting if made into something functional. Flameless votive candles are a lot of fun (and safe) to incorporate into your decor. In this project I’ll show you how to make a glass insulator into a flameless candle lantern.
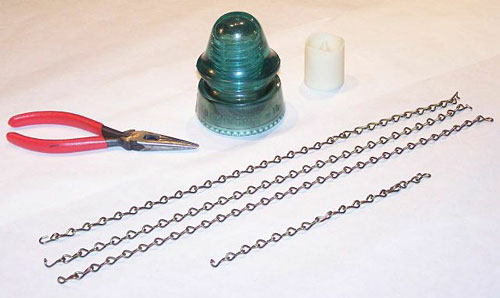
What you’ll need:
Glass insulator
Chain
Strong long-nosed pliers
Flameless votive candles – we sell LED battery powered votive candles that include a 4 hour timer
S-hook
Choosing the right chain for this project is important – it should be sturdy enough for the links to support the weight of the insulator, but not so strong that you can’t bend the links with pliers. At Schnarr’s the weight rating of each chain is indicated on the spool.
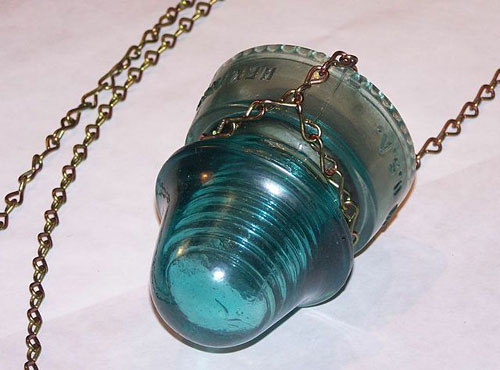
1. Select a length of chain just long enough to fit around the “waist” of the insulator. Don’t worry about cutting the chain to size – just pull a link open with the pliers to separate. The links will last longer and close more neatly if you open and close them with a side-to-side motion. With the weight of chain I chose I was able to hold a link on one hand and open with pliers held in the other hand, but if this is difficult try gripping the chain with pliers in each hand as you open and close the links.
2. Wrap the chain around the “waist” of the insulator and link together, re-closing the link to fasten the chain in place.
Attach chain to insulator
3. Decide at what level you’ll want your lantern to hang and prepare three pieces of chain of suitable and equal length. Attach one chain to a link anywhere on the “waist” piece.
4. To figure out where to attach the other two pieces of chain so that they are spaced evenly, count the chain links around the “waist” and divide that number by three. Attach the other two pieces that many links away from your first piece. For example, if your “waist” chain has 15 links, attach the hanging chain pieces every five links.
5. Link all three pieces together at the top by stringing the last link of each onto an S-hook. If you buy an open S-hook, you can let gravity hold the chains in place, but if you want extra security you can squeeze the S-hook closed with your pliers. If you buy a closed S-hook, just open and close with a side to side motion the way you did with the chain links.
Insulator lantern with light
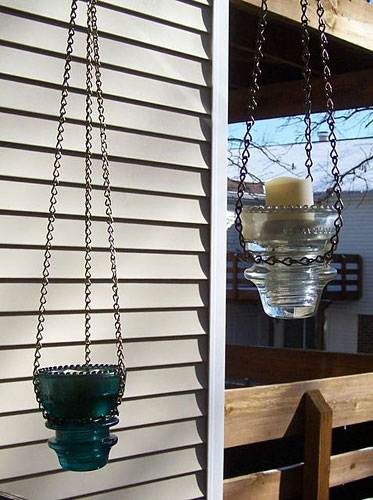
6. Now it’s time to decide how to hang your lantern. If you want it to hang straight from the ceiling, you can use a ceiling screw hook, toggle bolt, hanging kit, swag hook or decorative bracket of the type commonly used for hanging plant pots. Weigh your insulator lantern to make sure you don’t exceed the weight limits of your chosen hanging hardware. If you want to hang your lantern outside, some of the hanging hardware previously mentioned may help or another option is to drape an additional length of chain over a rafter or tree branch and link the lantern to it with an S-hook.
7. Switch on your candle and place it in the lantern. The style and size of the insulator will affect how deeply the candle sets into it. If you have trouble stabilizing the candle, try some Stick-Um candle adhesive.
 The next step in finishing my kitchen backsplash is to complete the tile work in four frames spaced at intervals above the strip. These are inspired by Spanish and Mexican tile murals in their shape and placement though they don’t attempt to depict any kind of representational scene. In the interim I had carved some new rubber stamps of ancient petroglyph designs and made some small stoneware tiles from them which I decided to include.